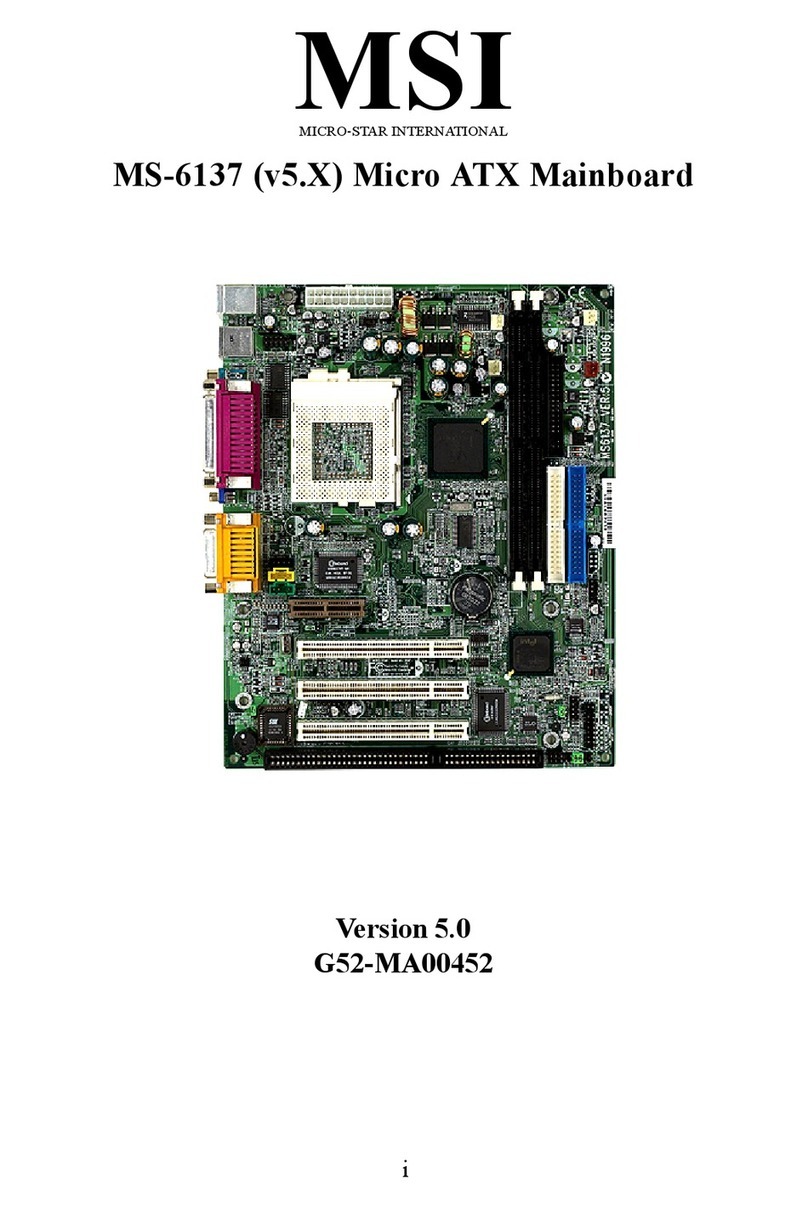
MSI MS-6137 User manual

Introduction
1-1
Chapter 1.
Introduction 1
The Micro-ATX WH1 mainboard is a high-performance computer
mainboard based on Intel®810E chipset. The MS-6137 is designed for Intel®
CeleronTM (PPGA) and Pentium®III processors for inexpensive business/per-
sonal desktop markets.
The Intel®810E chipset is the first generation Integrated Graphics chipset
for Intel®CeleronTM and Pentium®III processors. The graphics accelerator
architecture consists of dedicated multi-media engines executing in parallel to
deliver high performance 3D, 2D and motion compensation video capabilities.
An integrated centralized memory arbiter allocates memory bandwidth to mul-
tiple system agents to optimize system memory utilization. A new chipset com-
ponent interconnect, the hub interface, is designed into the Intel®810E chipset
to provide an efficient communication channel between the memory controller
hub and I/O controller hub.
The Intel® 810E chipset contains three core components. The GMCH
integrates a 66/100/133MHz for 810 and 66/100/133 MHz for 810E, P6 family
system bus controller, integrates 2D/3D graphics accelerator, 100MHz SDRAM
controller and high-speed hub interface for communication with the ICH0/ICH.
The ICH0/ICH integrates an Ultra ATA/33 (ICH0) or Ultra ATA/66 (ICH)
controller, USB host controller, LPC interface controller, FWH interface
controller, PCI interface controller, AC`97 digital controller and a hub interface
for communication with the GMCH/GMCHO. The Intel®82802 Firmware Hub
(FWH) component is part of the Intel®810E chipset. The FWH is key to ena-
bling future security and manageability infrastructure for the PC platform.
This chapter includes the following topics:
Mainboard Specification 1-2
Mainboard Layout 1-4
Quick Components Guide 1-5
Key Features 1-6
MSI Special Features 1-7
Chapter 1
1-2
CPU
zSupports Socket 370 for Intel®CeleronTM and Pentium®III processors.
zSupports up to 1.1GHz CPU.
Chipset
zIntel®810E (GMCH) chipset. (421 BGA)
- Integrated Graphics Controller.
- Intel DDM Architecture.
- SDRAM Memory Independent of System Bus.
zIntel®ICH chipset. (241 BGA)
- AC’97 Controller Integrated.
- 2 full IDE channels, up to ATA66.
- Low Pin Count interface for SIO.
Front Side Bus (FSB)
z66/100/133MHz clocks are supported.
Main Memory
zSupport two 168-pin DIMM sockets.
zSupport a maximum memory size of 256MB(64-bit) or 512MB(128-bit)
SDRAM.
Slots
zTwo AMR (Audio Modem Riser) slots.
zThree PCI 2.2 32-bit PCI bus slots (support 3.3v/5v PCI bus interface)
On-Board IDE
zAn IDE controller on the ICH chipset provides IDE HDD/CD-ROM with
PIO, Bus Master and Ultra DMA66 operation modes.
zCan connect up to four IDE devices.
On-Board Peripherals
zOn-Board Peripherals include:
- 1 floppy port supports 2 FDDs with 360K, 720K, 1.2M, 1.44M and
2.88Mbytes.
- 2 serial ports (COM A + COM B).
- 1 parallel port supports SPP/EPP/ECP mode.
- 4 USB ports (Rear * 2/ Front * 2).
Mainboard Specification

Introduction
1-3
- 1 IrDA connector for SIR.
- 1 VGA port.
- 1 audio/game port.
Video
zGMCH chip integrated.
z2D/3D Graphics.
zOnboard 4MB Display Cache (optional).
Audio
zAC97 2.0 interface.
zICH chip integrated.
BIOS
zThe mainboard BIOS provides “Plug & Play” BIOS which detects the pe-
ripheral devices and expansion cards of the board automatically.
zThe mainboard provides a Desktop Management Interface (DMI) function
which records your mainboard specifications.
Dimension
zMicro ATX Form Factor.
Mounting
z6 mounting holes.
System Hardware Monitor
zCPU/Power Supply Fan Revolution Detec.
zCPU Fan Control (the fan will automatically stop when the system enters
suspend mode).
zSystem Voltage Detect.
zCPU Overheat Warning.
zDisplay Actual Current Voltage.

Chapter 1
1-4
Mainboard Layout
MS-6137 v3.X Micro ATX Mainboard
BATT
+
Intel
FW82810E
Intel
FW82801AA
IR
J17
J10
JP5
JP3
ATX
Power Supply
PAUX1
CPUFAN
JP4
J3
BIOS
PCI Slot 3
PCI Slot 2
PCI Slot 1
IDE2
DIMM1
DIMM2
J15
J1
JGS1
J16
USB
ports
Top :
Parallel Port
Bottom:
COM A
VGA Port
Top : mouse
Bottom: keyboard
CD_IN
MODEM_IN
AD 1881A
JWOL1
AUX_IN
Top :
Game port
Bottom:
Line-Out
Line-In
Mic
SOCKET370
COM B
FDD
Winbond
W83627HF-AW
AMR1 AMR2
USB2

Introduction
1-5
zMicrosoft®PC99 Compliant
zMicro ATX Form Factor
zAudio/Video Chip Integrated
zSupport DMI(Desktop Management Interface) through BIOS
zTCAV (Build-in BIOS Anti-Virus)
zTOP Tech. (Thermal Overheat Protection Technology) Optional
zLAN Wake Up Function
zPC Alert™ III system hardware monitor
zSuspend to RAM/Disk
Key Features

Chapter 1
1-6
MSI Special Features
T.O.P Tech™ (optional)
The T.O.P TechTM is an extended sensing device that can 100% accu-
rately detect the CPU’s temperature. You can find out the temperature on BIOS
setup menu. The PC AlertTM also provides the information.
CPU temperaure on Setup menu
CPU Warning Temperature [Disabled]
Current System Temp.
Current CPU Temperature
Current Top Tech. III Temp.
SYSTEM fan
POWER fan
CPU fan
Vcore
VTT
3.3V
+5V
+12V
-12V
-5V
VBAT(V)
5VSB(V)
Chassis Intrusion Detect [Disabled]
Shutdown Temperature [Disabled]
Item Help
Menu Level >
↑ ↓ → ← Move Enter:Select +/-/PU/PD:Value F10:Save ESC:Exit F1:General Help
F5:Previous Values F6:Fail-Safe Defaults F7:Optimized Defaults
CMOS Setup Utility - Copyright(C) 1984-2001 Award Software
PC Health Status

Introduction
1-7
PC Alert™ III
The PC AlertTM III is a utility you can find in the CD-ROM disk. The
utility is just like your PC doctor that can detect the following PC hardware
status during real time operation:
* monitor CPU & system temperatures
* monitor fan speed(s)
* monitor system voltage
* monitor chassis intrusion
If one of the items above is abnormal, the program main screen will be
immediately shown on the screen, with the abnormal item highlighted in red.
This will continue to be shown,until user disables the warning.
Note: Items shown on PC Alert III vary depending on your system’s
status.

Chapter 1
1-8
Features:
zNetwork Management
- Monitoring & remote control
zBasic System Utilities
- Scandisk & Defragment to maintain your HDD
z3D Graphics Design
- Enables a more friendly user interface
zSofware Utilities
- SoftCooler Optimized Cooling

Hardware Setup
2-1
Chapter 2.
Hardware Setup
This chapter provides you with the information about hardware setup
procedures. While doing the installation, be careful in holding the components
and follow the installation procedures. For some components, if you install in
the wrong orientation, the components will not work properly.
Use a grounded wrist strap before handling computer components. Static
electricity may damage the components.
This chapter contains the following topics:
2
Central Processing Unit: CPU 2-2
Memory Installation 2-4
Power Supply 2-6
BackPanel 2-7
Connectors 2-12
Jumpers 2-19
Slots 2-23

Chapter 2
2-2
Central Processing Unit: CPU
The mainboard supports Intel®CeleronTM/Pentium®III processors. The
mainboard uses a CPU socket called PGA370 for easy CPU installation. When
you are installing the CPU, make sure the CPU has a heat sink and a cooling
fanattachedonthe top to preventoverheating. If you do not find the heatsink
and cooling fan, contact your dealer to purchase and install them before turn-
ing on the computer.
CPU Installation Procedures
Overheating will seriously damage the CPU and system,
always make sure the cooling fan can work properly to
protect the CPU from overheating.
WARNING!
1. Pull the lever sideways away
from the socket. Then, raise
the lever up to a 90-degree
angle.
2. Look for the gold arrow.
The gold arrow should point
towards the end of lever.
The CPU will only fit in the
correct orientation.
3. Hold the CPU down firmly,
and then close the lever to
complete the installation.
Open Lever
Gold Arrow
Sliding
Plate
Close
Lever

Hardware Setup
2-3
CPU Core Speed Derivation Procedure
If CPUClock = 100MHz
Core/Bus ratio = 9
then CPU core speed = Host Clock x Core/Bus ratio
= 100MHzx9
= 900MHz
Overclocking
This motherboard is designed to support overclocking.
However, please make sure your components are able to
tolerate such abnormal setting, while doing overclocking.
Any attempt to operate beyond product specifications is not
recommended. We do not guarantee the damages or risks
caused by inadequate operation or beyond product
specifications.
WARNING!

Chapter 2
2-4
Synchronous DRAM is a type of dynamic RAM memory chip that has
been widely used starting in the latter part of the 1990s. SDRAMs are based on
standard dynamic RAM chips, but have sophisticated features that make them
considerably faster. First, SDRAM chips are fast enough to be synchronized
with the CPU's clock, which eliminates wait states. Second, the SDRAM chip is
divided into two cell blocks, and data is interleaved between the two so that
while a bit in one block is being accessed, the bit in the other is being prepared
for access. This allows SDRAM to burst the second and subsequent, contigu-
ous characters at a rate of 10ns, compared to 60ns for the first character.
SDRAM provides 800 MBps or 1 GBps data transfer depending on
whether the bus is 100MHz or 133MHz.
Memory Installation
The mainboard supports a maximum memory size of 256MB (64-bit tech-
nology) or 512MB (128-bit technology for SDRAM). It provides two 168-pin
unbuffered DIMMs (Double In-Line Memory Module) slots. It supports 8 MB
to 128 Mbytes DIMM memory module.
Memory Bank Configuration
DIMM1
DIMM2

Hardware Setup
2-5
Slot Memory Module Total Memory
Slot 1
(Bank 0 & Bank 1) 8MB~128MB, 8MB~256MB
Slot 2
(Bank 2 & Bank 3) 8MB~128MB,
8MB~256MB
Total System Memory 8MB~512MB
Memory Installation Procedures
InstallingDIMMModules
You can install memory modules in any combination as follows:
1. The DIMM slot has 2 Notch Keys “VOLT and DRAM”, so the
DIMM memory module can only fit in one direction.
2. Insert the DIMM memory module vertically into the DIMM slot.
Then push it in.
3. The plastic clip at the side of the DIMM slot will automatically close.
VOLTDRAM
Front View Rear View
MemoryPopulationRules
1. Supports only SDRAM DIMM.
2. To operate properly, at least one 168-pin DIMM module must be installed.
3. This mainboard supports Table Free memory, so memory can be installed on
DIMM1 or DIMM 2 in any order.
4. Supports 3.3 volt DIMM.

Chapter 2
2-6
Power Supply
ATX 20-Pin Power Connector: JWR1
This connector allows you to connect to an ATX power supply. To
connect to the ATX power supply, make sure the plugs of the power supply is
inserted in the proper orientation and the pins are aligned. Then push down
the power supply firmly into the connector. The power connector supports
instant power on function which means that system will boot up immediately
when the power supply connector is inserted on the board.
The mainboard supports ATX power supply for the power system. Be-
fore inserting the power supply connector, always make sure that all compo-
nents are installed properly to ensure that no damage will be caused.
PIN SIGNAL
11 3.3V
12 -12V
13 GND
14 PS_ON
15 GND
16 GND
17 GND
18 -5V
19 5V
20 5V
PIN SIGNAL
1 3.3V
2 3.3V
3 GND
45V
5 GND
65V
7 GND
8 PW_OK
9 5V_SB
10 12V
JWR1 Pin Definition
JWR1
10 1
20 11

Hardware Setup
2-7
The Back Panel provides the following connectors:
Back Panel
Mouse Connector: JKBMS1
The mainboard provides a standard PS/2®mouse mini DIN connector for
attaching a PS/2®mouse. You can plug a PS/2®mouse directly into this
connector. The connector location and pin assignments are as follows:
PS/2 Mouse (6-pin Female)
21
3
4
5
6PIN SIGNAL DESCRIPTION
1 Mouse DATA Mouse DATA
2 NC No connection
3 GND Ground
4 VCC +5V
5 Mouse Clock Mouse clock
6 NC No connection
Pin Definition
Mouse
Keyboard USB
Parallel
COM A VGA L-out L-in MIC
Midi/Joystick

Chapter 2
2-8
Keyboard Connector: JKBMS1
The mainboard provides a standard PS/2®keyboard mini DIN connector
for attaching a PS/2®keyboard. You can plug a PS/2®keyboard directly into
this connector.
PS/2 Keyboard (6-pin Female)
PIN SIGNAL DESCRIPTION
1 Keyboard DATA Keyboard DATA
2 NC No connection
3 GND Ground
4 VCC +5V
5 Keyboard Clock Keyboard clock
6 NC No connection
Pin Definition
21
34
5
6
USB Connectors
The mainboard provides a UHCI (Universal Host Controller Interface)
Universal Serial Bus root for attaching USB devices such as keyboard, mouse
or other USB-compatible devices. You can plug the USB device directly into
ths connector.
USB Ports
1 2 3 4
5 6 7 8
PIN SIGNAL DESCRIPTION
1 VCC +5V
2 -Data 0 Negative Data Channel 0
3 +Data0 Positive Data Channel 0
4 GND Ground
5 VCC +5V
6 -Data 1 Negative Data Channel 1
7 +Data 1 Positive Data Channel 1
8 GND Ground
USB Port Description

Hardware Setup
2-9
Serial Port Connector: COM A & COM B
The mainboard offers one 9-pin male DIN serial port COM A and one 9-
pin COM B pin header. The ports are 16550A high speed communication ports
that send/receive 16 bytes FIFOs. You can attach a serial mouse or other serial
devices directly to them.
1 2 3 4 5
6 7 8 9
PIN SIGNAL DESCRIPTION
1 DCD Data Carry Detect
2 SIN Serial In or Receive Data
3 SOUT Serial Out or Transmit Data
4 DTR Data Terminal Ready)
5 GND Ground
6 DSR DataSetReady
7 RTS RequestToSend
8 CTS Clear ToSend
9 RI RingIndicate
9-Pin Serial Connectors
Pin Definition
Joystick/Midi Connectors
You can connect a joystick or game pad to this connector.
Audio Port Connectors
Line Out is a connector for Speakers or Headphones. Line In is used for
external CD player, Tape player, or other audio devices. Mic is a connector for
microphones.
1/8” Stereo Audio Connectors
Line Out Line In MIC

Chapter 2
2-10
Parallel Port Connector: LPT1
The mainboard provides a 25-pin female centronic connector for LPT. A
parallel port is a standard printer port that supports Enhanced Parallel Port
(EPP) and Extended Capabilities Parallel Port (ECP) mode.
13 1
1425
PIN SIGNAL DESCRIPTION
1 STROBE Strobe
2 DATA0 Data0
3 DATA1 Data1
4 DATA2 Data2
5 DATA3 Data3
6 DATA4 Data4
7 DATA5 Data5
8 DATA6 Data6
9 DATA7 Data7
10 ACK# Acknowledge
11 BUSY Busy
12 PE Paper End
13 SELECT Select
14 AUTOFEED# Automatic Feed
15 ERR# Error
16 INIT# Initialize Printer
17 SLIN# Select In
18 GND Ground
19 GND Ground
20 GND Ground
21 GND Ground
22 GND Ground
23 GND Ground
24 GND Ground
25 GND Ground
PinDefinition

Hardware Setup
2-11
VGA DB 15 Pin Connector
One DB 15-pin VGA connector is supplied for connection to a VGA
monitor.
DB 15-Pin Female Connector
5 1
15 11
Pin Definition
Analog Video Display Connector (DB-15S)
PIN SIGNAL DESCRIPTION
1 Red
2 Green
3 Blue
4 Notused
5 Ground
6 Ground
7 Ground
8 Ground
9 Power
10 Ground
11 Notused
12 SDA
13 Horizontal Sync
14 Vertical Sync
15 SCL

Chapter 2
2-12
The mainboard provides connectors to connect to FDD, IDE HDD, case,
modem, LAN, USB Ports, IR module and CPU/System FAN.
Floppy Disk Drive Connector: FDD
The mainboard provides a standard floppy disk drive connector that
supports 360K, 720K, 1.2M, 1.44M and 2.88M floppy disk types.
Connectors
IrDA Infrared Module Connector: IR
This connector allows you to connect an IrDA Infrared module. You
must configure the setting through the BIOS setup to use the IR function.
PIN SIGNAL
1 VCC
2NC
3 IRRX
4 GND
5 IRTX
Pin Definition
15
IR
Other manuals for MS-6137
2
This manual suits for next models
1
Table of contents
Other MSI Motherboard manuals

MSI
MSI MS-98K9 User manual

MSI
MSI G52-73501X1 User manual

MSI
MSI 7B93-001R User manual

MSI
MSI 970A GAMING PRO CARBON User manual

MSI
MSI RX480 Neo2 MS-7151 User manual

MSI
MSI MS-7793 User manual

MSI
MSI IM-Q35 Series User manual

MSI
MSI 845E Neo-V User manual

MSI
MSI G31P Neo2 Series User manual

MSI
MSI K8N Neo-V2 User manual

MSI
MSI G41M-P34 User manual

MSI
MSI PRO Series User manual

MSI
MSI MICRO ATX EX7 User manual

MSI
MSI MS-98E1 User manual

MSI
MSI B650M GAMING PLUS WIFI User manual

MSI
MSI ms-7377 User manual

MSI
MSI H310M PRO-M2 User manual

MSI
MSI Z87-G55 User manual

MSI
MSI 7E10-001R User manual

MSI
MSI X299 GAMING M7 ACK User manual