manuals.online logo
Brands
  1. Home
  2. •
  3. Brands
  4. •
  5. multicomp pro
  6. •
  7. Measuring Instrument
  8. •
  9. multicomp pro MP780966 User manual

multicomp pro MP780966 User manual

Page <1> V1.009/09/22
Newark.com/multicomp-pro
Farnell.com/multicomp-pro
sg.element14.com/b/multicomp-pro
Solar Power Meter
User Manual
Part Number: MP780966
Page <2> V1.009/09/22
Newark.com/multicomp-pro
Farnell.com/multicomp-pro
sg.element14.com/b/multicomp-pro
1. Introduction
Solar power meter is a device used to measure solar power (sunlight). The MP780966 has the advantages of high precision,
good stability and fast response.
Measurement unit: w/m² or BTU/(ft²*h).
2. Safety Precautions and regulations
This meter is in compliance with safety standard EN 61010-1 related to electronic measuring instruments. For your own
safety and to avoid damaging the instrument follow the procedures described in this instruction manual and read carefully
before operation
3. Meter Description
3.1 Features
1. Sunlight measurement up to 1999w/m²or 634BTU/(ft²*h)
2. High accuracy and rapid response
3. Data HOLD function to hold measurement values
4. Unit and sign display for easy reading
5. Measuring unit selection between w/m²and BTU/(ft²*h)
6. Manual range selection
7. Direct reading
8. Maximum and minimum value measurement
9. Low battery indication
3.2 Instrument Description
1. Photo Detector
2. The photo detector connection port
3. Zero adjustment
4. LCD display (data, min/max, hold, w/m² or BTU (ft²*h), low battery indication)
5. ON/OFF button
6. Unit conversion button (w/m²or BTU/(ft²*h))
7. Range button
8. HOLD button
9. MIN/MAX button
10. Backlight button
Page <3> V1.009/09/22
Newark.com/multicomp-pro
Farnell.com/multicomp-pro
sg.element14.com/b/multicomp-pro
3.3 Description of function buttons
•  ON/OFF button:
Press the ‘ ’ button to turn ON/OFF the power
•  W/B button:
Press the ‘W/B’ button to switch from BTU/(ft²*h) to W/m². To select a di󰀨erent unit press this button once again.
•  R button (Range switching button):
Press the “R” button to convert range / measurement value
•  HOLD button:
Press the ‘HOLD’ button to go into hold mode. ‘HOLD’ appears on the screen to hold the data.
Press the “HOLD” button again to exit Hold mode.
•  MIN/MAX button:
When measuring the photometric values, press the ‘MIN/MAX’ button to display the min/max value. Long press the
“HOLD” button for 1 second, the min/max value released.
•  Backlight key:
Press the ‘ ’ button turn on or o󰀨 backlight.
4. Electrical Specication
Operating temperature and Relative Humindity: 5°C to 40°C, below 80%RH.
Storage temperature and relative humidity: -10°C to 60°C, below 70%.
Display: 3-1/2 digits LCD with maxmum reading 1999.
Sampling time: Approx 0.25 second
Resolution: 1W/m²;1BTU/(ft² × h)
Accuracy: Typically within ±10W/m² [±3BTU/(ft² × h)] or ±5%; ±0.38W/m²/°C per
temperature changes.
Overload: Display shows ‘OL’
Range: 1999W/m², 634BTU/(ft² × h).
Size: 162(L) × 63(W) × 28(H)
Page <4> V1.009/09/22
Newark.com/multicomp-pro
Farnell.com/multicomp-pro
sg.element14.com/b/multicomp-pro
Weight (including battery): About 250g
5. Operating instructions
•  Press the power button ‘ ’ to turn on the meter.
•  Press the ‘W/B’ button to select measurement range W/m²or BTU/(ft² × h).
•  Remove the protection cap of the photo detector and expose it to the light source in horizontal position. Read the
photometer value from the LCD display.
•  After the luminosity value has stabilized. Press ‘HOLD’ button to hold the testing data (NOTE: If display shows ‘OL’, it
means that the input signal is too strong and a higher range must be selected.)
•  After the measurement is completed, cover the protective cover, the LCD display should be displayed at ‘000’, if not please
press “zero” adjust before turn o󰀨.
6. Accessories
•  User manual.
•  4.5V (1.5V AAA × 3) alkaline battery
•  carrying case
7. Safety and maintenance
•  Operating altitude: below 2000m.
•  Operating environment: for indoor use, Pollution level II.
•  Do not place the meter in direct sunlight or store the meter where temperature or humidity is excessively high.
•  Remember to turn OFF the power after use. If the meter is not to be used for a long time, removed battery.
•  Clean the meter with a dry soft cloth, wet cloths, liquid and water are prohibited.
8. Battery replacement
•  When the symbol ‘ ’ is display, batteries need replacement. Turn o󰀨 the meter and disconnect the photo detector from 
the meter.
•  Unscrew the battery compartment and remove the battery, insert a new battery of the same type (1.5V AAA × 3 alkaline
battery), re-screw the battery compartment
Important Notice : This data sheet and its contents (the “Information”) belong to the members of the AVNET group of companies (the “Group”) or are licensed to it. No licence is granted for
the use of it other than for information purposes in connection with the products to which it relates. No licence of any intellectual property rights is granted. The Information is subject to change
without notice and replaces all data sheets previously supplied. The Information supplied is believed to be accurate but the Group assumes no responsibility for its accuracy or completeness,
any error in or omission from it or for any use made of it. Users of this data sheet should check for themselves the Information and the suitability of the products for their purpose and not make
any assumptions based on information included or omitted. Liability for loss or damage resulting from any reliance on the Information or use of it (including liability resulting from negligence or
where the Group was aware of the possibility of such loss or damage arising) is excluded. This will not operate to limit or restrict the Group’s liability for death or personal injury resulting from its
negligence. Multicomp Pro is the registered trademark of Premier Farnell Limited 2019.
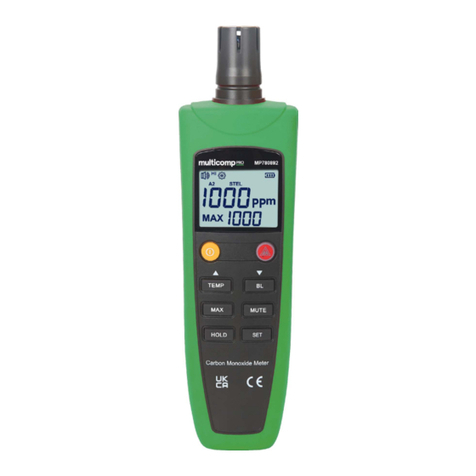
Other multicomp pro Measuring Instrument manuals

multicomp pro MP780119 User manual

multicomp pro

multicomp pro MP780119 User manual

multicomp pro MP780859 User manual

multicomp pro

multicomp pro MP780859 User manual

multicomp pro MP001186 User manual

multicomp pro

multicomp pro MP001186 User manual

multicomp pro MP770291 User manual

multicomp pro

multicomp pro MP770291 User manual

multicomp pro MP780892 User manual

multicomp pro

multicomp pro MP780892 User manual

multicomp pro MP780522 User manual

multicomp pro

multicomp pro MP780522 User manual

multicomp pro MP780117 User manual

multicomp pro

multicomp pro MP780117 User manual

multicomp pro MP700506 User manual

multicomp pro

multicomp pro MP700506 User manual

multicomp pro MP005768 User manual

multicomp pro

multicomp pro MP005768 User manual

multicomp pro MP780647 User manual

multicomp pro

multicomp pro MP780647 User manual

multicomp pro MP780649 User manual

multicomp pro

multicomp pro MP780649 User manual

multicomp pro MP780905 User manual

multicomp pro

multicomp pro MP780905 User manual

multicomp pro MP760861 User manual

multicomp pro

multicomp pro MP760861 User manual

multicomp pro MP780002 User manual

multicomp pro

multicomp pro MP780002 User manual

multicomp pro MP760862 User manual

multicomp pro

multicomp pro MP760862 User manual

multicomp pro MP780994 User manual

multicomp pro

multicomp pro MP780994 User manual

multicomp pro MP700121 User manual

multicomp pro

multicomp pro MP700121 User manual

multicomp pro MP780118 User manual

multicomp pro

multicomp pro MP780118 User manual

multicomp pro MP780904 User manual

multicomp pro

multicomp pro MP780904 User manual

multicomp pro MP760607 User manual

multicomp pro

multicomp pro MP760607 User manual

multicomp pro MP700852 User manual

multicomp pro

multicomp pro MP700852 User manual

multicomp pro MP700006 User manual

multicomp pro

multicomp pro MP700006 User manual

multicomp pro MP780896 User manual

multicomp pro

multicomp pro MP780896 User manual

multicomp pro MP60607 User manual

multicomp pro

multicomp pro MP60607 User manual

Popular Measuring Instrument manuals by other brands

Radiodetection RD8000 Operation manual

Radiodetection

Radiodetection RD8000 Operation manual

SCHOTT handylab pH 12 operating manual

SCHOTT

SCHOTT handylab pH 12 operating manual

Ludlum Measurements 2241-2RK manual

Ludlum Measurements

Ludlum Measurements 2241-2RK manual

ELEKON BATLOGGER A Short manual

ELEKON

ELEKON BATLOGGER A Short manual

Hanna Instruments HI 931400 instruction manual

Hanna Instruments

Hanna Instruments HI 931400 instruction manual

nox A1 Resetting guide

nox

nox A1 Resetting guide

Bender W1-35/8000 manual

Bender

Bender W1-35/8000 manual

Vympel Hygrovision Mini operating manual

Vympel

Vympel Hygrovision Mini operating manual

Extech Instruments HD300-NISTL user guide

Extech Instruments

Extech Instruments HD300-NISTL user guide

Bosch GLM 30 Professional Original instructions

Bosch

Bosch GLM 30 Professional Original instructions

Thermo DCT7088 user manual

Thermo

Thermo DCT7088 user manual

Optics Focus 7ISW152 user manual

Optics Focus

Optics Focus 7ISW152 user manual

Amprobe ACD-23SW user manual

Amprobe

Amprobe ACD-23SW user manual

AEMC PEL 52 user manual

AEMC

AEMC PEL 52 user manual

Hanna Instruments HI 250 instruction manual

Hanna Instruments

Hanna Instruments HI 250 instruction manual

Test Equipment Depot BST-TDS01 instruction manual

Test Equipment Depot

Test Equipment Depot BST-TDS01 instruction manual

Keysight Technologies P50 B Series quick start guide

Keysight Technologies

Keysight Technologies P50 B Series quick start guide

Kilsen KZ705 Series Installation sheet

Kilsen

Kilsen KZ705 Series Installation sheet

manuals.online logo
manuals.online logoBrands
  • About & Mission
  • Contact us
  • Privacy Policy
  • Terms and Conditions

Copyright 2025 Manuals.Online. All Rights Reserved.