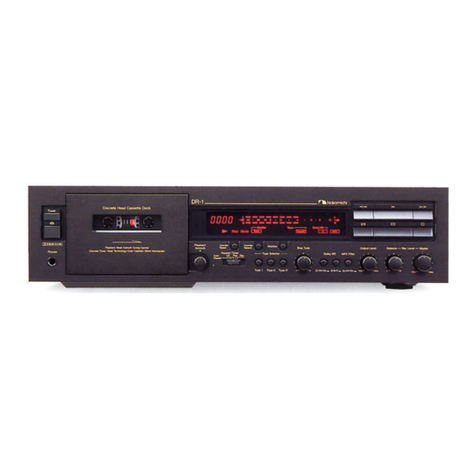
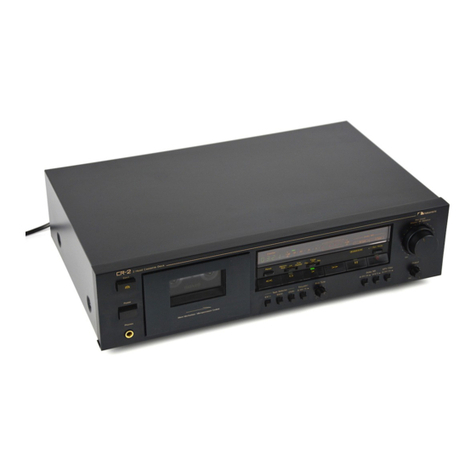
(1) Power Switch
Pressingthis button activates the deck.
Pressing it once more switches the power off.
When the power is switched on, the cassette
holder illumination is lit and the tape counter
(26) is reset.
(2) Eject Button
By depressing this button,the cassette holder
is opened for insertion and removal of a
cassette.
(3) Headphone Jack
Accepts standard stereophoneplug. (--P.
6)
(4)
Cassette Holder
See-thru cover provides unobstructed view of
the cassette. The cover can be easily
removedfor routine cleaning of heads,
capstans and pinchrollers etc. (--p. 15)
(5) Rewind Button
For rapid tape-winding in the reverse
direction. During operation, the indicator on
the top right of the button lights up.
(6) Pause Button
Used for noise-free, short-term interruption of
the tape transport in recording or playback.
Duringoperation, the indicator on the top
right of the button lights up.
(7)
Play Button
Starts forward tape motion for recording or
playback.Duringoperation,the indicator on
the top right of the button lights up.
(8)
Stop Button
Brings all tape motionto a full stop from any
mode. Duringoperation, the indicator on the
top right of the button lights up.
(9) Fast-forward Button.
For rapid tape winding in the forward direction.
Duringoperation, the indicator on the top right
of the button lights up.
(10) Record Button
Used for recording and also for the auto play
feature (--p. 7). During recording, the indicator
indicatoron the top right of the button lights
UP.
(11) Tape Selector Switch
Used to select the EX, SX or ZX position.For
NakarnichiEX and EX
U
tapes or other low-
noiselhigh output ferric oxide tapes, set the
switch to the "EX" position.For NakamichiSX
tape or other chrome-equivalenttapes, use
the "SX position.For NakamichiZX or other
metaltapes, use the "ZX" position. (--p. 10)
(12) Bias Tune Control
Usedfor fine tuning of the bias current.
(+P.
1
1
1
(13) Eq Switch
Usedto select either 70or 120microsecond
equalization. (--p. 10)
(14) Tape Start Memory Switch
When this switch is set to "On", the tape is
automaticallystoppedat the tape counter
indication "0000 in rewind
or
fast-forward
(memoryfeature).This deck also
incorporates an auto play feature. It is
activated by means of the record button and
puts the deck into the playback mode at
"0000". (-p. 7)
(15) Dolby NR Switch
Usedtoselect Dolby B-Type noise reduction
for a 10-dB improvement in high-frequency
S/N ratio,or Dolby C-Type noise reduction for
a 20-dB improvement.When a Dolby system
is used, the respective indicator (22) lights up.
(--P. 14)
(16) Timer Switch
Permits unattendedrecording or pre-
programmedplayback in conjunction with an
external audo timer (--D.
8)
(1
7)
Input Level Controls (L,R)
Usedto adjust the input (record) level to the
deck and the lefthight channel balance.
(-p. 12).Fade-in or fade-out can be
performedwith the master fader control (25).
(-P. 7)
(1
8)
MPX Filter Switch
When this switch is set to "On", a filter cuts
off the 19-kHz multiplex carrier signal used in
FM stereo broadcasts.Remains of this carrier
might otherwise interfere with correct
operation of the Dolby system. This switch
should be set to "Off" when recording
anything else than FM broadcasts.
(19) Output Level Control
Controls the output level of the deck as well
as the headphones listening level for both
channels simultaneously.
(20) Peak Level Meters
Provide exact indication of peak levels inthe
wide rangeof
-
40dB to
+
10dB. (--p. 1
3)
Hinged
Panel
-
,.
-
----------------
,
. .
,c
.
.,.
,
,j_,,_
---__-----------
The various control switches of this
cassette deck are located beneatha
..
..
.
hinged panel.The panel is opened by a
...
-
slight push on the upper right corner.
I-.
,
-:
:
--
.
-,:
For protection,the hinged panel is
designed to become unhingedif strong
force is applied while it is open. Insuch a
-
--
case, be sure to correctly re-attach the
panel beforeclosing it.
/
I
Lock back into place by pressing
align and lock
