manuals.online logo
Brands
  1. Home
  2. •
  3. Brands
  4. •
  5. Nautilus
  6. •
  7. Fitness Equipment
  8. •
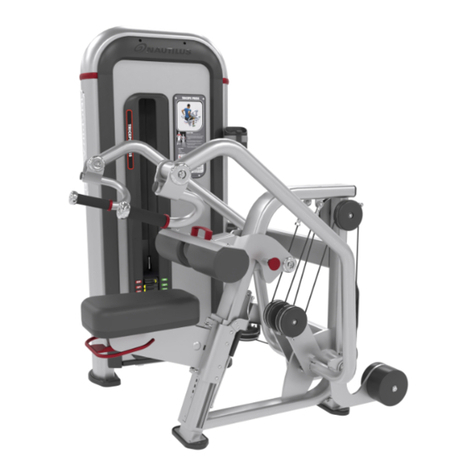
  9. Nautilus NP-L3004 User manual

Nautilus NP-L3004 User manual

OWNER’S
MANUAL
LEVERAGE® ROW
Core Health & Fitness
Page 1
PRODUCT SPOTLIGHT ............................................................................................................................................. 2
Warnings .......................................................................................... 3
IMPORTANT LABEL LOCATIONS ............................................................................................................................................. 6
EXERCISE GUIDELINES ............................................................................................................................................. 7
INSTALLATION ............................................................................................................................................. 8
Hardware .......................................................................................... 9
SUPPORT AND SERVICE ...........................................................................................................................................16
MAINTENANCE ...........................................................................................................................................17
WARRANTY ...........................................................................................................................................18
TABLE OF CONTENTS
Page 2
NP-L3004 Leverage®Row
Overall Weight Width Length Height User Weight
550 lbs (250 kg) 51” (130 cm) 79” (201 cm) 46” (117 cm) 0-350 lbs (0-159 kgs)
All products may be covered by US and Foreign Patents and Patents Pending.
PRODUCT SPOTLIGHT
Page 3
Leverage safety and warning information
It is very important that you read and review this manual
before operating the Product and keep this manual for
future reference. Remember to perform the periodic main-
tenance requirements specied in the Manual to assure
proper operation and your continued satisfaction.
It is the sole responsibility of the purchaser of Nautilus®
Leverage® to read the owner’s manual, warning labels and
instruct all individuals, whether they are the end user or
supervising personnel on proper usage of the equipment.
It is recommended that all users of the Nautilus Leverage
be informed of the following information prior to its use.
Nautilus recommends that all commercial tness equip-
ment be used in a supervised area. It is recommended
that the equipment be located in an access controlled
area. Control is the responsibility of the facility owner. The
extent of control is at the discretion of the owner.
Proper Usage
Do not use any equipment in any way other than de-
signed or intended by the manufacturer. It is imperative
that Nautilus equipment be used properly to avoid injury.
Keep hands and feet clear at all times from moving parts
to avoid injury.
Read all machine warnings and seek the instruction of a
qualied tness professional prior to using any Nautilus
strength product.
Anchoring Equipment
All equipment MUST be secured (bolted and tightened) to
a solid, level surface, using a minimum of 3 of the anchor-
ing holes provided, to stabilize and eliminate rocking or
tipping over. Shim any mounting surface that does not
rest thoroughly on the oor using at washers, DO NOT
force the foot to contact the ground with anchors.

Fasteners must have a minimum of 500 lbs. tensile capac-
ity, be a bolt of grade 2 or better and be installed per the
bolt manufacturer’s specications.

WARNING: Due to the wide variety of ooring on which
equipment may be anchored or installed and dierences
in applicable local building codes, Core Health & Fitness is
not responsible for any damage to the ooring that may
result due to anchoring or installing equipment to the
oor and for compliance with local building codes. Only
licensed contractors or certied installers should be used
to insure proper anchoring, installation, and compliance
with local building code.
Check for damaged parts
DO NOT use any equipment that is damaged and or has
worn or broken parts. Use only replacement parts sup-
plied by Nautilus® and Core Health & Fitness.
MAINTAIN LABELS AND NAMEPLATES: Do not remove la-
bels for any reason. They contain important information. If
unreadable or missing, contact Nautilus for a replacement.
MAINTAIN ALL EQUIPMENT: Preventative maintenance
is the key to smooth operating equipment as well as
keeping the product in safe operating condition. Failure
to conduct preventative maintenance by the owner may
cause the product to operate in an unsafe manner. Equip-
ment needs to be inspected and maintained at regular
intervals per the preventative maintenance schedule
provided in this manual.
Ensure that any person(s) making adjustments or perform-
ing maintenance or repair of any kind is qualied to do so.
Nautilus will provide service and maintenance training at
our corporate facility upon request or in the eld if proper
arrangements are made.
IMPORTANT SAFETY INSTRUCTIONS
Page 4
WARNING - to reduce the risk of injury to
person:
1. This equipment is designed for use in a commercial
gymnasium or health club. To ensure the proper use
of the equipment in a safe manner, all users of the
equipment should read this manual before using the
machine. This machine should be made a part of your
club training program in order that the equipment is
used by your members in a safe manner as intended.
In addition to instructing the club members in the
proper use of the equipment, the club member should
obtain a complete physical examination form their
health care provider before beginning any exercise
program.
2. This machine is not intended to be used by children.
It is not intended to be used by persons with reduced
physical, sensory, or mental capabilities or lack of
experience and knowledge, unless given instruction
and under the personal supervision concerning use
of the machine by a person responsible for their
safety. Do not leave children unsupervised around the
machine.
3. Do not over exert yourself during exercise. Stop
exercising if you feel pain or tightness in your chest,
become short of breath or feel faint. If you feel pain or
experience any abnormal symptoms, stop exercising
and consult your health care provider.
4. The safety and integrity of this machine can only
be maintained when the equipment is regularly
examined for damage and wear and repaired. It is the
sole responsibility of the owner of this equipment to
ensure that regular maintenance is performed. Worn
or damaged parts must be replaced immediately or
the equipment removed from service until the repair
is made.
5. DO NOT attempt to x a broken or jammed machine.
Contact appropriate sta or Nautilus Service.
6. Ensure all adjustment and locking features are
properly secured before using the equipment.
7. Load plates evenly and carefully to avoid tipping
equipment and possible crushing injuries. DO NOT
exceed 230 lbs. (104.5 kgs) per side of loaded weight.
8. Use a spotter for all activities.
9. Use only Olympic style weight plates (2.0”Bore) for
training weight. Do not use dumbbells or any means
other than those stated to increase weight resistance.
10. Always utilize weight plate retention devices such as
clamps or pins.
11. Only add weight plates up to the load limits of the
unit. Make sure all weight plates are completely placed
on the weight rod.
12. Never exceed the load rating for any plate loaded
station, body weight station, bench or other free
weight device, including specic weight rod and band
peg limits. See page 5 for maximum resistance loading
capacity.
13. Make sure there is enough room for safe access and
operation of the NAUTILUS equipment.
14. Make sure that all users are properly trained on how to
use the NAUTILUS equipment.
15. Wear proper exercise clothing and athletic shoes
during a workout. Avoid wearing loose clothing. Tie
back long hair and keep towels away from the moving
parts. Face forward at all times and never attempt to
turn around while the machine is moving.
16. It is the purchaser’s sole responsibility to properly
instruct its end users and supervising personnel as
to the proper operating procedures of all Nautilus
equipment.
Page 5
17. Stay clear of any components while in a dynamic state
of motion. Keep hands and feet away from all moving
parts. The convergence of these components can
cause serious injury.
18. Ensure that any person (s) making adjustments or
performing maintenance or repair of any kind is
qualied to do so.
19. Routinely inspect all fasteners that join attachments
and framework tighten as needed to maintain the
integrity of the unit.
20. Perform regular maintenance checks on the NAUTILUS
equipment. Also, pay close attention to all areas most
susceptible to wear.
21. Keep a repair log of all maintenance activities.
22. Immediately replace worn or damaged components.
If unable to immediately replace worn or damaged
components then remove the NAUTILUS piece of
equipment from service until the repair is made.
23. Use only replacement components supplied by
Nautilus. Substitutes are forbidden and will void all
warranties.
SAVE THESE INSTRUCTIONS
Page 6
This page shows examples of the Nautilus® Leverage Strength® warning labels and communication stickers placed on the equipment
as part of the manufacturing process. It is critical that owners maintain the integrity and placement of these stickers. If you nd any
stickers missing or damaged each sample indicated includes its corresponding part number so that replacements may be ordered.
NOTE: STICKERS AND LABELS ARE NOT SHOWN TO SCALE
IMPORTANT LABEL LOCATIONS
Page 7
Like most exercise, strength training involves an element of risk. Utilize this information to assist
you and/or your members in making the experience on NAUTILUS both productive and safe.
• Prior to engaging in any strength-training program, individuals with known health condi-
tions and/or individuals whom are unfamiliar with the risk (s) involved with weight train-
ing, should rst consult with a physician.
• All training sessions should be supervised by trained personnel.
• Be certain that the warning stickers axed on NAUTILUS, remain on the product and unal-
tered. Also, be certain that all the stickers (safety, instructional and/or other) are read and
understood by each user.
• All users should be instructed on the proper use of NAUTILUS as well as those actions that
should be avoided.
• The NAUTILUS Leverage has safety catches specically designed to enhance the use of
the product and protect the user – ALWAYS use the safety catches as outlined on the user
placards.
In an attempt to minimize user and/or bystander injury:
• Do not lean against framework, plate holders or any component whether it is in-motion or
static.
• Stay clear of any components while in a dynamic state of motion. Keep hands and feet
away from all moving parts. The convergence of these components can cause serious
injury.
• Exercising on free weight and selectorized products should be performed with the assis-
tance of a spotter.
• Always insure proper positioning of the safety stops during each exercise set.
EXERCISE GUIDELINES
Page 8
GENERAL NOTES:
• Unless otherwise noted Loctite
242/243 or equivalent thread
locker must be used on all
threaded fasteners. (Do not use
thread locker when a Nyloc nut is
used.)
• All NAUTILUS Strength equipment MUST be secured to the oor using either 10mm or 3/8in. (grade 5
minimum) bolts.
• This Installation Instructions Manual must be used in conjunction with the equipment’s Owner’s Manual. The
Owner’s manual describes equipment setup and instructs members on how to use it correctly and safely.
• LEVERAGE requires at least two people to perform the installation.
THREAD LOCKER APPLICATION: Clean all threads and holes, apply no more than 3-4 drops per bolt.
Thru Holes Blind Holes
Metric Steel Bolts Torque Specications
Bolt Size Thread Pitch Torque, N-m (lbs-ft)
6mm 1.25 10 to13.5 (8 to10)
8mm 1.25 25.5 to 28.5 (19 to 21)
10mm 1.75 55.5 to 58 (41 to 43)
12mm 1.25 61 to 65 (45 to 48)
• Torque all hardware to values as specied above, unless noted otherwise.
• See hardware sheet of this manual for fastener sizing information; for reference only.
• Note: All torque values are in N-m unless otherwise stated.
WARNING: All taper roller bearings should ship from the factory packed with grease. It is the installers responsibility
to verify that ALL taper roller bearings are fully packed with grease before assembly of the LEVERAGE product begins.
If any bearing needs grease added use a general purpose Lithium Grade 2 grease. Fully pack the roller bearing with
grease by forcing the grease under the bearing cage between the rollers from the large end of the roller until it oozes
thru the small end.
Failure to correctly lubricate bearings and maintain proper lubrication may result in damage that could cause bearing
to fail during operation, creating a risk of serious bodily harm.
PACKAGING REMOVAL:
Carefully remove all packaging materials that wrap the equipment. DO NOT USE A KNIFE OR BOX CUTTER AS
YOU MAY DAMAGE THE EQUIPMENT. At this time remove any sub-components from the pallet and set aside
for later assembly.
INSTALLATION
Required Tools
• 13mm Box / Open-End Wrench • 5mm Hex Key Socket
• 13mm Socket • 6mm Hex Key Socket
• Torque Wrench
Page 9
20
8
17
11
21
18
6
9
19
2
10
14
12
15
13
7
3
4
1
5
22
16
20
8
17
11
21
18
6
9
19
2
10
14
12
15
13
7
3
4
1
5
22
16
#Part No.Descripon
1110-3373 Screw, M10x1.5, 85mm, SHC, HK, AS, NKL, Gr-10.9
2110-3402 SCREW, #8-18, 3/4", HI-LOW, PHT, PH, CS, BO
3110-3576 SCREW, M8-1X50, SHHM, HE, SS
4110-3930 SCREW,M10x1.5,140mm,SHC,HK,AS,NKL,PT,GR12.9
5110-3936 SCREW,M10x1.5,70mm,HHC,HE,AS,ZC,GR12.9
6110-3973 NUT,M10X1.5,AS,ZC,NYLON
7731-0354 SCREW,M8x1.25,25,HHC,HE,AS,12.9,ZP,FT
8731-0355 WASHER,PLAIN,M8,NARROW
9731-0363 NUT,M10X1.5,NYLOC
10 731-0365 NUT,M8 X 1.25,NYLOC JAM
11 731-0367 WASHER,PLAIN,M10
12 731-0570 SCREW,M8x1.25,16mm,SHC,HK,AS,GR12.9,NKL,FT
13 731-1450 SCREW,M8 X 1.25,75mm,SHC,HK,AS,ZP
14 731-1462 SCREW,M8 X 1.25,80mm,BHC,HK,AS, NKL
15 731-5330 SCREW,M8x1.25,25,SHC,HK,AS,12.9,ZP,FT
16 731-5565 SCREW,M10x1.5,80,HHC,HE,AS,12.9,ZP,PT
17 731-5806 WASHER,M8,HAT
18 731-6104 Sloed Hex Nut,Low,M16X1.5mm
19 731-6107 PIN, COTTER,3.2mmDIA x 32mm LONG
20 731-7105 WASHER, M8, BELLEVIEW LOCK
21 731-7111 WASHER,M16,30mmOD,1mmTHK
22 731-7706 SCREW,M10x1.5,130mm,HHC,HE,AS,ZC,GR12.9
Once all packaging has been removed,
identify the major assembly parts as shown
to the right. Lay all parts out in a clean open
area to prepare for assembly.
Should any component not be present or if you have any operational questions, please refer to Contact Information on
page 16.
Hardware
The following hardware is referenced in this assembly manual by the numbers below.
Page 10
Assembly Instructions
1. Attach the rear support frame to the main frame with two
M10x1.5, 70mm bolts (#5), four #11 washers and two #9
nuts.
2. Attach the left weldment to the main frame with two
M10x1.5, 130mm bolts, #11 washers & #9 nuts vertically
through the frame spacers.
3. Secure horizontally with two M10x1.5, 80mm bolts and #11
washers through the compression sleeves.
4. Repeat on right side weldment.
5. Secure the right lift arm to the main frame.
a. Remove the cotter pin, then the slotted hex nut,
#21 washer, and bearing shown from the main
frame.
b. Place the lift arm on the shaft.
c. Reassemble and secure with the cotter pin.
Note: Small diameter of the bearing oriented
towards axle and arm. See bearing detail next
page. Make sure large bearing is fully greased
prior to install.
Page 11
Bearing Orientation: Lift Arms to Main Frame
6. Repeat on left side weldment.
7. With cotter pin secured, press in the end-caps until they
snap into place securely, both left and right sides.
8. Lower right lift arm onto bumper and conrm good
alignment for the stop, adjust the coupling basket as
necessary by loosening the two M8x1.25, 25mm bolts
under the arm.
Page 12
9. Independently assemble left and right lift assemblies
by connecting the long weldment link to the bell crank
weldment with a M10x1.5, 140mm bolt, #11 washer & #10
nylok nut.
Please note the two bell cranks are non-symmetrical.
Note the bearing dierences when installing.
10. Secure the right lift assembly to the main frame.
a. Remove the cotter pin, then the slotted hex nut,
#21 washer, and bearing shown from the main
frame.
b. Place the lift assembly on the shaft.
c. Reassemble and secure with the cotter pin.
Note: Small diameter oriented towards arm
on shaft. See below for details. Make sure large
bearing is fully greased prior to install.
Ø 25mm ID bearing
Ø 20mm ID bearing
Ø 25mm ID bearing
Ø 20mm ID bearing
Bearing Orientation: Lift Arms (Bell Crank) to Main Frame
Page 13
11. Connect the long weldment link to the main frame by
passing a M10x1.5, 85mm bolt through the rod end and
securing with #11 washer and #6 nut.
12. Repeat steps 10-11 on the left hand side.
13. Press in the end-caps 731-7683 until they snap into place
securely, both left and right sides.
14. Attach right arm to the axle, insert #21 washer, bearing and
O-Ring and secure with a cotter pin through slotted hex
nut.
Note: Small diameter of the bearing faces towards arm as
shown. See next page for details. Make sure large bearing is
fully greased prior to install.
Page 14
5
25 mm
20 mm
9
8
7
4
3
2
1
5
25 mm
20 mm
9
8
7
4
3
2
1
# Part No. Description
1 731-6107 PIN, COTTER,3.2mmDIA x 32mm LONG
2 731-6104 Slotted Hex Nut,Low,M16X1.5mm
3 731-7111 WASHER,M16,30mmOD,1mmTHK
4 731-2595 TAPPER ROLLER BEARING, 30304 GB 297-
9
5 731-0842 ASSY, BRG, TAPER, 30205
7 731-6430 BAR, PIVOT AXLE, L2, LONG
8 731-0355 WASHER,PLAIN,M8,NARROW
9 110-3576 SCREW, M8-1X50, SHHM, HE, SS
Bearing Orientation: Lift Arms (Bell Crank) to Outer Weldments
15. Attach the rod end from the short link to the lift assembly
using a M10x1.5, 90mm bolt, #11 washer & #6 nut.
16. Repeat steps 14-15 on the left hand side, paying attention
to bearing orientation at install.
17. Press in the end-caps 731-7683 until they snap into place
securely, both left and right sides.
Page 15
18. Remove the set screw 731-0570 from the end of the chest
pad assembly.
19. Pull down on the pop pin to install the chest pad.
20. Reinstall set screw once chest pad post is through
weldment.
21. Attach seat assembly to carriage with four M8x1.5, 20mm
bolts and #8 washers.
22. Attach the 4 weight horns to the left and right weldments
as shown with two M8x1.25, 25mm bolts, four #8 washers
and 2 #10 nuts through each weight tube, with the plate
on the inside of the weldment. The bumper stop slides on
when the bolts are secure.
23. Install footpads prior to bolting unit down.
24. Assembly is complete. Make sure all fasteners are tightened
to the specications listed on page 8.
Page 16
The Nautilus Support website provides a wealth of resources to help you get the best experience
from your Strength unit. It is important to check the website periodically for updated video content,
Owner’s Manual and Installation Instructions, Service Bulletins, and other information. The resourc-
es include:
• Contact number and email for Technical Support.
Go to https://support.corehandf.com/ for support information and information on all
Nautilus products.
• Updated Owner’s Manual, Installation Instructions, Service Bulletins, Instructional Videos,
and other information. https://support.corehandf.com/LEVERAGE
Contact Information
CORE HEALTH & FITNESS
4400 NE 77th Avenue, Suite 300
Vancouver, WA 98662
Telephone: (888) 678-2476
http://www.corehandf.com
Customer Support
Contact your local distributor, or Core Health &
Fitness directly at: 1-800-503-1221
support@corehandf.com
Please supply the serial number of your Leverage and the date of purchase when you call. Use the
space in the boxes below to write down this information.
Serial Number
Date of Purchase
You may download the latest version of the Installation Guide, as well as view instructional videos,
by visiting the support website at:
https://support.corehandf.com/LEVERAGE
SUPPORT AND SERVICE
Page 17
MAINTENANCE
With durable, high performance components, this equipment is designed for heavy usage with minimal maintenance
required. To keep it in top condition, perform regular daily, weekly and monthly preventive maintenance routines out-
lined below.
The safety and integrity of this machine can only be maintained when the equipment is regularly examined for damage
and wear and repaired. It is the sole responsibility of the owner of this equipment to ensure that regular maintenance
is performed. Worn or damaged parts must be replaced immediately or the equipment removed from service until the
repair is made.
GENERAL CLEANING
• Wipe LEVERAGE with a light all-purpose cleaner, such as diluted Simple Green at a 30:1
solution.
• Dry LEVERAGE with a soft cloth to prevent rust.
BEARING GREASE PACKING
Before bearings 731-0842 and 731-2595 are installed they must be fully packed with general purpose Lithium Grade 2
grease.
TIGHTENING OF THE TAPERED ROLLER BEARING ON ALL SHAFTS
To properly torque the tapper roller bearing:
• With the tab washer NOT installed torque the bearing nut to 40-42 Lbs-Ft.
(This will square and seat the bearings)
• Back the nut o, then install the tab washer.
• Torque the nut to 7- 9 Lbs-Ft, now bend tabs on washers to lock in place.
Page 18
Core Health & Fitness, LLC Limited Warranty
Commercial Fitness Products
CORE HEALTH & FITNESS, LLC, warrants to the original purchaser that its Commercial Fitness Products are free of defects in
workmanship and materials. Mechanical parts are covered for a period of two (2) years from date of purchase. Electronic
parts are covered for one (1) year from the date of purchase. Labor is covered for a period of one (1) year from the date of
purchase. Frames are warranted for 10 years from the date of purchase.
During the applicable warranty period, CORE HEALTH & FITNESS, LLC, will either repair or replace, at its option, defective
part(s) at no charge. The Manufacturer does not warrant the heart rate system performance on its products, as the heart
rate system performance varies, based on a user’s physiology, fitness level, age, method of use and other factors. Further-
more, the heart rate system is not for medical use.
In order to implement the provisions of this limited warranty, the original purchaser must contact Customer Support at
(888) 678-2476. Be prepared to provide the product serial number and a detailed description of the problem. Proof of
purchase or warranty registration will be needed to verify warranty effectivity and obtain warranty service and/or parts.
Do not return defective part(s) for repair or replacement without prior authorization.
CORE HEALTH & FITNESS, LLC, reserves the right to review defective part(s). All costs of shipping defective part(s) to and
from CORE HEALTH & FITNESS, LLC, for inspection shall be borne solely by the original purchaser. Any repair or modifica-
tion of defective part(s) by anyone other than an Authorized Technical Representative or Authorized Service Provider will
void this warranty. If CORE HEALTH & FITNESS, LLC, determines, in its sole discretion, that it is impractical to ship defective
part(s) to CORE HEALTH & FITNESS, LLC, CORE HEALTH & FITNESS, LLC, may designate, in its sole discretion, a repair facility
to inspect and estimate the cost to repair such defective part(s). The cost, if any, of shipping defective part(s) to and from
such repair facility and of such estimate shall be borne solely by the original consumer purchaser. Defective part(s) must
remain available for inspection until the claim is finalized. Whenever claims are settled, CORE HEALTH & FITNESS, LLC,
reserves the right to be subrogated under any existing insurance policies the claimant may have.
EXCLUSIONS
This limited warranty does not apply to cosmetic damage, imperfections that are within design specification(s) or that do
not materially alter functionality, or damage due to acts of God, accident, abuse, misuse, negligence, lack of normal main-
tenance, abnormal service or handling that differs from that specified for this model, improper installation or operation.
In addition, alteration or modification of the product, or repair by anyone other than a CORE HEALTH & FITNESS, LLC, tech-
nical representative or authorized service provider will void this warranty. This warranty is valid only in the continental
United States. It is the purchaser’s responsibility to maintain the product per the owner’s manual instructions that comes
with each product. Failure to follow the maintenance instructions shall void the manufacturer’s warranty.
DISCLAIMER OF WARRANTIES; LIMITATION OF LIABILITY
THIS WARRANTY IS IN LIEU OF ALL OTHER WARRANTIES, EXPRESS OR IMPLIED, INCLUDING WITHOUT LIMITATION, THE
IMPLIED WARRANTIES OF MERCHANTABILITY AND FITNESS FOR A PARTICULAR PURPOSE. REPAIR OR REPLACEMENT AS
PROVIDED ABOVE SHALL BE THE SOLE AND EXCLUSIVE REMEDY AVAILABLE TO THE PURCHASER. CORRECTION OF DEFECTS,
IN THE MANNER AND FOR THE PERIOD OF TIME DESCRIBED ABOVE, SHALL CONSTITUTE COMPLETE FULFILLMENT OF ALL
LIABILITIES AND RESPONSIBILITIES OF CORE HEALTH & FITNESS, LLC TO THE PURCHASER WITH RESPECT TO CONTRACT,
NEGLIGENCE, STRICT LIABILITY OR OTHERWISE. CORE HEALTH & FITNESS, LLC SHALL NOT BE LIABLE OR IN ANY WAY
RESPONSIBLE FOR ANY INCIDENTAL OR CONSEQUENTIAL DAMAGES BASED UPON BREACH OF ANY EXPRESS OR IMPLIED
WARRANTY ON THIS PRODUCT OR OTHERWISE.
Some states do not allow the exclusion or limitation of implied warranties or incidental or consequential damages, so the
above exclusions and limitations may not apply to you. This warranty gives you specific legal rights, and you may also
have other rights, which may vary, from state to state.
From P/N: 620-8360. REV: A. DOC., WARRANTY, COMMERCIAL Eective November, 2015
WARRANTY
© 2018 CORE HEALTH & FITNESS, LLC PART NUMBER 620-8418, REV B

Other Nautilus Fitness Equipment manuals
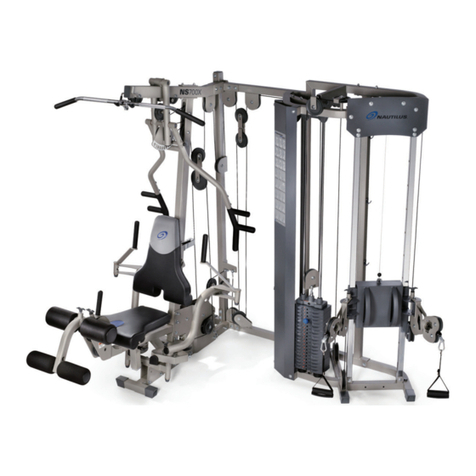
Nautilus NS-700 User manual

Nautilus

Nautilus NS-700 User manual

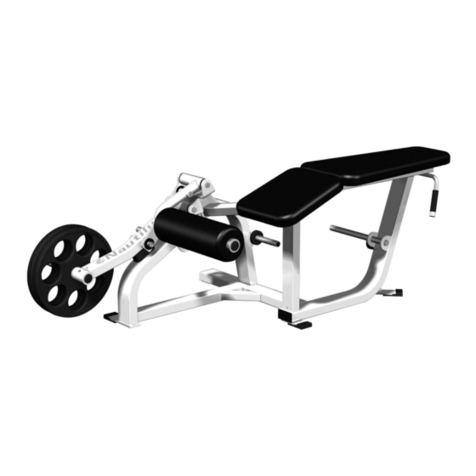
Nautilus Glute Drive User manual

Nautilus

Nautilus Glute Drive User manual

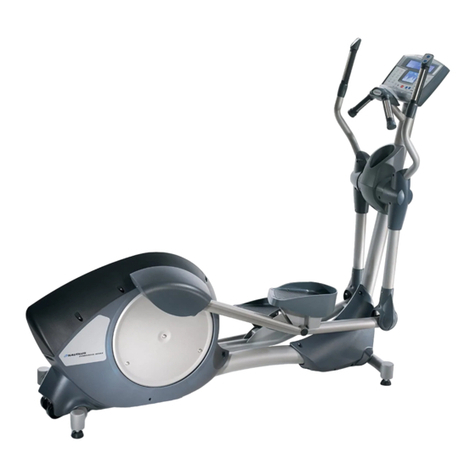
Nautilus NT 1810 User manual

Nautilus

Nautilus NT 1810 User manual

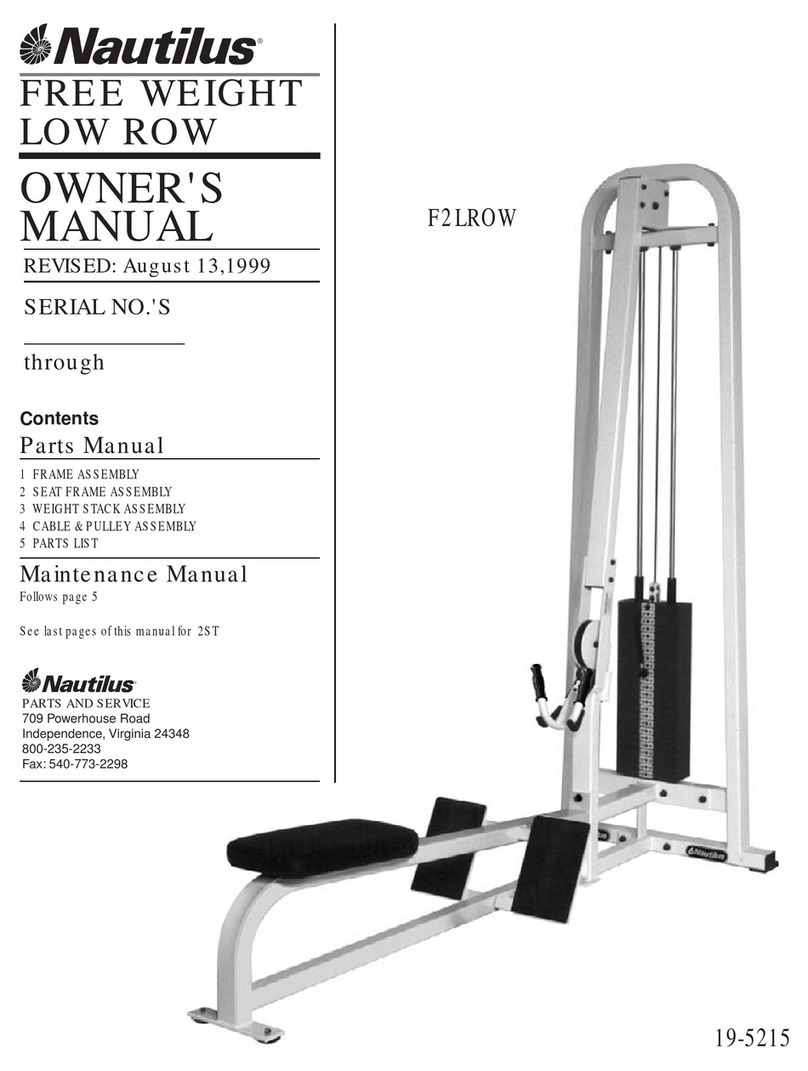
Nautilus F2LROW User manual

Nautilus

Nautilus F2LROW User manual

Nautilus Mobia User manual

Nautilus

Nautilus Mobia User manual

Nautilus ONE User manual

Nautilus

Nautilus ONE User manual

Nautilus VKR STRENGTH SYSTEM 1160 User manual

Nautilus

Nautilus VKR STRENGTH SYSTEM 1160 User manual

Nautilus NT-1830 User manual

Nautilus

Nautilus NT-1830 User manual

Nautilus F3BR User manual

Nautilus

Nautilus F3BR User manual

Nautilus 200 3346 User manual

Nautilus

Nautilus 200 3346 User manual

Nautilus Be Strong NS 300X User manual
Nautilus

Nautilus Be Strong NS 300X User manual

Nautilus EVO S9AA User manual

Nautilus

Nautilus EVO S9AA User manual

Nautilus NT-CC1 User manual

Nautilus

Nautilus NT-CC1 User manual

Nautilus Instinct User manual

Nautilus

Nautilus Instinct User manual

Nautilus INSPIRATION Strength User manual

Nautilus

Nautilus INSPIRATION Strength User manual

Nautilus F3 0-90 User manual

Nautilus

Nautilus F3 0-90 User manual

Nautilus INSPIRATION STRENGTH HDHR2 Operating instructions
Nautilus

Nautilus INSPIRATION STRENGTH HDHR2 Operating instructions

Nautilus IPTD3 User manual

Nautilus

Nautilus IPTD3 User manual

Nautilus IPTE3 User manual

Nautilus

Nautilus IPTE3 User manual

Nautilus 2ST HIP ABDUCTION User manual

Nautilus

Nautilus 2ST HIP ABDUCTION User manual

Nautilus BE STRONG NS 75X User manual

Nautilus

Nautilus BE STRONG NS 75X User manual

Nautilus Instinct User manual

Nautilus

Nautilus Instinct User manual

Nautilus IPLE3 User manual

Nautilus

Nautilus IPLE3 User manual

Nautilus NT-CC1 User manual

Nautilus

Nautilus NT-CC1 User manual
Popular Fitness Equipment manuals by other brands

SportsPlay 902-958 Installation instruction

SportsPlay

SportsPlay 902-958 Installation instruction

Life Span X-18 user manual

Life Span

Life Span X-18 user manual

Body Craft BCG 446-P instruction manual

Body Craft

Body Craft BCG 446-P instruction manual

Antworks Strong Ant IV Installation instruction

Antworks

Antworks Strong Ant IV Installation instruction

HEALTH RIDER HRBE2067.0 user manual

HEALTH RIDER

HEALTH RIDER HRBE2067.0 user manual

Power Tec WB-LS20 manual

Power Tec

Power Tec WB-LS20 manual

In Shape 17063 instruction manual

In Shape

In Shape 17063 instruction manual

Lifepro FLEXSTRIDE PRO user manual

Lifepro

Lifepro FLEXSTRIDE PRO user manual

Body Craft Jones Platinum JP1000.1 owner's manual

Body Craft

Body Craft Jones Platinum JP1000.1 owner's manual

FREE MOTION 800 user manual

FREE MOTION

FREE MOTION 800 user manual

Body Craft SEMG6221 Assembly and operating instructions

Body Craft

Body Craft SEMG6221 Assembly and operating instructions

Life Gear 30805 owner's manual

Life Gear

Life Gear 30805 owner's manual

Pro-Form G880 PFEVBE4805.0 user manual

Pro-Form

Pro-Form G880 PFEVBE4805.0 user manual

BH Hipower L210 Instructions for assembly and use

BH Hipower

BH Hipower L210 Instructions for assembly and use

Pro-Form 700 Cardio CrossTrainer user manual

Pro-Form

Pro-Form 700 Cardio CrossTrainer user manual

Life Fitness MJ4 owner's manual

Life Fitness

Life Fitness MJ4 owner's manual

Life Fitness Club Series Assembly instructions

Life Fitness

Life Fitness Club Series Assembly instructions

Total Gym Platinum Plus owner's manual

Total Gym

Total Gym Platinum Plus owner's manual

manuals.online logo
manuals.online logoBrands
  • About & Mission
  • Contact us
  • Privacy Policy
  • Terms and Conditions

Copyright 2025 Manuals.Online. All Rights Reserved.