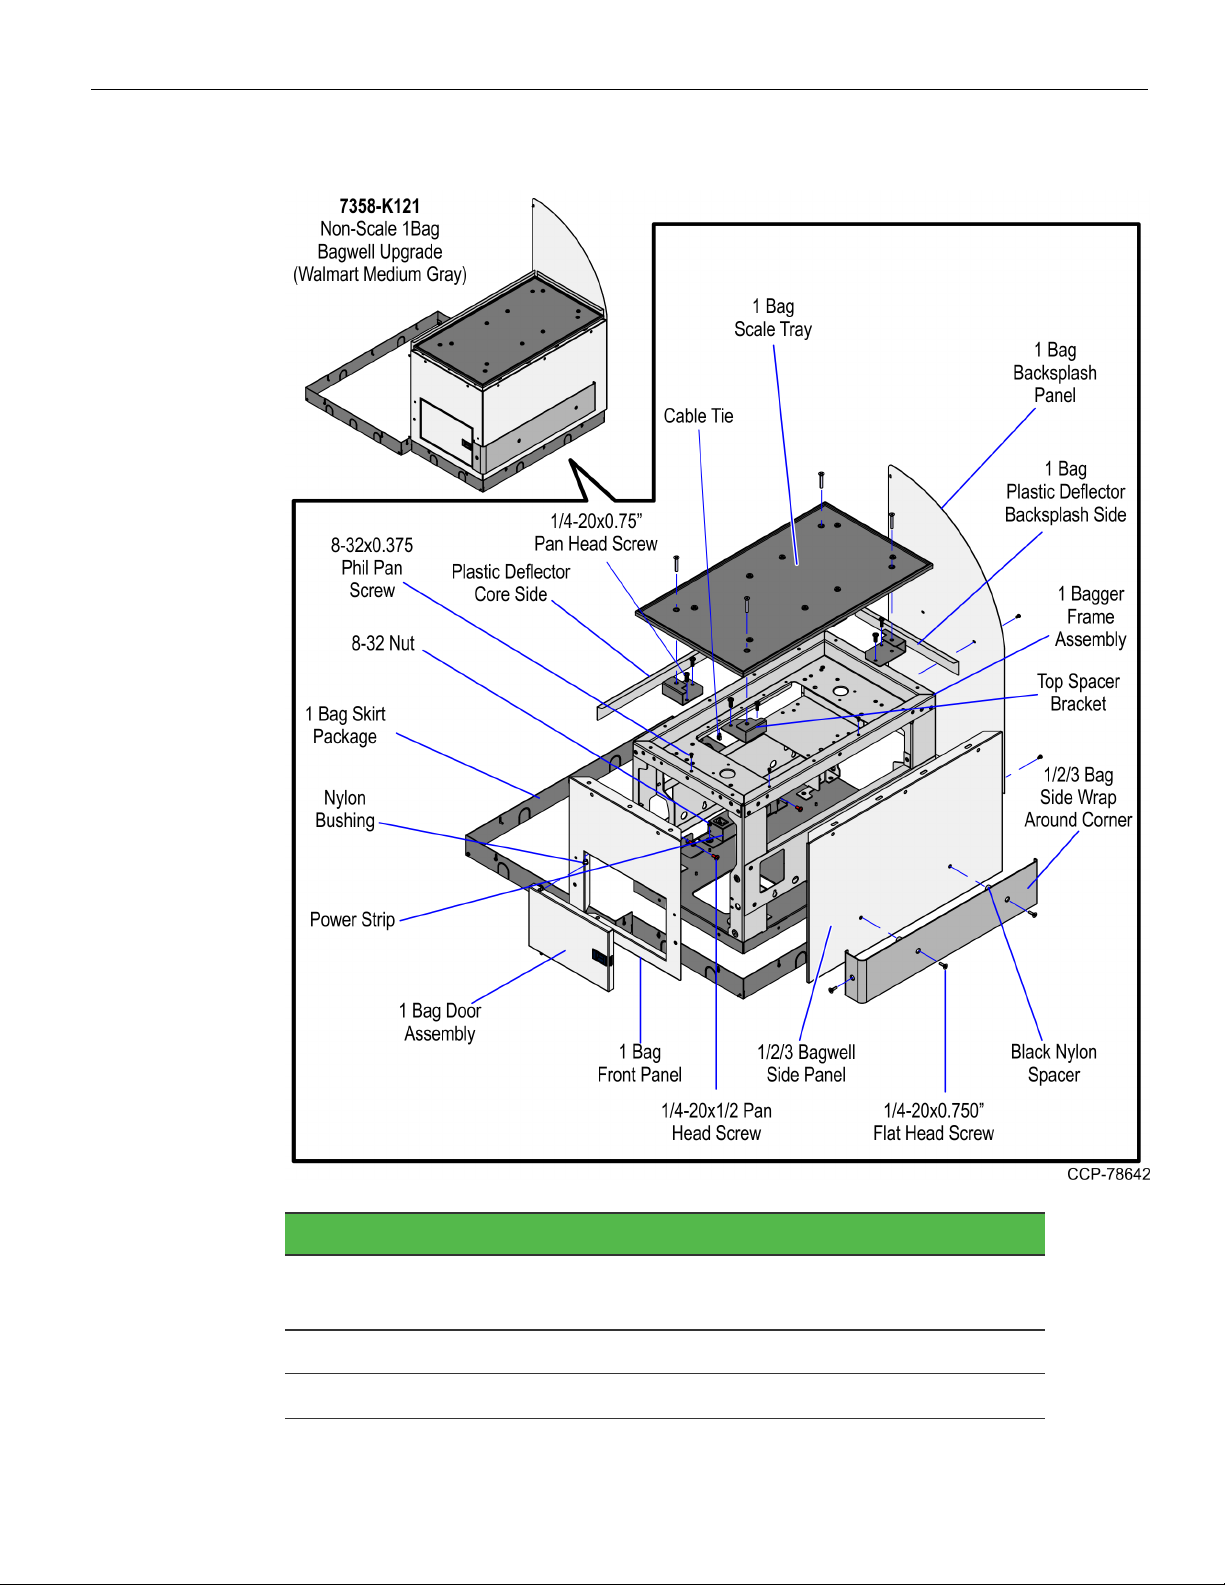
6 Non-Scale 1-Bag Bagwell Upgrade
Part Number Description
795-0137112 Panel - 1-Bag - Front (Walmart Light Blue)
795-0133312 Panel - 1/2/3 Bagwell Side (Walmart Light Blue)
* 795-0281612 Hole Cover Label - (Walmart Light Blue)
497-0526949 Skirt - 1-Bag BOM Package
497-0464170 Assembly - 1-Bag Frame With Leveling Feet and
Casters
497-0472267 1-Bag Scale Tray with Bag Rack Hardware
497-0457365 Plastic Deflector - Backsplash Side - 1-Bag
497-0455519 Plastic Deflector - Core Side
009-0005930 Cable Tie - Snap In Mounting
006-8612446 Screw - 8-32 x 0.375 in Phil Pan, Self Tapping - Type F
(10 pcs)
006-8616060 Screw - ¼–20 x 0.75 in, Pan Head, Phillips, Zinc Plated
Steel (8 pcs)
006-8623998 Screw - ¼–20 x 1–21/64 in, Phillips Flat Head, 82
Degree, Machine Thread, Zinc-Plated Steel (4 pcs)
006-8611505 Bushing, Nylon (2 pcs)
006-8611143 Nut Keps, 8-32, Steel, Blue Zinc (5 pcs)
006-8604541 Screw, ¼–20 x ½, Pan Head, Phillips (4 pcs)
497-0421485 Power Strip, IEC 4-POS, Plastic Case
497-0426042 Bag - 2 and 3.5 Bagger, LHC and RHC, Input Belt
007-9714414 Tie Strap Plain5.60Lg (4 pcs)
* 497-0513382 Label - Multiple Power Sources/ Disconnect Power
Caution
497-0521432 Bracket - Top - Spacer (4 pcs)
497-0457054 Black Nylon Spacer 15 mm OD x 10.4 mm ID x 10 mm
L (3 pcs)
497-0518277 Bumper - 1, 2, 3 Bag Side, Wrap Around Corner
006-8612492 Screw - ¼–20 x 0.750 in, Phillips Flat Head, 82 Degree,
Machine Thread, Zinc-Plated Steel (3 pcs)
* 497-0423108 Instructions-Kit (Reference Sheet)
* Items marked with an asterisk are not called out on the image.