NEC Versa LX User manual

NEC Versa LX and LXi Hard Disk Drive Upgrade Kit 1
NEC Versa®LX and LXi
Hard Disk Drive Upgrade Kit
NEVER boot the system with the CD (supplied with this kit) when the
original hard disk drive is installed in the internal bay because it will permanently destroy the
data on the original hard disk drive. ONLY boot the system with the CD when the new hard
disk drive is installed in the internal bay.
Congratulations on purchasing the NEC Versa Hard Disk Drive Upgrade Kit. The upgrade kit is
designed to support the NEC Versa LX and LXi systems with user-removable hard disk drives.
Note (NEC Versa LX systems only.) For hard disks, 12-GB or larger, the restore process
creates two partitions, not a single partition as shipped from the factory. If you want to create a
single partition for your hard disk drive, you should run the Partition Magic software (version 4.1
or higher) after the restore process completes. Partition Magic can either be downloaded from a
URL address provided by NECC Customer Support, or installed from the Application and Driver
CD that ships with your system (not available on all CDs). See the document, Restoring a 12-GB
or Larger Hard Disk Drive, which shipped with your hard disk, for detailed instructions on using
the Product Recovery CD and/or creating a single partition with Partition Magic.
In addition to introducing the hard disk drive upgrade kit contents, this sheet describes the
following.
Instructions for identifying your system’s user-replaceable hard disk drive (for NEC Versa
LX only).
Instructions on removing the internal hard disk drive.
Instructions on removing the hard disk drive from the cradle pack.
Instructions on installing the new drive in the drive bay.
Instructions on installing the system’s original drive into the cradle pack.
Instructions for copying the contents of your original hard disk drive to your new hard disk
drive.
Instructions for verifying the data transfer.
To be sure that you own a unit with a user-replaceable hard disk drive (for NEC Versa LX only),
check the following.
Turn your system over. Note the label on the back of the unit, which contains the Doc ID
(model name), Model Number, and NEC Serial Number for the unit.
Look at the 14-alphanumeric characters in the model number. A unit with a user-replaceable
hard disk drive has the letter “A” in the next to last position of the model number. An
example of a model number for a unit with a user-replaceable hard disk drive is VL210010-
0000A0.
2NEC Versa LX and LXi Hard Disk Drive Upgrade Kit
NEC Versa Hard Disk Drive Upgrade Kit Contents
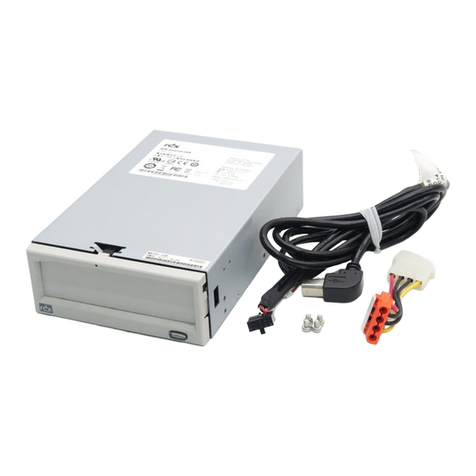
A–Cradle, hard disk drive, and
screw (attached as a unit) B–Phillips-head 1x60 screwdriver
Cradle Pack —the cradle with the hard disk drive installed is inserted into the system’s
VersaBay III.
Phillips-head 1x60 Screwdriver —used to remove the screw.
CD —(not shown) provides the utility used to copy the original disk drive contents to the
new drive.
Upgrade Precaution
Before attempting to copy the contents of the original hard disk drive to your new hard disk
drive, make sure you remove your original hard disk drive and install the new, larger capacity
hard disk drive from the cradle pack into the internal drive bay.
Removing the Internal Hard Disk Drive
The hard disk drive is located under the battery bay in your NEC Versa notebook computer. You
must remove the system’s main battery before removing the hard disk drive. Remove the hard
disk drive as follows.
1. Make sure the system is powered off and the AC adapter is disconnected.
2. Close the LCD and turn the system over.

NEC Versa LX and LXi Hard Disk Drive Upgrade Kit 3
3. Slide the battery release latch toward the back of the system and hold firmly.
Locating the latch
A— Battery Release Latch
4. Continue to hold the battery release latch as you slide the battery out of the system.
Removing the battery

4NEC Versa LX and LXi Hard Disk Drive Upgrade Kit
5. Remove the disk drive as follows:
Remove the screw that secures the hard disk drive.
Place your finger in the center notch of the hard drive lever and pull the lever up. Be
sure that both sides of the lever are raised.
Hard disk drive in the drive bay
A–Screw B–Hard Disk Drive Lever C–Hard Disk Drive
With the lever raised, place your fingers on the inside edge of the lever and on each
side of the center notch. Pull the drive toward the open side of the battery bay. Do not
apply pressure to the drive surface as you pull.
Use care when handling the hard disk drive. Hold it from the sides; do
not squeeze the drive by the top and bottom.
Disconnecting the drive
Once the drive is disconnected, use the lever to lift the drive out of the system. Once
removed, only handle the drive by its sides.

NEC Versa LX and LXi Hard Disk Drive Upgrade Kit 5
Use care when handling the hard disk drive. Hold it from the sides; do
not squeeze the drive by the top and bottom. Do not push on the top and bottom of the drive.
To eliminate static discharge, touch a grounded metal object while handling the hard disk drive.
Lifting the drive out of the bay
Note Using a small sticker, label the original drive to avoid confusion later. Place the sticker
on the same side as the caution label and mark the drive “original.”
Removing the Drive in the Cradle Pack
Use the following procedure to remove the hard disk drive from the cradle pack.
1. Place the cradle pack with the securing screw facing up.
2. Remove the securing screw. Place your finger in the center notch of the hard drive lever and
pull up the lever. Be sure that both sides of the lever are raised.
Removing the drive
A—Hard Disk Drive Lever B—Screw
3. With the lever raised, place your fingers on the inside edge of the lever and on each side of
the center notch. Pull the drive away from the drive connector. Lift the drive out of the
cradle.

6NEC Versa LX and LXi Hard Disk Drive Upgrade Kit
Installing the New Drive in the Drive Bay
Use the following steps to install the hard disk drive in the system’s drive bay.
1. Holding the drive by its sides, pull up the hard drive lever.
Keeping the lever raised, lower the new drive into the drive bay.
Lowering the drive into the bay
2. Align the drive connector with the connector in the drive bay.
3. Pressing against the outer edge of the lever, slide the drive toward the connectors and push
firmly to secure the connection. Do not apply pressure to the drive surface as you push.
Connecting the drive
A–Drive Connectors
4. Press down on both sides of the drive lever to lock it into place.

NEC Versa LX and LXi Hard Disk Drive Upgrade Kit 7
5. Replace the screw to secure the hard disk drive.
Securing the drive
A–Screw B–Hard Disk Drive Lever C–Hard Disk Drive
Installing the Drive in the Cradle Pack
Use the following steps to install the original hard disk drive in the cradle pack.
1. Place the cradle pack with the securing screw hole facing up.
2. Position the drive with the securing tab on the top. Keep the lever raised and lower the hard
disk drive into the cradle pack. Align the drive connector with the cradle pack connector.
Lowering the drive into the cradle
A–Hard Disk Drive Lever B–Cradle Pack Connector

8NEC Versa LX and LXi Hard Disk Drive Upgrade Kit
3. Slide the drive connector back into the cradle pack connector. Press down on both sides of
the lever to lock the drive into place. Secure the drive to the cradle with the screw.
Securing the drive
A—Hard Disk Drive Lever B—Screw
4. The cradle with the hard disk drive is ready to be inserted into the system’s VersaBay III
slot.
Launching the Copy Utility
Make sure that the CD-ROM drive and the new hard disk drive are installed in your NEC Versa
notebook. Insert the NEC Hard Drive Upgrade Setup CD into the drive and power on the
system. Use the following steps to run the Copy utility.
Note To confirm you have the hard disk drives in the correct locations, attempt to boot the
system. If the system boots, the original hard disk drive is not in the cradle. Do not use the Copy
utility with the original drive in the system’s internal drive bay.
1. When the system boots, a message appears stating that the internal drive contents will be
lost. Press Rto proceed. Press Qto quit.
Drive Image creates a small temporary partition on drive C where the data transfer files are
copied.
2. A message appears telling you to remove the CD from the drive, remove any diskettes, and
power off the system. Once you power off the system, remove the CD-ROM drive and
insert the VersaBay III cradle with the original disk drive installed into the system. Power
on the system.
3. The system boots and the PowerQuest DriveCopy main screen appears. Select “Entire Disk
Copy.”Verify that the source drive is Drive 2 and the destination drive is Drive 1. Select
“Finish.”
4. A warning message appears telling you that the contents of drive 2, VersaBay III drive,
replaces the contents of drive 1, internal drive. Click Yes.
The DriveCopy program copies the data to the new internal drive. The process takes
approximately 10 to 30 minutes depending on the amount of data to be copied.

NEC Versa LX and LXi Hard Disk Drive Upgrade Kit 9
Verifying the Data Transfer
When the copy process completes, a dialog box appears asking if you want to see the results.
Click Yes to see a graphical and text representation of the disk structure. Otherwise, select
“Exit.”At the prompt stating that the system needs to be rebooted, power off the system.
Remove the VersaBay III cradle from the system. Power on the system. The system boots from
the new internal hard disk drive and is ready for use.
Maintain the information on the disk drive as a backup copy until you are satisfied that the disk
copy process is complete or the data becomes outdated.
Your original disk drive can be used as a second drive in the VersaBay III.
Note (NEC Versa LX systems only.) For hard disks, 12-GB or larger, the restore process
creates two partitions, not a single partition as shipped from the factory. If you want to create a
single partition for your hard disk drive, you should run the Partition Magic software (version 4.1
or higher) after the restore process completes. Partition Magic can either be downloaded from a
URL address provided by NECC Customer Support, or installed from the Application and Driver
CD that ships with your system (not available on all CDs). See the document, Restoring a 12-GB
or Larger Hard Disk Drive, which shipped with your hard disk, for detailed instructions on using
the Product Recovery CD and/or creating a single partition with Partition Magic.

10 NEC Versa LX and LXi Hard Disk Drive Upgrade Kit
819-200649-001
10/2000
'%&(#!&('
Other manuals for Versa LX
9
This manual suits for next models
1
Table of contents
Other NEC Storage manuals