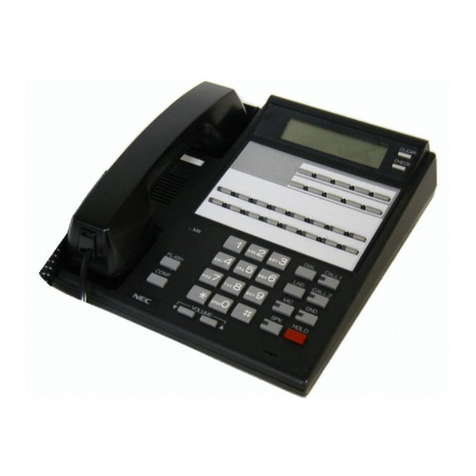
NEC Univerge SV8100 Instruction Manual

Page 1 of 8
SV8100 WITH ACD &INMAIL
ADMINISTRATION GUIDE
/&1HWZRUNV,QF_ZZZOFQHWZRUNVFRP_408.226.9999 | [email protected]

Page 2 of 8
Table of Contents
Phone System Programming............................................................................... 3
Phone Outline .................................................................................................. 3
Clock Setting.................................................................................................... 4
Program Set Name........................................................................................... 4
Program One-Touch Keys with Functions........................................................ 4
Message Waiting.............................................................................................. 4
System Speed Dial........................................................................................... 5
Voicemail Programming ...................................................................................... 6
Record Company Greetings............................................................................. 6
Record Delay Messages .................................................................................. 6
Holiday Greeting Activation/De-Activation........................................................ 7
Make Changes to Mailboxes............................................................................ 7
Set up Message Notification from a Mailbox..................................................... 7
The extension and mailbox numbers referenced in this guide are the most commonly
used configuration. It does not guarantee that your company will use the same extension and
mailbox numbers due to each systems customized configuration. If you are unsure of what
numbers were used in your configuration, please call or email LC Networks.
** Important Note:
/&1HWZRUNV,QF_ZZZOFQHWZRUNVFRP_408.226.9999 | [email protected]

Page 3 of 8
Phone System Programming
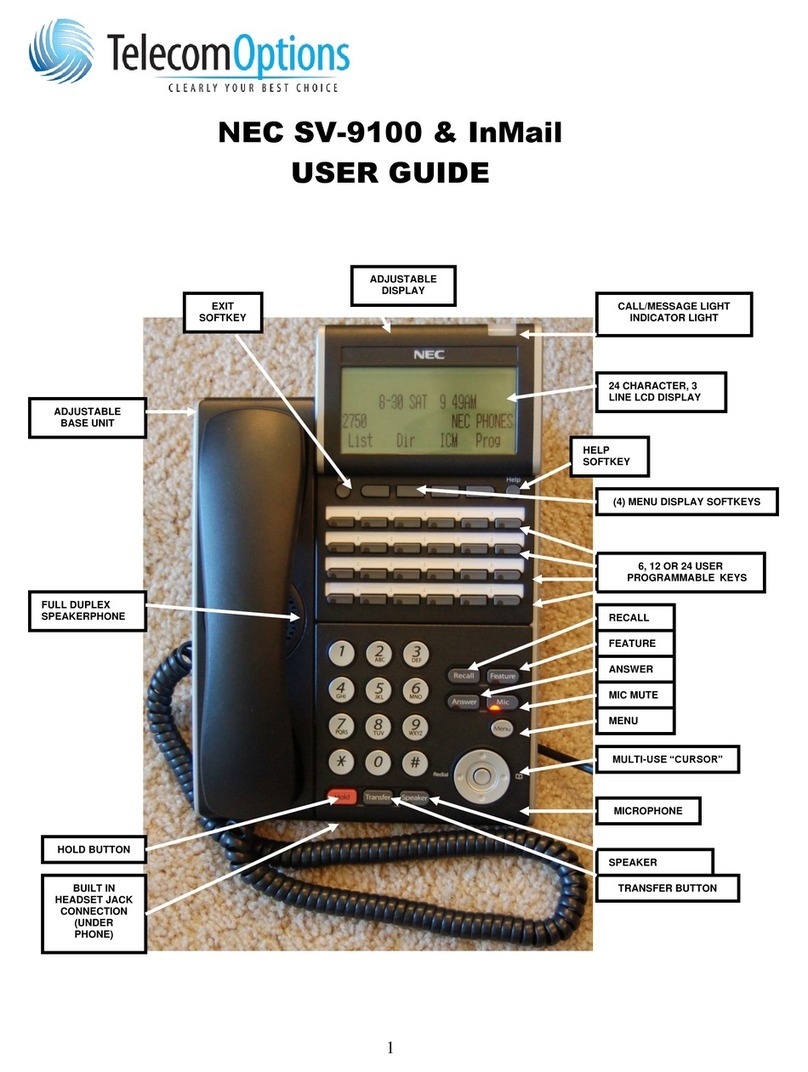
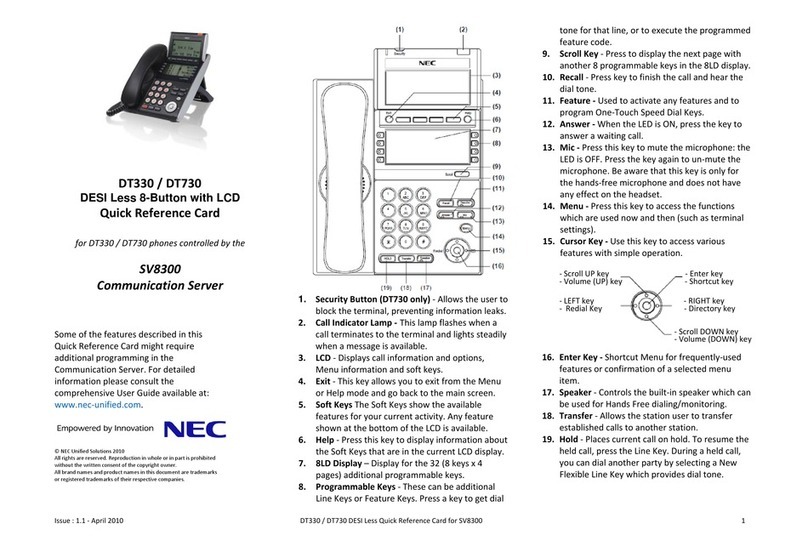
Phone Outline
Exit Exit’s out of various programming
Security Locks the phone for security purposes (If applicable, IP Phones only)
Message Indicator Flashes when you have a voicemail (or a message waiting)
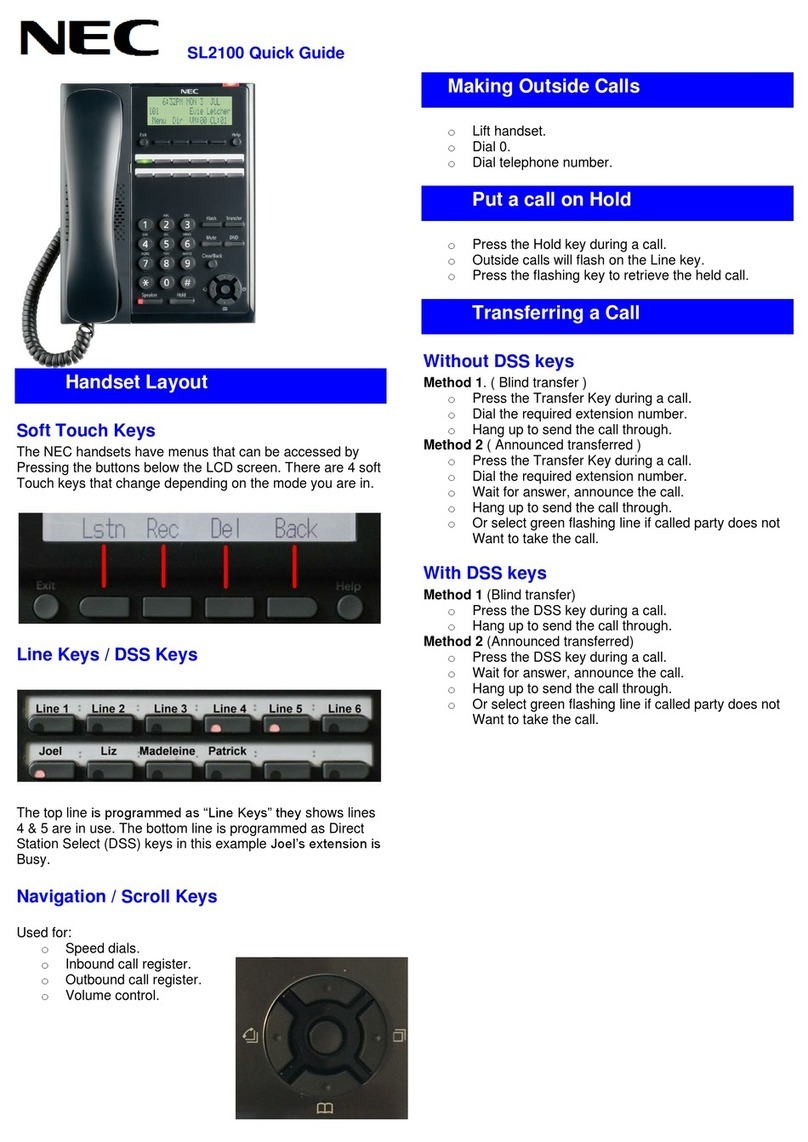
Soft Keys Corresponds with what the display says
Help Tells how a one touch key is programmed
Function One Touch Keys Used for various features, line keys, intercoms and one touch speed dials
Recall Same as Flash key for various features
Feature Used for programming
Answer Answers the First incoming call to a specific phone
Mic Mutes the microphone while on speakerphone
Menu Access to Company Directory, Call History and Ring Settings
Directory Speed Dials
Up Adjusts the volume on the ringer, handset and speaker
Down Adjusts the volume on the ringer, handset and speaker
Redial Review the last numbers dialed
Speaker Speakerphone
Transfer Transfer a call to another extension
Hold Holds the call
/&1HWZRUNV,QF_ZZZOFQHWZRUNVFRP_408.226.9999 | [email protected]

Page 4 of 8
Clock Setting
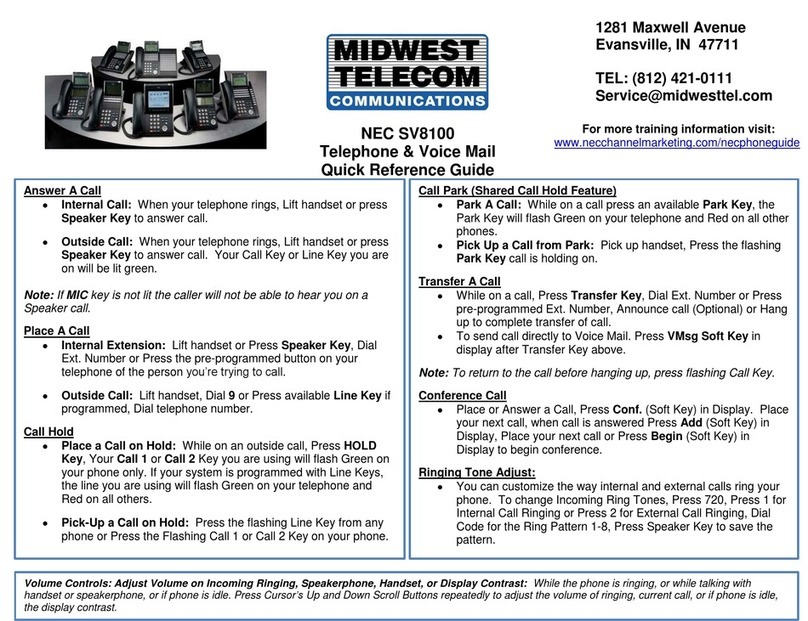
1. Press SPEAKER key, enter 728
Change the Time:
2. Dial 2 digits for the hour (must be in 24 hour clock time)
3. Dial 2 digits for the minutes
4. Press SPEAKER
Program Set Name
1. Press SPEAKER key, enter 700
2. Enter the extension number
3. Spell out name; press HOLD
NOTE
4. Press SPEAKER
: #moves cursor to right: FEATURE key moves cursor to left
Program One-Touch Keys with Functions
1. Press SPEAKER
2. Enter 751
3. Press the key you would like to program
4. Enter 2 digit code from below
5. Press SPEAKER
Code
Function
Brief Explanation
00
Not Defined
Clears the button and leaves it blank
01
DSS/One Touch
Extension number or a phone number
03
DND Key
Do Not Disturb
05
Headset
Needed if you are using a corded headset
10 Call Fwd Immediate
Forwards all calls immediately to desired
destination
13 Call Fwd B/NA
Forwards calls if you are busy or do not
answer the call in time to desired destination
37
DND / Call Fwd Override
Access to a phone in DND or Call Fwd
78
Record
Records conversation into a mailbox
Message Waiting
1. Call the extension
To Set
2. Press 0
3. Press SPEAKER
1. Press SPEAKER
To Clear
2. Enter 773
3. Press SPEAKER
/&1HWZRUNV,QF_ZZZOFQHWZRUNVFRP_408.226.9999 | [email protected]

Page 5 of 8
System Speed Dial
1. Press SPEAKER key
Program a new Speed Dial
2. Enter 753
3. Enter a speed dial code: 000-999
4. Enter the desired telephone number you want to store (up to 24 digits); NOTE: do
NOT enter a 9 before the telephone number
5. Press HOLD key
6. Spell out the name using the dial pad
NOTE
7. Press HOLD key
: press #to move cursor to right or FEATURE key to move cursor to left
8. Press SPEAKER key
Use this keypad digit . . . When you want to. . .
1
Enter characters:
1 @ [ ¥ ] ^ _ ` { | } Æ ¨ Á À Â Ã Ç É Ê ì ó
2
Enter characters:
A-C, a-c, 2.
3
Enter characters:
D-F, d-f, 3.
4
Enter characters:
G-I, g-i, 4.
5
Enter characters:
J-L, j-l, 5.
6
Enter characters:
M-O, m-o, 6.
7
Enter characters:
P-S, p-s, 7.
8
Enter characters:
T-V, t-v, 8.
9
Enter characters:
W-Z, w-z, 9.
0
Enter characters:
0 ! “ # $ % & ’ ( ) ô Õ ú ä ö ü α ε .
*
Enter characters:
*
+ , - . / : ; < = > ?
B E
σ
S
8 ¢ £
#
# = Accepts an entry (only required if two letters on the same key are
needed – ex: TOM). Pressing # again = Space. (In system programming
mode, use the right arrow Soft key instead to accept and/or add a space.)
FEATURE
Clear the character entry one character at a time.
HOLD
Clear all the entries from the point of the flashing cursor and to the right.
1. Lift handset or press speaker key
To Use Speed Dial
2. Press REDIAL key
3. Enter desired code
OR: press DIR, then SPD, use arrow keys to scroll OR press a letter on the dial pad then use
arrow keys to scroll
1. Press SPEAKER Key
Delete a Speed Dial
2. Enter 753
3. Enter the Code you would like to delete: 000-999
4. When the name and number appear, press EXIT (Top left key)
5. Press SPEAKER key
/&1HWZRUNV,QF_ZZZOFQHWZRUNVFRP_408.226.9999 | [email protected]

Page 6 of 8
Voicemail Programming
Record Company Greetings
1. From Ext 101
2. Enter security code press VOICEMAIL (**see note on Table of Contents)
3. Press 72 to enter system administration
4. Press 4to record an instruction greeting (main company greeting)
5. Enter mailbox 001
OR enter to record the DAY greeting
002
OR enter to record the NIGHT greeting
003
to record a HOLIDAY greeting
6. Press R(7 on dial pad) to record and follow the prompts
7. Press L( 5 on dial pad) to listen to your recording and press # to exit listen mode
8. Press #to back up one step to step 5 to record another greeting
9. Hang up when you are finished
Example:
Thank you for calling………Our regular business hours are….
If you know the extension of the person you are calling please enter it now or press 4 for
our company directory
To reach reception or to leave a general message please remain on the line and wait for
the beep
Record Delay Messages
1. From Ext 101
2. Enter security code press VOICEMAIL (**see note on Table of Contents)
3. Press SA (72 on dial pad) to enter system administration
4. Press A(2 on dial pad) to record an instruction greeting (main company greeting)
5. Enter mailbox to record the FIRST Delay Message
OR enter to record the SECOND Delay Message
6. Press R(7 on dial pad) to record and follow the prompts
7. Press L( 5 on dial pad) to listen to your recording and press # to exit listen mode
8. Press #to back up one step to step 5 to record another greeting
9. Hang up when you are finished
Example:
Please continue to hold, someone will be right with you…
Thank you for holding. Please stay on the line as it is quicker then re-dialing.
/&1HWZRUNV,QF_ZZZOFQHWZRUNVFRP_408.226.9999 | [email protected]

Page 7 of 8
Holiday Greeting Activation/De-Activation
1. Record a holiday greeting.. (See above for instructions)
2. From Ext 101
3. Enter security code for this mailbox
press VOICEMAIL (**see note on Table of Contents)
4. Press 72 for system administration
5. Press 6for override
6. When asked for the table: enter 1
7. Press ON soft key on display
8. Press SPEAKER
**** NOTE: to take override OFF after the holiday follow steps 2-6 then at step 7 press OFF
soft key on display, then press speaker
Make Changes to Mailboxes
1. From Ext 101
2. Enter security code .. if required
press VOICEMAIL (**see note on Table of Contents)
3. Press 72 for system administration
4. Press 7for subscriber mailbox maintenance
5. Choose from one of the following options:
A. Press 32 to erase all messages in a mailbox
B. Press 34 to erase the greeting in a mailbox
C. Press 36 to erase the name recording for the mailbox
D. Press 7to delete the security code for a mailbox
E. Press 6to record the name for a mailbox
Set up Message Notification from a Mailbox
1. Press VOICEMAIL key
2. Enter security code
3. Press 67
4. Press 6(or NOTIFY on display)
5. Press 6(or ONon Display)
6. Enter the two digits of the hour you would like the Notification to start, followed by 2 (A)
for AM or 7 (P) for PM
7. Enter the two digits of the hour you would like the Notification to end, followed by 2 (A)
for AM or 7 (P) for PM
8. Press 6to be notified from a number
9. Enter in the telephone number
/&1HWZRUNV,QF_ZZZOFQHWZRUNVFRP_408.226.9999 | [email protected]

Page 8 of 8
San Jose Office
LC Networks, Inc.
1011 Timothy Drive
San Jose, CA 95133
Office:408.226.9999
LC Networks, Inc.
1011 Timothy Drive
San Jose, CA 95133
Office:408.226.9999
sales@lc
ZZZOFQHWZRUNVFRP
Other manuals for Univerge SV8100
89
Table of contents
Other NEC Telephone manuals