manuals.online logo
Brands
  1. Home
  2. •
  3. Brands
  4. •
  5. NERI
  6. •
  7. Light Fixture
  8. •
  9. NERI Altair Heron User manual

NERI Altair Heron User manual

Rev. A - 2010
ATTENZIONE - CAUTION
ATTENTION - ACHTUNG
ATENCIÓN
Questo manuale va letto
e conservato con molta attenzione
This manual should be read with
attention and kept with great care
Ce manuel doitêtre lu très
attentivement et soigneusement
conservé
Die Anleitung sollte mit großer
Aufmerksamkeit gelesen und
aufbewahrt werden
Este manual se debe leer con
detenimiento y conservar
cuidadosamente
LIBRETTO ISTRUZIONI
APPARECCHI
DI ILLUMINAZIONE
INSTRUCTION BOOKLET
LIGHT FIXTURES
NOTICE DE MONTAGE
LUMINAIRES
INSTALLATIONSANLEITUNG
BELEUCHTUNGSAPPARATE
MANUAL DE
INSTRUCCIONES DE
DISPOSITIVOS
DE ALUMBRADO
Light Altair - Heron
2 3
NERI spa
S.S. Emilia 1622 - 47020 Longiano (FC) - Italy
Tel. +39 0547 652111 Fax +39 0547 54074
www.neri.biz - [email protected]
Certicato/Certicate
9105.DONE
ISO 9001:2008
Certicato/Certicate
9191.NER1
ISO 14001:2001
Questo manuale è soggetto a copyright © 2012. Tutti i diritti sono riservati.
E’ vietata la riproduzione anche parziale di esso senza il consenso scritto della Neri spa.
La Neri spa si riserva il diritto di apportare modiche ai propri prodotti e alla documentazione senza obligo di preavviso.
This manual is subject to copyright © 2012. All rights reserved.
Reproduction of this manual, even partially, is forbidden without written consent from Neri spa.
Neri spa reserves the right to modify its products and documentation without obligation to give prior warning.
Ce manuel fait l’objet d’un copyright © 2012. Tous droits réservés.
Ce manuel ne peut être reproduit, même partiellement, sans l’accord écrit de Neri spa.
Neri spa se réserve le droit d’apporter toutes modications à ses produits et à la documentation sans préavis.
Dieses Handbuch unterliegt dem Copyright © 2012. Alle Rechte vorbehalten.
Seine - auch auszugsweise - Reproduktion ohne schriftliche Zustimmung der Neri spa ist verboten.
Die Neri spa behält sich das Recht vor, an ihren Produkten und der Dokumentation Veränderungen vorzunehmen, ohne dies
vorher ankündigen zu müssen.
Este manual está protegido por derechos de la propiedad intelectual © 2012. Reservados todos los derechos
Se prohibe la reproducción incluso parcial del mismo sin el permiso por escrito de la empresa Neri spa.
La empresa Neri spa se reserva el derecho de aportar cambios a los propios productos y a la documentación
sin obligación de aviso previo.
Autori: Isacco Neri - Titolo: Libretto istruzioni apparecchi di illuminazione - Pubblicatore: Neri spa
Progetto e coordinamento graco: Daniele Lombardi - Stampa: Grache MDM spa, Forlì FC, Ottobre 2012.
Tutti i diritti riservati. E’ fatto espresso divieto a qualunque riproduzione parziale o totale del presente testo.
© 2012, DESIGN PATENTED, PRINTED IN ITALY
3
INDICE - CONTENTS - INDEX - INHALTVERZEICHNIS - INDICE
SIMBOLI E ETICHETTA
SYMBOLS AND LABEL
SYMBOLES ET ETIQUETTE
SYMBOLE UND AUFKLEBER
SÍMBOLOS Y ETIQUETAS
pag 5-6
1°
PRESCRIZIONI DI SICUREZZA
SAFETY PRECAUTIONS
PRESCRIPTIONS DE SECURITE
SICHERHEITSVORSCHRIFTEN
NORMAS DE SEGURIDAD
pag 7
2°
RICAMBI
SPARE PARTS
PIÈCES DE RECHANGE
ERSATZTEILE
RECAMBIOS
pag 22
13°
MANUTENZIONE
MAINTENANCE
ENTRETIEN
WARTUNG
MANTENIMIENTO
pag 21
12°
GARANZIA
GARANTEE
GARANTIE
GARANTIE
GARANTÍA
pag 19
10°
DESTINAZIONE D’USO
INTENDED USE
UTILISATION DES LUMINAIRES
ZWECKBESTIMMUNG
UTILIZACIÓN
pag 19
9°
CARATTERISTICHE
CHARACTERISTICS
CARACTERISTIQUES
EIGENSCHAFTEN
CARACTERÍSTICAS
pag 18
8°
AVVERTENZE PER L’INSTALLAZIONE
INSTALLATION INFORMATION
PRECAUTIONS POUR L’INSTALLATION
INSTALLIERUNGSHINWEISE
ADVERTENCIAS PARA LA INSTALACIÓN
pag 16-17
7°
OTTICHE e REGOLAZIONI
REFLECTOR and ADJUSTMENTS
REFLECTEURS ET REGLAGES
OPTIK-ELEMENTE UND EINSTELLUNGEN
REFLECTORES Y SU REGULACIÓN
pag 13-15
6°
INSTALLAZIONE
INSTALLATION
INSTALLATION
INSTALLATION
INSTALLATIÓN
pag 9-11
4°
DISIMBALLO
UNPACKING
DEBALLAGE
AUSPACKEN
DESEMBALAJE
pag 8
3°
SMALTIMENTO
DISPOSAL
MISE AU REBUT
ENTSORGUNG
RECICLADO
pag 20
11°
SOSTITUZIONE FUSIBILE
FUSE REPLACEMENT
REPLACEMENT DU FUSIBILE
AUSTAUSCH DER SICHERUNG
SUSTITUCIÓN FUSIBLES
pag 12
5°
4 5
INTRODUZIONE - INTRODUCTION - INTRODUCTION - EINLEITUNG - INTRODUCCIÓN
La Neri spa è impegnata costantemente nella ricerca e progettazione di prodotti di alta qualità, lunga durata e sicurezza.
Questo manuale intende presentare le metodiche di installazione, uso e manutenzione corrette, ponendosi come guida
nei confronti di installatori professionali. A tale scopo questo manuale va letto e conservato con molta attenzione.
Neri spa is constantly committed to research and design for products of high quality, durability and safety. This manual
aims to present correct methods of installation, use and maintenance, as a guide for professional installers. This manual
should be read and kept with great care.
Neri spa a toujours eu pour objectif la recherche et la conception de produits de haute qualité, offrant longévité et sécu-
rité. Ce manuel, qui présente les modes d’installation, d’utilisation et d’entretien corrects des luminaires, est un guide à
l’adresse des installateurs professionnels. Il doit donc être lu très attentivement et soigneusement conservé.
Die Neri spa ist andauernd mit der Forschung und Entwicklung von qualitativ hochstehenden, langlebigen und sicher-
en Produkten beschäftigt. Diese Anleitung will die korrekten Methoden der Installation, des Einsatzes und der War-
tung vorstellen und sieht sich dabei als Führer hinsichtlich professioneller Installateure. Die Anleitung sollte mit großer
Aufmerksamkeit gelesen und aufbewahrt werden.
La empresa Neri spa trabaja de continuo en el estudio y proyección de productos de alta calidad, de larga duración y
seguri-dad. Este manual presentará los métodos de instalación, uso y mantenimiento correctos, siendo una guía para
instaladores profesionales. Por ello, este manual se debe leer con detenimiento y conservar cuidadosamente.
NOTE GENERALI ALLA CONSEGNA - DELIVERY INFORMATION
NOTES GENERALES POUR LA LIVRAISON - ALLGEMEINE ANMERKUNGEN ZUR ANLIEFERUNG
NOTAS GENERALES A LA ENTREGA
Gli apparecchi per illuminazione possono essere spediti esclusivamente in scatole di cartone (A) in varie dimensioni.
In ogni caso comunque al ricevimento della merce controllare che:
1) l’imballo sia integro; 2) la fornitura corrisponda all’ordine (vedi bolla di consegna); 3) non vi siano parti mancanti.
In caso di danni o parti mancanti, informare immediatamente e in modo dettagliato (e/o con foto) la Neri spa.
The light xture can be shipped and delivered only in cardboard boxes (A) of various sizes.
On receipt of the goods, always:
1) check that packing is undamaged; 2) check that goods received correspond to order (consult delivery note); 3) check
that there are no missing parts.In case of damage or missing parts, immediately inform Neri spa, giving full details
(and/or with pho-tograph).
Les luminaires ne peuvent être expédiés qu’emballés dans des boîtes en carton (A) de dimensions diverses. Quoi qu’il
en soit, dès la réception de la marchandise, s’assurer que:
1) l’emballage soit intact; 2) la fourniture corresponde à la commande (voir bulletin de livraison); 3) il ne manque aucune
partie. En cas de dommages ou de parties manquantes, en informer immédiatement d’une manière détaillée (et/ou avec
photo) Neri spa.
Die Beleuchtungsapparate werden ausschließlich in Pappkartons (A) unterschiedlicher Größe versandt Jedenfalls muss
man beim Wareneingang stets kontrollieren, dass:
1) die Verpackung unversehrt ist; 2) die Lieferung der Bestellung entspricht (siehe Lieferschein); 3) keine Teile fehlen.
Bei Schäden oder fehlenden Teilen sofort und detailliert (u./o. mit Foto) die Neri spa informieren.
Los aparatos de alumbrado se pueden enviar sólo en cajas de cartón (A) de varios tamaños. De todos modos al recibir
la mercancía controlen:
1) que el embalaje esté íntegro; 2) que el suministro corresponda al pedido (vean albarán); 3) que no falten piezas.
En caso de daños o piezas que falten, informen a Neri spa de inmediato y con detalles (y/o con foto).
A
5
www.neri.biz
Fig. 1 Fig. 2 Fig. 4 Fig. 6Fig. 3 Fig. 5
SIMBOLI / ETICHETTA - SYMBOLS AND LABEL- SYMBOLES ET ETIQUETTE
SYMBOLE UND AUFKLEBER - SÍMBOLOS Y ETIQUETAS
1°
Ogni apparecchio è contrassegnato da una etichetta adesiva posta sull’imballo. Vi sono riportati il codice e la descrizione,
due dati basilari con cui è possibile identificarlo.
Every light fixture is marked with a sticker on the packing. This shows the code and the description, the two essential
items of information for identification.
Tous les éléments portent une étiquette adhésive placée sur l’emballage. Sur cette étiquette figurent le code et la
description, deux données fondamentales pour leur identification.
Jedes Element ist durch einen Aufkleber auf der Verpackung gekennzeichnett. Darauf befinden sich der Code und die
Beschreibung, zwei Basisdaten, durch die man es identifizieren kann.
Cada elemento está marcado con una etiqueta adhesiva colocada sobre el embalaje. Aparecen allí el código y la
descripción, dos datos básicos con que se pueden identificar.
I simboli mostrati sopra hanno il seguente significato:
Fig 1 > NOTA INFORMATIVA
Fig 2 > VERIFICA TECNICA
Fig 3 > PERICOLO
Fig 4 > CASCO OBBLIGATORIO
Fig 5 > SCARPE ANTINFORTUNISTICHE
Fig 6 > GUANTI DA LAVORO.
The symbols shown above have the following
meanings:
Fig. 1 > INFORMATIVE NOTE
Fig. 2 > TECHNICAL CHECK
Fig. 3 > DANGER
Fig. 4> SAFETY HELMET COMPULSORY
Fig. 5 > SAFETY FOOTWEAR
Fig. 6 > WORK GLOVES.
Les symboles indiqués ci-dessus correspondent aux
significations suivantes:
Fig 1 > NOTE INFORMATIVE
Fig 2 > VERIFICATION TECHNIQUE
Fig 3 > DANGER
Fig 4 > CASQUE OBLIGATOIRE
Fig 5 > CHAUSSURES DE SECURITE
Fig 6 > GANTS DE TRAVAIL.
Die oben gezeigten Symbole haben folgende
Bedeutung:
Fig 1 > INFORMATIVE ANMERKUNG
Fig 2 > TECHNISCHE ÜBERPRÜFUNG
Fig 3 > GEFAHR
Fig 4 > HELMPFLICHT
Fig 5 > UNFALLSICHERE SCHUHE
Fig 6 > ARBEITSHANDSCHUHE.
Los símbolos mostrados arriba tienen el siguiente
significado:
Fig 1 >NOTA INFORMATIVA
Fig 2 >COMPROBACIÓN TÉCNICA
Fig 3 >PELIGRO
Fig 4 > CASCO OBLIGATORIO
Fig 5 > CALZADO ESPECIAL DE TRABAJO
Fig 6 >GUANTES DE TRABAJO
Code: MN025A2153313
LA.MU.025 AL.VTR.TRA. OTT.5
ST 100W E40 CL2
67
Etichette adesive di avvertimento e indicazione sono poste sull’apparecchio e l’installatore deve scrupolosamente
seguirne le indicazioni. Vi possono essere indicazioni sulle caratteristiche della lampada da installare o sostituire (fig.
A) o altre indicazioni di particolare importanza.
Stickers with warnings and instructions are applied to the light fixture, and the installer must comply scrupulously
with the information given. The information given may include indications on the characteristics of the lamp to be fitted
or replaced (fig. A) or other instructions of particular importance.
L’installateur doit respecter scrupuleusement les indications et les avertissements figurant sur les étiquettes
adhésives placées sur l’appareil. Celles-ci peuvent contenir des indications sur les caractéristiques des lampes à installer
ou à remplacer (fig. A) ou d’autres informations importantes.
Auf dem Apparat befinden sich Aufkleber mit Hinweisen und Vorsichtsmaßregeln, und der Installateur muss den
Hinweisen gewissenhaft folgen. Es kann sich um Hinweise zur Beachtung der Charakteristiken der zu installierenden
oder zu ersetzenden Lampe (Fig. A) oder andere Hinweise von besonderer Wichtigkeit.
En el aparato aparecen colocadas etiquetas adhesivas con advertencias e indicaciones y el instalador las debe
seguir al pie de la letra. Puede haber indicaciones sobre las características de la lámpara que se va a instalar o a
substituir (fig A) y otras indicaciones de especial importancia.
SIMBOLI / ETICHETTA - SYMBOLS AND LABEL- SYMBOLES ET ETIQUETTE
SYMBOLE UND AUFKLEBER - SÍMBOLOS Y ETIQUETAS
1°
A
ATTENZIONE
Accenditore con impulso di innesco 3,5 ÷ 4,5 KV.
Installare solo lampade compatibili
al tipo di impulso.
ATTENTION
Igniter with starting impulse 3.5 – 4.5 KV. Install
only lamps compatible
with this impulse type.
7
www.neri.biz
In base alle varie direttive in vigore nei vari paesi europei ed extraeuropei, nel luogo di lavoro devono essere rispettate
determinate regole. Le indicazioni di sicurezza non hanno lo scopo di alterare o modificare le direttive sopra menzionate;
il loro unico scopo è quello di sottolinearle o amplificarle. Queste prescrizioni di sicurezza sono indirizzate agli installatori
professionali, i quali devono attentamente leggere e comprendere questo manuale.
La non osservanza delle prescrizioni citate in questo manuale aumenta il rischio di incidenti.
Prima di effetuare qualsiasi operazione munirsi di: casco antiurto, guanti da lavoro, scarpe antifortunistiche,
abbigliamento da lavoro.
A variety of rules must be followed in workplaces, depending on the legislation applicable in different countries of Europe
and elsewhere. The aim of the safety precautions illustrated here is not to replace or modify this applicable legislation,
but solely to emphasize or reinforce it. These safety precautions are intended for professional installers, who must
carefully read and understand this manual. Failure to apply the precautions illustrated in this manual will
increase the risk of accidents. Before carrying out any operations whatsoever installers must put on: safety helmets,
work gloves, safety footwear and suitable working clothes.
Conformément aux différentes directives en vigueur dans les pays européens et extra-européens, les lieux de travail
sont soumis à des règles précises qui doivent être respectées. Ces indications de sécurité n’entendent ni modifier ni
altérer les directives susdites mais ont pour but de les souligner ou d’en étendre l’application. Ces prescriptions de
sécurité s’adressent aux installateurs professionnels, qui devront lire attentivement ce manuel et en comprendre
parfaitement le contenu. La non-observation des prescriptions figurant dans ce manuel augmente le risque
d’accidents. Avant d’effectuer toute opération, s’équiper de: casque antichoc, gants de travail, chaussures de
sécurité, habillement de travail.
Auf Grundlage der verschiedenen in europäischen und außereuropäischen Ländern geltenden Vorschriften, müssen am
Ort der Arbeit bestimmte Regeln eingehalten werden. Die Sicherheitsangaben haben nicht den Sinn, die o.a. Vorschriften
zu verändern; ihr einziger Zweck ist es, sie zu unterstreichen oder zu erweitern. Diese Sicherheitsvorschriften wenden sich
an professionelle Installateure, die diese Anleitung aufmerksam lesen und begreifen müssen. Die Nichtbeachtung
der Vorschriften dieses Handbuchs erhöht das Unfallrisiko.
Vor der Durchführung von Arbeiten muss man sich eindecken mit: Schutzhelm, Arbeitshandschuhen, unfallsicheren
Schuhen, Arbeitsbekleidung.
De acuerdo con las diversas directivas en vigor en los países europeos y en los de fuera de Europa, en el lugar de
trabajo se deben respetar determinadas normas. Las normas de seguridad no tienen el objetivo de alterar o modificar
las directivas mencionadas anteriormente; el único objetivo es el de ponerlas en evidencia o ampliarlas. Estas normas
de seguridad se dirigen a los instaladores profesionales, los cuales deben leer atentamente y comprender
perfectamente este manual. El no observar las normas de seguridad citadas en este manual implica aumentar el
riesgo de accidentes. Antes de iniciar cualquier trabajo, pónganse: casco de seguridad, guantes de trabajo, calzado
especial de trabajo, ropa de trabajo.
ATTENZIONE - CAUTION
ATTENTION - ACHTUNG
ATENCIÓN
2°
PRESCRIZIONI DI SICUREZZA - SAFETY PRECAUTIONS - PRESCRIPTIONS DE
SECURITE - SICHERHEITSVORSCHRIFTEN - NORMAS DE SEGURIDAD
8 9
DISIMBALLO - UNPACKING - DEBALLAGE
AUSPACKEN - DESEMBALAJE
ABC
ATTENZIONE - CAUTION
ATTENTION - ACHTUNG
ATENCIÓN
Per il disimballo degli elementi comportarsi nel seguente modo: 1) predisporre a terra una robusta stuoia per proteggere le
parti verniciate (fig. A); 2) non trascinare o rotolare gli elementi a terra, ma porli sulla stuoia; 3) non usare taglierini o lame
per togliere l’imballo (B), manualmente togliere il nastro adesivo dagli imballi; 4) togliere i punti metallici dalle scatole (fig. C),
attenzione a non disperderli nell’ambiente;
ATTENZIONE - La non osservanza delle prescrizioni citate sopra aumenta il rischio di incidenti.
ATTENZIONE - Non disperdere l’imballo nell’ambiente, potrebbe essere fonte di pericolo e inquinamento (fig. D).
Seguire le normali procedure di smaltimento dei rifiuti urbani in conformità alle norme vigenti.
To unpack, proceed as follows: 1) Lay a robust mat on ground to protect paintwork (fig. A). 2) Do not drag or roll elements on
ground, but place on mat; 3) Do not use knives or other blades to remove packing materials, as this could damage paintwork
(fig. B), but remove adhesive tape from packing by hand. 4) Remove metal staples from cardboard boxes (fig. C), taking care
to collect them for correct disposal.
CAUTION - Failure to apply the above precautions will increase the risk of accidents.
CAUTION - Do not dispose incorrectly of packaging materials, which could be a source of pollution and danger (fig. D).
Follow normal waste disposal procedures for urban wastes in compliance with applicable legislation.
Pour le déballage des éléments, suivre les indications suivantes: 1) étendre sur le sol une natte robuste pour protéger les
parties peintes (fig. A); 2) ne pas traîner ou faire rouler les éléments sur le sol mais les placer sur la natte;
3) pour enlever l’emballage, ne pas utiliser de coupoirs ou de lames (fig. B), mais ôter le ruban adhésif des emballages
manuellement; 4) enlever les points métalliques des boîtes (fig. C), jeter ces derniers dans un endroit approprié;
ATTENTION - La non-observation des prescriptions citées ci-dessus augmente le risque d’accidents.
ATTENTION - Déposer l’emballage dans un lieu de collecte approprié, pour éviter tout danger ou pollution de
l’environnement (fig. D).
Suivre les normales procédures de collecte des ordures urbaines conformément aux normes en vigueur.
Beim Auspacken der Elemente muss man wie folgt vorgehen: 1) auf dem Boden eine robuste Matte zum Schutz der lackierten
Teile ausbreiten (Fig. A); 2) die Elemente nicht auf die Erde ziehen oder rollen, sondern auf die Matte aufsetzen; 3) keine
Schneidewerkzeuge zur Entfernung der Verpackung benutzen, man könnte sonst die Lackierung beschädigen (Fig. B), die
Klebefilme von Hand entfernen; 4) Die Metallstifte der Kisten entfernen (Fig. C) und sie nicht in der Umgebung liegen lassen;
ACHTUNG - Die Nichtbeachtung dieser Anweisungen erhöht das Unfallrisiko.
ACHTUNG - Die Verpackung nicht in der Umgebung liegen lassen, sie könnte eine Gefahrenquelle sein und die
Umwelt verschmutzen (Fig. D).
Folgen Sie den normalen Verfahren zur Beseitigung von städtischen Abfällen entsprechend den geltenden
Vorschriften.
Para desembalar los elementos compórtensen del siguiente modo: 1) Coloquen en el suelo una estera gruesa para proteger
las partes pintadas (fig A); 2) No arrastren o hagan rodar los elementos en el suelo, mas pónganlos sobre la estera;
3) No usen cuchillos o cuchillas para cortar el embalaje, pues podrían raspar la pintura (fig C), retiren manualmente la cinta
adhesiva de los embalajes; 4) Retirar las grapas de las cajas (Fig. C), atención a no dejarlas tiradas en el ambiente.
ATENCIÓN- El no observar las normas de seguridad citadas anteriormente implica aumentar el riesgo de accidentes.
ATENCIÓN- No dejen el embalaje tirado por ahí, podría resultar fuente de peligro o de contaminación (fig D).
Sigan el procedimiento normal de retirada de la basura urbana según las leyes vigentes.
3°
D
9
www.neri.biz
4°
INSTALLAZIONE - INSTALLATION - INSTALLATION - INSTALLATION - INSTALLATIÓN
A
ATTENZIONE - CAUTION
ATTENTION - ACHTUNG
ATENCIÓN
B
E
ATTENZIONE: Per l’installazione utilizzare una piattaforma aerea o similare
per fare operare in sicurezza almeno due persone. Svitare la vite M6 (g. A)
e rimuovere il coperchio dal braccio di sostegno (g. B). Svitare le due viti inferiori
M6 per aprire il cofano del corpo illuminantee, accompagnandone l’apertura no
a ne corsa della molla a gas (g. C). Apllicare la guarnizione adesiva sul braccio
(g. D). Installare il corpo illuminante sul braccio e stringere le quattro viti M8 (g.
E).
WARNING: For installation use an aerial platform or similar equipment to
permit safe working for at least two persons. Loosen the M6 screws (g. A)
and remove the cover from the sustaining arm (g. B). Loosen the two lower M6
screws to open the cover of the lighting xture, holding it during opening until the
gas spring has nished its run (g. C). Apply the adhesive gasket on the arm (g.
D). Install the lighting xture on the arm and tighten the four M8 screws (g. E).
ATTENTION: Pour l’installation, utiliser une plateforme élévatrice, ou un
instrument semblable, qui permet de faire travailler en sécurité au moins
deux personnes. Dévisser la vis M6 (g. A) et enlever le couvercle du bras de
soutien (g. B). Desserrer les deux vis M6 inférieures pour ouvrir le capot du
luminaire, et accompagner l’ouverture du ressort à gaz jusqu’à la butée (g. C).
Appliquez la garniture adhésive sur le bras (g. D). Installer le luminaire sur le bras
et serrer les quatre vis M8 (g. E).
ACHTUNG:VerwendenSie fürdie Installation eineoberirdische Plattformoder
eine ähnliche Vorrichtung, sodass mindestens zwei Personen in Sicherheit
arbeiten können. Lösen Sie die Schraube M6 (Abb. A) und entfernen Sie den
Deckel vom Stützarm (Abb. B). Lösen Sie die beiden unteren Schrauben M6 zum
Öffnen der Haube des Beleuchtungskörpers. Begleiten Sie den Öffnungsvorgang
bis zum Endanschlag der Gasfeder (Abb. C). Die anhaftende Dichtung auf dem
Arm anbringen (g. D). Installieren Sie den Beleuchtungskörper auf dem Arm und
ziehen Sie die vier Schrauben M8 (Abb. E) fest.
ATENCIÓN: para la instalación se debe utilizar una plataforma aérea o
similar en la que puedan trabajar en plena seguridad al menos dos personas.
Desenroscar el tornillo M6 (g. A) y quitar la tapa del brazo de soporte (g. B).
Desenroscar los dos tornillos inferiores M6 y abrir la cubierta del cuerpo de
iluminación acompañándola hasta que el muelle de gas (g. C) llegue al nal de
su carrera. Aplicar la guarnición adhesiva al brazo (g. D). Instalar el cuerpo de
iluminación en el brazo y apretar los cuatro tornillos M8 (g. E).
C
D
10 11
H
4°
INSTALLAZIONE - INSTALLATION - INSTALLATION - INSTALLATION - INSTALLATIÓN
CL 2
L
I
CL 1
ATTENTION
Igniter with starting impulse
3.5 – 4.5 KV. Install only lamps
compatible with this impulse type.
M
G
Estrarre dalla parte inferiore del braccio circa 80 cm di cavo elettrico,
inserirlo attraverso il passacavo (g. F). Adagiare il cavo elettrico all’interno
del corpo illuminante no ai morsetti del sezionatore, facendo attenzione
che non interferisca con il movimento della molla a gas (g. G). Spellare i
li e collegarli ai morsetti del sezionatore (g. H). Stringere le due viti sul
sezionatore per bloccare il cavo.
Per il collegamento in classe 1 (g. I), in classe 2 (g. L).
Attenzione: vericare che le caratteristiche della lampada siano
conformi alle caratteristiche dell’apparecchio (etichette dati e
avvertimento - Fig. M).
Remove about 80 cm of electric wire from the lower part of the arm and
pass it through the wire-holder (g. F). Lower the electric wire into the
lighting xture as far as the isolator clips, taking care that it does not
obstruct movement of the gas spring (g. G). Strip the wires and connect
them to the isolator clips (g. H). Tighten the two screws on the isolator to
fasten the wire.
For class 1 insulation connection (Fig. I), in class 2 (Fig. L)
Attention: make sure that the features of the lamp comply with the
features of the xtures (labels, data and notice - Fig. M).
Extraire environ 80 cm de câble électrique de la partie inférieure du bras,
et le faire passer à travers le passe-l (g. F). Poser le câble électrique à
l’intérieur du luminaire jusqu’aux bornes du sectionneur, en faisant attention
de ne pas gêner le mouvement du ressort à gaz (g. G). Dénuder les ls
et les raccorder aux bornes du sectionneur (g. H). Serrer les deux vis du
sectionneur pour bloquer le câble.
Pour la connexion en classe 1 d’isolation (g. I), en classe 2 (g. L)
Attention: vérier que les caractéristiques de la lampe soient
conformes aux caractéristiques de l’appareil (étiquette informations et
avertissement - Fig. M).
Ziehen Sie aus dem unteren Teil des Arms zirka 80 cm Stromkabel heraus
und führen dieses über den Kabeldurchgang (Abb. F) ein. Verlegen Sie das
Stromkabel im Innern des Beleuchtungskörpers bis zu den Klemmen des
Trennschalters und achten Sie darauf, dass es zu keinen Behinderungen
mit der Bewegung der Gasfeder kommt (Abb. G). Isolieren Sie die Kabel
ab und schließen diese an die Klemmen des Trennschalters an (Abb. H).
Drehen Sie die beiden Schrauben auf dem Trennschalter fest, um das Kabel
zu blockieren.
Für den Anschluss Isolationsklasse 1 (Abb. I), in Klasse 2 (Abb. L).
Achtung: Stellen Sie sicher, dass die Eigenschaften der Lampe
in Übereinstimmung mit den Eigenschaften des Apparats stehen
(Etiketten mit Daten und Hinweisen - Abb. M).
Extraer 80 cm de cable eléctrico por la parte inferior del brazo e introducirlo
por el pasacables (g. F). Introducir el cable eléctrico dentro del cuerpo de
iluminación hasta los bornes del seccionador, prestando atención en que no
diculten el moviendo del muelle a gas (g. G). Pelar los cables y conectarlos
a los bornes del seccionador (g. H). Apretar los dos tornillos del seccionador
para bloquear el cable. La conexión puede ser con aislamiento de clase 1
(g. I) o clase 2 (g. L).
Atención: comprueben que las características de la lámpara sean
conformes con las características del aparato (etiqueta de datos y
advertencias - Fig. M).
F
MN025A2153313
230V - 50Hz - IP66
MT - ST 100W - E40
11
www.neri.biz
N
P
Il dispositivo di supporto della lampada è dotato di 2 molle ad incastro per
il ssaggio. Spingere sulle due molle ed estrarre il supporto portalampada
dalla sede (g. N). Avvitare la lampada (Fig. O) e reinserire il supporto
portalampada, e fare attenzione che anche le due molle si incastrino nelle
apposite sedi (Fig. P). Chiudere il cofano (g. Q) e bloccarlo con le due
viti inferiori M6. Applicare il coperchio al braccio di sostegno (g. R) e
stringere la vite M6 (g. S).
The lamp supporting device is equipped with two snap in springs for
fastening it (Fig. N). Push on both springs and take out the lamp holder
support from its seat. Screw the lamp (Fig. O) and put back the lamp
holder support. Make sure the springs snap into their seats (Fig. P). Close
the cover (g. Q) and fasten it with the two lower M6 screws. Place the
cover on the sustaining arm (g. R) and tighten the M6 screws (g. S).
Le dispositif de support de la lampe est pourvu de 2 ressorts à
emboîtement pour la xation (Fig. N). Pousser sur les deux ressorts et
extraire le support de la douille de son siège. Visser la lampe (Fig. O)
et réinsérer le support de la douille et faire attention à ce que les deux
ressorts s’emboîtent dans leur siège (Fig. P). Refermer le capot (g. Q) et
le bloquer avec les deux vis M6 inférieures. Positionner le couvercle sur
le bras de soutien (g. R) et serrer la vis M6 (g. S).
Die Halterung der Lampe ist mit 2 Einspannfedern zur Befestigung
ausgestattet (Abb. N). Drücken Sie auf die beiden Federn und ziehen
Sie die Lampenhalterung aus ihrem Sitz. Schrauben Sie die Lampe (Abb.
O) an und setzen Sie die Lampenhalterung wieder ein. Achten Sie dabei
darauf, dass auch die beiden Federn in ihren Sitzen einrasten (Abb. P).
Schließen Sie die Haube (Abb. Q) und blockieren sie mit den beiden
unteren Schrauben M6. Bringen Sie den Deckel am Stützarm (Abb. R)
an und ziehen Sie die Schraube M6 (Abb. S) fest.
El dispositivo de soporte de la lámpara está dotado con 2 muelles
empotrados para la jación (Fig. N). Presionen los muelles y extraigan el
soporte portalámparas de su sede. Tornillo la lámpara (Fig. O) y vuelvan
a colocar el soporte portalámparas; controlen que los dos muelles se
empotren en sus sedes (Fig. P). Cerrar la cubierta (g. Q) y bloquearla
con los dos tornillos M6 inferiores. Aplicar la tapa en el brazo de soporte
(g. R) y apretar el tornillo M6 (g. S).
4°
INSTALLAZIONE - INSTALLATION - INSTALLATION - INSTALLATION - INSTALLATIÓN
Q
SR
O
12 13
A
Alcune congurazioni di apparecchi possono essere munite di fusibile di protezione collocato sulla piastra cablaggio (g. A).
Attenzione, prima di effettuare operazioni di verica o sostituzione del fusibile, disinserire l’apparecchio dalla rete di
alimentazione elettrica.
Per sostituire il fusibile, aprire l’apparecchio e sostituire il fusibile con uno di caratteristiche uguali al precedente, come descritto
sull’etichetta dell’apparecchio. Vericare attentamente con esame a vista, se la causa della rottura del fusibile è dovuta agli
ausiliari elettrici che presentano anomalie visibili (crepe, bruciature, parti annerite da fumi, morsetti allentati, ecc.). In questo
caso, prima di sostituire il fusibile, andrà vericato il funzionamento di tutti i singoli componenti del cablaggio.
Some types of light xture may be tted with a protection fuse located on the wiring plate (g. A).
Caution! Before any operations to check or replace fuse, disconnect the light xture from the power supply.
To replace fuse, open xture, and replace the fuse with one of an identical type, as indicated on the product label. Carefully
inspect visually to check if blown fuse was caused by electrical components with visible defects (cracks, burns, smoke marks,
slack terminals, etc). In this case, check correct operation of all electrical components before replacing fuse.
Certaines congurations d’appareils peuvent être dotées d’un fusible de protection placé sur la plaque de câblage (g. A).
Attention, avant d’effectuer toute opération de contrôle ou de remplacement du fusible, débrancher l’appareil.
Pour remplacer le fusible, ouvrir l’appareil, et remplacer le fusible par un autre présentant les mêmes caractéristiques que le
précédent, tel que précisé sur l’étiquette de l’appareil. Vérier visuellement avec le plus grand soin si la rupture du fusible est
due à des anomalies visibles des auxiliaires électriques (ssures, brûlures, parties noircies par des fumées, bornes desserrées,
etc.). Dans ce cas, avant de remplacer le fusible, vérier le fonctionnement de chaque composant du câblage.
Einige Apparatkongurationen können zum Schutz mit Sicherungen auf der Verkabelungsplatte versehen sein (Fig. A).
Achtung: vor dem Durchführen von Überprüfungen oder dem Austauschen der Sicherung muss man den Apparat von der
Stromversorgung trennen. Um die Sicherung auszutauschen, den Apparat öffnen, und die Sicherung durch eine andere mit den
gleichen Eigenschaften, wie sie auf dem Etikett des Apparates beschrieben sind, ersetzen.
Durch genaues Hinsehen überprüfen, ob der Grund für die Zerstörung der Sicherung auf elektrisches Zubehör zurückzuführen ist, das
sichtbare Anomalien aufweist (Sprünge, Brandecken, Rauch-geschwärzte Teile, gelockerte Klemmen usw.).
In diesem Fall muss das Funktionieren aller Verkabelungskomponenten überprüft werden, bevor die Sicherung ausgetauscht wird.
Algunos tipos de aparatos podrían ir provistos de un fusible protector situado en la placa portacables (g. A).
Atención: antes de efectuar operaciones de comprobación o sustitución de los fusibles, desenchufen el aparato de
la red eléctrica. Para sustituir el fusible, abran el aparato y sustituyan el fusible por uno de las mismas características del
anterior, como se describe en la etiqueta del aparato. Comprueben con un examen visual si la causa de la rotura del fusible se
debe a los auxiliares eléctricos que presentan anomalías visibles (grietas, quemaduras, piezas ennegrecidas por humo, bornes
sueltos, etc...). Es tal caso, antes de sustituir el fusible, habrá que comprobar el funcionamiento de cada pieza del cableado.
5° SOSTITUZIONE FUSIBILE - FUSE REPLACEMENTS - REPLACEMENT DU FUSIBILE
AUSTAUSCH DER SICHERUNG - SUSTITUCIÓN DEL FUSIBLE
8,5X31,5 mm - 400V - 6A gG;
230 VOLT
OFF
13
www.neri.biz
Gli apparecchi MN025A possono essere configurati con due ottiche con caratteristiche diverse.
Ottica TIPO 5 (asimmetrica trapezioidale) con basculazione. La direzione del fascio luminoso può essere modificata con
angoli che vanno da 0° a +
12°30’
oppure da 0° a -
12°30’
, con passi di 2°30’.
Ottica TIPO 7(simmetrica rettangolare) con basculazione. La direzione del fascio luminoso può essere modificata, con
angoli che vanno da 0° a +
12°30’
, con passi di 2°30’.
MN025A fixtures can be configured with two reflectors having different features.
TYPE 5 reflector (trapezoid asymmetrical) with swivelling. The direction of the light ray, can modify with angles ranging
between 0° and +
12°30’
or between 0° and –
12°30’
, with steps of 2°30’.
TYPE 7 reflector (rectangular symmetrical) with swivelling. The direction of the light ray, can modify with angles ranging
between 0° and +
12°30’
, with steps of 2°30’.
Les luminaires MN025A peuvent être configurés avec deux ou trois optiques ayant des caractéristiques
différentes.
Optique TYPE 5 (asymétrie trapézoïdale) avec basculement. La direction du faisceau lumineux peut être modifiée par
l’installateur, avec des angles qui vont de 0° à +
12°30’
° ou bien de 0° à -
12°30’
°, avec pas de 2°30’.
Optique TYPE 7 (symétrie rectangulaire) avec basculement. La direction du faisceau lumineux peut être modifiée par
l’installateur, avec angles allant de 0° à +
12°30’
°, avec pas de 2°30’.
Die MN025A Apparate können mit zwei Beleuchtungssystemen mit verschiedenen Eigenschaften konfiguriert
werden.
Beleuchtungssystem TYP 5 (asymmetrische Trapezform) mit Schwenkung. Die Richtung des Lichtbündels kann vom
Installateur geändert werden. Dabei sind Winkel von 0° bis +12°30’° oder von 0° bis - 12°30’ möglich, mit Schritten von 2°30’.
Beleuchtungssystem TYP 7 (symmetrische Rechteckform) mit Schwenkung. Die Richtung des Lichtbündels kann vom
Installateur geändert werden. Dabei sind Winkel von 0° bis +
12°30’
° möglich, mit Schritten von 2°30’.
Los aparatos MN025A se pueden configurar con dos ópticas con características diferentes.
Óptica de TIPO 5 (asimétrica trapezoidal) con basculación. La dirección del haz luminoso puede ser modificada por el
instalador con ángulos que van desde 0° hasta +
12°30’
° o desde 0° a -
12°30’
° con pasos de 2°30’.
Óptica de TIPO 7 (simétrica rectangular) con basculación. La dirección del haz luminoso puede ser modificada por el
instalador con ángulos que van desde 0° hasta +
12°30’
° con pasos de 2°30’.
5 7
6°
OTTICHE E REGOLAZIONI - REFLECTOR AND ADJUSTEMENTS - REFLECTEURS ET
REGLAGES OPTIK - ELEMENTE UND EINSTELLUNGEN - REFLECTORES Y SU REGULACIÓN
14 15
6°
OTTICHE E REGOLAZIONI - REFLECTOR AND ADJUSTEMENTS - REFLECTEURS ET
REGLAGES OPTIK - ELEMENTE UND EINSTELLUNGEN - REFLECTORES Y SU REGULACIÓN
Regolazione del sistema
ottico TIPO 5 (asimmetrica trapezioidale) con basculazione.
L’installatore può modificare la geometria del fascio luminoso regolando l’inclinazione dell’ottica in positivo o negativo.
Le posizioni angolari
vanno da 0° a +12°30’ oppure da 0° a - 12°30’, con passi di 2°30’. Agire sulla molla per modificare
l’inclinazione sull’asta dentellata, in cui vi sono marcate le gradazioni (fig. A).
Regolazione del sistema ottica TIPO 7 (simmetrica rettangolare) con basculazione.
L’installatore può modificare la geometria del fascio luminoso regolando l’inclinazione dell’ottica solo in positivo.
Le posizioni angolari
vanno da 0° a +12°30’, con passi di 2°30’. Agire sulla molla per modificare l’inclinazione sull’asta
dentellata, in cui vi sono marcate le gradazioni positive (fig. B).
Adjustment of the TYPE 5 reflector system (trapezoid asymmetrical) with swivelling. The installer may modify the geometry of
the light ray by adjusting the inclination of the reflector, either positively or negatively.
The angle positions range from 0° to +12°30’ or from 0° to – 12°30’, with steps of 2°30’. Use the springs to modify the inclination
on the toothed rod where the degrees are marked (Fig. A).
Adjustment of the TYPE 7 reflector system (rectangular asymmetrical) with swivelling.
The installer may modify the geometry of the light ray by adjusting the inclination of the reflector only positively.
The angle positions range from 0° to +12°30’, with steps of 2°30’. Use the spring to modify the inclination on the toothed rod
where the positive degrees are marked (Fig. B).
Réglage du système optique TYPE 5 (asymétrie trapézoïdale) avec basculement.
L’installateur peut modifier la géométrie du faisceau lumineux en réglant l’inclinaison de l’optique en positif ou en négatif.
Les positions angulaires vont de 0° à +12°30’ ou bien de 0° a - 12°30’, avec pas de 2°30’. Intervenir sur le ressort pour modifier
l’inclinaison sur la tige dentelée où sont indiqués les degrés (fig. A).
Réglage du système optique TYPE 7 (symétrie rectangulaire) avec basculement.
L’installateur peut modifier la géométrie du faisceau lumineux en réglant l’inclinaison de l’optique seulement en positif.
Les positions angulaires vont de 0° à +12°30’ avec pas de 2°30’. Intervenir sur le ressort pour modifier l’inclinaison sur la tige
dentelée où sont indiqués les degrés positifs (fig. B).
Einstellung des Beleuchtungssystems TYP 5 (asymmetrische Trapezform) mit Schwenkung. Der Installateur kann die
Geometrie des Lichtbündels ändern, indem er die Neigung des Beleuchtungssystems positiv oder negativ ändert.
Es sind Winkel von 0° bis +12°30’ oder von 0° bis - 12°30’ möglich, mit Schritten von 2°30’ Betätigen Sie die Feder, um die
Neigung auf der Zahnstange, auf der die Abstufungen markiert sind, zu ändern (Abb. A).
Beleuchtungssystem TYP 7 (symmetrische Rechteckform) mit Schwenkung. Der Installateur kann die Geometrie des
Lichtbündels nur ändern, indem er die Neigung des Beleuchtungssystems positiv ändert.
Es sind Winkel von 0° bis +12°30’ möglich, mit Schritten von 2°30’ Betätigen Sie die Feder, um die Neigung auf der Zahnstange,
auf der die positiven Abstufungen markiert sind, zu ändern (Abb. B).
Regulación del sistema con óptica de TIPO 5 (asimétrica trapezoidal) con basculación.
El instalador puede modificar la forma del haz luminoso regulando la inclinación de la óptica en positivo o negativo.
Las posiciones angulares van desde 0° hasta +12°30’ o desde 0° hasta - 12°30’, con pasos de 2°30’. Actuar en el muelle para
modificar la inclinación de la varilla dentada en la cual se encuentran las marcas de los grados (fig. A).
Regulación del sistema con óptica de TIPO 7 (simétrica rectangular) con basculación.
El instalador puede modificar la forma del haz luminoso regulando la inclinación de la óptica sólo en positivo.
Las posiciones angulares van desde 0° hasta +12°30’ con pasos de 2°30’. Actúen en el muelle para modificar la inclinación de
la varilla dentada en la cual se encuentran las marcas de los grados positivos (fig. B).
A
5
B
7
15
www.neri.biz
Le immagini
di anco sono un esempio di come può cambiare la geometria del usso
luminoso regolando i sistemi ottici TIPO 5 e 7, dotati di basculazione (g. C,D).
Si possono variare con facilità i coefcienti di utilizzazione lato strada e lato marciapiede,
mantenendo inalterata la posizione dell’apparecchio (g. E), oppure mantenere la stessa
geometria del usso luminoso sulla carreggiata avendo i pali di sostegno a distanze
diverse dalla carreggiata (g. F).
The pictures on the side show how to change the geometry of the light ow, by adjusting
the TYPE 5 and 7 reector systems, provided with swivelling (Fig. C, D). One can easily
change the user coefcients on the road and sidewalk side, while keeping the position of
the xture unchanged (Fig. E), or else keeping the same geometry of the light ow on the
roadway, with the supporting posts at different distances from the roadway (Fig. F).
Les images à côté sont un exemple pour représenter comment on peut changer la
géométrie du ux lumineux en réglant les systèmes optiques TYPE 5 et 7, pourvus de
basculement (g. C, D). On peut changer facilement les coefcients d’utilisation côté
route et côté trottoir, en maintenant inaltérée la position de l’appareil (g. E) ou bien
maintenir la même géométrie du ux lumineux sur la chaussée avec les candélabres de
soutien à des distances différentes sur la chaussée (g. F).
Die nebenstehenden Abbildungen sind ein Beispiel dafür, wie sich die Geometrie des
Lichtusses ändern kann durch die Einstellung der mit Schwenkung ausgestatteten
Beleuchtungssysteme TYP 5 und 7 (Abb. C, D).
Die Verwendungskoefzienten Straßenseite und Bürgersteigseite können leicht geändert
werden, wobei die Position des Apparats unverändert beibehalten wird (Abb. E). Oder
es kann dieselbe Geometrie des Lichtusses auf die Fahrbahn mit Stützkandelabern in
unterschiedlichen Abständen von der Fahrbahn beibehalten werden (Abb. F).
Las imágenes al lado son un ejemplo de cómo se puede cambiar la forma del haz
luminoso regulando los sistemas ópticos de TIPO 5 y 7 con basculación (gs. Cy D).
Se pueden variar fácilmente los coecientes de uso del lado calzada y del lado acera sin
variar la posición del aparato (g. E), o mantener la misma forma del haz luminoso sobre
la calzada teniendo los postes de soporte a diferentes distancias de la calzada (g. F).
0°
+12°30’
C
D
0° 7°30’ 12°30’
0° 7°30’ 12°30’
E
F
L’ottica TIPO 5 è indicata per impianti con supporti a lato della carreggiata. L’ottico
TIPO 7 è indicata per impianti con supporti a centro carreggiata.
The TYPE 5 reflector is suitable for fixtures with supports on the side of the
roadway.
The TYPE 7 reflector is suitable for fixtures with supports in the middle of the
roadway.
L’optique TYPE 5 est indiquée pour les installations avec supports sur le côté de la chaussée. L’optique 7 est indiquée pour
les installations avec supports au centre de la chaussée.
Das Beleuchtungssystem TYP 5 ist für Anlagen mit Halterungen an der Seite der Fahrbahn geeignet. Das Beleuchtungssystem
TYP 7 ist für Anlagen mit Halterungen in der Mitte der Fahrbahn geeignet.
La óptica de TIPO 5 está indicada para instalaciones con soportes al lado de la calzada. La óptica de TIPO 7 está indicada
para instalaciones con soportes en el centro de la calzada.
6°
OTTICHE E REGOLAZIONI - REFLECTOR AND ADJUSTEMENTS - REFLECTEURS ET
REGLAGES OPTIK - ELEMENTE UND EINSTELLUNGEN - REFLECTORES Y SU REGULACIÓN
16 17
AVVERTENZE PER L’INSTALLAZIONE - L’installazione deve essere eseguita secondo le prescrizioni della norma
CEI 64-7 Impianti elettrici di illuminazione pubblica e similari. L’apparecchio è previsto solo per il funzionamento nella
posizione per cui è stato progettato (vedi disegni modelli pagine seguenti).
In fase di montaggio è cura dell’installatore verificare in particolare che l’accoppiamento braccio-apparecchio garantisca
il grado di protezione IP specificato sull’apparecchio stesso.
L’apparecchio deve essere utilizzato solo se completo degli schermi di protezione.
Se lo schermo risulta danneggiato o rotto, l’apparecchio non va utilizzato.
Ripristinare le condizioni originali prima di riutilizzarlo
Lo schermo di potezione è in vetro temperato; per i ricambi e la loro fornitura rivolgersi al costruttore dell’apparecchio.
Il peso massimo degli apparecchi cablati (ad esclusione della lampada), la proiezione della superficie massima soggetta
alla spinta del vento e le dimensioni dei modelli sono riportati nelle tabelle delle pagine seguenti.
Per l’alimentazione sono idonei cavi dotati di un isolamento supplementare o doppio.
Quando l’apparecchio è in classe II fare attenzione che, durante l’installazione, parti metalliche esposte non vadano in
contatto elettrico con parti dell’installazione elettrica collegate ad un conduttore di protezione.
L’apparecchio è idoneo per l’installazione all’interno e all’esterno.
Le eventuali lampade a vapori di alogenuri impiegate devono avere una bassa emissione UV.
INSTALLATION INFORMATION - Installation must be carried out in accordance with national standards.
The fixture is intended only to work in the position for which it was designed (see model drawings on the following pages).
During assembly, the installer must make sure that the arm-fixture coupling guarantees the IP safety class specified on
the fixture.
The fixture must be used only if complete with safety screens.
If the screen is damaged or broken, the fixture must not be used.
Restore the original conditions before reusing.
The safety screen is hardened glass; for their spare parts and supplies, refer to the manufacturer of the equipment.
The maximum weight of the fully-wired light fixtures (excluding lamp), the maximum projected surface area subject to
wind pressure and the dimensions of the different models are shown in the chart on the following page. Cables with added
or double insulation are recommended for the power supply.
If the lantern is installed under Class II protection standards, particular care must be taken while assembling to ensure
that exposed metal parts do not come into electrical contact with parts of the electrical installation connected to a
protection conductor.
The light fixture is suitable for internal and external installation.
If fitted, halide vapour lamps must have low UV emission.
PRECAUTIONS POUR L’INSTALLATION - L’installation doit être effectuée selon les prescriptions nationales.
L’appareil est prévu uniquement pour le fonctionnement dans la position pour laquelle il a été conçu (voir dessins des
modèles dans les pages qui suivent). Lors du montage, l’installateur devra vérifier surtout que l’accouplement bras-
appareil garantisse le degré de protection IP spécifié sur l’appareil en question.
L’appareil pourra être utilisé uniquement s’il est pourvu des écrans de protection.
Si l’écran devait être endommagé ou cassé, l’appareil ne devra pas être utilisé.
Rétablir les conditions originales avant de l’utiliser à nouveau.
Le écran de protection est en verre trempé; pour les pièces de rechange et leur livraison, vous adresser au constructeur
de l’appareil.
Le poids maximum des appareils câblés (l’ampoule exclue), la projection de la surface maximum soumise à la poussée
du vent et les dimensions des modèles sont indiqués sur le tableau de la page suivante. Les câbles d’alimentation
appropriés doivent être dotés d’un guipage supplémentaire ou double. Lorsque l’appareil est en classe II, s’assurer
que, pendant l’installation, les parties métalliques exposées n’entrent pas en contact électrique avec des parties de
l’installation électrique reliées à un conducteur de protection.
L’appareil est approprié à une installation en intérieur et extérieurs.
Les lampes à vapeurs d’halogénures éventuellement employées doivent présenter une émission réduite d’ultraviolets.
7°
AVVERTENZE PER L’INSTALLAZIONE - INSTALLATION INFORMATION - PRECAUTIONS POUR
L’INSTALLATION - INSTALLATIONSANLEITUNG - ADVERTENCIAS PARA INSTALACIÓN
17
www.neri.biz
INSTALLIERUNGSHINWEISE - Die Installierung wird ausschließlich nach den Vorschriften der deutschen Normen
durchgeführt. Der Apparat ist nur für den Betrieb in der Position, für die er projektiert wurde, vorgesehen (siehe
Modellzeichnungen auf den nachstehenden Seiten).
Bei der Installation liegt es in der Verantwortung des Installateurs, insbesondere sicherzustellen, dass die Kopplung
Arm-Apparat den auf dem Apparat selbst spezifizierten IP Schutzgrad garantiert.
Der Apparat darf nur komplett mit Schutzschirmen benutzt werden.
Sollte der Schirm beschädigt oder zerstört sein, darf der Apparat nicht benutzt werden.
Stellen Sie den Originalzustand vor der erneuten Benutzung wieder her.
Die Schutzschirme müssen in Sekuritglas ausgestattet sein. Nehmen Sie für Ersatzteile und deren Lieferung Kontakt
mit dem Hersteller des Apparats auf.
Das Höchstgewicht des verkabelten Apparates (mit Ausnahme der Lampe), die Projektion der Windstößen ausgesetzten
maximalen Oberfläche und die Abmessungen der Modelle werden in der Tabelle der folgenden Seite aufgeführt. Wenn
der Apparat zur Klasse II gehört, muss man bei der Installation darauf achten, dass keine Metallteile mit Teilen der
Elektroinstallation Kontakt bekommen, die mit einem Schutzleiter verbunden sind.
Der Apparat ist für interne und externe Installation verwendbar.
Die evtl. verwendeten Halogenlampen dürfen nur eine geringe UV-Strahlung haben.
ADVERTENCIAS PARA LA INSTALACIÓN - La instalación debe efectuarse según las prescripciones nacionales.
El aparato sólo puede funcionar en la posición para la cual ha sido proyectado (véanse los dibujos de los modelos en
las páginas siguientes).
Durante el montaje, el instalador debe controlar atentamente que el acoplamiento brazo-aparato garantice el grado de
protección IP especificado en el aparato en cuestión.
El aparato sólo se puede utilizar con las pantallas de protección.
Si la pantalla se daña o se rompe, no utilicen el aparato.
Restablezcan las condiciones originales antes de volverlo a utilizar.
Pantalla de protección en vidrio templado; para los recambios y su suministro, ponerse en contacto con el fabricante
del aparato.
El peso máximo de los aparatos cableados (excluida la bombilla), la protección máxima de la superficie sujeta a la
fuerza del viento y las dimensiones de los modelos aparecen en la tabla de la página siguiente. Para la alimentación
son idóneos los cables dotados de aislamiento suplementario o doble.
Cuando el aparato está en clase II, presten atención a que durante la instalación las partes metálicas expuestas no
entren en contacto eléctrico con partes de la instalación eléctrica conectadas a un conductor de protección.
El aparato no es idóneo para la instalación interna y externa.
Las eventuales lámparas de vapor de haluro empleadas deben ser de emisión baja de rayos UV.
7°
AVVERTENZE PER L’INSTALLAZIONE - INSTALLATION INFORMATION - PRECAUTIONS POUR
L’INSTALLATION - INSTALLATIONSANLEITUNG - ADVERTENCIAS PARA INSTALACIÓN
119 cm
21,5 cm
52 cm
S = 0,180 m
2
Kg 19
MN025A
18 19
Apparecchio per illuminazione stradale conforme alle norme CEI EN 60598-1:2001; 60598-2-3; Direttiva B.T. 2006/95/CE;
Direttiva EMC 2004/108/CE - 92/31/CEE - 98/68/CEE.
Corpo in pressofusione e lamiera d’alluminio. Piastra di cablaggio in alluminio. Portalampada in ceramica. Schermo in vetro
temperato piano trasparente; ottica basculante in alluminio purissimo; guarnizione in silicone. Verniciatura color grigio Neri.
Le caratteristiche elettriche speciche sono riportate sull’etichetta dati posta sull’apparecchio (esempio g. A).
Device for street lighting compliant with CEI EN 60598-1:2001; 60598-2-3; Directive B.T. 2006/95/CE; Directive EMC
2004/108/CE – 92/31/CEE – 98/68/CEE standards. Made in galvanized steel, die-cast aluminium and sheet aluminium.
Wiring plate in anozided sheet aluminium.
Ceramic lampholder; screen in at transparent tempered glass; reectors swivelling, in super-pure aluminium; silicon seals.
Painted in Neri grey. For electrical characteristics see data label directly on xture (example g. A).
Luminaire pour l’éclairage public conforme aux normes CEI EN 60598-1:2001; 60598-2-3; Directive B.T. 2006/95/CE;
Directive EMC 2004/108/CE – 92/31/CEE – 98/68/CEE.
Réalisé en acier zingué, moulage sous pression et tôle d’aluminium.
Plaque de câblage en tôle d’aluminium. Douille en céramique; écran en verre trempé plan transparent. Réecteurs basculant
en aluminium très pur; joints en silicone. Peinture couleur gris Neri.
Les caractéristiques électriques gurent sur l’étiquette des données placée sur l’appareil (exemple  g. A).
Apparat zur Straßenbeleuchtung, konform zu den Normen CEI EN 60598-1: 2001; 60598-2-3; Vorschrift B. T. 2006/95/
CE; Vorschrift EMC 2004/108/CE – 92/31/CEE – 98/68/CEE. Hergestellt aus verzinktem Stahl, Aluminium-Pressguss und
Aluminiumblech; Lampenfassung aus Keramik; Schirme aus transparentem gehärtetem Flachglas; Optiken kippbar, aus purem
Aluminium; Silikondichtungen. Lackierung mit Neri-Grau des oberen Teils und des tragenden Rahmens aus Stahl bei den
Aufsatz-Versionen, mit Weiß im unteren Teil des Schirms. Zu den elektrischen Eigenschaften siehe das Etikett mit den
Daten auf dem Apparat (Beispiel Fig. A).
Dispositivo de alumbrado para la vía pública conforme a las normas CEI EN 60598-1:2001; 60598-2-3; Directiva B.T. 2006/95/
CE, DirectivaEMC 2004/108/CE - 92/31/CEE - 98/68/CEE.
Realizado en acero cincado, fundido a presión y en chapa de aluminio.
Placa portacables en chapa de aluminio; portalámpara de cerámica; pantalla de protección en cristal templado.
Pantallas reectoras basculante de aluminio purísimo; juntas de silicone. Pintura color gris Neri.
Características eléctricas: vean la etiqueta de datos situada en el aparato (ejemplo Fig. A)
8° CARATTERISTICHE - CHARACTERISTICS - CARACTERISTIQUES
EIGENSCHAFTEN - CARACTERÍSTICAS
Fig. A
MN025A2153513
MT 150W E40
ST 150W E40
19
www.neri.biz
L’apparecchio è stato realizzato a regola d’arte. La sua durata ed efficienza sarà migliore se usato correttamente e con interventi di
manutenzione regolare. Questo apparecchio deve essere destinato solo all’uso per il quale è stato progettato, e cioè l’illuminazione di
ambienti esterni-interni. Ogni altro uso è considerato improprio e pericoloso, ed il costruttore non può essere considerato responsabile
per danni derivanti da un uso improprio e irragionevole.
The light fixture has been manufactured in compliance with correct practice. Its duration and efficiency will be greater if used correctly
and with regular maintenance operations. This light fixture must be installed only for the use for which it was designed, namely for the
illumination of outdoor / indoor spaces. Any other use must be considered to be improper and dangerous, and the manufacturer cannot
be held liable for any damage caused by improper and unreasonable use.
L’appareil a été réalisé dans les règles de l’art. Sa durée et son efficacité seront meilleures s’il est utilisé correctement et soumis à de
régulières interventions d’entretien. Cet appareil ne doit être destiné qu’à l’utilisation pour laquelle il a été conçu, à savoir, l’éclairage
de milieux externe et interne. Toute autre utilisation étant considérée comme impropre et dangereuse, le constructeur décline toute
responsabilité en cas de dommages dérivant d’une utilisation impropre et irraisonnable de l’appareil.
Der Apparat ist fachgerecht hergestellt worden. Seine Lebensdauer und Effizienz wird besser sein, wenn er korrekt verwendet und
regelrecht gewartet wird. Dieser Apparat darf nur für den Zweck vorgesehen werden, für den er entwickelt wurde, das ist: Beleuchten
im externen und internen Bereich. Jede andere Verwendung ist als unsachgemäß und gefährlich anzusehen, und der Hersteller kann
nicht verantwortlich für Schäden gemacht werden, die aus einem unsachgemäßen und unvernünftigen Gebrauch herrühren.
El aparato ha sido fabricado perfectamente. Su duración y eficiencia resultarán mejores si se utiliza correctamente y se realizan
intervenciones regulares de mantenimiento. Este aparato debe ser destinado exclusivamente al uso para el cual ha sido concebido,
es decir: para alumbrar entornos
interna y externa
. Cualquier otro empleo se considera inadecuado y peligroso, y el constructor no
puede ser considerado responsable de ello.
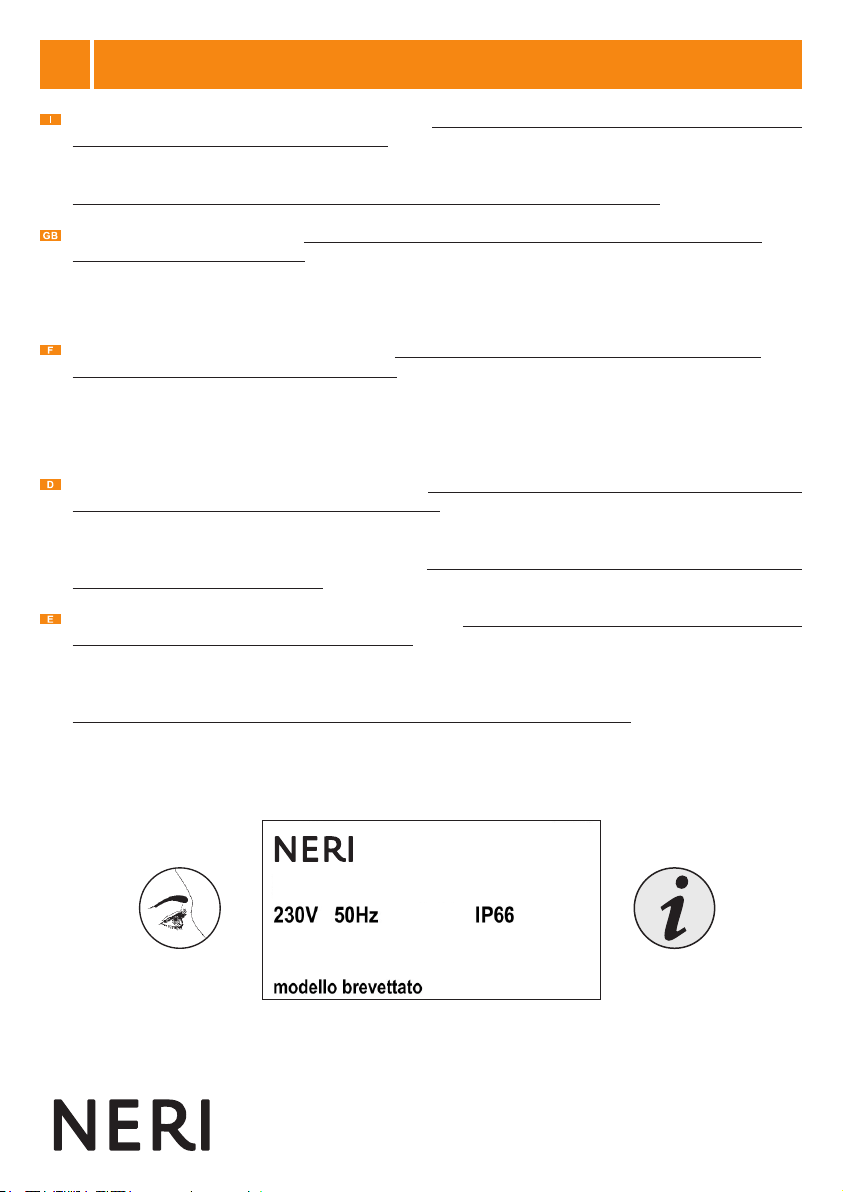
9° DESTINAZIONE D’USO - INTENDED USE - UTILISATION DES LUMINAIRES
ZWECKBESTIMMUNG - UTILIZACIÓN
La garanzia del costruttore opera per anni 2 (due) dalla data di consegna.
La garanzia è esclusa nelle ipotesi in cui sia fatto un uso improprio dell’apparecchio, in caso di interventi o modiche non autorizzate
dalla costruttrice, e comunque ogni qualvolta non siano state rispettate le istruzioni del presente manuale. Qualsiasi intervento per
modiche alle parti meccaniche ed elettriche anche di lieve entità invalida ogni forma di garanzia e di responsabilità del costruttore.
The manfacturer’s guarantee is valid for 2 (two) years from the delivery date.
The guarantee is invalidated if the light xture is used improperly, in case of operations or modications that have not been
authorized by the manufacturer, and in all other situations in which the instructions given in this manual are not respected. Any kind
of operation to modify mechanical or electrical components, even if only slight, will invalidate all forms of guarantee and liability of
the manufacturer.
La garantie du constructeur est valable 2 (deux) ans à partir de la date de la livraison.
La garantie perd toute validité en cas d’utilisation impropre de l’appareil, en cas d’interventions ou de modications non autorisées
par le constructeur et, quoi qu’il en soit, en cas de non-respect des instructions indiquées dans le présent manuel. Toute intervention
de modication sur les parties mécaniques et électriques, même légère, annule toute forme de garantie et de responsabilité du
constructeur.
Die Herstellergarantie gilt für 2 Jahre (zwei) ab dem Lieferdatum.
Die Garantie wird ausgeschlossen bei unsachgemäßer Verwendung des Apparates, bei nicht vom Hersteller autorisierten Eingriffen
oder Veränderungen und jedenfalls immer, wenn die Anweisungen dieser Anleitung nicht beachtet worden sind. Jede auch
geringfügige Änderungsmaßnahme an mechanischen und elektrischen Teilen lässt jede Form von Garantie und Verantwortung des
Herstellers ungültig werden.
La garantía del fabricante es válida durante 2 años (dos), a partir de la fecha de entrega.
Queda excluida la garantía cuando se realice un empleo inadecuado del aparato, en caso de intervenciones o modicaciones
no autorizadas por el fabricante, y en todo caso, cada vez que no hayan sido respetadas las instrucciones del presente manual.
Cualquier intervención para realizar modicaciones en las partes mecánicas y eléctricas, aunque sean de entidad leve, invalida
cualquier forma de garantía y exime de la responsabilidad al fabricante.
10° GARANZIA - GARANTEE - GARANTIE
GARANTIE - GARANTIA
20 21
Apparecchio contrassegnato in conformità alla Direttiva Europea 2002/96/CE (WEEE). Il simbolo
sul prodotto o sulla
documentazione, indica che il prodotto non va trattato come riuto domestico, ma deve essere consegnato presso
specici punti di raccolta per il riciclaggio di apparecchiature elettriche o elettroniche. Assicurandosi che questo prodotto sia
smaltito in modo corretto, l’utente contribuisce a prevenire le potenziali conseguenze negative per l’ambiente e la salute.
Lo smaltimento abusivo o inadeguato comporta sanzioni economiche e/o amministrative, stabilite a norma di legge.
Per informazioni sui centri di raccolta e sul corretto smaltimento del prodotto, contattare l’autorità locale o la Neri. S.p.A.
This product is marked according to the European directive 2002/96/EC (WEEE). The symbol on the product, or on the
documents, indicates that this appliance may not be treated as household waste. Instead it shall be handed over to the
applicable collection point for the recycling of electrical and electronic equipment. Make sure that this product is disposed in
corrected way, the customer contributes to prevent the negative potential consequences for the environment and the health.The
illicit disposal or inadequate involves economic and/or administrative sanctions, established according to the law. For information
about the centers of collection and the corrected disposal of the product, contact the local authority or the Neri S.p.A.
Cet appareil porte le symbole du recyclage conformément à la Directive Européenne 2002/96/CE concernant les Déchets
d’Equipements Èlectriques et Èlectroniques (WEEE). Le symbole présent sur l’appareil ou sur la documentation indique que
ce produit ne peut en aucun cas être traité comme déchet ménager. Il doit par conséquent être remis à un centre de
collecte des déchets chargé du recyclage des équipement électrique et électroniques. Assurez-vous que ce produit est
disposé de la manière correcte, le client contribue à empêcher les possibles conséquences négatives pour l’environnement et
la santé. La disposition illicite ou inadéquate implique des approbations économiques et/ou administratives, établies selon la
loi. Pour informations é propos des centres de collection et des la correcte disposition du produit, contactez l’autorité locale o
la Neri S.p.A.
In Übereinstimmung mit den Anforderungen der Europäischen Richtlinie 2002/96 EG über Elektro- und Elektronik-Altgeräate
(WEEE) ist vorliegendes Geräat mit einer Markierung versehen. Auf den Produkt oder der beiliegend produktdokumentation
ist folgendes Symbol einer durchgestrichenen Abfalltonne abgebildet. Es weist darauf hin, dass eine Entsorgung im normalen
Haushaltsabfall nicht zulässig ist Entsorgen Sie dieses Produkt im Recyclinghof mit einer getrennten Sammlung für Elektro-
und Elektronikgeräate. Überprüfen Sie ob dieses Produkt wird in behobener Weise abgeschafft, der Kunde beiträgt, um die
Minuspotentialkonsequenzen für das Klima und die Gesundheit zu verhindern. Die unerlaubte oder unpassende Beseitigung
bezieht die ökonomischen und/oder administrativen Aufschriften mit ein, entsprechend dem Gesetz. Zu Information über die
Mitten der Ansammlung und die behobene Beseitigung des Produktes, treten Sie der lokalen Berechtigung oder mit dem Neri
S.p.A in Verbindung.
Este aparado lleva el marcado en conformidad con la Directiva 2002/96/EC del Parlamento Europeo y del Consejo sobre
residuos de aparados eléctricos y electrónicos (RAEE). El simbolo en el producto o en los documentos, indica que no se
puede tratar como residuo doméstico. Es necesario entregarlo en un punto de recogida para reciclar aparados elétricos y
electrónicos. Recicle los productos de manera correcta. La disposición ilícita o inadecuada implica los endosos económicos
y/o administrativos, establecidos según la ley. Para la información sobre los centros de colección y la disposición correcta del
producto, entre en contacto con la autoridad local o Neri S.p.A.
SMALTIMENTO - DISPOSAL - MISE AU REBUT
ENTSORGUNG - RECICLADO
11°

Other NERI Light Fixture manuals

NERI LIGHT 400 User manual

NERI

NERI LIGHT 400 User manual

NERI LIGHT 500 User manual

NERI

NERI LIGHT 500 User manual

NERI LIGHT 32 Series User manual

NERI

NERI LIGHT 32 Series User manual

NERI LIGHT 22 Series User manual

NERI

NERI LIGHT 22 Series User manual

NERI LIGHT 150 User manual

NERI

NERI LIGHT 150 User manual

NERI Light 106 User manual

NERI

NERI Light 106 User manual

NERI Light 23 Series User manual

NERI

NERI Light 23 Series User manual

NERI LIGHT 31 Series User manual

NERI

NERI LIGHT 31 Series User manual

NERI LIGHT 804 User manual

NERI

NERI LIGHT 804 User manual

NERI Nebula L User manual

NERI

NERI Nebula L User manual

Popular Light Fixture manuals by other brands

ABB Stanilite installation manual

ABB

ABB Stanilite installation manual

Cooper Lighting Ametrix ADY071451 installation instructions

Cooper Lighting

Cooper Lighting Ametrix ADY071451 installation instructions

Gearwrench 83124 user manual

Gearwrench

Gearwrench 83124 user manual

Light Efficient Design RemPhos RP-SWL-15W-40K-BK-GI user manual

Light Efficient Design

Light Efficient Design RemPhos RP-SWL-15W-40K-BK-GI user manual

EuroLite TMH XB-200 user manual

EuroLite

EuroLite TMH XB-200 user manual

Emos ZY2096 manual

Emos

Emos ZY2096 manual

YELLOWRIVER YR-IP1024Q user manual

YELLOWRIVER

YELLOWRIVER YR-IP1024Q user manual

Lightolier Calculite DS specification

Lightolier

Lightolier Calculite DS specification

vonado 42109 manual

vonado

vonado 42109 manual

Klarstein SUMMERSHINE SLIM manual

Klarstein

Klarstein SUMMERSHINE SLIM manual

Eternal Lighting Cube RGBA user manual

Eternal Lighting

Eternal Lighting Cube RGBA user manual

SICK deTec2 Core operating instructions

SICK

SICK deTec2 Core operating instructions

Lucci LEDlux 229150 installation instructions

Lucci LEDlux

Lucci LEDlux 229150 installation instructions

Westfalia Wetelux 91 96 03 Original instructions

Westfalia

Westfalia Wetelux 91 96 03 Original instructions

Martin CYCLO 04 DMX user manual

Martin

Martin CYCLO 04 DMX user manual

SGM G-1 BEAM user manual

SGM

SGM G-1 BEAM user manual

RSA Lighting ACCURUS TRIM ACT1985 Specification sheet

RSA Lighting

RSA Lighting ACCURUS TRIM ACT1985 Specification sheet

AGPtek SY-ZY2101002 user manual

AGPtek

AGPtek SY-ZY2101002 user manual

manuals.online logo
manuals.online logoBrands
  • About & Mission
  • Contact us
  • Privacy Policy
  • Terms and Conditions

Copyright 2025 Manuals.Online. All Rights Reserved.