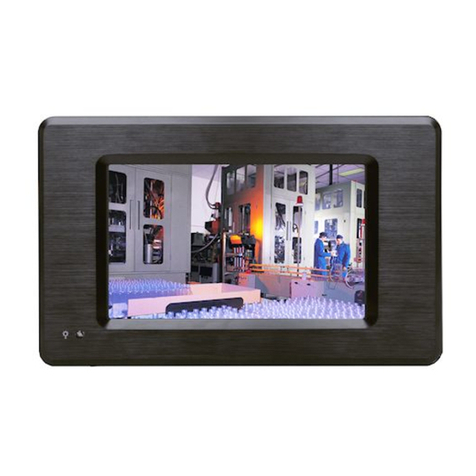
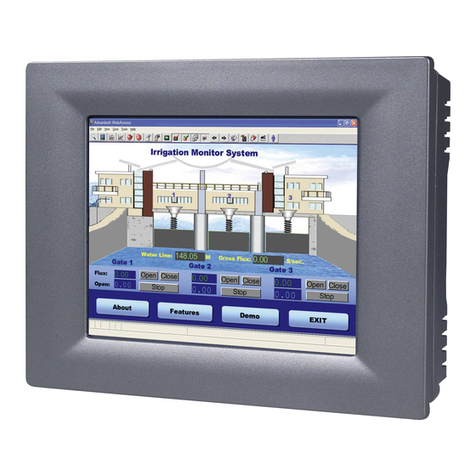
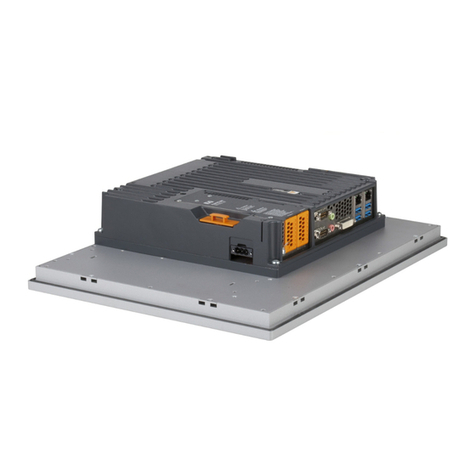
Nexcom KPPC 1514B User manual

NEXCOM International Co., Ltd.
PublishedJanuary 2019 www.nexcom.com
Intelligent Platform & Services BusinessUnit
Kiosk Panel PC
KPPC 1514B/1814B/2114B
UserManual

Copyright © 2019 NEXCOM International Co., Ltd. All Rights Reserved. ii KPPC1514B/1814B/2114BUser Manual
Content
Contents
Preface
Copyright .............................................................................................iv
Disclaimer..............................................................................................iv
Acknowledgements...............................................................................iv
Regulatory ComplianceStatements........................................................iv
Declaration of Conformity......................................................................iv
RoHSCompliance...................................................................................v
Warranty and RMA ................................................................................vi
SafetyInformation .................................................................................ix
Installation Recommendations................................................................ix
Safety Precautions................................................................................... x
TechnicalSupportand Assistance...........................................................xi
Conventions Usedin this Manual ...........................................................xi
Global ServiceContact Information........................................................xii
Package Contents.................................................................................xiv
Ordering Information ............................................................................xvi
Chapter 1: Product Introduction
KPPC1514B/1814B/2114B Series............................................................1
Specifications..........................................................................................2
Knowing Your KPPC Series......................................................................4
RearTop..............................................................................................4
RearBottom........................................................................................5
Rear....................................................................................................6
Mechanical Dimensions...........................................................................7
KPPC 1514B........................................................................................7
KPPC 1814B........................................................................................8
KPPC 2114B........................................................................................9
Chapter 2: Jumpersand Connectors
Before You Begin..................................................................................10
Precautions ..........................................................................................10
JumperSettings ....................................................................................11
Locations of the Jumpersand Connectors.............................................12
LAN Ports LEDDescription.....................................................................13
Jumpers................................................................................................14
ClearRTCRAM .................................................................................14
COM1 Ring/+5V/+12VSelection........................................................14
LVDSPanel Voltage Select..................................................................15
Inverter VoltageSelect.......................................................................15
Inverter Backlight Control Mode Select..............................................16
Chassis Intrusion Jumper...................................................................16
ConnectorPin Definitions.....................................................................17
InternalConnectors...........................................................................17
SATA Power Connector..................................................................17
Audio Amplifier Connector ............................................................17
ChassisFan Connector...................................................................18
CPU Fan Connector........................................................................18
LVDSConnector.............................................................................19
EmbeddedDisplayPort ...................................................................19
Digital I/O Connector .....................................................................20

Content
System Panel Connector.................................................................20
SerialATA 6.0Gb/sConnector 1 .....................................................21
SerialATA 6.0Gb/sConnector 2 .....................................................21
SpeakerConnector ........................................................................22
USB2.0 Connectors .......................................................................22
SPI Flash Programmable Connector ................................................23
BatteryConnector..........................................................................23
Backlight Inverter Power Connector ...............................................24
Serial Port Connector(COM1) ........................................................24
Serial Port Connector(COM2) ........................................................25
4-pin DC-In PowerConnector ........................................................25
Front Panel Audio Connector.........................................................26
Chapter 3: System Setup
Removingthe Top Cover.......................................................................27
Installing SO-DIMM Memory Modules...................................................29
Installing a SATA StorageDrive..............................................................30
Installing LGA1151 35W CPU ...............................................................33
Installing Expansion Cards.....................................................................36
Chapter 4: BIOS Setup
About BIOS Setup.................................................................................38
Whento Configure the BIOS.................................................................38
Default Configuration...........................................................................39
Entering Setup......................................................................................39
Legends................................................................................................39
BIOS Setup Utility..................................................................................41
Main.................................................................................................41
Advanced..........................................................................................42
Chipset..............................................................................................50
Security.............................................................................................52
Boot..................................................................................................53
Save & Exit........................................................................................53
3
Copyright © 2019 NEXCOMInternational Co., Ltd. All Rights Reserved. KPPC1514B/1814B/2114BUser Manual

Preface
PrefaCe
4
Copyright © 2019 NEXCOMInternational Co., Ltd. All Rights Reserved. KPPC1514B/1814B/2114BUser Manual
Copyright
This publication, including all photographs, illustrations and software, is
protected under international copyright laws, with all rights reserved. No
part of this manual may be reproduced, copied, translated or transmitted in
any form or by any means without the prior written consent from NEXCOM
International Co., Ltd.
Disclaimer
Theinformation in this document is subject to change without prior notice and
doesnotrepresentcommitmentfromNEXCOMInternationalCo.,Ltd.However,
users may update their knowledge of any productin useby constantlychecking
its manual posted on our website: http://www.nexcom.com. NEXCOM shall
not be liable for direct, indirect, special, incidental, or consequential damages
arisingout of the useof any product, nor for any infringements upon the rights
of third parties, which may result from such use. Any implied warranties of
merchantabilityor fitnessfor any particularpurposeisalso disclaimed.
Acknowledgements
KPPC 1514B/1814B/2114B is a trademark of NEXCOM International Co.,
Ltd. All other product names mentioned herein are registered trademarks of
their respective owners.
Regulatory Compliance Statements
Thissectionprovidesthe FCCcompliancestatement for ClassA devicesand
describeshow to keepthe systemCE compliant.
Declaration of Conformity
FCC
This equipment has been tested and verified to comply with the limits for a
Class A digital device, pursuant to Part 15 of FCC Rules. These limits are
designedto provide reasonable protection againstharmful interference when
the equipment is operated in a commercial environment. This equipment
generates, uses, and can radiate radio frequency energy and, if not installed
and usedin accordance with the instructions, may causeharmful interference
to radio communications. Operation of this equipment in a residential area
(domestic environment) is likely to cause harmful interference, in which
case the user will be required to correct the interference (take adequate
measures)at their own expense.
CE
The product(s) described in this manual complies with all applicable
European Union (CE)directives if it has a CE marking. For computer systems
to remain CE compliant, only CE-compliant parts may be used. Maintaining
CEcompliancealsorequirespropercableand cabling techniques.

Preface
RoHSCompliance
NEXCOM RoHS Environmental Policy and Status
Update
NEXCOM is a global citizen for building the digital
infrastructure. We are committed to providing green
products and services,which arecompliant with
European Union RoHS (Restriction on Use of Hazardous Substance in
Electronic Equipment) directive 2011/65/EU, to be your trusted green
partner and to protect our environment.
RoHSrestricts the useof Lead (Pb)< 0.1% or 1,000ppm, Mercury (Hg) < 0.1%
or 1,000ppm, Cadmium (Cd) < 0.01% or 100ppm, Hexavalent Chromium
(Cr6+) < 0.1% or 1,000ppm, Polybrominated biphenyls (PBB) < 0.1% or
1,000ppm, and PolybrominateddiphenylEthers(PBDE)< 0.1% or1,000ppm.
In order to meet the RoHS compliant directives, NEXCOM has established
an engineering and manufacturing task force to implement the introduction
of green products. The task force will ensure that we follow the standard
NEXCOM development procedure and that all the new RoHS components
and new manufacturing processes maintain the highest industry quality
levelsfor which NEXCOM are renowned.
The model selection criteria will be based on market demand. Vendors and
supplierswill ensurethat all designedcomponents will be RoHS compliant.
How to recognize NEXCOM RoHS Products?
Forexisting products where there arenon-RoHSand RoHSversions,the
suffix“(LF)” will be added to the compliant product name.
All newproductmodelslaunchedafterJanuary2013will beRoHScompliant.
Theywill usethe usual NEXCOMnaming convention.
5
Copyright © 2019 NEXCOMInternational Co., Ltd. All Rights Reserved. KPPC1514B/1814B/2114BUser Manual

Copyright © 2019 NEXCOMInternational Co., Ltd. All Rights Reserved. vi KPPC1514B/1814B/2114BUser Manual
Preface
Warranty and RMA
NEXCOM Warranty Period
1. NEXCOM makes products in accordance with the Industry standard and,
NEXCOM warrants that all the Industry-grade IPC and System products
will be free from defect in neither material nor workmanship for twenty-
four (24)months from the day of invoice issued.
2. For NEXCOM Panel PC product lines (the APPC, MPPC and KPPC series),
they are also guaranteed against defect in materials and workmanship
for the period of twenty-four (24) months in their motherboard design.
For3rd party parts, it follows with original suppliers’ standard: 12 months
for battery pack and LCD, 24 months for adaptor / add on modules
(including GSMmodule, RFIDmodule, and antenna).
3. If NEXCOM determines customer’s warranty claim is valid, NEXCOM will
repair or replace product(s) without additional charge for parts and
labor. An extended Warranty Program will extend the warranty period of
the product accordingly.
Warranty Coverage
The warranty applies only to products manufactured or distributed by
NEXCOM and its subsidiaries. This warranty covers all the products/
shipments except for:
1. Any claimed defect, products that have been repaired or modified by
persons who have not been authorized by NEXCOM or, products which
have been subjected to misuse, abuse, accident, improper installation,
or usage not in accordance with the product instruction. NEXCOM
assumes no liability as a consequence of such events under the term of
this warranty.
One example is the replacement of Tablet’s or Hand-held’s LCD display
due to scratching stains or other degradation; these will not be covered
under this warranty.
2. Damages caused by customers’ delivery/shipping of the product or,
product failure resulted from electrical power/voltage shock, or,
installation of parts/components which are not supplied/approved by
NEXCOM in advance.
3. Third-party products:
a. Software, suchasthe devicedrivers,
b. External devicessuchasHDD, printer,scanner,mouse,LCDpanel,
battery, and so on,
c.Accessory/partsthat were not approvedbyNEXCOM and,
d. Accessory/partswere added to products after they were shipped from
NEXCOM.
Productwill be treated as“Out of Warranty “if:
a. Itexpiresthewarranted24monthsperiodfromthedayitwaspurchased.
b. It had been altered by persons other than an authorized NEXCOM service
person or, which have been subjected to misuse, abuse, accident, or
improper installation.
c.It doesn’t havethe original NEXCOM SerialNumber labelingfor
NEXCOM’s warranty period identification or, tracking.

Copyright © 2019 NEXCOMInternational Co., Ltd. All Rights Reserved. vii KPPC1514B/1814B/2114BUser Manual
Preface
RMA that NEXCOM has determined not to be covered by the warranty will
be charged the NEXCOM Standard Repair Fee for the repairing. If a RMA is
determined to be not repairable, customer will be notified and product(s)
may be returned to customer at their request; a minimum service fee may
be charged however.
NEXCOM Return Merchandise Authorization (RMA) Procedure
For the RMA (Return Merchandise Authorization) shipment, customer is
responsible for packaging and shipping the product to the designated
NEXCOM service sites, with shipping charges prepaid by the customer. The
original NEXCOMshipping box should be usedwheneverpossible. NEXCOM
shall pay for the return of the product to the customer’s location. In case of
expedited shipping request, an extra service charge shall be assessed and
the customer is responsiblefor this extrareturn shipping charge.
1. Customersshould enclosethe “NEXCOM RMA ServiceForm” with the
returned products.
2. Customers need to write down all the information related to the problem
on the “NEXCOM RMA Service Form “when applying for the RMA
service; information will help to understand the problem, including the
fault description, on-screenmessages,and picturesif possible.
3. Customers could send back the faulty product with or without the
accessories and key parts such as the CPUand DIMM. If the key partsare
included, please be noted clearly within the return form. NEXCOM takes
no responsibilityfor the parts which arenot listed in the return form.
4. Customers hold the responsibility to ensure that the packing of defective
products is durable enough to be resistant against further damage due
to the transportation; damage caused by transportation is treated as “
Out of Warranty “under our Warrantyspecification.
5. RMA product(s)returned by NEXCOMto anylocation other than the
customer registered delivery address will incur an extra shipping charge,
the customer is responsible for paying the extra shipping charges, duties,
and taxesof this shipment.
Product Repairing
1. NEXCOM will repair defective products covered under this limited
warranty that are returned to NEXCOM; if products do prove to be
defective, they will be repaired during their warranty period unless other
warranty terms havebeen specified.
2. NEXCOM owns all parts removedfrom repaired products.
3. NEXCOM will useparts made by variousmanufacturers in performing the
repair.
4. Therepairedproducts will be warranted subjectedto the original
warranty coverage and period only.
5. For products returned as defective but, proved to be no defect/fault after
the RMA process, NEXCOM reserves the right to claim for a NDF (No
Defect Found)Service Charge.
6. NEXCOM will issue RMA Report which included Repair Detailed
Information to the customer when the defective products were repaired
and returned.
7. In addition to the above,NEXCOM may authorizeIndependent/Third-
party suppliersto repairthe defective products for NEXCOM.

Preface
Out Of Warranty Service
There will be a service charge from NEXCOM for the “Out Of Warranty”
product service;they are the Basic Diagnostic Service Fee and the Advanced
Component Replacement Fee respectively. And, if the product can not be
repaired, NEXCOM will either return the product to the customer or, just
scrapit, followed by customer’s instruction.
1. Testingand Parts Replacement
NEXCOM will have the following Handling Charges for those OoW
products that returned:
a. BasicLaborCostand TestingFee:asTablelisted.
b. PartsFee:NEXCOM will chargefor main IC chipsetssuchasthe N.B.,
S.B.,Super-IO, LAN, Sound,Memory, and so on.
c. 3rd-party DeviceFee:products replacementfor CPU,DIMM, HDD,
Chassis,and UPS.
2. Out of Warranty product will have a three months warranty for the fixed
issues.If the product failed with different problem within 3 months, they
will still incur the servicechargeof “Out of Warranty”.
3. Out of Warranty “products will not berepairedwithout a signedPIfrom
the customer,the agreementof the repair process.
Add-on card, 3rd Party Device and board level repair cost higher than
new product prices, customer can abandon to sign PI to repair and,
pleasecontact with salesto buy newproducts.
8
Copyright © 2019 NEXCOMInternational Co., Ltd. All Rights Reserved. KPPC1514B/1814B/2114BUser Manual

Preface
Installation Recommendations
Ensure you have a stable, clean working environment. Dust and dirt can get
into components and cause a malfunction. Use containers to keep small
components separated.
9
Copyright © 2019 NEXCOMInternational Co., Ltd. All Rights Reserved. KPPC1514B/1814B/2114BUser Manual
Adequate lighting and proper tools can prevent you from accidentally
damaging the internal components. Most of the procedures that follow
requireonly afew simpletools, including the following:
▪A Philipsscrewdriver
▪A flat-tipped screwdriver
▪A groundingstrap
▪An anti-staticpad
Usingyourfingerscandisconnectmostof theconnections.It is recommended
that you do not use needle-nose pliers to disconnect connections as these
candamagethe soft metal or plasticpartsof the connectors.
Safety Information
Beforeinstallingand usingthe device, note the following precautions:
▪Readall instructionscarefully.
▪Donot placethe unit on an unstable surface, cart, or stand.
▪Follow all warnings and cautions in this manual.
▪When replacing parts, ensure that your service technician uses parts
specifiedby the manufacturer.
▪Avoid using the system near water, in direct sunlight, or near a heating
device.
▪The load of the system unit does not solely rely for support from the
rackmounts located on the sides. Firm support from the bottom is highly
necessaryin order to provide balance stability.
▪The computer is provided with a battery-powered real-time clock circuit.
There is a danger of explosion if battery is incorrectly replaced. Replace
only with the sameor equivalent type recommended by the manufacturer.
Discardusedbatteries accordingto the manufacturer’s instructions.

Preface
Safety Precautions
10
Copyright © 2019 NEXCOMInternational Co., Ltd. All Rights Reserved. KPPC1514B/1814B/2114BUser Manual
1. Readthesesafetyinstructionscarefully.
2. Keep this User Manual for later reference.
3. Disconnect this equipment from anyACoutlet before cleaning. Usea
damp cloth. Donot useliquid or spraydetergents for cleaning.
4. Forplug-in equipment, the power outlet socketmust be located nearthe
equipment and must be easily accessible.
5. Keep this equipment away from humidity.
6. Putthis equipment on a stablesurfaceduring installation. Dropping it or
letting it fall may cause damage.
7. Theopenings on the enclosurearefor air convection to protect the
equipment from overheating.DONOTCOVERTHEOPENINGS.
8. Make sure the voltage of the power sourceis correct beforeconnecting
the equipment to the power outlet.
9. Place the power cord in a way so that people will not step on it. Do not
place anything on top of the power cord. Useapower cord that hasbeen
approved for use with the product and that it matches the voltage and
current marked on the product’s electrical range label. The voltage and
current rating of the cord must be greater than the voltage and current
rating marked on the product.
10. All cautions and warningson the equipment should be noted.
11. If the equipment is not usedfor a long time, disconnectit from the
power sourceto avoid damageby transient overvoltage.
12. Never pour any liquid into an opening. This may cause fire or electrical
shock.
13. Never open the equipment. For safety reasons, the equipment should be
opened only by qualified service personnel.
14.If one of the following situations arises, get the equipment checked by
servicepersonnel:
a. Thepower cord or plug is damaged.
b.Liquid haspenetratedinto the equipment.
c. Theequipment hasbeenexposedto moisture.
d. Theequipment doesnot work well, or you cannot get it to work
accordingto the user’s manual.
e. Theequipment hasbeendropped and damaged.
f. Theequipment hasobvious signsof breakage.
15. Do not placeheavy objects on the equipment.
16. The unit uses a three-wire ground cable which is equipped with a third
pin to ground the unit and prevent electric shock. Do not defeat the
purpose of this pin. If your outlet does not support this kind of plug,
contact your electrician to replaceyour obsolete outlet.
17. CAUTION: DANGER OF EXPLOSION IF BATTERY IS INCORRECTLY
REPLACED. REPLACE ONLY WITH THE SAME OR EQUIVALENT TYPE
RECOMMENDED BY THE MANUFACTURER. DISCARD USED BATTERIES
ACCORDINGTOTHEMANUFACTURER’S INSTRUCTIONS.

Copyright © 2019 NEXCOMInternational Co., Ltd. All Rights Reserved. xi KPPC1514B/1814B/2114BUser Manual
Preface
Technical Support and Assistance
1. Forthe most updated information of NEXCOM products, visitNEXCOM’s
website at www.nexcom.com.
2. For technical issues that require contacting our technical support team or
sales representative, please have the following information ready before
calling:
–Productnameand serial number
–Detailed information of the peripheral devices
–Detailed information of the installed software (operatingsystem,
version,application software, etc.)
–A complete description of the problem
–Theexactwordings of the error messages
Warning!
1.Handlingthe unit: carry the unit with both hands and handle it with care.
2. Maintenance:to keepthe unit clean,use only approvedcleaningproducts
or cleanwith a dry cloth.
Conventions Used in this Manual
Warning:
Information about certain situations, which if not observed,
can cause personal injury. This will prevent injury to yourself
when performing a task.
C
C
A
A
U
U
T
T
I
I
O
O
N
N
!
!
Caution:
Information to avoid damaging components or losing data.
Note:
Providesadditional information to complete a task easily.

Copyright © 2019 NEXCOMInternational Co., Ltd. All Rights Reserved. xii KPPC1514B/1814B/2114BUser Manual
Preface
Global Service Contact Information
Headquarters
NEXCOM International Co., Ltd.
9F,No. 920, Chung-ChengRd.,
ZhongHeDistrict, New TaipeiCity,23586,
Taiwan,R.O.C.
Tel:+886-2-8226-7786
Fax:+886-2-8226-7782
www.nexcom.com
Asia
Taiwan
NexAIoT Co., Ltd.
Taipei Office
13F,No.920, Chung-ChengRd.,
ZhongHe District,
New TaipeiCity, 23586, Taiwan,R.O.C.
Tel:+886-2-8226-7796
Fax:+886-2-8226-7792
Email:sales@nexcom.com.tw
www.nexcom.com.tw
NexAIoT Co.,Ltd.
Taichung Office
16F,No.250, Sec.2, Chongde Rd.,
Beitun Dist.,
TaichungCity 406, R.O.C.
Tel:+886-4-2249-1179
Fax:+886-4-2249-1172
Email:sales@nexcom.com.tw
www.nexcom.com.tw
NexCOBOTTaiwan Co., Ltd.
13F,No.916, Chung-ChengRd.,
ZhongHe District,
New TaipeiCity,23586, Taiwan,R.O.C.
Tel:+886-2-8226-7796
Fax:+886-2-8226-7792
Email:sales@nexcom.com.tw
www.nexcom.com.tw
GreenBaseTechnology Corp.
13F,No.922,Chung-ChengRd.,
Zhonghe Dist.,
New TaipeiCity,23586, Taiwan,R.O.C.
Tel:+886-2-8226-7786
Fax:+886-2-8226-7900
Email:sales@nexcom.com.tw
www.nexcom.com.tw
China
NEXSEC Incorporated
Floor5, No.4, No.7 fengxian middle Rd.,
(BeikeIndustrial Park),HaidianDistrict,
Beijing, 100094, China
Tel:+86-10-5704-2680
Fax:+86-10-5704-2681
Email:sales@nexcom.cn
www.nexcom.cn

Preface
NEXGOL
1st Floor, BuildingB4,Electronic2nd Area,
(PhoenixLakeIndustrial Park),YongchuanDist.,
Chongqing City,402160, China
Tel:+86-23-4960-9080
Fax:+86-23-4966-5855
Email:sales@nexcobot.com
www.nexgol.com/NexGoL
13
Copyright © 2019 NEXCOMInternational Co., Ltd. All Rights Reserved. KPPC1514B/1814B/2114BUser Manual
Beijing NexGemo Technology Co.,Ltd.
5th Floor, Gemotech Building, No.1, Development Rd.,
Changping International Information Industry Base,
Changping District,
Beijing,102206, China
Tel:+86-10-8190-9399
Fax:+86-10-8190-9456
Japan
NEXCOM Japan
9F,TamachiHaraBldg.,
4-11-5, Shiba Minato-ku,
Tokyo,108-0014, Japan
Tel:+81-3-5419-7830
Fax:+81-3-5419-7832
Email:sales@nexcom-jp.com
www.nexcom-jp.com
NEXCOM Shanghai
Room603/604, Huiyinmingzun PlazaBldg., 1,
No. 609, Yunlin East Rd.,
Shanghai,200062, China
Tel:+86-21-5278-5868
Fax:+86-21-3251-6358
Email:sales@nexcom.cn
www.nexcom.cn
NEXCOM SurveillanceTechnology Corp.
Floor5, BuildingC, ZhenHanIndustrial Zone,
GanKeng Community, Buji Street,
LongGangDistrict,
ShenZhen,518112, China
Tel:+86-755-8364-7768
Fax:+86-755-8364-7738
Email:steveyang@nexcom.com.tw
www.nexcom.cn
NEXCOM United System Service
Room 603/604, HuiyinmingzunPlazaBldg. 1,
No. 609, Yunlin East Rd.,
Shanghai,200062, China
Tel:+86-21-5278-5868
Fax:+86-21-3251-6358
Email:renwang@nexcom.com.tw
www.nexcom.cn
Europe
United Kingdom
NEXCOM EUROPE
10 Vincent Avenue,
Crownhill BusinessCentre,
Milton Keynes,Buckinghamshire
MK8 0AB,United Kingdom
Tel:+44-1908-267121
Fax:+44-1908-262042
Email:sales.uk@nexcom.eu
www.nexcom.eu
America
USA
NEXCOM USA
2883 BayviewDrive,
FremontCA94538, USA
Tel:+1-510-656-2248
Fax:+1-510-656-2158
Email:sales@nexcom.com
www.nexcom.com

Preface
Package Contents
Before continuing, verify that the KPPC 1514B/1814B/2114B series package
that you received is complete. Your package should have all the items listed
in the following table.
KPPC1514B/1814B/2114B SeriesStandard Kit
Item
Part
Number
Description
Qty
1
7400084003X00
Power
Adapter FSP:FSP084-DHAN3 84W
12V/7A
for IEC/EN62368 1
2
5060200082X00
Thermal
PadVER:AEAPUS 2
3
50311F0111X00
Flat Head
ScrewLong Fei:F3x5ISO+Nylok
Black
4
4
50311F0100X00
Round
HeadScreww/Spring+Flat Washer Long
Fei:P3x6L
3
5
5061700832X00
HDD
Bracket 2
HDDBracket
PowerAdapter Thermal Pad & Screws
Dual HDDBracket SATACable
Flat Head ScrewRound Head Screw
KPPC1514B/1814B/2114B SeriesOptional Assy HDD Kit
(P/N: 10IK0061404X0)
14
Copyright © 2019 NEXCOMInternational Co., Ltd. All Rights Reserved. KPPC1514B/1814B/2114BUser Manual
Item
Part
Number
Description
Qty
1
5061700985X00
Dual
HDD Bracket 106x18x11.7mm T=1mm
SECC
2
2
50311F0111X00
Flat Head
ScrewLong Fei:F3*5ISO+Nylok
Black
F3x5
Black Nylok 8
3
50311F0100X00
Round
Head Screww/Spring+Flat Washer Long
Fei:P3x6L, P3x6
iso/SW6x0.5 NI 3
4
603ATA0107X00
SATA
Cable Great Ideal: YXH18032901
SATA
CON7P180D to 90DL=350mm 1

Preface
KPPC1514B/1814B/2114B SeriesPanel Mounting Clips (Optional)
15
Copyright © 2019 NEXCOMInternationalCo., Ltd. All Rights Reserved. KPPC1514B/1814B/2114BUser Manual
Item
Description
Qty
1
Panel
Mounting Clipsx12 (P/N: 88YK0212100X0) 12
Panel Mounting Clipsx12
KPPC1514B/1814B/2114B Series Optional HDD Kit Package
(P/N: 10IK0061404X0)
Item
Description
Qty
1
2x
2.5 HDD Bracket Kit for IKS614Bwith SATACable
(A000)
(P/N: 10IK0061404X0) 10

Preface
Ordering Information
xvi
Copyright © 2019 NEXCOMInternationalCo., Ltd. All Rights Reserved. KPPC1514B/1814B/2114BUser Manual
Thefollowing information below providesordering information for the
KPPC1514B/1814B/2114B series.
Barebone
•KPPC1514B (P/N:10YK0151400X0)
15.6“LEDbacklight touch panel PC with Intel® FCLGA1151 35W, w/ 2 x
HDMI, 2 xGbELAN,4 xUSB3.0, 2 xserialport, 1 xLine-out, 1 x Mic-in
•12V, 84W power adapter w/ o power cord (P/N: 7400084003X00)
•KPPC1814B (P/N:10YK0181400X0)
18.5“LEDbacklight touch panel PC with Intel® FCLGA1151 35W, w/ 2 x
HDMI, 2 xGbELAN,4 xUSB3.0, 2 xserialport, 1 xLine-out, 1 x Mic-in
•12V, 84W power adapter w/ o power cord (P/N: 7400084003X00)
•KPPC2114B (P/N:10YK0211400X0)
21.5“LED backlight touch panel PC with Intel® CPU FCLGA1151 35W,
w/ 2 x HDMI, 2 x GbE LAN, 4 x USB 3.0, 2 x serial port, 1 x Line-out, 1 x
Mic-in
•12V, 84W power adapter w/ o power cord(P/N: 7400084003X00)
Optional
•Intel®
Pentium®
G4400TE (3M Cache,2.4 GHz), 2C/2T,35W
(P/N: 71IX02GTM4X00)
•Intel®
Pentium®
G4600TE (3M Cache,2.4 GHz), 2C/4T,35W
(P/N: TBD)
•Intel®
Core™ i3-6100TE (4M Cache,2.70 GHz), 2C/4T,35W
(P/N: 71IX02GTM3X00)
•Intel®
Core™ i5-6500TE (6M Cache,up to 3.30 GHz), 4C/4T,35W
(P/N: 71IX02GTM1X00)
•Intel®
Core™ i7-6700TE (8M Cache,up to 3.40 GHz), 4C/8T,35W
(P/N: 71IX02GTM2X00)
•Intel®
Core™ i3-7101TE (3M Cache,3.40 GHz), 2C/4T,35W
(P/N: 71IY03GTM3X00)
•Intel®
Core™ i5-7500T (6M Cache,up to 3.30 GHz), 4C/4T,35W
(P/N: 71IY03GTM2X00)
•Intel®
Core™ i7-7700T (8M Cache,up to 3.80 GHz), 4C/8T,35W
(P/N: 71IY03GTM1X00)

Chapter 1: Product Introduction
ChaPter 1: ProduCt IntroduCtIon
Key Features
▪6th generationIntel®
Core™ i LGA1151 35W processors
▪(1366x768), P-Capmulti-touch display (KPPC1514B/1814B)
▪FHD(1920x1080), P-Cap multi-touch display (KPPC 2114B)
▪Support rich I/O, 2 x GbELAN,2 x COM, 5 x USBetc.
▪Mounting support: Panel/Wall/Stand/VESA(KPPC1514B/1814B/2114B)
▪Metal housing with robust aluminum IP65 compliant front bezel for harsh
environment
▪Fanlessdesign
KPPC1514B/1814B/2114BSeries
Overview
1
Copyright © 2019 NEXCOMInternationalCo., Ltd. All Rights Reserved. KPPC1514B/1814B/2114BUser Manual

Chapter 1: Product Introduction
Specifications
2
Copyright © 2019 NEXCOMInternationalCo., Ltd. All Rights Reserved. KPPC1514B/1814B/2114BUser Manual
Panel
KPPC 1514B
▪LCDsize:15.6”, 16:9
▪Resolution:1366 x 768
▪Luminance:400 cd/m²
▪Contrast ratio: 500
▪LCDcolor:16.7M
▪Viewing angle: 80(U),80(D),85(L), 85(R)
▪Backlight: LED
KPPC 1814B
▪LCDsize:18.5”, 16:9
▪Resolution:1366 x 768
▪Luminance:250 cd/m²
▪Contrast ratio: 1000
▪LCDcolor:16.7M
▪Viewing angle: 80(U),80(D),85(L), 85(R)
▪Backlight: LED
KPPC 2114B
▪LCDsize:21.5”, 16:9
▪Resolution:FHD,1920 x1080
▪Luminance:250 cd/m²
▪Contrast ratio: 3000
▪LCDcolor:16.7M
▪Viewing angle: 89(U),89(D),89(L), 89(R)
▪Backlight: LED
Touchscreen
▪enTpointsP-Cap(projected capacitive touch)
▪Light transmission: 86%
▪Interface: USB
▪Anti-scratch surface:7H hardness
System
▪CPU:6th generation Intel®
CoreTM(formerly codenamedSkylake), with
socketsupporting FCLGA1151 35W processors
▪Memory: DualDDR42133MHz SO-DIMM,up to 16GBfor KPPC1514B/
1814B/2114B, non-ECC, un-buffered
▪Graphics:Intel®
HD Graphics 630
▪BIOS:AMIBIOS
▪WatchdogTimer 1~255sec./min programmable
▪Expansion:1 x half mini-PCIe, 1 x PCIe2.0 (Gen2)
Storage Device
▪1 x 2.5” SATASSD 6.0Gb/s
▪1 x Fullmini-PCIe (mSATA)
Power Requirements
▪Singlepower 12V DC input
▪Powermode AT/ATX(jumper selection)
Front I/O
▪Poweron/off button
▪1 x USB2.0
Rear I/O
▪2 x GbELANRealtek RTL8111G

Chapter 1: Product Introduction
▪4 x USB3.0
▪2 x HDMI (canonly output either one of the HDMI ports)
▪1 x RS232
▪1 x RS232/422/485
▪1 x Line-out
▪1 x Mic-in
▪1 x 12V DC-in power jack
Mechanical & Environment
▪otIePcptiron:IP65panelfront side
▪Mounting: panel/wall/VESA 100mm x 100mm
▪Operating temperature: 32°Fto 113°F (0°C to 45°C)
▪Storagetemperature:-4°F to 140°F (-20°C to 60°C)
▪Operatinghumidity: 10%~90% relativehumidity, non-condensing
▪Dimension:
–417.80 (W)x 312.80 (H) x66.25 (D)mm (KPPC 1514B)
–490.80 (W)x 320.60 (H)x65.15 (D)mm (KPPC 1814B)
–562.40 (W)x 382.40 (H)x65.35 (D)mm (KPPC 2114B)
▪Weight:
–7.44kg (KPPC1514B)
–8.0kg (KPPC1814B)
–9.9kg (KPPC2114B)
OSSupport List
▪indWows10 IoT 64-bit
Certifications
▪EMC & Safety
▪CE/FCCClassA
3
Copyright © 2019 NEXCOMInternationalCo., Ltd. All Rights Reserved. KPPC1514B/1814B/2114BUser Manual

Chapter 1: Product Introduction
Knowing Your KPPCSeries
Rear Top
Power Switch
Pressto power-on or power-off the panelPC.
USB 2.0
Usedto connect USB2.0/1.1 devices.
HDD LED
Indicatesthe hard drive activity of the system.
Power Switch
USB2.0
HDDLED
4
Copyright © 2019 NEXCOMInternationalCo., Ltd. All Rights Reserved. KPPC1514B/1814B/2114BUser Manual
This manual suits for next models
2
Table of contents
Other Nexcom Touch Panel manuals

Nexcom
Nexcom (M)PPC-120T-BT-01 User manual

Nexcom
Nexcom TPPC 2401 User manual

Nexcom
Nexcom APPC 1230T User manual

Nexcom
Nexcom TPPC 2210 User manual

Nexcom
Nexcom eLITE610 User manual

Nexcom
Nexcom OPPC 1240T Series User manual

Nexcom
Nexcom KPPC 1521A User manual

Nexcom
Nexcom APPC 3154 User manual

Nexcom
Nexcom PPC-240T-HW-01 User manual

Nexcom
Nexcom OPPC 1540HT-J1900 User manual