manuals.online logo
Brands
  1. Home
  2. •
  3. Brands
  4. •
  5. NightSearcher
  6. •
  7. Floodlight
  8. •
  9. NightSearcher SAFATEX Titan Atex User manual

NightSearcher SAFATEX Titan Atex User manual

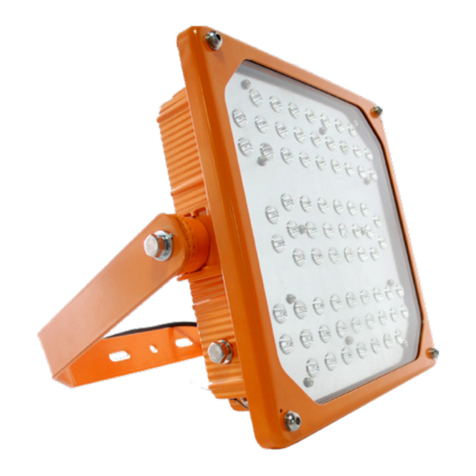
Titan Atex AC Floodlight - User Manual
Specications
Light Output 17000 Lumens, 120W
Light Source LED
Beam Distance 43m beam
Voltage AC100-277V, 50-60HZ
Ambient Temperature -40°C to 55°C
Product size (mm) (L)336 (W)164 (H)336mm
Product weight (g) 10.4kg
NS Part No. SA-TITAN-17000
Installation:
The installation and maintenance must be carried out by an electrician suitably trained in hazardous areas with knowledge
of explosion protection. Ensure that the mains power supply is disconnected before connecting the luminaire. Install the equipment in
accordance with the manufacturer’s instructions as well as any other applicable electrical codes. Always transport and store the equipment in
its original packaging and keep in a dry location. When unpacking check for any cracks or damage in the housing, glass, and glass frame.
If in doubt, do not install.
GUARANTEE TERMS
If at any time, you need to dispose of this product or parts of this product: please note that waste electrical products,
bulbs and batteries should not be disposed of with ordinary household waste.
Recycle where facilities exist. Check with your local authority for recycling advice.
Alternatively, NightSearcher is happy to take receipt of this product at end-of-life and will recycle it on your behalf.
Safe disposal of waste electrical products, batteries and bulbs
Standards:
IEC 60079-0: Explosive atmospheres-Part 0: Equipment-General requirements
IEC 60079-1 : Explosive atmospheres, Part 1: Equipment protection by ame proof enclosures “d”
IEC 60079-31: Explosive atmospheres, Part 31: Equipment dust ignition protection by enclosure”t”
EN 60079-0: Explosive atmospheres-Part 0: Equipment-General requirements
EN 60079-1: Explosive atmospheres-Part 1: Equipment protection by ame proof enclosures “d”
EN 60079-31: Explosive atmospheres-Part 31: Equipment dust ignition protection by enclosure”t”
EN 55015: Limits and methods of measurement of radio disturbance characteristics of electrical
lighting and similar equipment.
EN 60598-1: Luminaires-Part 1: General requirements and tests
IEC 62321: Electrotechnical products - Determination of levels of six regulated substances (lead, mercury, cadmium, hexavalent chromium,
polybrominated biphenyls, polybrominated diphenyl ethers)
COLOURED
CABLE
LIVE Brown
NEUTRAL Blue
EARTH/GROUND GREEN/YELLOW
The cable glands and junction box used with this luminaire must be certied to the Ex requirements.
The cable used must be suitable for the site application and/or the site requirements.
When assembling the cable entries for the mains connection, always observe the manufacturer’s specications for the glands used.
Unused cable entries must be closed and sealed by a certied blanking plug. The cable entries should be securely tightened to ensure
that the minimum protection rating is achieved. The cable entry should be rated to minimum of IP66 to maintain the protection level of the
luminaire.
Taking into Operation:
Prior to operating, check the luminaire for its correct installation in compliance with these operating instructions and other
applicable regulations. Attention: Only fully certied equipment may be put into operation.
Safety Instructions:
- The technical data indicated on the LED luminaire is to be observed.
- Changes of the design and modications to the LED luminaire are not permitted
- Observe the national safety rules and regulations during installation.
- NO eld replaceable parts.
安装:
必须由在危险区域接受过适当培训且具有相关知识的电工进行安装和维护
的防爆。 确保在连接灯具之前断开主电源。 将设备安装在
按照制造商的说明以及任何其他适用的电气规范。 始终使用原始包装运输和存放设备,并存放在干燥的地方。 打开包装时,
检查外壳、玻璃和玻璃框架是否有任何裂缝或损坏。
如有疑问,请勿安装。
灯具出货配有0.5米电缆线:
多种颜色电缆线芯
火线 棕色
零线 蓝色
地线 黄绿色
与灯具一起使用的格兰和接线盒必须符合 Ex要求
所使用的电缆必须适合现场应用和/或现场要求。
连接电缆引入口时,请注意观察厂家所用格兰的规格。
未使用的电缆引入口必须用认证的堵头封闭和密封。电缆入口应牢固拧紧,以确保达到最低保护等级。
电缆入口至少达到IP66,以保持灯具的保护等级。
操作:
操作之前,请检查灯具的正确安装,需符合这些操作说明和其他适用的规定。注意:只有完全认证的设备才能进行操作。
安全守则:
- 请观察LED灯具上的技术参数。
- 不允许更改LED灯具的设计
- 在安装过程中请遵守国家安全规则。
- 现场无可更换的部件。
インストール:
設置と保守は、危険な領域で適切な訓練を受けた知識のある電気技師が行う必要があります
防爆の。 照明器具を接続する前に、主電源が切断されていることを確認してください。 に機器を設置する
製造元の指示およびその他の該当する電気規則に従ってください。 機器は常に元のパッケージで輸送および保管し、乾燥
した場所に保管してください。 開梱するときは、ハウジング、ガラス、ガラスフレームにひびや損傷がないか確認してく
ださい。
疑わしい場合は、インストールしないでください。
0.5メートルの固定ケーブルを使用した場合の電気的接続:
着色ケーブル
ライブ 褐色
中性 青
アース/グラウ
ンド
グリーン/イエロー
この照明器具に使用されるケーブルグランドおよび接続ボックスは、Ex 要件
に適合していることが証明されていなければなりません。使用されるケーブル
は、現場のアプリケーションおよび/またはサイトの要件に適している必要が
あります。
電源接続用のケーブル エントリーを組み立てるときは、使用されるグランドについて製造元の仕様書に従ってください。
未使用のケーブル エントリーは、認定されたブランキング プラグで閉じて密閉する必要があります。最低限の保護定格が達成されるよ
うに、ケーブルの入り口をしっかりと締めてください。照明器具の保護レベルを維持するために、ケーブルの入口はIP66の最小値にする
必要があります。
操作を開始する:
操作の前に、これらの操作説明書およびその他の適用される規則に従って、照明器具の正しい設置状態を確認してください。重要:完全
に認定された機器のみを作動させることができます。
安全についての案内:
- LED照明器具に記載されている技術データを遵守すること。
- LED照明器具の設計変更や変更は許可されていない
- 設置中に国の安全規則および規則を守ってください。
- 交換可能な部品はありません。
Certications and Ratings:
Ex nR IIC T5 or T6 Gc
Ex tb IIIC T95°C or T85°C Dc IP66
ATEX ZONE 2 & 22
ATEX Certicate No.: TÜV 15 ATEX 7672 X
Rohs
ABS
IK 08
CE
IP66
Product Certication
ATEX, CE, RoHS, and ABS
Fix Ceiling bracket to the
expansion anchor bolts USE 4 *M8 screw bolt to x
luminaire and ceiling bracket.
Ceiling mount installation:
2 31
13
?1 3
13
160
40
70
316
All NightSearcher products have a 3-year standard warranty on all manufacturing defects and 1-year warranty on all rechargeable batteries from the
date of purchase.
Extended Warranty: Customers have the option to extend the warranty of the product to 5 years for manufacturing defects.
Registration of the product must be made within one month of purchase by sending us an email sales@nightsearcher.co.uk. In the message please state in your
own words that you would like to register your NightSearc her product for the extended warranty. To view NightSearcher’s warranty policy, please visit:
http://nightsearcher.com/en/warranty.html or scan the QR code.
NightSearcher Limited, Unit 4 Applied House, Fitzherbert Spur, Farlington, Portsmouth, Hampshire, PO6 1TT, UK
T: +44 (0)23 9238 9774 • E: sales@nightsearcher.co.uk • W: www.nightsearcher.co.uk
将天花板支架固定到
膨胀锚栓
使用4 * M8螺栓固定
灯具和天花板支架。
天花板安装:
2 31
13
?1 3
13
160
40
70
316
将天花板支架固定到
膨胀锚栓
使用4 * M8螺栓固定
灯具和天花板支架。
天花板安装:
2 31
13
?1 3
13
160
40
70
316
Electrical connections when supplied with 0.5 metre xed cable:
Installation:
L’installation et l’entretien doivent être effectués par un électricien dûment formé dans les zones dangereuses et connaissant
de protection contre les explosions. Assurez-vous que l’alimentation secteur est débranchée avant de brancher le luminaire. Installez
l’équipement dans conformément aux instructions du fabricant ainsi qu’à tout autre code électrique applicable. Transportez et stockez
toujours l’équipement dans son emballage d’origine et conservez-le dans un endroit sec. Lors du déballage, vériez s’il y a des ssures
ou des dommages dans le boîtier, le verre et le cadre en verre.En cas de doute, ne l’installez pas.
Raccordements électriques fournis avec câble xe de 0.5 mètres:
CÂBLE COULEUR
VIVRE MARRON
NEUTRE BLEU
TERRE / TERRE VERT JAUNE
Les presse-étoupes et la boîte de raccordement utilisés avec ce luminaire doivent être certi-
és selon les exigences de l’Ex. Le câble utilisé doit être adapté à
l’application du site et / ou aux exigences du site.
Lors de l’assemblage des entrées de câble pour le branchement secteur, respecter les indications du fabricant pour les gaines utilisées.
Les entrées de câble inutilisées doivent être fermées et scellées par une che de sécurité certiée. Les entrées de câbles doivent être
solidement serrées pour garantir une protection minimale. L’entrée de câble doit être classée au minimum à IP66 pour maintenir le niveau
de protection du luminaire.
Mise en service:
Avant le fonctionnement, vériez que le luminaire est correctement installé conformément aux présentes instructions de service et aux
autres prescriptions applicables. Attention: Seul un équipement entièrement certié peut être mis en service.
Consignes de sécurité:
- Les indications techniques indiquées sur le luminaire LED doivent être respectées.
- Les modications de la conception et les modications apportées au luminaire à DEL ne sont pas autorisées
- Respecter les règles de sécurité nationales lors de l’installation.
- PAS de pièces remplaçables sur site.
Installazione:
L’installazione e la manutenzione devono essere eseguite da un elettricista adeguatamente formato in aree pericolose con conoscenza
di protezione contro le esplosioni. Assicurarsi che l’alimentazione di rete sia scollegata prima di collegare l’apparecchio. Installare l’attrez-
zatura in conformità con le istruzioni del produttore e qualsiasi altro codice elettrico applicabile. Trasportare e conservare sempre l’appar-
ecchiatura nella sua confezione originale e conservarla in un luogo asciutto. Durante il disimballaggio, vericare la presenza di crepe o
danni nell’alloggiamento, nel vetro e nella cornice del vetro. In caso di dubbio, non installare.
I collegamenti elettrici quando forniti con cavo sso 0.5 metro:
CAVO NUMERATA
VIVRE Marrone
NEUTRO Blu
EARTH / TERRA VERDE GIALLO
La scatola passacavi e connessione utilizzata con questo apparecchio deve
essere certicato ai requisiti Ex. Il cavo utilizzato deve essere adatto per l’appli-
cazione del sito e / oi requisiti del sito.
Durante il montaggio delle entrate cavi per il collegamento alla rete, osservare sempre le speciche del produttore per le
ghiandole utilizzati. ingressi cavi non utilizzati devono essere chiusi e sigillati da un tappo cieco certicato. Gli ingressi dei cavi devono
essere serrati per garantire che il rating minimo di protezione è raggiunto. L’ingresso dei cavi deve essere
valutato al minimo di IP66 per mantenere il livello di protezione dell’apparecchio.
Prendendo in funzione:
Prima di utilizzare, controllare l’apparecchio per la sua corretta installazione in conformità alle presenti istruzioni per l’uso e le altre norme
applicabili. Attenzione: solo apparecchi completamente certicato può essere messo in funzione.
Istruzioni di sicurezza:
- I dati tecnici indicati sulla illuminazione a LED è da osservare.
- Variazioni di progettazione e modiche al corpo illuminante a LED non sono ammessi
- Rispettare le regole e le norme di sicurezza nazionali durante l’installazione.
- NO campo parti sostituibili.
Instalación:
La instalación y el mantenimiento deben ser realizados por un electricista debidamente capacitado en áreas peligrosas con conocimiento
de protección contra explosiones. Asegúrese de que la fuente de alimentación principal esté desconectada antes de conectar la luminar-
ia. Instale el equipo en de acuerdo con las instrucciones del fabricante, así como con cualquier otro código eléctrico aplicable. Transporte
y almacene siempre el equipo en su embalaje original y manténgalo en un lugar seco. Al desempacar, verique si hay grietas o daños en
la carcasa, el vidrio y el marco de vidrio. En caso de duda, no instale.
Conexiones eléctricas cuando se suministran con cable jo de 0.5 metros:
CABLE COLORIDO
VIVIR MARRÓN
NEUTRAL AZUL
TIERRA VERDE AMARILLO
Los prensaestopas y la caja de conexiones utilizados con esta luminaria deben estar certicados
según los requisitos de Ex. El cable utilizado debe ser adecuado para la aplicación del sitio y / o
los requisitos del sitio.
Al montar las entradas de cable para la conexión a la red, observe siempre las especicaciones del fabricante de los prensaestopas uti-
lizados.Las entradas de cable no utilizadas deben cerrarse y sellarse con un tapón de obturación certicado. Las entradas de cable deben
estar rmemente apretadas para asegurar que se alcance la clasicación de protección mínima. La entrada del cable debe tener un valor
mínimo de IP66 para mantener el nivel de protección de la luminaria.
En funcionamiento:
Antes de operar, compruebe que la luminaria ha sido instalada correctamente de acuerdo con estas instrucciones de operación y otras
regulaciones aplicables. Atención: Sólo se puede poner en funcionamiento un equipo totalmente certicado.
Instrucciones de seguridad:
- Se deben observar los datos técnicos indicados en la luminaria LED.
- Los cambios en el diseño y las modicaciones de la luminaria LED no están permitidos
- Observar las normas de seguridad nacionales durante la instalación.
- NO hay piezas reemplazables en el campo.
Installation:
Die Installation und Wartung muss von einem Elektriker durchgeführt werden, der über Kenntnisse in explosionsgefährdeten Bereichen
verfügt des Explosionsschutzes. Stellen Sie sicher, dass die Netzstromversorgung getrennt ist, bevor Sie die Leuchte anschließen.
Installieren Sie das Gerät in in Übereinstimmung mit den Anweisungen des Herstellers sowie allen anderen anwendbaren elektrischen
Vorschriften. Transportieren und lagern Sie das Gerät immer in der Originalverpackung und bewahren Sie es an einem trockenen Ort auf.
Überprüfen Sie beim Auspacken Gehäuse, Glas und Glasrahmen auf Risse oder Beschädigungen.
Im Zweifelsfall nicht installieren.
Elektrische Anschlüsse bei 0.5 Meter Festkabel:
FARBIGES KABEL
LEBEN BRAUN
NEUTRAL BLAU
ERDBODEN GRÜN GELB
Die mit dieser Leuchte verwendeten Kabelverschraubungen und
Anschlussdosen müssen nach den Ex Anforderungen zertiziert sein
Das verwendete Kabel muss für die Standortanwendung und / oder die
Standortanforderungen geeignet sein.
Bei der Montage der Kabeleinführungen für den Netzanschluss beachten Sie bitte die Herstellerangaben für die verwendeten Drüsen.
Unbenutzte Kabeleinführungen müssen durch einen zertizierten Blindstopfen verschlossen und versiegelt werden. Die Kabeleinführun-
gen sollten sicher angezogen werden, um sicherzustellen, dass die minimale Schutzleistung erreicht wird. Die Kabeleinführung sollte auf
mindestens IP66 ausgerichtet sein, um das Schutzniveau der Leuchte aufrechtzuerhalten.
Inbetriebnahme:
Prüfen Sie vor dem Betrieb die Leuchte auf die korrekte Installation unter Beachtung dieser Bedienungsanleitung und anderer geltender
Vorschriften. Achtung: Es dürfen nur vollständig zertizierte Geräte in Betrieb genommen werden.
Sicherheitshinweise:
- Die auf der LED-Leuchte angegebenen technischen Daten sind zu beachten.
- Änderungen der Auslegung und Änderungen an der LED-Leuchte sind nicht zulässig
- Beachten Sie bei der Installation die nationalen Sicherheitsbestimmungen und Vorschriften.
- KEIN Feld austauschbare Teile.
Fixer le support de plafond au
boulons d’ancrage d’expansion UTILISER 4 * M8 boulon à vis
pour xer luminaire et support
de plafond.
Installation au plafond:
2 31
13
?1 3
13
160
40
70
316
Fixer le support de plafond au
boulons d’ancrage d’expansion UTILIZZARE bullone M8 4 *
per il ssaggio apparecchio
e supporto a softto.
Installazione a softto:
2 31
13
?1 3
13
160
40
70
316
Fixer le support de plafond au
boulons d’ancrage d’expansion USE 4 * tornillo M8 para jar
Luminaria y soporte de techo.
Instalación de montaje en
techo:
2 31
13
?1 3
13
160
40
70
316
Fixer le support de plafond au
boulons d’ancrage d’expansion USE 4 * tornillo M8 para jar
Luminaria y soporte de techo.
Instalación de montaje en
techo:
2 31
13
?1 3
13
160
40
70
316

Other NightSearcher Floodlight manuals

NightSearcher Galaxy Star User manual

NightSearcher

NightSearcher Galaxy Star User manual

NightSearcher GALAXY-PRO 6K User manual

NightSearcher

NightSearcher GALAXY-PRO 6K User manual

NightSearcher Solaris MegaStar Lite 20K User manual

NightSearcher

NightSearcher Solaris MegaStar Lite 20K User manual

NightSearcher NSPRO250 User manual

NightSearcher

NightSearcher NSPRO250 User manual

NightSearcher TRIGGER-PRO User manual

NightSearcher

NightSearcher TRIGGER-PRO User manual

NightSearcher WORKBRITE Series User manual

NightSearcher

NightSearcher WORKBRITE Series User manual

NightSearcher SLIMSTAR-PIR Series User manual

NightSearcher

NightSearcher SLIMSTAR-PIR Series User manual

NightSearcher NS750 XML User manual

NightSearcher

NightSearcher NS750 XML User manual

NightSearcher PANTHER HID Operator's manual

NightSearcher

NightSearcher PANTHER HID Operator's manual

NightSearcher Solaris Pro-X User manual

NightSearcher

NightSearcher Solaris Pro-X User manual

NightSearcher Solaris Maxi 20K Series User manual

NightSearcher

NightSearcher Solaris Maxi 20K Series User manual

NightSearcher SOLOSTAR User manual

NightSearcher

NightSearcher SOLOSTAR User manual

NightSearcher Panther XHP-X User manual

NightSearcher

NightSearcher Panther XHP-X User manual

NightSearcher WorkStar User manual

NightSearcher

NightSearcher WorkStar User manual

NightSearcher Trigger Pro User manual

NightSearcher

NightSearcher Trigger Pro User manual

NightSearcher Solaris Pro User manual

NightSearcher

NightSearcher Solaris Pro User manual

NightSearcher FASTSTAR NSFASTSTAR10 User manual

NightSearcher

NightSearcher FASTSTAR NSFASTSTAR10 User manual

NightSearcher SL1600 User manual

NightSearcher

NightSearcher SL1600 User manual

NightSearcher Solaris Pro User manual

NightSearcher

NightSearcher Solaris Pro User manual

NightSearcher ProStar User manual

NightSearcher

NightSearcher ProStar User manual

NightSearcher SAFATEX Floodlight User manual

NightSearcher

NightSearcher SAFATEX Floodlight User manual

NightSearcher SL200 User manual

NightSearcher

NightSearcher SL200 User manual

NightSearcher ProStar User manual

NightSearcher

NightSearcher ProStar User manual

NightSearcher Hawk-Star X User manual

NightSearcher

NightSearcher Hawk-Star X User manual

Popular Floodlight manuals by other brands

JB Systems Light Beam Twister Operation manual

JB Systems Light

JB Systems Light Beam Twister Operation manual

Green Brook LEDAF33 Installation & operating instructions

Green Brook

Green Brook LEDAF33 Installation & operating instructions

HQ Power VDPL300D user manual

HQ Power

HQ Power VDPL300D user manual

Night Watcher NW520 user guide

Night Watcher

Night Watcher NW520 user guide

Green Brook LEDAF36 Installation & operating instructions

Green Brook

Green Brook LEDAF36 Installation & operating instructions

Gamma+ Starburst PixBar user manual

Gamma+

Gamma+ Starburst PixBar user manual

MegaLite Outshine T100 user manual

MegaLite

MegaLite Outshine T100 user manual

Sea-Dog 405620-3 Installation & operation instructions

Sea-Dog

Sea-Dog 405620-3 Installation & operation instructions

Timeguard LED100PIRBP Installation & operating instructions

Timeguard

Timeguard LED100PIRBP Installation & operating instructions

XanLite PR100WMB user manual

XanLite

XanLite PR100WMB user manual

American DJ JELLY COSMOS BALL User instructions

American DJ

American DJ JELLY COSMOS BALL User instructions

Hyperikon Triple Motion installation instructions

Hyperikon

Hyperikon Triple Motion installation instructions

Chauvet Rogue R2 Wash Quick reference guide

Chauvet

Chauvet Rogue R2 Wash Quick reference guide

TECH GT-GCR10W-40 manual

TECH

TECH GT-GCR10W-40 manual

Lightforce ROK40 User instructions

Lightforce

Lightforce ROK40 User instructions

Mebner UWL 1220/Tec operating instructions

Mebner

Mebner UWL 1220/Tec operating instructions

Red Arrow FLAC50Y installation instructions

Red Arrow

Red Arrow FLAC50Y installation instructions

Honeywell ExiLED M ST LED 25m quick start guide

Honeywell

Honeywell ExiLED M ST LED 25m quick start guide

manuals.online logo
manuals.online logoBrands
  • About & Mission
  • Contact us
  • Privacy Policy
  • Terms and Conditions

Copyright 2025 Manuals.Online. All Rights Reserved.