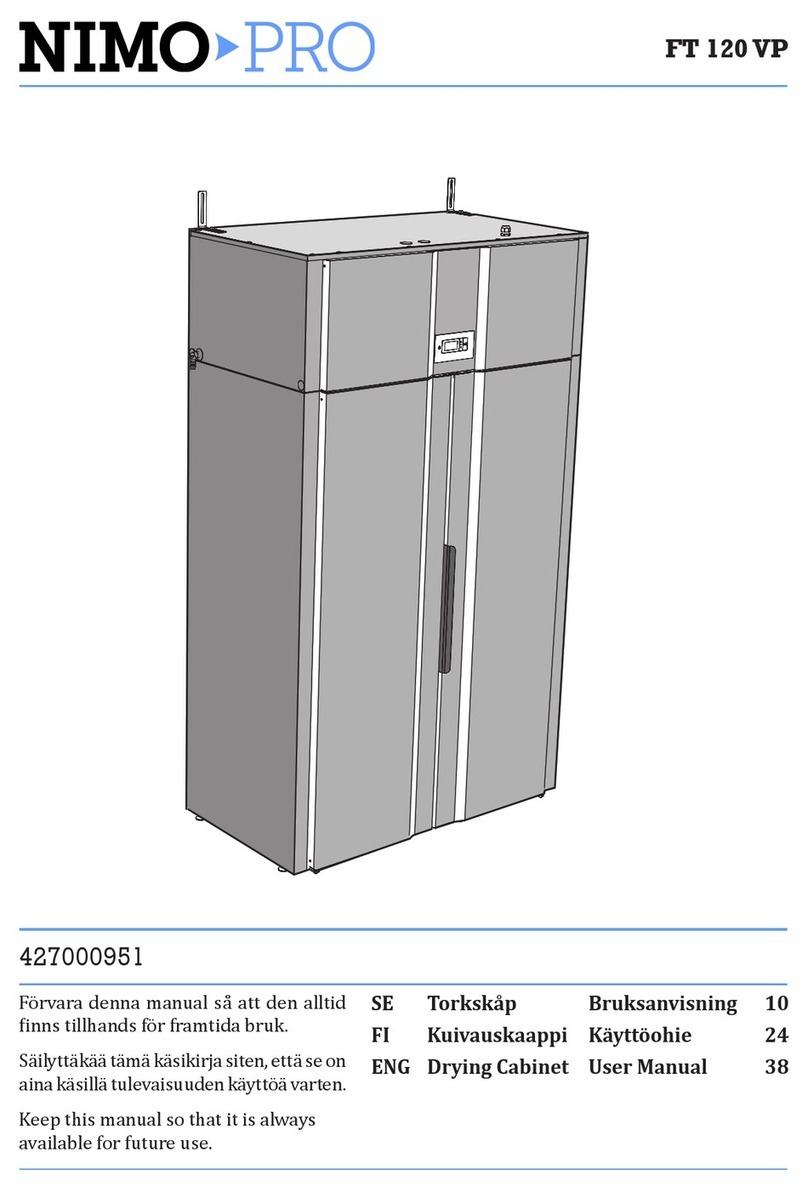
NIMO ECO Dryer 2.0 HP User manual

ECO DRYER 2.0
HELLO
Drying Cabinet
ECO Dryer 2.0 HP
Installation and
User Manual
ENG Art. No: 427000851

ECO DRYER 2.0 HP
Dear NIMO customer,
Congratulations on making an excellent choice, and welcome to the NIMO family,
a global family with its roots in Sweden.
We at NIMO thank you for your trust and hope that you will enjoy using your
new drying cabinet.
A good drying cabinet should be well designed, dry clothes well, have a low
environmental impact, be user-friendly, save time and energy, have a long service
life and be reliable. NIMO offers you all these features.
When you buy a NIMO product you can be sure that the inside is just as good
as the outside and that the ethics and morality that go into building this product
are just as high as the quality and function you are getting. That’s what Swedish
quality is all about.
Before using the product for the first time, please read the user instructions and the
advice on caring for the product. This will help you get the best possible results from
your product and all its functions.
If you have any questions, do not hesitate to call us or to contact us through our
website.
Best wishes from Sweden and the NIMO team.
IDENTIFICATION PLATE
Doc. No 427000851 Rev. 01
Right to make changes reserved.
Printed on environmentally friendly paper meeting
the requirements of Friends of the Earth Sweden
and the Swedish Society for Nature Conservation.

3
Manufacturer: NIMOVERKEN AB
BOX124
S548 22 HOVA SWEDEN
PH +46 0 506 488 00
FAX +46 0 506 488 10
www.nimoverken.com
CONTENTS
THIS USER MANUAL 4
SAFE OPERATION 5
DESCRIPTION OF THE CABINET 6
AIR FLOW IN THE CABINET 7
CONDENSATION WATER 8
DETACHABLE WATER TANK 8
CONNECTION TO FLOOR DRAIN 9
RECONNECTION TO WATER TANK 9
INSTALLATION 10
UNPACKING 10
REVERSING THE DOOR SWING
OPENING 11
PLACEMENT/ATTACHMENT 11
ELECTRICAL CONNECTIONS 12
CONTROL PANEL 13
BUTTONS 13
START-UP 14
HOW TO PLACE THE WASHING 15
USER TIPS 15
DRYING PROGRAMME 16
SELECTION OF DRYING
PROGRAMME 16
DRYING FUNCTION 17
START THE DRYING PROGRAMME 17
STOP 18
THE DOOR IS OPENED 18
AUTOMATIC PROGRAMMES –
PARAMETER SETTING 19
PARAMETER ADJUSTMENT 20
INTRODUCTION 20
PARAMETER ADJUSTMENT 20
CARE 22
CLEANING 22
REPLACEMENT PARTS 22
HOW TO DEAL WITH MINOR
FAULTS YOURSELF 23
TECHNICAL DATA 25

4
THIS USER MANUAL
NOTE Keep the user
manual so that it is always
available for future use.
The contents of this user manual describe
the drying cabinet’s functions and
how it should be used. It also includes
instructions for installation and main-
tenance.

5
SAFE OPERATION
This advice on safe operation has been compiled so that you can avoid
incorrect use and unnecessary risks of accidents and should be read
before the drying cabinet is installed and used.
CAUTION: This equipment is only intended to be used to dry textiles
washed in water.
pThe drying cabinet can be used by children over the age of 8 and
persons (including children) with impaired physical, sensory or
mental capacity or who lack experience or knowledge, provided
they have received guidance or information on how to use the
drying cabinet in a safe way and understand the risks that may
occur.
pDo not allow children to play in, on or with the drying cabinet.
Keep an eye on children when they are in the immediate vicinity of
the cabinet.
pIf the mains lead is damaged it must be immediately replaced,
and this work must only be performed by the manufacturer, the
manufacturer’s service agent or similarly qualified persons in
order to avoid danger.
pCleaning and maintenance must not be performed by children
without supervision.
pAvoid hanging textiles that are dripping or soaking wet as the
cabinet is not intended to collect large volumes of water. This may
lead to water escaping onto the floor.
pIf you are hanging items with such a high moisture content that
they are dripping or soaking wet, we recommend spinning them
if possible, and if this is not possible wringing the items before
placing them in the drying cabinet. We also recommend placing
the cabinet on a collecting pan to prevent possible water damage
to the floor.

6
DESCRIPTION OF THE CABINET
The ECO Dryer 2.0 HP drying cabinet
works according to the principle of the
heat pump, with a dehumidifier unit
instead of a conventional hot-air unit.
As a result, the washing is dried at lower
heat and with substantially lower energy
consumption.
The cabinet is a fully enclosed system.
No exhaust air connection is required.
The moisture condenses during the
process, and the water that is formed is
conveyed to a detachable water tank, or
via a hose to the drain.
In addition, the fan is so powerful that
it causes the garment to utter, which
makes the drying process even more
ecient.
Wall attachment
Extendable hanging
sections (3x)
Door hangers
Detachable shoe rack
Tank for condensation
water
Dehumidier unit
Adjustable feet (4x)

7
AIR FLOW IN THE CABINET
Air inow in 6 rows
of holes
Cleaning lter
beneath the shoe
rack
Return air after
dehumidication.
Goes into a duct
on the back of the
drying cabinet.
Dehumidier unit
NOTE Make sure that shoes
and similar items placed in
the cabinet do not block the
air flow.

8
CONDENSATION WATER
Condensation water can be discharged in two ways, either by being collected in a
detachable water tank or by being conveyed through a hose to the oor drain.
DETACHABLE WATER TANK
The water tank is dimensioned to be easily
adequate for a complete wash. A good rule is
always to empty the water tank before each
drying of a load of washing.

9
CONDENSATION WATER
CONNECTION TO FLOOR DRAIN
The oor drain is supplied from the factory with a hose to the de-
tachable water tank. To change to discharging condensation to a
oor drain, proceed as follows:
1Carefully pull the
upper part of the
hose out around
2-3 cm.
2Cut o the hose in
the middle of the
opening.
3Assemble the new
drain hose with the
nipple provided in
the assembly kit, as
illustrated. Pull the
hose on without
hose clips.
Place the drain hose
in one of the recesses
in the panel.
Rear review of the cabinet
New hose to drain
Nipple
Trimmed hose
from pump
RECONNECTION TO
WATER TANK
If you wish to
reconnect the
condensation
water to the
water tank, re-
place the nipp-
le with the blue
plastic tube
supplied in the
assembly kit.
Assemble with
hose clips.

10
UNPACKING
INSTALLATION
Assembly kit:
Complete delivery must include:
Cabinet with dehumidier unit
Assembly kit for attaching cabinet
User Manual
Packaging materials such as plastic and
Styrofoam should be kept out of the
reach of children.
Check that all transportation securing
devices have been removed before
connecting the dryer.
After unpacking, check that the product
is fee of faults. Damage, defects and
any missing parts must be immediately
reported to the dealer.
Check that the product has not been
damaged in transit. Any damage in
transit must be reported to the dealer
within 7 days.
The drying cabinet must
be handled carefully if
it is only standing on its
wooden pallet.
RISK OF TIPPING OVER.
Screw TRX 5x70 fzk
for wall mounting 2
Screw MRT 5 x 20
for xing bracket 4
Nylon wall plug 2
Bracket for wall
attachment 2
Cover plug 9
PCV hose 10 x 13 1.5 m
Plastic tube 8 x 10 1
Spring clip 2
Nipple for water hose 1
Hand brush for lter
1
Qty Qty

11
INSTALLATION
The cabinet is supplied from the factory
with the door hung on the right. The
door can be changed to being hung on
the left.
If this is required, contact
the manufacturer or the
manufacturer’s service
agent.
REVERSING THE DOOR SWING OPENING
PLACEMENT/ATTACHMENT
LEVELLING
The drying cabinet should stand level
on a at surface, resting on all four feet.
Use an Allen wrench and correct the
position of all four adjustable feet from
the outside.
ATTACHMENT TO WALL
The cabinet must be attached to a wall
to prevent tipping over.
The assembly kit contains two angle
brackets mounted on the top of the
drying cabinet as illustrated.The brackets
have slots for adaptation to the wall.
Secure the cabinet to the wall. Screws
for xing, washers and plastic plugs are
provided in the assembly kit.
WARNING The drying cabinet should
not be used without being screwed to a
wall due to the risk of tipping forwards.
Attachment
bracket
Top of the drying
cabinet
The drying cabinet is only designed for
operation indoors in a dry environment.
The drying cabinet should not be installed
in a location where high pressure water is
used for cleaning.

ECODRYER 2.0
HELLO
12
The drying cabinet should be connec-
ted to a 220 - 240V single-phase 50 Hz
grounded socket.
The drying cabinet is supplied ready for
connection with a cable with a groun-
ded plug.
Fuse 10 A.
ELECTRICAL CONNECTIONS
The manufacturer cannot be held liable if
the electrical connections are not carried
out as prescribed in this manual.
Check that the supply current matches
that stated on the identification plate
and that the mains lead is grounded
correctly according to standards in force.
We recommend that the mains lead
be fitted with a residual current device
(RCD).
Appliance must be connected to a
dedicated circuit.
The socket should be located where the
plug can be easily disconnected when
required.
The drying cabinet should be connected
using the plug supplied to a grounded
wall socket, and should not be
permanently connected.
INSTALLATION

ECO DRYER 2.0
HELLO
13
CONTROL PANEL
BUTTONS
The user interface has 4 touch buttons.
ON/OFF
Start/Stop, starts and stops the programme. OK, conrms selection and
moves on to next menu level.
Increase the value or step in one direction through the programmes.
Reduce the value or step in one direction through the programmes.

14
START-UP
WARNING Read the safety instructions
on page 5 before using the drying
cabinet.
Read this user manual
before using the drying
cabinet for the first time.
After the cabinet has been installed and
connected, you should wait at least three
hours before using it for the rst time.This
is to allow the oil in the compressor to run
back. The compressor may otherwise be
damaged.
1Check that the cabinet is rmly at-
tached to the wall. See page 11.
2Check that no packaging material has
been left behind.
3Use a mild detergent with hot water
and wash the inside and outside of
the drying cabinet. See also the‘Care’
section later in the manual.

15
HOW TO PLACE THE WASHING
CAUTION Do not dry garments or
similar items that have been treated with
petrol or other volatile and flammable
substances. This may lead to the
formation of an explosive gas mixture.
USER TIPS
DRYING
Always follow the washing instruc-
tions on garments if such instructions
are provided.
If fabric softener or antistatic product
is used, the manufacturer’s instruc-
tions concerning the utilisation of
the product should be followed.
Remove washing that is already dry.
This will reduce the drying time for
remaining washing.
NOTE If the sealing strip does not close
completely, or if the door has a tendency
to want to open, this may be due to the
cleaning filter not having been installed
correctly. Make sure that the cleaning
filter and the filter holder are pressed
down so that no air leakage occurs.
The cabinet contains three sections with
hangers. Each section has a number of
bars on which to hang the washing.
p
Hang the articles in the drying cabinet
according to how much space they re-
quire – not according to their weight.
pTurn up the two bottom hanger sec-
tions if long garments are to be dried.
pHang gloves, caps, scarves and similar
items on the hanger strips on the
inside of the door.
pDraw the hanger hooks in the upper
hanger section forward so that the
washing can be hung more easily.
Push them back when not in use.
pDo not overload the drying cabinet.
If you do, the washing will become
creased and dry unevenly. Instead,
leave a space between the garments
if possible.
pDo not place shoes or similar items on
the shoe rack in such a way that they
obstruct the air ow.
pAvoid drying heavy items of clothing
together with lighter items as they
have very dierent drying times.
pMake sure not to hang knitted items.
These will stretch unnecessarily as
they are heavy when wet.
p
Avoid hanging textiles that are dripping
or soaking wet in the drying cabinet, as
the drying cabinet is not intended to
collect large volumes of water.
This also leads to abnormally long
drying times.
NOTE When the cabinet is cold, it can
happen that the sealing strip in the door
does not close completely. However, this
is fully compensated when the cabinet
warms up as the sealing strip expands.

16
DRYING PROGRAMME
The drying cabinet is equipped with two automatic programmes:
pNORMAL DRY
pEXTRA DRY
The automatic programmes switch the drying process o automatically
when the items of clothing are dry.
SELECTION OF DRYING PROGRAMME
pNORMAL DRY – Used for drying of garments of normal thickness
pEXTRA DRY – Used for drying of thicker garments, deep drying

17
DRYING FUNCTION
START THE DRYING PROGRAMME
p LAST USED DRYING PROGRAMME
Press the ON/OFF switch to the ON position – indicated by the display lighting up
and showing the most recently run programme.
After a few seconds the display shows the most recently run programme. If this is the
programme you want, press START/STOP.
Or choose another drying programme by stepping UP or DOWN with the arrow keys.
Then start the drying programme with the START/STOP button.
p DOOR OPEN
If the door is open when the drying programme is started and the START/STOP
button is activated, the display shows “CLOSE DOOR”.
Close the door and the selected drying programme will start.
p IN OPERATION
The animated symbol (bar) on the left-hand side of the display indicates that the
drying process is in progress.
p CONDENSATION WATER TANK
If the condensation water tank becomes full, the drying process is immediately dis-
continued and the display will show “CHECK WATER TANK”. Empty the water tank
and re-start the drying process.
p COOLING
During the cooling period the display shows the text “COOL” and counts down the
time 10min, remaining time.

18
DRYING FUNCTION
p PROGRAMME END
When the cooling period has ended, the drying process is nished, and the display
shows the text “END” (ashing).
When the START/STOP button is pressed after the door is opened, the current
programme is stopped and the display shows the most recently used programme.
STOP
To discontinue a drying process in progress, press START/STOP.
THE DOOR IS OPENED
If the door is opened when the drying process is under way, the drying process will
continue for a further 5 minutes. The display will show “CLOSE DOOR” and a pro-
gramme pause period of 5 minutes will be counted down.
If the door is closed within this 5 minute period, the drying process continues.
If the door is left open, the drying process is discontinued after 5 minutes and has
to be re-started manually.
If you wish to discontinue the drying process immediately, without a 5 minute period,
press START/STOP.
NOTE In waiting mode the display goes off after 15 min and lights up again when any
of the buttons on the control panel is activated or the door is opened.
NOTE Empty the condensation tank after each drying process.

19
AUTOMATIC PROGRAMMES – PARAMETER SETTING
There are ways of optimising the drying cabinet’s two automatic programmes in
relation to prevailing installation conditions.
This is done by adjusting the parameter values for the automatic programme con-
cerned on the control panel.
This is only to be done if you nd that:
p The washing is not dried suciently
p The washing is over-dried – long drying time.
See instructions on Parameter setting on the next page.

20
PARAMETER ADJUSTMENT
INTRODUCTION
The drying cabinet is equipped with two automatic programmes, Normal and Extra
Dry. The automatic programmes end automatically when the washing is dry.
To decide when the washing is dry, a measured value is compared with a factory-set
parameter, parameter P 2072 for automatic programme normal dry and para-
meter P 2071 for automatic programme extra dry.
It is primarily these two parameters that are adjusted to optimise the drying process
of the automatic programmes.
p If you nd that washing is not dried suciently in:
Automatic programme normal dry, the parameter value for P 2072
is reduced.
Automatic programme extra dry, the parameter value for P 2071
is increased.
p If you nd that washing is over- dried, long drying time in:
Automatic programme normal dry, the parameter value for P 2072
is increased.
Automatic programme extra dry, the parameter value for P 2071
is reduced.
Optimisation of the drying process must always take place in small steps, start by
adjusting the parameter concerned by 1-2 units up or down, then check the result
after the next drying process and if appropriate make a further adjustment.
PARAMETER ADJUSTMENT
The drying cabinet’s parameter list is accessed through the control panel. The para-
meter list is shown as follows: on the top row of the display the current value is
shown, e.g. P 2071,
on the bottom row the set value of the parameter
is shown.
Other manuals for ECO Dryer 2.0 HP
1
Table of contents
Other NIMO Dryer manuals

NIMO
NIMO ETS 1500 User manual

NIMO
NIMO PRO FT 120 FL User manual

NIMO
NIMO ETS 1700E User manual

NIMO
NIMO ETS 1500 E User manual

NIMO
NIMO Easy Dryer 1700 User manual

NIMO
NIMO PRO FT 120 VP User manual

NIMO
NIMO FT 120 VP User manual

NIMO
NIMO KM 80 User manual

NIMO
NIMO Easy Dryer 1900 User manual

NIMO
NIMO KM 80 User manual
Popular Dryer manuals by other brands

Bosch
Bosch WTW85490BY Installation and operating instructions

Bosch
Bosch Nexxt WTMC4300US Operating & installation instructions

Smeg
Smeg CDL83 Operating and installation instructions

Crosslee PLC
Crosslee PLC TUMBLE DRYER Instructions for use

Maytag
Maytag MDG16MN Specifications

Award
Award TDHP8 user manual