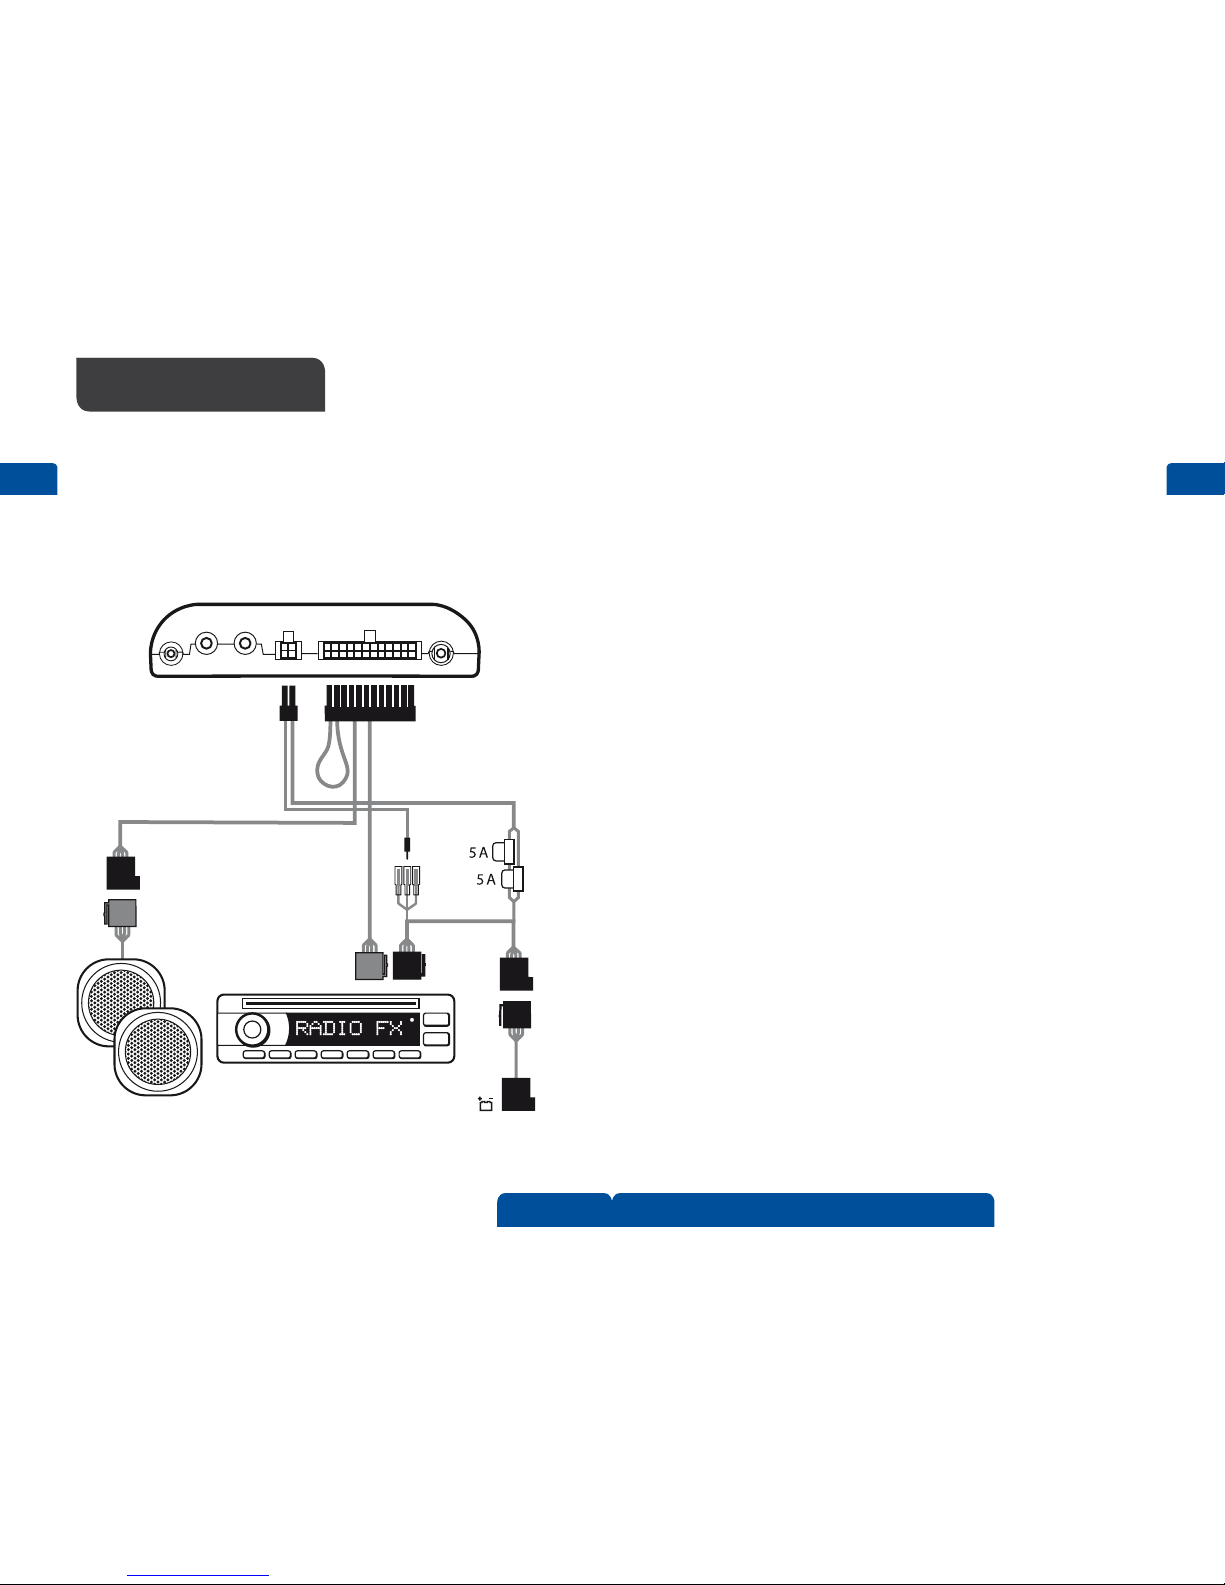
1. To connect the ISO cable to the car radio:
• Unplug the appropriate cables from the car radio, and insert the ISO cable
plug instead. Connect the open ends of the cables to the car radio speakers.
• Connect one of the wires labelled Mute 1, Mute 2, or Mute 3 on the car radio
to the ISO cable. Leave the other mute wires connected as they are.
• Insert the power cable plug of the ISO cable to the respective connector on
the hands-free unit.
• Check the +12-V power pin and the ignition pin on the car radio and the
respective pins of the ISO cable. If necessary, swap the pins on the fuses
of the ISO cable. Plug the ISO cable to the two open ISO connectors.
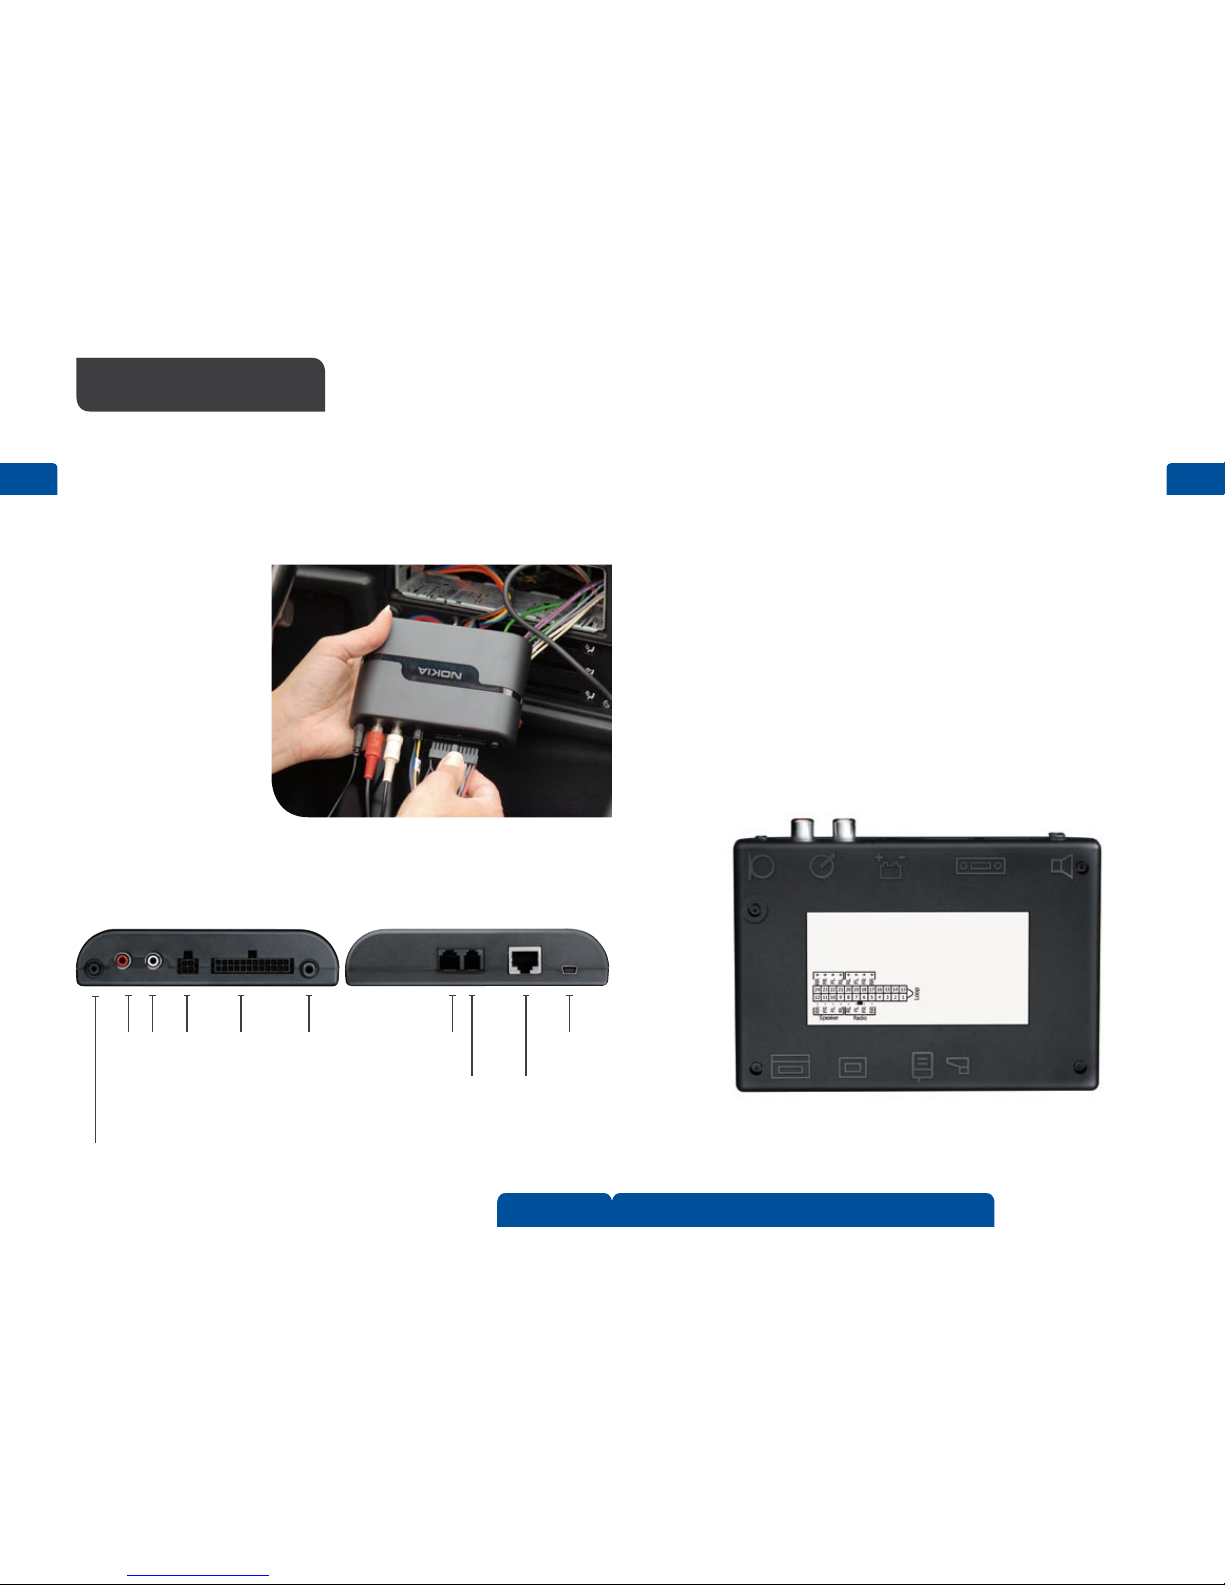
2. Plug the ISO cable to the respective connector on the hands-free unit.
3. Cut the loop indicated with scissors in the figure.
4. Connect the stereo outputs of the hands-free unit to the AUX input of the
car radio. Use an appropriate cable specific to your car radio (this cable is
not supplied with the car kit).
5. Connect the external input device CU-10 and the microphone MP-2 to the
respective connectors on the hands-free unit.
6. To charge a compatible Nokia mobile phone through the car kit, connect
one end of the supplied charging cable CA-134 to the hands-free unit and
the other end to the 2.0 mm (0.08 inch) charging connector of the phone.
7. Switch on the car kit, press the wheel in the standby mode, and select
Settings > Audio > Music output > Automatic detection.
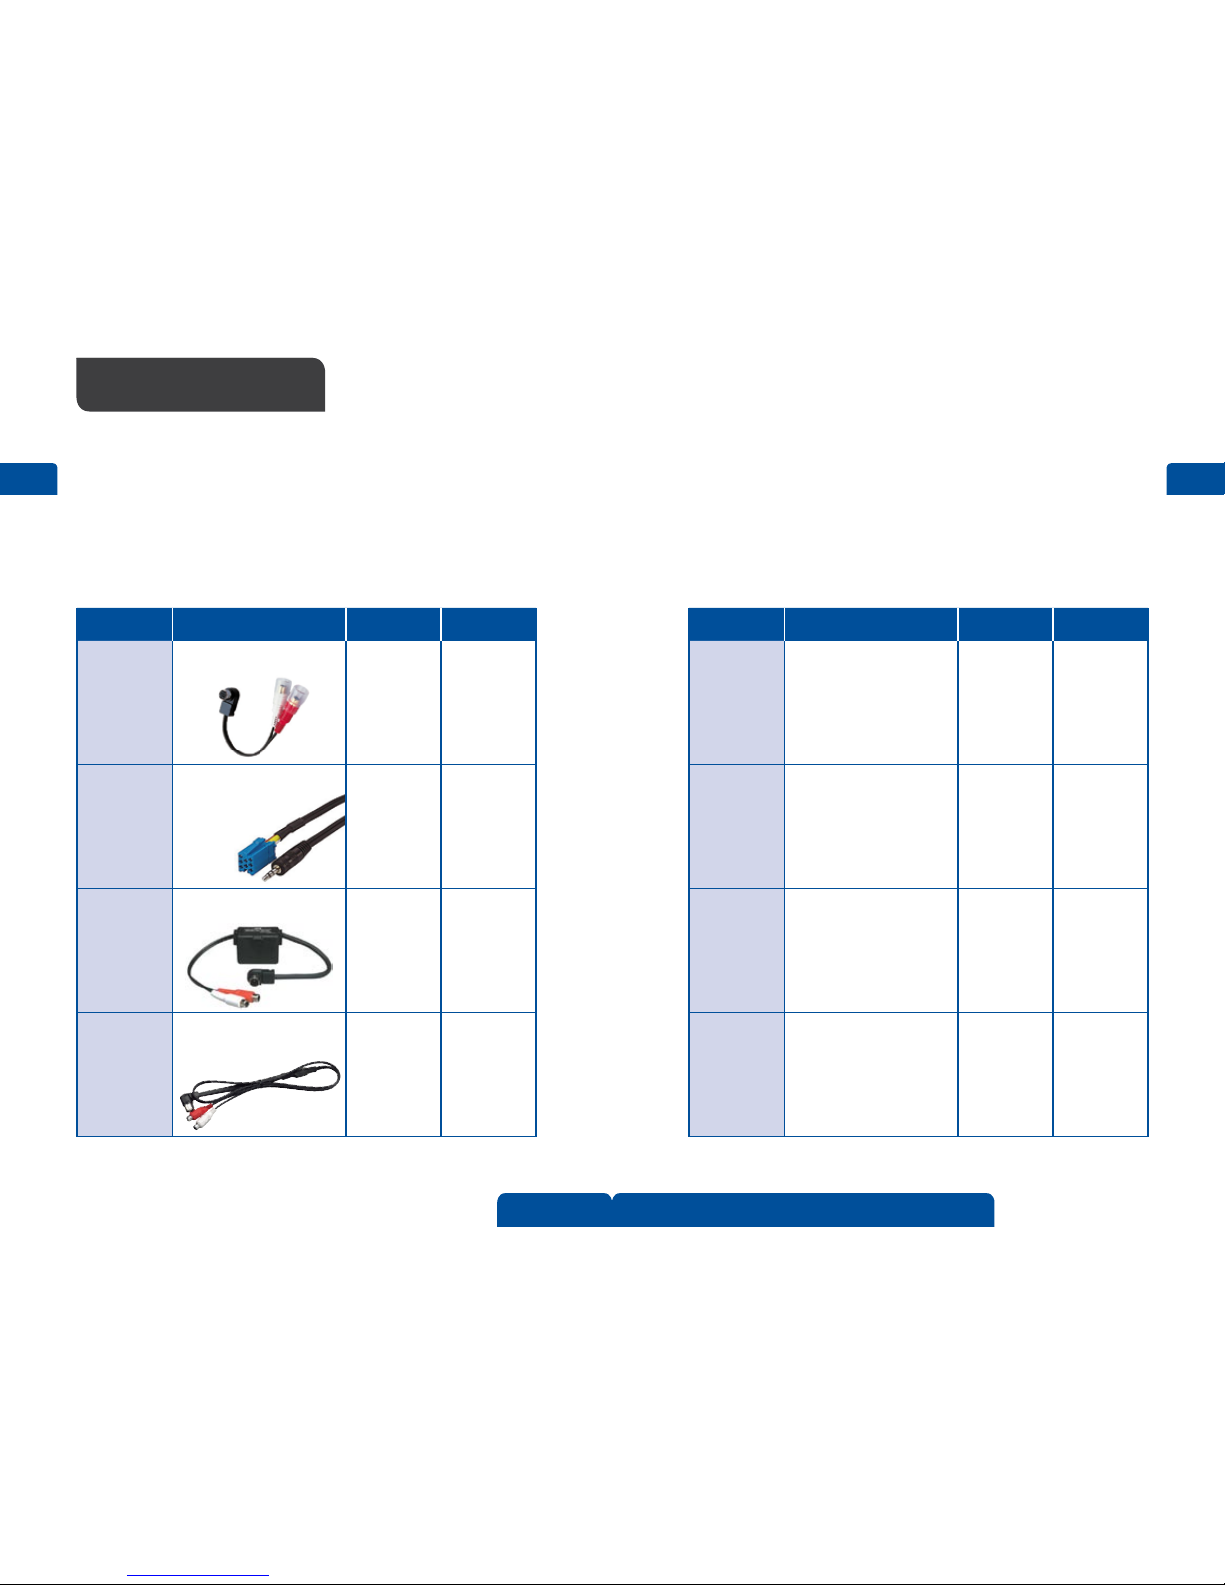
For connection of the line-out of the hands-free unit to the line-in of the radio
a radio-specific cable is needed. To connect the ISO cable to the car radio
adaptor cables might be needed.
Usage of the car loudspeakers for telephony
and the car stereo system for music
Please note: car accessories must be installed or repaired by qualified professionals only.
Carefully read the User Guide and Installation Guide for each system to be installed.
13
Installation guidelines
12
© 2008 Nokia.
All rights reserved.
Options of installation, II