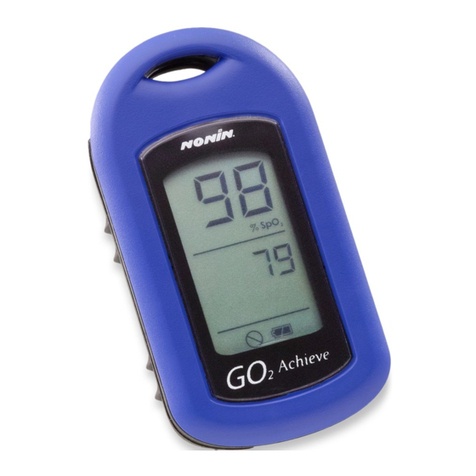
Nonin 9571 Go2 LED User manual

9571
MODEL
User Guide
GO2 LED Users Guide1 Cover nospinelines.indd 2 10/12/2009 3:25:41 PM

i ii
ENGLISH
Introduction ....................................................................................................1
Contents of Package .......................................................................................1
Symbols ..........................................................................................................2
Intended Use ...................................................................................................4
Installing the Battery.......................................................................................8
Applying the GO2 LED Model 9571 to Your Finger ........................................10
Activating the Device and Verifying Operation ..............................................12
Reading Your Results ....................................................................................13
Care and Maintenance ..................................................................................15
Specifications ................................................................................................20
Equipment Response Time ............................................................................23
Testing Summary ..........................................................................................24
SpO2 Accuracy Testing ............................................................................24
Pulse Rate Motion Testing ......................................................................24
Low Perfusion Testing .............................................................................24
Warranty .......................................................................................................25
Table of Contents
7366-201-01 GO2 LED User Guide1_ENG.indd 1-2 3/12/2010 10:31:57 AM

1 2
ENGLISH
Introduction
Thank you for buying the GO2 LED Model 9571 Fingertip Pulse Oximeter. This small, por-
table device will give you important information about your oxygen saturation (the amount
of oxygen in your blood) and pulse rate at your fingertip! The Model 9571 is easy to use and
needs no routine maintenance except battery replacement. This User Guide explains how to
use and care for your GO2 LED Model 9571.
Contents of Package
• GO2 LED Model 9571
• One AAA Alkaline Battery
• User Guide
• Quick Guide (Back Cover)
Symbols
The following symbols are associated with your GO2 LED Model 9571.
Symbol Definition of Symbol
Consult Instructions for Use
! Caution!
0123 CE Marking: conformance to EC Directive No. 93/42/EEC for medical devices
Type BF Applied Part (patient isolation from electrical shock).
Not for Continuous Monitoring (no alarm for SpO2)
UL Mark for Canada and the United States with respect to electric shock,
fire, and mechanical hazards only in accordance with IEC 60601-1, UL 60601-1
and CAN/CSA C22.2 No. 601.1.
7366-201-01 GO2 LED User Guide1_ENG.indd 1-2 3/12/2010 10:31:58 AM

3 4
ENGLISH
Battery
Indicates separate collection for electrical and electronic equipment (WEEE).
IP33 Protected against spraying water and against access to hazardous parts
with a tool, per IEC 60529.
SN
Serial Number
EC
REP
Authorized Representative in the European Community
+70°C
-30°C
Temperature Limitation for storage/shipping
%SpO2Percent Oxygen Saturation Display
Pulse Rate Display
Intended Use
GO2 LED Model 9571 is intended to measure blood oxygen saturation (%SpO2) (the
amount of oxygen in your blood) and pulse rate of both adults and children. It is de-
signed for fingers (not the thumb) between 0.3 and 1.0 inch (0.8 – 2.5cm) thick. The GO2
LED Model 9571 is intended for low perfusion conditions as defined in the specifications
in this manual. Limit finger movement as much as possible when using this device. Con-
tact your licensed health care professional for your expected oxygen saturation level (to
compare with your readings). The GO2 LED Model 9571 is intended for Home Health
Care Only.
Contraindications
• Do not use the GO2 LED in a magnetic resonance (MR) environment.
Warnings
• Keep the oximeter away from young children. Small items such as the battery door,
battery, and lanyard are choking hazards.
• Certain activities may pose a risk of injury, including strangulation, if the lanyard
should become wrapped around your neck. Use the lanyard with caution.
7366-201-01 GO2 LED User Guide1_ENG.indd 3-4 3/12/2010 10:32:00 AM

5 6
ENGLISH
Cautions
• Do not use the GO2 LED as the only basis for making medical decisions. It is intended
only to be used as additional information that you can give to your licensed
health care professional.
• The GO2 LED might misinterpret excessive movement as good pulse strength. Limit
finger movement as much as possible when using the device.
• The GO2 LED must be able to measure your pulse properly to give you an accurate reading. Do
not put the device on the same hand/arm when using a blood pressure cuff or monitor.
• The GO2 LED has no alarms. It will not sound if the amount of oxygen in your blood is
low or if your pulse rate is too high or too low.
• Do not place the GO2 LED in liquid or clean it with agents containing ammonium chloride,
isopropyl alcohol, or products that are not listed in this User’s Guide.
• The GO2 LED is not intended for use in institutions.
• Any of the following conditions may reduce the performance of the GO2 LED:
- flickering or very bright light;
- weak pulse quality (low perfusion);
- low hemoglobin;
- arterial catheters;
- nail polish, and/or artificial nails; and
- any tests recently performed on you that required an injection of
intravascular dyes.
• The GO2 LED may not work if you have poor circulation. Rub your finger to
increase circulation, or place the device on another finger.
• The GO2 LED measures oxygen saturation of functional hemoglobin. High levels of
dysfunctional hemoglobin (caused by sickle cell anemia, carbon monoxide, etc.)
could affect the accuracy of the measurements.
• Batteries can leak or explode if used or disposed of improperly. Remove the
battery if the GO2 LED will be stored for more than 30 days.
• Do not use the GO2 LED in a combustible environment (oxygen enriched environment).
• Do not use the GO2 LED outside the specified operating and storage temperature ranges.
• Do not use the GO2 LED for more than 30 minutes without relocating the device
to another finger.
!
7366-201-01 GO2 LED User Guide1_ENG.indd 5-6 3/12/2010 10:32:00 AM

7 8
ENGLISH
• The GO2 LED needs to be used according to information provided in the User Guide.
• Do not tamper with, or hang lanyard from the flexible circuit.
• Radios and cell phones or similar devices may affect the GO2 LED and should be kept at
least 2 meters (7 feet) away from the device.
• Field strengths from fixed transmitters, such as base stations for radio (cellular/cordless)
telephones and land mobile radios, amateur radio, AM and FM radio broadcast towers
and TV broadcast towers may affect accuracy.
• Use in emergency vehicles with communication systems may affect accuracy.
• Functional tester cannot be used to assess the accuracy of this pulse oximeter.
• Follow local disposal and recycling laws for the GO2 LED and its components,
including the battery.
• The GO2 LED is a precision electronic instrument and must be repaired by Nonin
Technical Service.
Installing the Battery
One 1.5 volt AAA-size (LR03) battery powers the GO2 LED for approximately 2,400
measurements. Nonin recommends using alkaline batteries (one is included with
each new GO2 LED). NOTE: You may use rechargeable batteries; however, they may
require more frequent replacement.
1. Remove the battery door located on the left side of the GO2 LED by sliding it
towards you (see page 9 diagram).
2. Insert one new 1.5 volt AAA-size battery. Follow the plus (+) and minus (-) markings
for battery direction (as shown inside of the battery compartment).
7366-201-01 GO2 LED User Guide1_ENG.indd 7-8 3/12/2010 10:32:00 AM

9 10
ENGLISH
3. Carefully reposition the battery door. NOTE: Do not force it into place; it fits only
when positioned correctly.
When battery is low, the numeric displays flash once per second. Replace battery as soon as
possible. Remove battery if the device will be stored for more than 30 days.
Applying the GO2 LED Model 9571 to Your Finger
Hold the GO2 LED with the display facing toward you; slide your finger into the opening
at the bottom of the device, as shown below, until the fingertip touches the built-in
stop guide.
For best results, make sure the finger is centered within the finger guide; keep the GO2
LED at heart or chest level.
7366-201-01 GO2 LED User Guide1_ENG.indd 9-10 3/12/2010 10:32:00 AM

11 12
ENGLISH
NOTE: Correct positioning of the device on your finger is critical for accurate
measurements. While on the finger, do not press the GO2 LED against any surface and
do not squeeze or hold it together. The internal spring provides the correct pressure;
additional pressure may cause inaccurate readings.
Activating the Device and Verifying Operation
The GO2 LED automatically turns on when a finger is inserted. When a finger is inserted,
the GO2 LED performs a brief self test, as shown below. Verify that all segments of the
LED (Light Emitting Diode) display appear during the startup sequence.
7366-201-01 GO2 LED User Guide1_ENG.indd 11-12 3/12/2010 10:32:00 AM

13 14
ENGLISH
Reading Your Results
When you put your finger in the GO2 LED, you’ll notice an LED display come on. The num-
bers you see show:
• the amount of oxygen in your blood, displayed as %SpO2; and
• your Pulse Rate, displayed as a 2 or 3 digit number, measuring the number
of times your heart beats per minute.
At the bottom of the display window, a tricolor LED Pulse Quality Indicator shows the pulse
signal quality, while blinking at the corresponding pulse rate. This display changes colors to
alert you to changes in pulse quality that may affect the readings: green - good pulse signal,
yellow - marginal pulse signal, and red - an inadequate pulse signal.
If you are not getting a pulse rate reading and your pulse quality indicator is marginal or
inadequate, warm the finger or reposition to another finger.
After the startup sequence, the GO2 LED begins sensing the pulse (indicated by the blinking
pulse quality indicator). Allow the device to stabilize, observing about 4 seconds of continu-
Pulse Quality Indicator
Percent Oxygen Saturation
Pulse Rate
ous green-colored pulse quality before relying on the displayed values. It is common for the
displayed values to fluctuate slightly over a period of several seconds. If the pulse quality
indicator blinks yellow or red, try another finger.
A minus sign (-) appears in the left-most digit of the %SpO2 display when the GO2 LED
senses that the finger has been removed. The last measured SpO2 and pulse rate values
freeze for 10 seconds, then the device turns off. The device will automatically shut off (to
conserve battery life) approximately 10 seconds after the finger is removed, or after a
2-minute period of inadequate pulse signals.
7366-201-01 GO2 LED User Guide1_ENG.indd 13-14 3/12/2010 10:32:02 AM

15 16
ENGLISH
Care and Maintenance
The GO2 LED requires no calibration or periodic maintenance other than battery replace-
ment. Wipe the device with a soft cloth dampened with a mild detergent or 10% bleach
solution. Do not use undiluted bleach or any cleaning solution other than those recom-
mended here, as permanent damage could result. Dry with a soft cloth, or allow to air dry.
Clean once per week or more frequently if handled by multiple users.
Caution: Do not place the GO2 LED in liquid or clean it with agents containing ammo-
nium chloride, isopropyl alcohol, or products that are not listed in this User’s Guide.
Problems Possible Cause Possible Solutions
Troubleshooting
Display Lockup Display does not appear
to change (you should
see the pulse quality
indicator flash green or
yellow if the device is on
the finger).
Reposition finger or change
fingers.
Remove and replace battery.
If the problem persists contact
Nonin Technical Service.
!
7366-201-01 GO2 LED User Guide1_ENG.indd 15-16 3/12/2010 10:32:02 AM

17 18
ENGLISH
Problems Possible Cause Possible Solutions
Problems Possible Cause Possible Solutions
Troubleshooting
Display blank Nothing appears on
the display.
Reposition finger to activate
the device.
Verify battery is correctly
inserted. Note: If battery is
installed backwards, the unit will not
function.
Dead battery. Replace battery.
May be too cold. Allow device to sit
at room temperature for at least 30
minutes.
After unit has been dropped or shocked,
battery may need to be removed and
reinstalled.
If the problem persists contact Nonin
Technical Service.
Troubleshooting
Missing segments
on LED display.
No readings
Faulty display.
Low pulse quality
(no reading).
Contact Nonin Technical
Service.
Try the following:
1. Reposition finger.
2. Warm finger by rubbing.
3. Select a different finger.
For more information, please
see Reading Your Results.
7366-201-01 GO2 LED User Guide1_ENG.indd 17-18 3/12/2010 10:32:02 AM

19 20
ENGLISH
Parts and Accessories
GO2CC Black neoprene carrying case with belt loop
GO2L Black 20” lanyard
GO2R Clip on retractable holder
WARNING: Certain activities may pose a risk of injury, including strangulation, if the
lanyard should become wrapped around your neck. Use the lanyard with caution.
For more information about Nonin parts and accessories, contact your distributor, or
contact Nonin at (877) 577-2635 (USA and Canada) or (763) 553-9968.
Specifications
Oxygen Saturation Display Range 0% to 100%
Pulse Rate Display Range 18 to 321 beats per minute
(BPM)
Oxygen Saturation Declared Accuracy Range (Arms*) 70% to 100% SpO2 ± 2 digits
Low Perfusion Oxygen Saturation Declared
Accuracy Range (Arms*) 70% to 100% SpO2 ± 2 digits
Pulse Rate Declared Accuracy Range(Arms*) 20 to 250 BPM ± 3 digits
Low Perfusion Pulse Rate Declared Accuracy
Range (Arms*) 40 to 240 BPM ± 3 digits
Measurement Wavelengths and Output Power
Red 660 nanometers @ 0.8mW
Max Average
Infrared 910 nanometers @ 1.2mW
Max Average
*± 1 Arms represents approximately 68% of measurements.
7366-201-01 GO2 LED User Guide1_ENG.indd 19-20 3/12/2010 10:32:03 AM

21 22
ENGLISH
Temperature (Operating) +41°F to +104°F (5°C to +40°C)
Storage/Transportation -22°F to +158°F (-30°C to +70°C)
Device temperature will not exceed 41°C as measured
during a controlled environment test.
Humidity (Operating) 10% to 90% relative humidity,
non-condensing
Storage/Transportation 10% to 95% relative humidity,
non-condensing
Operating Altitude Up to 40,000 feet /12,192 meters
Battery Life (Continuous) Approximately 2400 spot
checks based on ~21 hours
of operation using one AAA-
size alkaline battery, calculated
at 30 seconds per use.
Battery Life (Storage) 6 months minimum
Classifications per IEC 60601-1 / CAN/CSA-C22.2 No. 601.1 / UL 60601-1
Degree of Protection Type BF-Applied Part
Enclosure Degree of Ingress Protection IP33
Mode of Operation Continuous
This equipment complies with International Standard IEC 60601-1-2:2004 for electromagnetic
compatibility for medical electrical equipment and/or systems. This standard is designed to provide
reasonable protection against harmful interference in a typical installation. However, because of the
proliferation of radio-frequency transmitting equipment and other sources of electrical noise in
health care, home, and many other environments, it is possible that high levels of such interference
due to close proximity or strength of a source might disrupt the performance of this device.
This product complies with ISO 10993-1, Biological evaluation of medical devices – Part 1: Evaluation
and testing.
7366-201-01 GO2 LED User Guide1_ENG.indd 21-22 3/12/2010 10:32:03 AM

23 24
ENGLISH
Equipment Response Time Testing Summary
SpO2 accuracy and low perfusion testing were conducted by Nonin Medical, Inc., as described below:
SpO2 Accuracy Testing
SpO2 accuracy testing is conducted during induced hypoxia studies on healthy, non-smoking, light- to dark-
skinned subjects during motion and no-motion conditions in an independent research laboratory. The measured
arterial hemoglobin saturation value (SpO2) of the sensors is compared to arterial hemoglobin oxygen (SaO2)
value, determined from blood samples with a laboratory co-oximeter. The accuracy of the sensors in comparison
to the co-oximeter samples measured over the SpO2 range of 70 - 100%. Accuracy data is calculated using the
root-mean-squared (Arms value) for all subjects, per ISO 9919:2005, Medical Electrical Equipment–Particular
requirements for the basic safety and essential performance of pulse oximeter equipment for medical use.
Pulse Rate Motion Testing
This test measures pulse rate oximeter accuracy with motion artifact simulation introduced by a pulse oximeter
tester. This test determines whether the oximeter meets the criteria of ISO 9919:2005 for pulse rate during
simulated movement, tremor, and spike motions.
Low Perfusion Testing
This test uses a SpO2 Simulator to provide a simulated pulse rate, with adjustable amplitude settings at various
SpO2 levels for the oximeter to read. The oximeter must maintain accuracy in accordance with ISO 9919:2005 for
heart rate and SpO2 at the lowest obtainable pulse amplitude (0.3% modulation).
100
95
90
85
80
75
70
65
60
0.0
8.0
16.0
24.0
32.0
40.0
48.0
56.0
64.0
72.0
80.0
SaO2 Reference 4 Beat Average
Time in seconds
SpO2
Specific to this example: The response of the 4-beat average is 1.5 seconds.
7366-201-01 GO2 LED User Guide1_ENG.indd 23-24 3/12/2010 10:32:03 AM

25 26
ENGLISH
Warranty
Nonin warrants to the purchaser, for 2 years from the date of purchase, each GO2 LED-
Model 9571 exclusive of the battery. Nonin will repair or replace any GO2 LED Model 9571
found to be defective in accordance with this warranty, free of charge, for which Nonin has
been notified by the purchaser by serial number that there is a defect, provided notification
occurs within the applicable warranty period.
This warranty excludes cost of delivery to and from Nonin. Nonin reserves the right to
charge a fee for a warranty repair request on any GO2 LED Model 9571 found to be within
specifications. GO2 LED Model 9571 is a precision electronic instrument and must be
repaired by Nonin Technical Service. Any sign or evidence of opening the GO2 LED Model
9571, field service by non-Nonin personnel, tampering, or any kind of misuse of the GO2
LED Model 9571, shall void the warranty. The GO2 LED Model 9571 is warranted for
Home Health Care Use Only. All non-warranty work shall be done at Nonin’s standard
rates and charges in effect at the time of delivery to Nonin.
Nonin Medical, Inc.
13700 1st Avenue North
Plymouth, MN 55441-5443
(763) 553-9968
(877) 577-2635
web site: www.nonin.com
e-mail: [email protected]
Authorized EC Representative:
MPS, Medical Product Service GmbH
Borngasse 20
D-35619 Braunfels, Germany
©2010 Nonin Medical, Inc.
EC
REP
7366-201-01 GO2 LED User Guide1_ENG.indd 25-26 3/12/2010 10:32:03 AM
7366-201-01

27 28
ENGLISH
Please take a moment to find and record the 9-digit serial number found on the back of your GO2 LED Model
9571. You’ll need this number if you have to contact Nonin with technical service issues or if you have any
questions regarding the use or performance of your pulse oximeter. Nonin’s technical service department can be
reached at (877) 577-2635.
My Serial Number: _________________________________________________
7366-201-01 GO2 LED User Guide1_ENG.indd 27-28 3/12/2010 10:32:03 AM

1.
2.
www.go2nonin.com
+70°C
-30°C
0123 !
Warning: Keep away from small children; this device contains small parts
that may pose a choking hazard.
GO2 LED Users Guide1 Cover nospinelines.indd 1 10/12/2009 3:25:38 PM
Table of contents
Other Nonin Medical Equipment manuals
Nonin
Nonin 9847 User manual
Nonin
Nonin 8500AV User manual

Nonin
Nonin Avant 4000 User manual
Nonin
Nonin NoninConnect Elite 3240 User manual
Nonin
Nonin 7500 Troubleshooting guide

Nonin
Nonin 3230 User manual
Nonin
Nonin RespSense LS1R-9R User manual
Nonin
Nonin RespSense User manual
Nonin
Nonin 8000AA User manual
Nonin
Nonin 2500 PalmSAT User manual

Nonin
Nonin 7500 User manual

Nonin
Nonin 8500 User manual
Nonin
Nonin SenSmart X-100 Manual
Nonin
Nonin LifeSense LS1-9R User manual
Nonin
Nonin Avant 4100 User manual
Nonin
Nonin Onyx II 9550 User manual
Nonin
Nonin 8600 User manual
Nonin
Nonin Avant 9600 User manual

Nonin
Nonin 7500FO User manual

Nonin
Nonin Avant 9600 User manual
