Notifier 1010 Assembly instructions

NSW (Head Office)
7 Columbia Court
Norwest Business Park
Baulkham Hills NSW 2153
Ph: (02) 9899-4155
Fax: (02) 9899-4156
QLD
16 Lucy St
Moorooka
Qld 4104
Ph: (07) 3892-6444
Fax: (07) 3892-6455
VIC
Unit 2 297 Ingles St
Port Melbourne
Vic 3207
Ph: (03) 9681-9929
Fax: (03) 9681-9930
Notifier Inertia Pty Ltd (A.C.N 002 692 962)
A PITTWAY COMPANYA PITTWAY COMPANY
www.inertia.com.au
INSTALLATION AND PROGRAMMING MANUAL
1010
2020
INTELLIGENT FIRE
DETECTION AND
ALARM SYSTEM
SOFTWARE VERSION 3.0
REVISION AUS 1

PAGE 21010/2020 INSTALLATION AND PROGRAMMING MANUAL
COPYRIGHT © 2000, NOTIFIER INERTIA PTY LTD
Table Of Contents
SECTION 1: INSTALLATION .............................................................................................5
PANEL OVERVIEW. .............................................................................................................................................................5
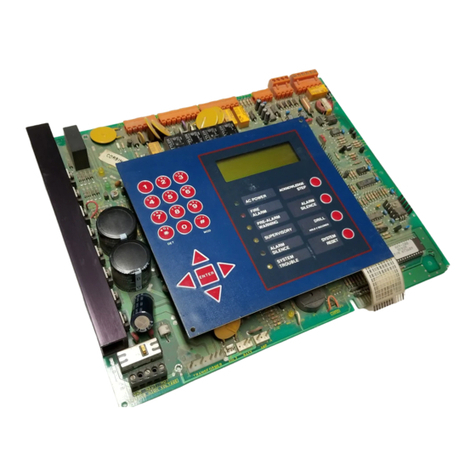
USING THE 1010/2020 DISPLAY INTERFACE ASSEMBLY (DIA)...................................................................................................................................5
The Keypad....................................................................................................................................................................................................5
Description....................................................................................................................................................................................................5
The “ACK NEXT” Button..............................................................................................................................................................................5
The “EXT Bell ISOLATE” Button .................................................................................................................................................................5
The “RESET’ Button......................................................................................................................................................................................6
The “TEST MENU” Button...........................................................................................................................................................................6
The “ISOLATE” Button.................................................................................................................................................................................6
CABINET SIZES ..................................................................................................................................................................6
LOOP TERMINATIONS FOR THE 1010 FIRE INDICATOR PANEL..............................................................................................7
1010 PANEL – 1 LOOP...........................................................................................................................................................................................7
1010 PANEL – 2 LOOPS.........................................................................................................................................................................................7
1010 PANEL – 3 LOOPS.........................................................................................................................................................................................8
1010 PANEL – 4 LOOPS.........................................................................................................................................................................................8
LOOP TERMINATIONS FOR THE 2020 FIRE INDICATOR PANEL..............................................................................................9
2020 PANEL – 1 LOOP...........................................................................................................................................................................................9
2020 PANEL – 2 LOOPS.........................................................................................................................................................................................9
2020 PANEL – 3 LOOPS.......................................................................................................................................................................................10
2020 PANEL – 4 LOOPS.......................................................................................................................................................................................10
2020 PANEL – 5 LOOPS.......................................................................................................................................................................................11
2020 PANEL – 6 LOOPS.......................................................................................................................................................................................11
2020 PANEL – 7 LOOPS.......................................................................................................................................................................................12
2020 PANEL – 8 LOOPS.......................................................................................................................................................................................12
2020 PANEL – 9 LOOPS.......................................................................................................................................................................................13
2020 PANEL – 10 LOOPS.....................................................................................................................................................................................13
LOOP WIRING SPECIFICATION........................................................................................................................................... 14
EXPLANATION OF LOOP BOARDS...........................................................................................................................................................................14
LOOP WIRING SPECIFICATION................................................................................................................................................................................14
COMMON FAULT FINDING TECHNIQUES .............................................................................................................................15
NETWORK WIRING SYSTEMS............................................................................................................................................. 16
RS-485 AND RS-232 CIRCUITS .......................................................................................................................................16
PRINTER CONNECTIONS....................................................................................................................................................16
CONNECTING A PRINTER DIRECTLY TO THE DISPLAY (DIA)....................................................................................................................................17
CONNECTING A PRINTER TO THE SIB BOARD .......................................................................................................................................................17
CONNECTING A LAPTOP IN TERMINAL MODE TO EMULATE A PRINTER.....................................................................................................................18
TERMINAL MODE PROGRAMMING FROM A LAPTOP COMPUTER ...............................................................................................................................18
ANNUNCIATOR TERMINATIONS ..........................................................................................................................................19
RS-485 FROM SIB CARD TO ANNUNCIATORS........................................................................................................................................................19
RS-485 TO AN LCD-80TM...................................................................................................................................................................................19
CONNECTING AND PROGRAMMING AN LCD-80 (ACS MODE) FROM A LAPTOP.................................................................20
LAPTOP TO LCD-80 TERMINATIONS......................................................................................................................................................................20
PROGRAMMING CUSTOM MESSAGES.....................................................................................................................................................................21
ENTERING CUSTOM POINT LABELS........................................................................................................................................................................22
CPU TERMINATIONS ........................................................................................................................................................23
POWER SUPPLY TERMINATIONS........................................................................................................................................ 23
TERMINATING THE LOOP AND DEVICES ON THE LOOP.........................................................................................................24
TERMINATING THE ANALOGUE LOOP TO THE LIB CARDS.........................................................................................................................................24
WIRING ANALOGUE ADDRESSABLE DETECTORS.....................................................................................................................................................24
WIRING CONVENTIONAL CIRCUITS (MMX-2)..........................................................................................................................................................25
WIRING MONITOR MODULES (MMX-101) ..............................................................................................................................................................25
WIRING CONTROL MODULES (CMX-2)..................................................................................................................................................................26
WIRING SHORT CIRCUIT ISOLATOR MODULES (ISO-X)...........................................................................................................................................26

1010/2020 INSTALLATION AND PROGRAMMING MANUAL PAGE 3
COPYRIGHT © 2000, NOTIFIER INERTIA PTY LTD
XP-5M & XP-5C MODULES .................................................................................................................................................................................27
1668 FAN CONTROLS....................................................................................................................................................... 28
TERMINATION OF MODULES .................................................................................................................................................................................28
APPLICATION OF FAN CONTROL MODULES.............................................................................................................................................................28
DIP-SWITCH SETTINGS .....................................................................................................................................................29
SETTING ANNUNCIATOR BOARD ADDRESSES:........................................................................................................................................................29
SCS-8 FAN CONTROL MODULE ANNUNCIATOR......................................................................................................................................................29
ACM-16AT PUSHBUTTON & LED INDICATOR ANNUNCIATOR....................................................................................................................................30
ACM-32A LED INDICATOR ANNUNCIATOR .............................................................................................................................................................30
ACM-8R RELAY BOARD ANNUNCIATOR ................................................................................................................................................................30
LDM-32 LED DRIVER ANNUNCIATOR....................................................................................................................................................................31
LCD-80 LCD MIMIC ANNUNCIATOR (DUAL MODE) IN ACS MODE............................................................................................................................31
LCD-80 LCD MIMIC ANNUNCIATOR (DUAL MODE) IN TERMINAL MODE....................................................................................................................32
LCD-80TM LCD MIMIC ANNUNCIATOR (TERMINAL MODE).....................................................................................................................................32
APPLYING/REMOVING POWER TO THE FIRE ALARM SYSTEM ..............................................................................................33
SECTION TWO: PROGRAMMING.....................................................................................34
PROGRAMMING OVERVIEW ...............................................................................................................................................34
RECOMMENDED PROCEDURE ...............................................................................................................................................................................34
OVERVIEW ..........................................................................................................................................................................................................34
MAIN PROGRAMMING MENU..............................................................................................................................................35
PARTIAL SYSTEM PROGRAMMING .....................................................................................................................................36
LIB INSTALLATION 1=INST) .................................................................................................................................................................................37
LIB LOOP STYLE 4 OR STYLE 6 (2=STY)..............................................................................................................................................................37
TIME DELAYS (3=TDLY) ......................................................................................................................................................................................38
AUDIO VISUAL POWER SUPPLIES (4=AVPS)..........................................................................................................................................................38
ZONE BOUNDARY (5=ZBND)................................................................................................................................................................................39
EXTERNAL EQUIPMENT (6=EXTEQ.......................................................................................................................................................................39
LOCAL PARAMETERS (7=LOCP)...........................................................................................................................................................................40
ISIB (8=ISIB)......................................................................................................................................................................................................41
ADDITIONAL SYSTEM PARAMETERS (9=PARM).....................................................................................................................................................41
Day/Night Sensitivity...................................................................................................................................................................................42
Drift Compensation .....................................................................................................................................................................................43
INTERNATIONAL DISPLAY OPTION (0=CONT, 1=IDO)............................................................................................................................................43
FULL SYSTEM PROGRAMMING ..........................................................................................................................................43
PARTIAL POINT PROGRAMMING ........................................................................................................................................44
TYPE ID (1=TYPID) ............................................................................................................................................................................................45
CONTROL-BY-EVENT 2=CBE)..............................................................................................................................................................................45
LABEL (3=LBL)....................................................................................................................................................................................................46
OPTIONAL FEATURES (4=OPTNS)........................................................................................................................................................................47
ANNUNCIATOR MAPPING (5=AMAP).....................................................................................................................................................................47
COOPERATIVE CONTROL-BY-EVENT (6=CCBE) ....................................................................................................................................................48
REMOVING A DEVICE (5=REMV) ......................................................................................................................................52
CHANGING THE PASSWORD 6=PSWD...............................................................................................................................52
A Forgotten Password?...............................................................................................................................................................................52
CHANGING THE “ALL SYSTEMS NORMAL” MESSAGE (7=MSG)..........................................................................................52
ACCESSING THE HISTORY LOG (8=HIS)............................................................................................................................53
START...............................................................................................................................................................................................................53
STOP.................................................................................................................................................................................................................53
CLEAR ..............................................................................................................................................................................................................53
PROGRAMMING GUIDELINES:............................................................................................................................................54
WHAT IS A SOFTWARE ZONE ................................................................................................................................................................................54
FORWARD-ACTIVATING ZONES .............................................................................................................................................................................54
REVERSE ACTIVATING ZONES...............................................................................................................................................................................54
CONTROL BY EVENT -LISTS AND EQUATIONS .........................................................................................................................................................54
C.B.E Equations: Operators........................................................................................................................................................................56
C.B.E SIZE LIMITATIONS ......................................................................................................................................................................................59
COOPERATIVE CONTROL-BY-EVENT .....................................................................................................................................................................60
C.B.E PROGRAMMING EXAMPLES.........................................................................................................................................................................60
SOFTWARE TYPE-ID’S - AN OVERVIEW........................................................................................................................63

PAGE 41010/2020 INSTALLATION AND PROGRAMMING MANUAL
COPYRIGHT © 2000, NOTIFIER INERTIA PTY LTD
RECOMMENDED TYPE ID’S FOR COMMON APPLICATIONS .........................................................................................................................................63
Input Devices...............................................................................................................................................................................................63
Output Devices ............................................................................................................................................................................................63
Addressable Detectors.................................................................................................................................................................................64
Alarm Initiation Modules.............................................................................................................................................................................64
System Common Output Modules................................................................................................................................................................65
Output Modules ...........................................................................................................................................................................................66
Software Zones ............................................................................................................................................................................................66
Annunciator Zone........................................................................................................................................................................................67
Annunciator Input........................................................................................................................................................................................67
Annunciator Output.....................................................................................................................................................................................67
1668 (SCS-8) PROGRAMMING .........................................................................................................................................68
A fan that starts in firemode with associated duct detector:........................................................................................................................68
A fan that stops in firemode, with associated duct detector.........................................................................................................................69
Fire Trip Relay ............................................................................................................................................................................................69

1010/2020 INSTALLATION AND PROGRAMMING MANUAL PAGE 5
COPYRIGHT © 2000, NOTIFIER INERTIA PTY LTD
SECTION 1: INSTALLATION
PANEL OVERVIEW.
The following section describes the Keypad functions, the cabinet sizes, the 1010 (4 loop) and the
2020 (10 loop) Analogue Fire Detection System.
USING THE 1010/2020 DISPLAY INTERFACE ASSEMBLY (DIA)
THE KEYPAD
DESCRIPTION
The Keypad on the right has both Alpha and Numeric facilities for each button, in most cases to
enter an Alpha character you may need to press the button more than once. In the case of entering
Loop 3 Detector 33, you will need to use the Next Char button to advance the cursor on the LCD
display between each keystroke, as D and the number 3, share the same button.
THE “ACK NEXT” BUTTON
When pressed allows you to scroll through the list of Alarms, Faults and Isolates on the LCD
display, the “ACK NEXT” button is also used to acknowledge any alarms or faults that may appear
on the LCD display
THE “EXT BELL ISOL” BUTTON
“EXT BELL ISOL” will isolate all CON and FORC type outputs flagged with “Bell Isolate”. This is to
prevent the main bells from ringing during routine testing. Also once an alarm has been
acknowledged, you can press the “EXT BELL ISOL” button, and the bells will silence and remain
silenced. If automatic bell cut-off is set, then once the cut-off is initiated the EXT BELL ISOL will
remain isolated until a system reset. If bell cut-off is not set, the EXT BELL ISOL can be toggled
on/off by pressing the button.
Please also refer to TDLY setting in programming section for further information on Bell Isolate
Inhibit and Automatic Bell Cut-off Times.

PAGE 61010/2020 INSTALLATION AND PROGRAMMING MANUAL
COPYRIGHT © 2000, NOTIFIER INERTIA PTY LTD
THE “SYSTEM RESET’ BUTTON
Once all alarms have been acknowledged, the “RESET” button can be pressed, and the panel will
return to all systems normal, unless the alarms are still present, in which case the panel will go back
into alarm.
THE “TEST MENU” BUTTON
Allows you to enter a detector to place into alarm
THE “ISOL” BUTTON
This facility allows you to isolate the currently displayed device in alarm.
CABINET SIZES
There are three sizes of cabinets:
1/ 1865mm,x 610mm, x 380mm.
2/ 1330mm, x 610mm, x 380mm.
3/ 885mm, x 610mm, x 220mm.

1010/2020 INSTALLATION AND PROGRAMMING MANUAL PAGE 7
COPYRIGHT © 2000, NOTIFIER INERTIA PTY LTD
LOOP TERMINATIONS FOR THE 1010 FIRE INDICATOR PANEL
1010 PANEL – 1 LOOP
Notifier 1010
Loop Hardware Arrangement
1 Loop Panel
Top Top
SIB CPU 1010
Loop 1 Bottom Bottom
LIB-200A Not Used
Top Top
Not Used Not Used
Bottom Bottom
Not Used Not Used
1010 PANEL – 2 LOOPS
Notifier 1010
Loop Hardware Arrangement
2 Loop Panel
Top Top
SIB CPU 1010
Loop 1 Bottom Bottom Loop 2
LIB-200A LIB-200A
Top Top
Not Used Not Used
Bottom Bottom
Not Used Not Used

PAGE 81010/2020 INSTALLATION AND PROGRAMMING MANUAL
COPYRIGHT © 2000, NOTIFIER INERTIA PTY LTD
1010 PANEL – 3 LOOPS
Notifier 1010
Loop Hardware Arrangement
3 Loop Panel
Top Top
SIB CPU 1010
Loop 1
Loop 3 Bottom Bottom Loop 2
LIB-400 LIB-200A
Top Top
Not Used Not Used
Bottom Bottom
Not Used Not Used
1010 PANEL – 4 LOOPS
Notifier 1010
Loop Hardware Arrangement
4 Loop Panel
Top Top
SIB CPU 1010
Loop 1 Loop 4
Loop 3 Bottom Bottom Loop 2
LIB-400 LIB-400
Top Top
Not Used Not Used
Bottom Bottom
Not Used Not Used

1010/2020 INSTALLATION AND PROGRAMMING MANUAL PAGE 9
COPYRIGHT © 2000, NOTIFIER INERTIA PTY LTD
LOOP TERMINATIONS FOR THE 2020 FIRE INDICATOR PANEL
2020 PANEL – 1 LOOP
Notifier 2020
Loop Hardware Arrangement
1 Loop Panel
Top Top
SIB CPU 2020
Loop 1 Bottom Bottom
LIB-200A Not Used
Top Top
Not Used Not Used
Bottom Bottom
Not Used Not Used
2020 PANEL – 2 LOOPS
Notifier 2020
Loop Hardware Arrangement
2 Loop Panel
Top Top
SIB CPU 2020
Loop 1 Bottom Bottom Loop 2
LIB-200A LIB-200A
Top Top
Not Used Not Used
Bottom Bottom
Not Used Not Used

PAGE 10 1010/2020 INSTALLATION AND PROGRAMMING MANUAL
COPYRIGHT © 2000, NOTIFIER INERTIA PTY LTD
2020 PANEL – 3 LOOPS
Notifier 2020
Loop Hardware Arrangement
3 Loop Panel
Top Top
SIB CPU 2020
Loop 1 Bottom Bottom Loop 2
LIB-200A LIB-200A
Loop 3 Top Top
LIB-200A Not Used
Bottom Bottom
Not Used Not Used
2020 PANEL – 4 LOOPS
Notifier 2020
Loop Hardware Arrangement
4 Loop Panel
Top Top
SIB CPU 2020
Loop 1 Bottom Bottom Loop 2
LIB-200A LIB-200A
Loop 3 Top Top Loop 4
LIB-200A LIB-200A
Bottom Bottom
Not Used Not Used

1010/2020 INSTALLATION AND PROGRAMMING MANUAL PAGE 11
COPYRIGHT © 2000, NOTIFIER INERTIA PTY LTD
2020 PANEL – 5 LOOPS
Notifier 2020
Loop Hardware Arrangement
5 Loop Panel
Top Top
SIB CPU 2020
Loop 1 Bottom Bottom Loop 2
LIB-200A LIB-200A
Loop 3 Top Top Loop 4
LIB-200A LIB-200A
Loop 5 Bottom Bottom
LIB-200A Not Used
2020 PANEL – 6 LOOPS
Notifier 2020
Loop Hardware Arrangement
6 Loop Panel
Top Top
SIB CPU 2020
Loop 1
Loop 6 Bottom Bottom Loop 2
LIB-400 LIB-200A
Loop 3 Top Top Loop 4
LIB-200A LIB-200A
Loop 5 Bottom Bottom
LIB-200A Not Used

PAGE 12 1010/2020 INSTALLATION AND PROGRAMMING MANUAL
COPYRIGHT © 2000, NOTIFIER INERTIA PTY LTD
2020 PANEL – 7 LOOPS
Notifier 2020
Loop Hardware Arrangement
7 Loop Panel
Top Top
SIB CPU 2020
Loop 1 Loop 7
Loop 6 Bottom Bottom Loop 2
LIB-400 LIB-400
Loop 3 Top Top Loop 4
LIB-200A LIB-200A
Loop 5 Bottom Bottom
LIB-200A Not Used
2020 PANEL – 8 LOOPS
Notifier 2020
Loop Hardware Arrangement
8 Loop Panel
Top Top
SIB CPU 2020
Loop 1 Loop 7
Loop 6 Bottom Bottom Loop 2
LIB-400 LIB-400
Loop 3
Loop 8 Top Top Loop 4
LIB-400 LIB-200A
Loop 5 Bottom Bottom
LIB-200A Not Used

1010/2020 INSTALLATION AND PROGRAMMING MANUAL PAGE 13
COPYRIGHT © 2000, NOTIFIER INERTIA PTY LTD
2020 PANEL – 9 LOOPS
Notifier 2020
Loop Hardware Arrangement
9 Loop Panel
Top Top
SIB CPU 2020
Loop 1 Loop 7
Loop 6 Bottom Bottom Loop 2
LIB-400 LIB-400
Loop 3 Loop 9
Loop 8 Top Top Loop 4
LIB-400 LIB-400
Loop 5 Bottom Bottom
LIB-200A Not Used
2020 PANEL – 10 LOOPS
Notifier 2020
Loop Hardware Arrangement
10 Loop Panel
Top Top
SIB CPU 2020
Loop 1 Loop 7
Loop 6 Bottom Bottom Loop 2
LIB-400 LIB-400
Loop 3 Loop 9
Loop 8 Top Top Loop 4
LIB-400 LIB-400
Loop 5
Loop 10 Bottom Bottom
LIB-400 Not Used

PAGE 14 1010/2020 INSTALLATION AND PROGRAMMING MANUAL
COPYRIGHT © 2000, NOTIFIER INERTIA PTY LTD
LOOP WIRING SPECIFICATION
EXPLANATION OF LOOP BOARDS.
The LIB-200A is a 1-loop board for the 1010 & 2020 panel and can support 99 detectors and 99
modules. The field wiring is electrically isolated from the rest of the system so that any two-ground
faults on separate loops will not cause invalid replies from devices. A short to any other system
circuit will not cause communication loss. The LIB-200A has an earth fault detection circuit with
selectable high/low sensitivity and isolate. The LIB-200A has two LED’s; yellow displays earth fault
and red indicates alarm condition.
The LIB-400 is a two Loop version, and has the same features as the LIB-200A,
LOOP WIRING SPECIFICATION
The recommended wiring to be used is two core twisted pair, .75mm2minimum.
Style 4. (Loop does not return to the panel)
Port A, (Channel A) 3800M maximum, 50 Ohms resistance maximum.
Port B, (Channel B) 3800M maximum, 50 Ohms resistance maximum
Style 6. (Closed loop, returning to panel)
Total Loop, 3800M maximum, 50 Ohms resistance maximum.

1010/2020 INSTALLATION AND PROGRAMMING MANUAL PAGE 15
COPYRIGHT © 2000, NOTIFIER INERTIA PTY LTD
COMMON FAULT FINDING TECHNIQUES
If using optional shielded twisted pair cable to minimise radiated emissions of radio
frequency energy, do not allow the shield drain wire to enter the cabinet. Connect the drain wire
to the outside of the cabinet via an earth type connector. Maintain the continuity of the shield wire
throughout the loop but do not connect to any devices, and only earth one end.
Before connecting the loop to the LIB-200A or LIB-400 card, carry out the following tests;
1. Check continuity of loop wiring, by placing a short on one end and reading the short with a
multimeter at the other end.
2. Check the loop resistance, same as above (be sure to set the multimeter to ohms), the loop
resistance cannot exceed 50 ohms, which is 25 ohms per leg. (See examples above).
3. Check for devices incorrectly wired, set the multimeter to diode Test, and place the leads on the
cable, the reading should be approx. .645,- reverse the leads- now the reading should be approx.
1.2 or higher, if both readings read low- this indicates a device incorrectly wired, or a short on the
wiring. Note:(Each device has a diode installed)
4. Voltage reading, set the multimeter to D.C. volts and read the voltage at the loop card before
connecting the loop, the reading should be approx. 24 volts, now connect the loop, the reading
should now be 15-16 volts. If the voltage goes down low this could indicate a short on the line, or
there is a device incorrectly wired (possible Reverse polarity), find the device and correct the loop
connections at that device.
5. Earth Fault test, Select ohms on the multimeter and check between each leg of the loop and
earth, if the reading falls below 50,000 ohms, an earth fault will appear on the loop when
connected, find the cause of the earth fault and rectify. (Possible causes of an earth fault are
moisture, inadequate insulation from surrounding building, equipment or materials).
NOTE:
A note on ‘Loop Resistance Measurement’, when ISO-X devices are present. When power is
removed from the Loop, the positive side of the circuit is opened at each ISO-X isolation module.
To measure the Loop resistance, temporarily place a jumper between Terminals 2 and 4 on each
ISO-X while taking measurements. Remember to remove all the jumpers and test all isolator
modules when you have finished taking the readings.

PAGE 16 1010/2020 INSTALLATION AND PROGRAMMING MANUAL
COPYRIGHT © 2000, NOTIFIER INERTIA PTY LTD
NETWORK WIRING SYSTEMS
The Noti-fire-net network wiring system is to be wired in 1.5mm2- 2core twisted pair (no shield)
The network cable can run up to 1 klm between nodes (Each Fire Panel is a Node). For optimal
performance, Noti-fire Net should be run in a closed loop (style 6), however, Noti-fire-Net does have
the ability to run in an open-ended format (style 4). The cable is terminated on to a network card
(see the Noti-fire-Net manual for termination data).
RS-485 AND RS-232 CIRCUITS
The 1010/2020 has multiple RS-232 and RS-485 circuits, the illustrations below show the positions
and where to find them.
RS-485 circuits used for Annunciators wired outside of the Panel, are to be wired in 2 core Twisted
Shielded. Total RS485 run should not exceed 1.5 k’s in length. A second 2-core twin for 24Vdc is
also required for powering the Annunciators. (The last Annunciator must have a 120-ohm resistor
fitted across the RS-485 circuit). The shield must be earthed at the panel end, to the nearest earth
point immediately inside the Panel.
RS-485 circuits used for Terminal mode operation (LCD-80tm direct from the DIA) wired outside the
Panel, are to be wired in 4 core Twisted Shielded, or 2 x 2 core Twisted Shielded, and 2 core twin
for power supply requirements if needed. (The last Annunciator must have two 120-ohm resistors
fitted across the RS-485 circuits) The shields must be earthed at the Panel end, to the nearest earth
point immediately inside the Panel.
RS-232 circuits used for printer’s etc, wired outside of the Panel, are to be wired in Twisted Shielded
wiring and not to exceed 15 mtrs in length. The shield must be earthed at the Panel end, to the
nearest earth point immediately inside the Panel.
The following illustrations indicate the connection points for RS-485 and RS-232 circuits.
PRINTER CONNECTIONS
The following section indicates the terminations required, connecting a printer to various points on
the 1010/2020 Fire Panel.
When converting to a DB9 or a DB25 pin connector, follow the tables below for connection details.
DB9 DB25
Rx pin 2 Rx pin 3
ref pin 5 ref pin 7
Conversion
from a
DB9 to a DB25 Tx pin 3 Tx pin 2

1010/2020 INSTALLATION AND PROGRAMMING MANUAL PAGE 17
COPYRIGHT © 2000, NOTIFIER INERTIA PTY LTD
CONNECTING A PRINTER DIRECTLY TO THE DISPLAY (DIA)
RS-232 from DIA card to Printer
DIA DB9 DB25
5 Tx Rx pin 2 Rx pin 3
6 ref Ref pin 5 ref pin 7
This printer connection is a Non Monitored Non Supervised port, and one directional. The printer will
print whatever appears on the LCD.
CONNECTING A PRINTER TO THE SIB BOARD
SIB-NET/SIB-2048A RS-232 “Printer” Terminal Designations
SIB DB9 DB25
2 Tx Rx 2 Rx 3
3 ref Ref 5 ref 7
4Rx Tx 3 Tx 2
This printer connection will print events and reports from the system as requested, and this
connection is monitored.

PAGE 18 1010/2020 INSTALLATION AND PROGRAMMING MANUAL
COPYRIGHT © 2000, NOTIFIER INERTIA PTY LTD
CONNECTING A LAPTOP IN TERMINAL MODE TO EMULATE A PRINTER
A Laptop computer can be used in lieu of a printer for uploading the history file or capturing reports
from the fire panel.
Set the Laptop up in terminal mode, and connect as per the instructions above for connecting a
printer to the SIB card. (Terminals 2, 3, & 4).
Place the Laptop in “terminal mode” (Hyperterm or equivalent) and set with the following
options for the COM port.
2400 Baud.
7 Data bits.
1 Stop Bit.
Even Parity.
Xon/Xoff handshaking.
Select “Capture text to file” in the Terminal Mode program on the Laptop.
Then Press the Special Function button on the 1010/2020 Panel,
and press “2=HIS”, and follow the prompts.
The 1010/2020 panel will now upload the entire history log to the Laptop computer which can then
be saved to disk for permanent records.
TERMINAL MODE PROGRAMMING FROM A LAPTOP COMPUTER
A Laptop computer can also be used in Terminal Mode to operate and program the panel in lieu of
using the system keypad. This makes for much faster input of device descriptions etc when not
using Verifier TM.
Terminal Mode Settings:
2400 Baud.
7 Data bits.
1 Stop Bit.
Even Parity.
Xon/Xoff.
SIB DB9 DB25 Contact Notifier Inertia Fire Systems for
10 Tx Rx 2 Rx 3 Function key setting in Terminal Mode.
11 ref Ref 5 ref 7
12 Rx Tx 3 Tx 2

1010/2020 INSTALLATION AND PROGRAMMING MANUAL PAGE 19
COPYRIGHT © 2000, NOTIFIER INERTIA PTY LTD
ANNUNCIATOR TERMINATIONS
RS-485 FROM SIB CARD TO ANNUNCIATORS
The RS-485 circuit must be wired in 2 core twisted pair, and can be run to a distance of 1.5 klms,
The 24Vdc must be from the Non-resettable terminals on the power supply, or a remote 24Vdc-
power supply can be used.
A record of any external power supplies used must be placed within the 1010/2020 enclosure,
preferably in a place easily recognisable to service personal.
LCD-80TM Connection
The LCD80TM is a terminal mode remote LCD mimic. Ie: It displays whatever is on the main LCD.
RS-485 TO AN LCD-80TM

PAGE 20 1010/2020 INSTALLATION AND PROGRAMMING MANUAL
COPYRIGHT © 2000, NOTIFIER INERTIA PTY LTD
CONNECTING AND PROGRAMMING AN LCD-80 (ACS MODE) FROM A LAPTOP
The following section details the programming procedure for programming LCD-80 (Dual Mode)
Mimics. Note the terminations for a DB-9 or DB-25 pin connector.
LAPTOP TO LCD-80 TERMINATIONS
LCD-80 DB-9 Db-25
1 Rx 3 Tx 2 Tx
6 ref 5ref 7 ref
7 Tx 2 Rx 3 Rx
Programming outline:
Remove 24vdc power.
Connect the RS-232 interface to the Laptop as shown above.
Reconnect 24vdc to the LCD-80
Insert the PK-1 Programming Key onto the connector P6.
Program the LCD-80.
Exit Program mode by removing the Programming Key.
The Laptop must be in “terminal mode” and set with the following options:
2400 Baud.
7 Data bits.
1 Stop Bit.
Even Parity.
Xon/Xoff.
The LCD-80 now is ready for programming
Other manuals for 1010
1
This manual suits for next models
1
Table of contents
Other Notifier Security System manuals
Popular Security System manuals by other brands

Honeywell Home
Honeywell Home Touchscreen 6290W user guide

ADEMCO
ADEMCO Alpha Vista 5130XT installation instructions

Swann
Swann SW351-WSA operating instructions

Reonix Automation
Reonix Automation R2+ quick start guide

CrimeStopper
CrimeStopper CS-2000DPII SERIES IV Installation & operating instructions

Konyks
Konyks FireSafe 2 quick start