NuWave 31201 Technical specifications
NUWAVE™ PRECISION
PRESSURE COOKER
MANUAL & RECIPES


Product Information 5
Important Safeguards 6-7
Safety Systems & Structure 8-9
Benefits 10
Operating Instructions 11-13
Cooking Instructions 14-15
Cleaning & Maintenance 16-17
Cooking Tricks & Tips 18-20
NuWave™Precision Pressure Cooker Recipes 21-33
Squash Soup 21
Spiced Tomato Rice Soup 22
Red Potatoes with Garlic & Butter Sauce 23
Simple Healthy Brown Rice 23
Creamy Mashed Potatoes 24
Fifteen Minute Risotto 25
Root Vegetable Casserole 26
Pork Chops 27
Italian Sausage with Peppers & Onions 28
Corned Beef & Cabbage 29
Beef Stroganoff 30
Texas Style Chili 31
Simply Whole Chicken 32
Beer Steamed Mussels 33
Table of Contents

5
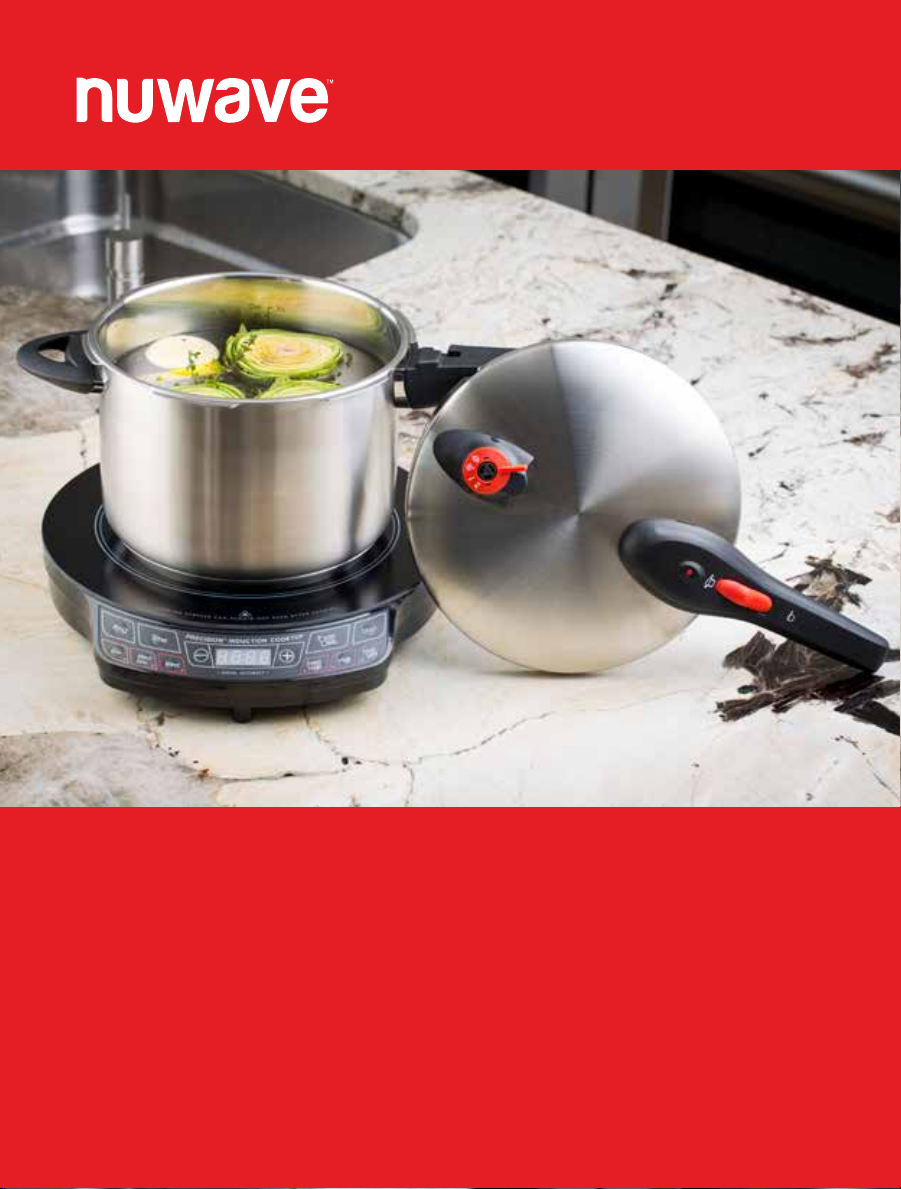
Product Information
Your NuWave Precision Pressure Cooker (NuWave™ PPC) should NOT be placed in any
type of oven or microwave. It is suitable for use with the following heating sources:
induction, gas, hotplate, halogen, electric and ceramic.
Model No. 31201
Body Diameter 9 inches (22 centimeters)
Nominal Capacity 6.5 quarts (6 liters)
Working Pressure 7.3 / 13.1 psi (50 / 90 kilopascals)
Material (body) Brushed Stainless Steel
Material (handle) Phenolic (PF2A2)
Weight 6.45 pounds (2.6 kilograms)
Induction Gas Hotplate Halogen Electric Ceramic
Product Information

6Important Safeguards
Important Safeguards
Read all instructions
1. Do not touch hot surfaces. Use handles.
2. Close supervision is necessary when the pressure cooker is used near children.
3. Do not place the pressure cooker in a heated oven.
4. Extreme caution must be used when moving a pressure cooker containing hot
liquids.
5. Do not use pressure cooker for other than intended use.
6. This appliance cooks under pressure. Improper use may result in scalding
injury. Make certain unit is properly closed before operating. See Operating
Instructions.
7. Do not fill the unit over ⅔full. When cooking foods that expand during
cooking such as rice or dried vegetables, do not fill the unit over ½full.
Over filling may cause a risk of clogging the vent pipe and developing excess
pressure. See Operating Instructions.
8. Be aware that certain foods, such as applesauce, cranberries, pearl barley,
oatmeal or other cereals, split peas, noodles, macaroni, rhubarb, or spaghetti
can foam, froth, and sputter, and clog the pressure release device (steam vent).
These foods should not be cooked in a pressure cooker.
9. Always check the pressure release devices for clogging before use.
10. Do not open the pressure cooker until the unit has cooled and all internal
pressure has been released. If the handles are difficult to push apart, this
indicates that the cooker is still pressurized – do not force it open. Any
pressure in the cooker can be hazardous. See Operating Instructions.
11. Do not use this pressure cooker for pressure frying with oil.
12. When the normal operating pressure is reached, turn the heat down so all the
liquid, which creates the steam, does not evaporate.
SAVE THESE INSTRUCTIONS.

7
Important Safeguards
Additional Safeguards:
• If you cook meat with skin, such as sausage, swelling can occur when cooked
under pressure. Piercing skin after cooking can lead to bursts of hot liquid.
• Do not lean over the NuWave PPC at any time while it is cooking.
• The NuWave PPC should not be used for any medical purposes. It is not
designed to reach the required temperature for sterilization.
• The rubber gasket creates a pressure seal between lid and pot. Keep the gasket
completely clean and free from any cracks or deterioration.
• It is extremely important to fill the NuWave PPC with liquid prior to operation.
Never cook in the NuWave PPC without liquid as doing so can cause the
NuWave PPC to overheat and damage the safety mechanisms. In case of
overheating, never remove the NuWave PPC from the heat source. Instead,
turn off the heat immediately and let the NuWave PPC cool until the pressure
indicator depresses.
• Make sure all parts of the pressure regulator and ventilated pipe are clean and
properly assembled.
• If the pressure indicator button is raised and too much steam is escaping, lower
the cooking temperature in order to lower the pressure.
• Do not alter the safety mechanisms or attempt to repair the NuWave PPC as
this will void the warranty. Please adhere to the Maintenance Instructions
specified for use, or contact customer service at 877-689-2838 for assistance.
• Use only the appropriate replacement parts from NuWave to maintain proper
functionality and safety. Visit www.NuWaveNow.com for replacement part and
pieces.

8Safety Systems & Structure
Safety Systems & Structure
1. Lid: Made of high quality stainless steel.
2. Safety Plate: Safety locking device is activated when push plate is closed and locked.
This avoids opening lid when there is pressure in the NuWave PPC.
3. Safety Valve: A safety device that assures the push plate stays locked when
pressurized.
3a. Safety valve
3b. O-Ring for safety valve
4. Safety Window: A safety feature that releases excess pressure automatically when
cooking pressure is too high.
5. Anti-Clogging Nut: Effectively prevents food from plugging steam outlet to avoid
excess pressure within NuWave PPC.
6. Rubber Gasket: Creates a pressure seal between lid and pot. All parts must remain
completely clean and avoid any cracks or deterioration.
4
3a
3b
6
35
1
2
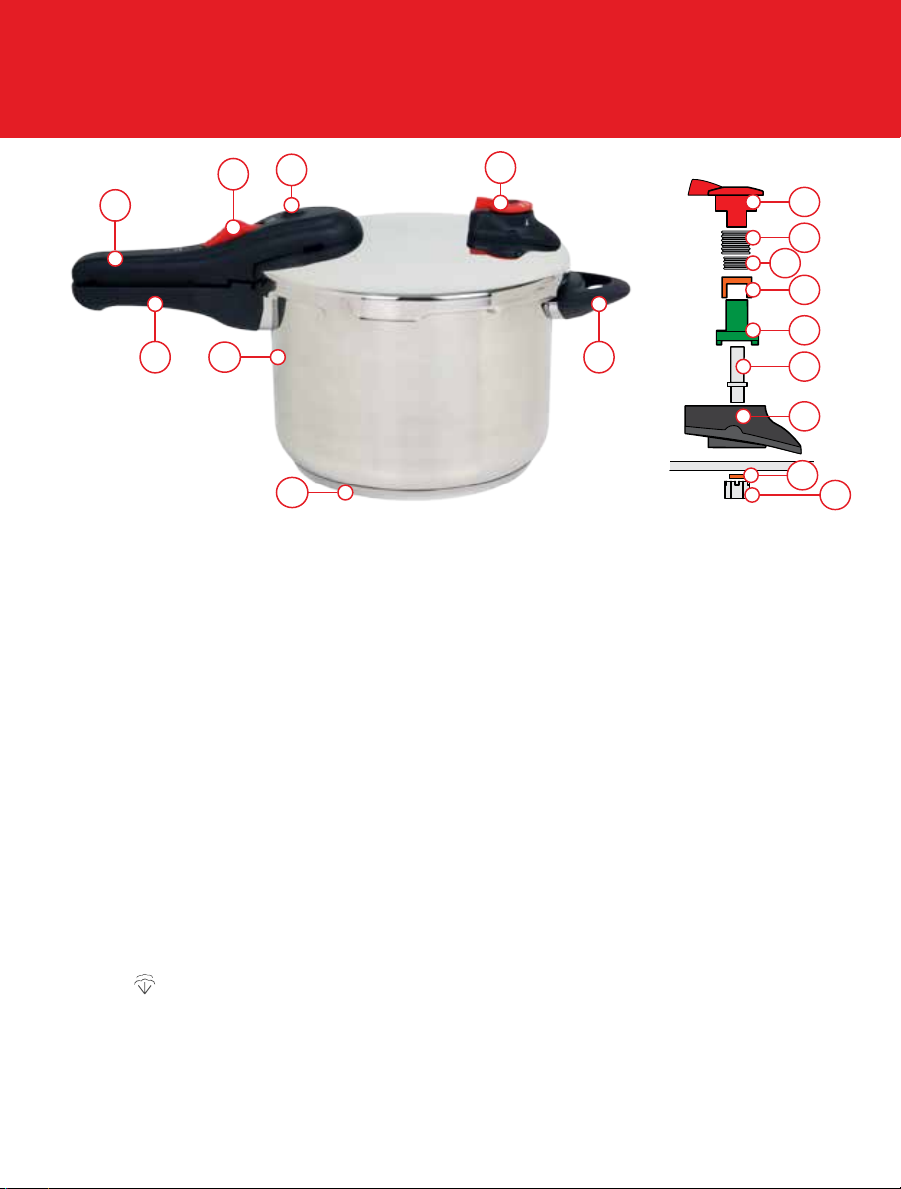
9
Safety Systems & Structure
7. Lid Handle: Used to remove lid from NuWave PPC, the lid handle contains important
components for vital use.
7a. Push Plate: When lid is properly closed, the push plate lets you move it
backwards to lock. Push the push plate forward to unlock lid.
7b. Pressure Indicator: Pressure indicator rises once pressurized, and returns to
original place when pressure is released.
8. Body Handle: Marks position where lid and pot fit together.
9. Side Handle: This piece allows for easier transportation when moving NuWave PPC.
10. NuWave™ PPC Pot: Contains and holds food as it cooks.
11. Body Base: Comprised of three layers of induction-ready stainless steel, for quick and
even heat distribution.
10
11
98
12. Pressure Regulator Device: This keeps
pressure stable and within normal
operating levels while cooking.
1 = low pressure level (7.3 psi)
2 = high pressure level (13.1 psi)
= quick steam release position
ø= regulator removal position
12a. Valve Pressure Regulator Dial
12b. Large Spring
12c. Small Spring
12d. Valve Shaft Cover
12e. Valve Shaft Core
13. Ventilated Pipe: the device for the
releasing of steam in the NuWave PPC.
14. Pressure Regulator Base
15. Sealing Ring for pressure regulator
7
7a 7b 12
12a
12b
12c
12d
12e
5
15
13
14
Lid

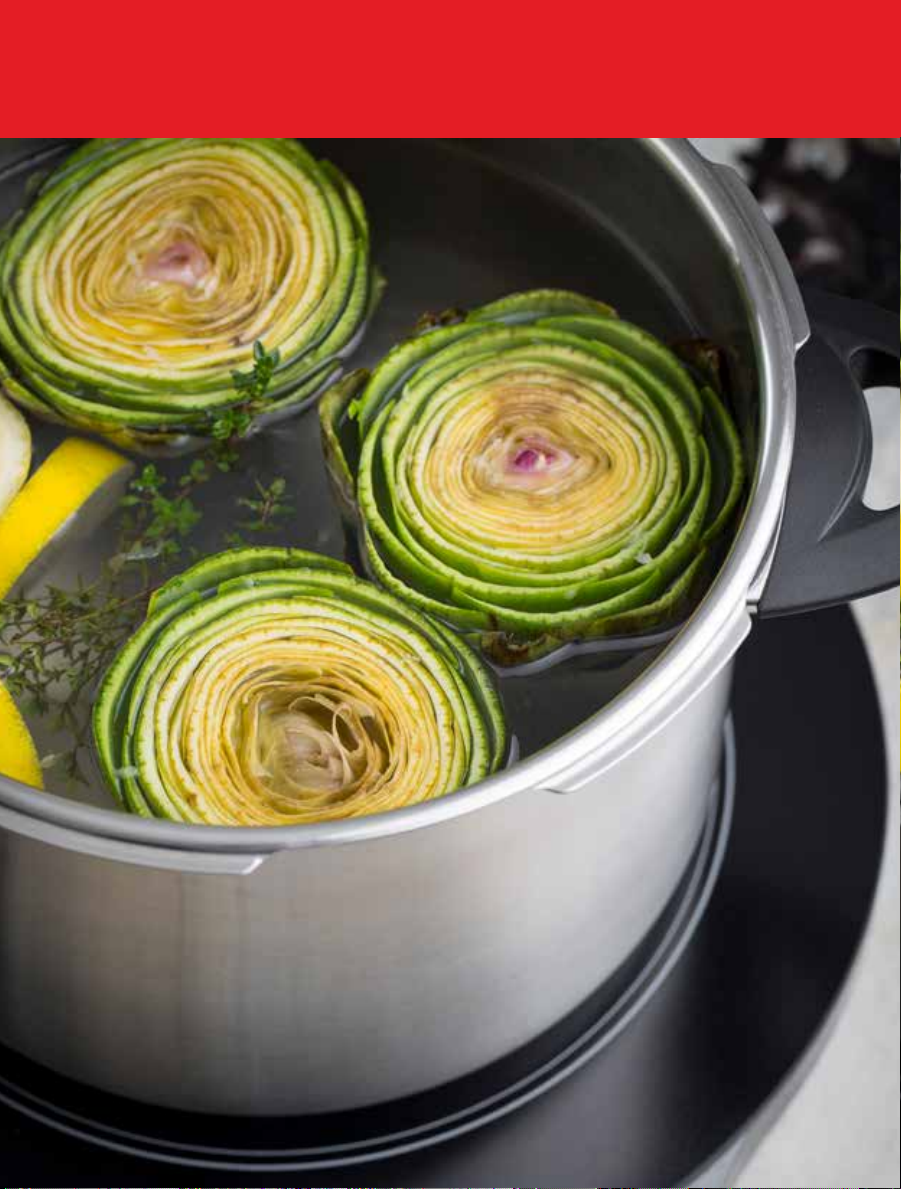
10 Benets
Benefits
NuWave™ PPC consists of a cooking pot and a special lid that locks into place on the
top of the pot. When NuWave PPC is heated, steam is sealed inside, which creates
pressure. With this high pressure, the internal temperature of the NuWave PPC is
raised above the normal boiling point of water. The cooking process is thus expedited
leading to healthier meals.
Faster
• On average, the NuWave PPC prepares food faster than traditional cooking methods.
Tastier
• Pressure cooking allows food to retain its full and natural flavor by cooking quickly
and efficiently. With the natural flavor intact, less seasoning is required, enabling you
to craft your meals precisely to your taste.
Healthier
• Vitamins and minerals are retained in food prepared with the NuWave PPC compared
to conventional stove top cooking. In addition, pressure cooking utilizes water in lieu
of oil or fat, eliminating excess amounts from the meal.
Multifunctional
• The NuWave PPC can be used for steaming, simmering and stewing fresh or
even frozen foods. Prepare everything from delicate soups and desserts to hearty
meat dishes.
Other manuals for 31201
1
Table of contents
Other NuWave Kitchen Appliance manuals

NuWave
NuWave Olio User manual

NuWave
NuWave Nutri-Pot 10Q User manual

NuWave
NuWave Olio 33701 User manual

NuWave
NuWave PIC Pro User manual

NuWave
NuWave Bravo XL 20801 User manual

NuWave
NuWave Nutri-Pot 13Q Quick guide

NuWave
NuWave PIC TITANIUM User manual

NuWave
NuWave PIC Flex User manual

NuWave
NuWave NuWave Medley XL User manual

NuWave
NuWave 31820 User manual


Popular Kitchen Appliance manuals by other brands

Tayama
Tayama TYG-35AF instruction manual

AEG
AEG 43172V-MN user manual

REBER
REBER Professional 40 Use and maintenance

North American
North American BB12482G / TR-F-04-B-NCT-1 Assembly and operating instructions

Presto
Presto fountain popper instruction manual

Westmark
Westmark 1035 2260 operating instructions


