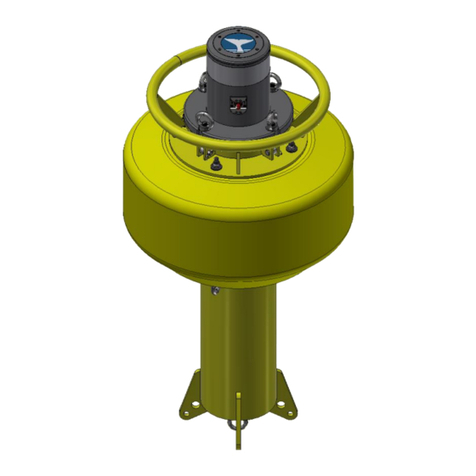
Ocean Sonics Coastal Acoustic Drifting Buoy User manual

Coastal Acoustic Drifting Buoy
User Guide
April 2020
Version 2.1

Ocean Sonics Buoy User Guide April 2020 P.1
Table of Contents
Introduction..............................................................................................................................................................2
Important Notes.................................................................................................................................................2
Specifications......................................................................................................................................................2
Features................................................................................................................................................................2
Ocean Sonics Buoy Quick Start .....................................................................................................................3
Assemble Buoy Configuration......................................................................................................................3
Connect to Ocean Sonics Buoy Wi-Fi .......................................................................................................3
Setup Hydrophone............................................................................................................................................3
Charging the Batteries ........................................................................................................................................4
Deployment..............................................................................................................................................................6
Recovery ...................................................................................................................................................................6
Maintenance............................................................................................................................................................8
Contact Ocean Sonics Ltd..................................................................................................................................8
Appendix A ..............................................................................................................................................................9
Troubleshooting Wi-Fi Connection ........................................................................................................9
Appendix B ........................................................................................................................................................... 10
Checking Wi-Fi Network Configuration ............................................................................................ 10
Setting Up Wi-Fi Password................................................................................................................... 10
Configuring Network Settings............................................................................................................... 10
Factory Reset .............................................................................................................................................. 12
Resetting Wi-Fi............................................................................................................................................... 13
Appendix C ........................................................................................................................................................... 14
Marco Settings - DHCP ........................................................................................................................... 14
Appendix D ........................................................................................................................................................... 15
Confirming Voltages ..................................................................................................................................... 15
Appendix E............................................................................................................................................................ 15
Using the Ocean Sonics Buoy with a Smart Phone or Tablet....................................................... 15
Appendix F............................................................................................................................................................ 16
Sample Buoy Assembly................................................................................................................................ 16
Appendix G ........................................................................................................................................................... 17
Technical Drawing......................................................................................................................................... 17

Ocean Sonics Buoy User Guide April 2020 P.2
Introduction
The Ocean Sonics Coastal Acoustic Drifting Buoy is an easy way to deploy one or more
icListen Smart Hydrophones while keeping them synchronized. Users can create a custom
array using the extension cables and Smart Cables as building blocks. The setup and
configuration of the hydrophones can be done with the buoy’s internal Wi-Fi access point.
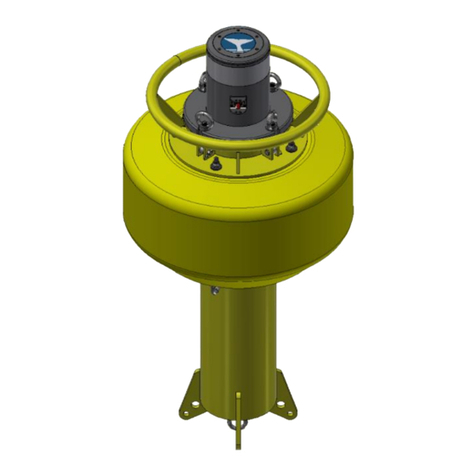
The yellow drifting buoy is small and lightweight, so it can be deployed from a small vessel
by 1 or 2 people. This solution combines power, Wi-Fi, and time synchronization with a
hydrophone array.
Important Notes
•Buoy battery life will depend on set-up of deployment,
number of hydrophones and smart cables.
•Do NOT allow the batteries to deep discharge
if the buoy does not have a low voltage cut-off module.
Batteries should not be discharged below 21 V.
To confirm the battery voltage, see Appendix D
•Turn the buoy OFF when not in use.
•Recharge batteries after each 6 to 8-hour deployment.
•Stand the buoy upright or lay on its side.
•Do NOT flip the buoy or turn upside down.
oBattery positioning is ballasted for upright position.
oTurning the buoy upside down could result in damage to batteries.
Specifications
WEIGHT
25 kg in air
DIMENSIONS
1 m x 0.5 m
Features
•Built-in Rechargeable Batteries
•ON/OFF Switch
•GPS Time Synchronization & Logging
•Hydrophones Synchronized within 1 µs
•Selectable cable lengths
•Up to 6 icListens per Buoy
•Buoy and Moorings are designed to
be acoustically quiet
•Wi-Fi for Real-time Set Up, Status,
and Spectral Display

Ocean Sonics Buoy User Guide April 2020 P.3
Ocean Sonics Buoy Quick Start
OSL Tip:
For a quick setup install Ocean Sonics’ Software Programs
Marco and Lucy on your PC prior to setting up your Ocean Sonics Buoy.
Assemble Buoy Configuration
1. Ensure the buoy is fully charged and in the OFF position (OFF Position: 0).
Figure 1. Top Hat of Buoy, Off (0) Position
2. Attach cables and hydrophones in configuration for deployment (see Appendix F).
3. Turn on Ocean Sonics Buoy (ON Position: 1).
Connect to Ocean Sonics Buoy Wi-Fi
4. Use a PC to connect to the Ocean Sonics Buoy Wi-Fi
(for troubleshooting Wi-Fi see Appendix A)
a. Go to Wi-Fi settings on computer
b. Ensure Wi-Fi is turned on
c. Show available networks
d. Select Buoy Wi-Fi to connect
For buoy Wi-Fi settings see Appendix B.
Setup Hydrophone
5. Open Marco on PC [Ocean Sonics’ Software Program found on icListen USB drive].
a. Click Refresh to view the hydrophone(s) connected to the buoy.
b. All units on Marco should be set to DHCP (See Appendix C for Marco Help).
c. Using Marco open the icListen in a Web Browser (double click on serial #).
6. Configure hydrophone for deployment.
a. Set icListen to Synchronise to GPS.
i. Under Special Features ensure Sync In –Falling Edge is selected
and Decode Time from PPS is checked.

Ocean Sonics Buoy User Guide April 2020 P.4
ii. If the buoy is in a location where it can receive a GPS signal,
the Home Page should indicate the hydrophone is synchronising or is
Synchronised to PPS (see below).
iii. When it has a GPS sync, the time will indicate it was set by PPS.
(This can take up to 5 minutes for a hydrophone to obtain GPS
synchronisation. Ensure the correct date and time are displayed.)
b. Set up Sampling Rates for icListen.
i. Under Settings Tab →Data Collection, select the settings for
deployment - Sampling rates of WAV and FFT data.
Charging the Batteries
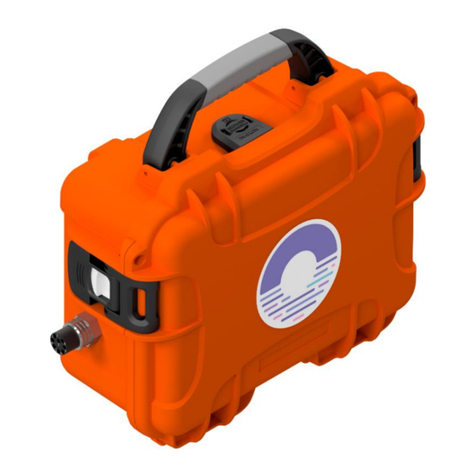
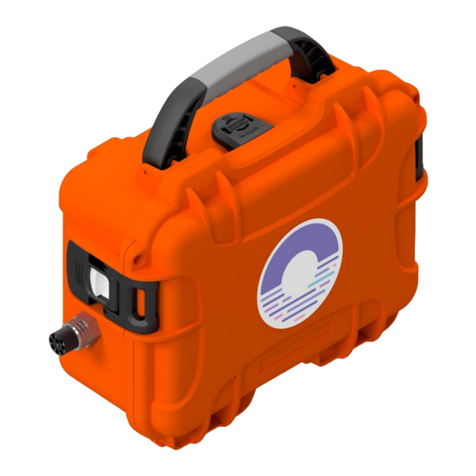
1. Ensure the buoy is in a secure, dry location for charging.
2. Lay the buoy on its side with MCBH8 plug in accessible position.
(Do NOT turn upside down or flip buoy onto top hat.)
3. Insert power cord into wall plug.
4. Mate connector and secure locking sleeve (see below).
Figure 2. Power Adapter connecting to Buoy
5. Charging should take approximately 8-10 hours to reach full capacity.
6. To Check Battery Voltage, see Appendix D.

Ocean Sonics Buoy User Guide April 2020 P.5
GPS Position Logging
1. Enter the IP address: 192.168.1.1 into a web browser.
2. Select the GPS Tab and click CONFIGURE.
3. Click Enable.
4. Click APPLY.
5. Click OK.
Each time Logs are turned on and off (enabled / disabled) a new log file will be created.

Ocean Sonics Buoy User Guide April 2020 P.6
Deployment
Note: For safe deployment ensure the vessel engine is stopped during deployment.
1. Set-up buoy using Ocean Sonics Guidelines for Deployment and the Quick Start
above.
2. Check operation using Wi-Fi to ensure hydrophones are recording and streaming.
3. Start deployment with bottom of array cables.
a. Lower the bottom weight on end of cables into water.
b. Slowly feed in the hydrophones and cables of the array.
Special care should be taken with the heave plates and hydrophones.
c. The Buoy should be the last instrument lowered to the water.
4. The Wi-Fi connection will continue streaming to PC while the buoy is within range
(up to 100 m).
Recovery
Note
The recovery requires 2-3 individuals. It is best to have 1-2 people retrieving the
equipment from the water while another person is laying the equipment out on the deck
as it is retrieved taking care of fragile hydrophones and minimizing tangling of the array.
1. Transit to buoy.
2. Use gaff hook to secure buoy.
3. Tie a rope around the top ring to secure buoy.
4. Retrieve the buoy from the water.
a. Lay the buoy on deck while holding onto the rope attached to the cabled array
below.
A winch can be used to allow easier retrieval of buoy on deck.
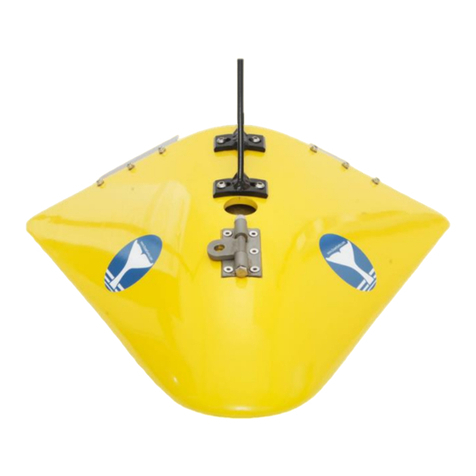
b. Slowly pull out the heave plate and recover the remaining array by hand, with
special care handling hydrophones.
5. Connect to the Wi-Fi on the Buoy.
a. Note: The Buoy may shut off Wi-Fi link if batteries are low power.
i. If this is the case, use the test cable instead of the buoy Wi-Fi.
6. Turn off recording on all hydrophones- using the Web Browser or Lucy.
7. Turn off Ocean Sonics Buoy (OFF Position: 0).
8. Rinse the Buoy, hydrophones and equipment with fresh water.
9. Hydrophones can be Powered Down to retain battery at 100%.
For each hydrophone:
a. Attach test cable.
b. Insert the reset tool.

Ocean Sonics Buoy User Guide April 2020 P.7
GPS Position Data Retrieval
Position data can be retrieved either by following the link provided in the GPS tab or using
an FTP client such as FileZilla.
From Web Browser [IP: 192.168.1.1]
1. On GPS Tab follow the hyperlink “this link”
2. Find File with date logged and download.
FTP Client (FileZilla)
1. Fill out the fields as shown below with the password being root.
2. Choose a destination folder on your computer and copy over the log files in the log
folder following the steps outlined for downloading hydrophone data.
Clearing Log Files
To delete all logged GPS files.
1. Disable GPS logging in the web browser.
2. Click CLEAR_LOGS.

Ocean Sonics Buoy User Guide April 2020 P.8
Maintenance
•The buoy should be thoroughly rinsed with fresh water after each deployment to
remove saltwater and debris.
•The buoy should only be opened when it is safe to do so in a clean environment
without chance of water entering the inside.
•The buoy should be recharged after each deployment.
Contact Ocean Sonics Ltd.
To download Ocean Sonics Software please visit:
https://sites.google.com/a/oceansonics.com/ocean-sonics-resource-site/
Service
To request an RMA or technical support
Email: support@oceansonics.com
Phone: 1-902-655-3000
Sales
For general sales inquiries
Email: sales@oceansonics.com
Phone: 1-902-655-3000
Website
https://OceanSonics.com
Mailing and Shipping Address
Ocean Sonics
110 Parkway Dr.
Truro Heights, NS Canada
B6L 1N8

Ocean Sonics Buoy User Guide April 2020 P.9
Appendix A
Troubleshooting Wi-Fi Connection
If advanced Network Settings have been changed on a computer, it may be necessary to
check with your network administrator for permission to change network settings.
If the computer is set to a static IP address, the settings should be changed (see below) to
turn on Automatic DHCP for use with the Wi-Fi Buoy.
Windows 10:
1. Go to Network Connections: Control Panel\Network and Internet\Network
Connections.
2. Right Click on Wi-Fi.
3. Choose Properties.
4. Click on Internet Protocol Version 4 (TCP/IPv4).
5. Click on Properties.
6. Ensure Obtain an IP address automatically and Obtain DNS server address
automatically are chosen.

Ocean Sonics Buoy User Guide April 2020 P.10
Appendix B
Checking Wi-Fi Network Configuration
a. Open your web browser of choice and type in IP Address of buoy.
[192.168.1.1]
b. Type in default username and password on the web page and click SIGN IN.
Username: root
Password: root
Setting Up Wi-Fi Password
1. Type in IP Address of buoy in web browser.
2. Choose Wi-Fi AP Settings Tab.
3. Type in password (must be 8 or more characters) into Password bar.
4. Click CONFIGURE & RESTART.
Note: Clicking CONFIGURE & RESTART will cause the connection to be lost. User must
reconnect and sign in to Wi-Fi with new password.
5. To delete password protection on Wi-Fi, leave Password field blank and click
CONFIGURE & RESTART.
Configuring Network Settings
To change IP Address Mode to DHCP
1. Open Web Browser with IP address of buoy.
2. Sign In.

Ocean Sonics Buoy User Guide April 2020 P.11
3. Click CONFIGURE.
4. Select DHCP.
5. Click CONFIGURE & RESTART .
Note: The buoy will restart, and communications will be lost. IP address provided will no
longer be the static address, the address can be found by viewing the Network Connection
Settings for the Wi-Fi.

Ocean Sonics Buoy User Guide April 2020 P.12
Changing Static IP Address
1. Open Web Browser with IP address of the buoy.
2. Sign In.
3. Click CONFIGURE.
4. Type in New IP address and Netmask.
(Gateway and DNS server can be left blank and will not be changed.)
5. Click CONFIGURE & RESTART.
Note: The buoy will restart, and communications will be lost. User must reconnect to Wi-Fi
and can open web browser with new IP address.
Factory Reset
If there are problems with the Wi-Fi settings a Factory reset can be applied.
This will reset to default IP address and password. This is the same function as the Reset
Button on the buoy (see Resetting Wi-Fi).

Ocean Sonics Buoy User Guide April 2020 P.13
Resetting Wi-Fi
A Wi-Fi reset can be done to recover the Wi-Fi network settings to the original configuration
that was provided for the buoy. All Wi-Fi settings will be lost and restored to default.
A Reset would be necessary in the following states:
•The Wi-Fi network on the Ocean Sonics Buoy was configured and caused the Wi-Fi
to stop working and communications were lost.
•The Wi-Fi password for an Ocean Sonics Buoy was set and forgotten.
All Wi-Fi settings will be lost and restored to default.
1. Remove Top Hat of Buoy.
2. Press and hold the Reset button for at least 4 seconds (as seen below).

Ocean Sonics Buoy User Guide April 2020 P.14
Appendix C
Marco Settings - DHCP
a. Click on the hydrophone serial number.
b. Click Configure …
c. Choose Automatic (DHCP).
d. Click Send to Device and wait for settings to be successfully sent to the unit.
e. Continue this for each unit so they are all set to DHCP IP addresses.
f. Units should all show up green indicating they are ready.

Ocean Sonics Buoy User Guide April 2020 P.15
Appendix D
Confirming Voltages
A voltmeter can be used to confirm the proper voltage is being supplied to the array on the
buoy.
1. Place the negative voltmeter lead (black) into pin 1 of the MCBH8F bulkhead.
connector on the battery pack end cap for the common connection (pinout below).
2. Place the positive voltmeter lead (red) into pin 7 (pinout below).
Fully Charged Batteries should measure approximately ~25 V.
Batteries should not be discharged past 21 V.
Appendix E
Using the Ocean Sonics Buoy with a Smart Phone or Tablet
1. Download an App on your device that will allow the discovery of IP addresses on
your Network. Suggested App: Fing
2. Connect to buoy Wi-Fi on device.
3. Open the Fing App to find the IP address of the hydrophone(s) connected.
4. Type the hydrophone IP Address of your hydrophone(s) found into a web browser
5. Use the web browser to configure settings for deployment as shown in Quick Start.
6. Web Browser can also be used to configure buoy Settings and set up GPS logging by
going to IP Address: 192.168.1.1 (using the same instructions as above for the
computer).
MCBH8F Bulkhead Connector Pinout

Ocean Sonics Buoy User Guide April 2020 P.16
Appendix F
Sample Buoy Assembly
Buoy assembly and deployment should be performed by an experienced professional,
with knowledge on deploying oceanographic equipment. Strain relief on cable
connections and securing hydrophones should be done with care. Failure to follow
best practices could result in damages in equipment or personnel.
DRIFTING BUOY

Ocean Sonics Buoy User Guide April 2020 P.17
Appendix G
Technical Drawing
Table of contents
Other Ocean Sonics Marine Equipment manuals
Popular Marine Equipment manuals by other brands

AUTOHELM
AUTOHELM ST50 Wind Trim Operation and installation

Fike
Fike 326-0001 Installation and maintenance instructions

Datawell BV
Datawell BV Waverider DWR-MkIII installation guide

Guidance Navigation
Guidance Navigation RadaScan Operator's guide

Garmin
Garmin Cessna Caravan G1000 Maintenance manual

Qlightec
Qlightec QAP100BZ user manual

Furuno
Furuno FE-880T Operator's manual

Jensen
Jensen MCD5070 Installating and operation manual

Teleflex Marine
Teleflex Marine MV-3 Series installation manual

Raymarine
Raymarine SmartPilot ST6001 operating guide

Webasto
Webasto 20 Series operating instructions

Apollo
Apollo REACH WIRELESS RW1300-210APO quick start guide