Ocean Sonics Recorder Buoy User manual

Recorder Buoy User Guide
August 8, 2019
Version 1.1
April 2020
Version 2.2

Recorder Buoy User Guide April 2020 P.1
Table of Contents
Overview...................................................................................................................................................................2
Important Notes......................................................................................................................................................2
Specifications......................................................................................................................................................2
Features ................................................................................................................................................................2
Ocean Sonics Buoy Quick Start .....................................................................................................................3
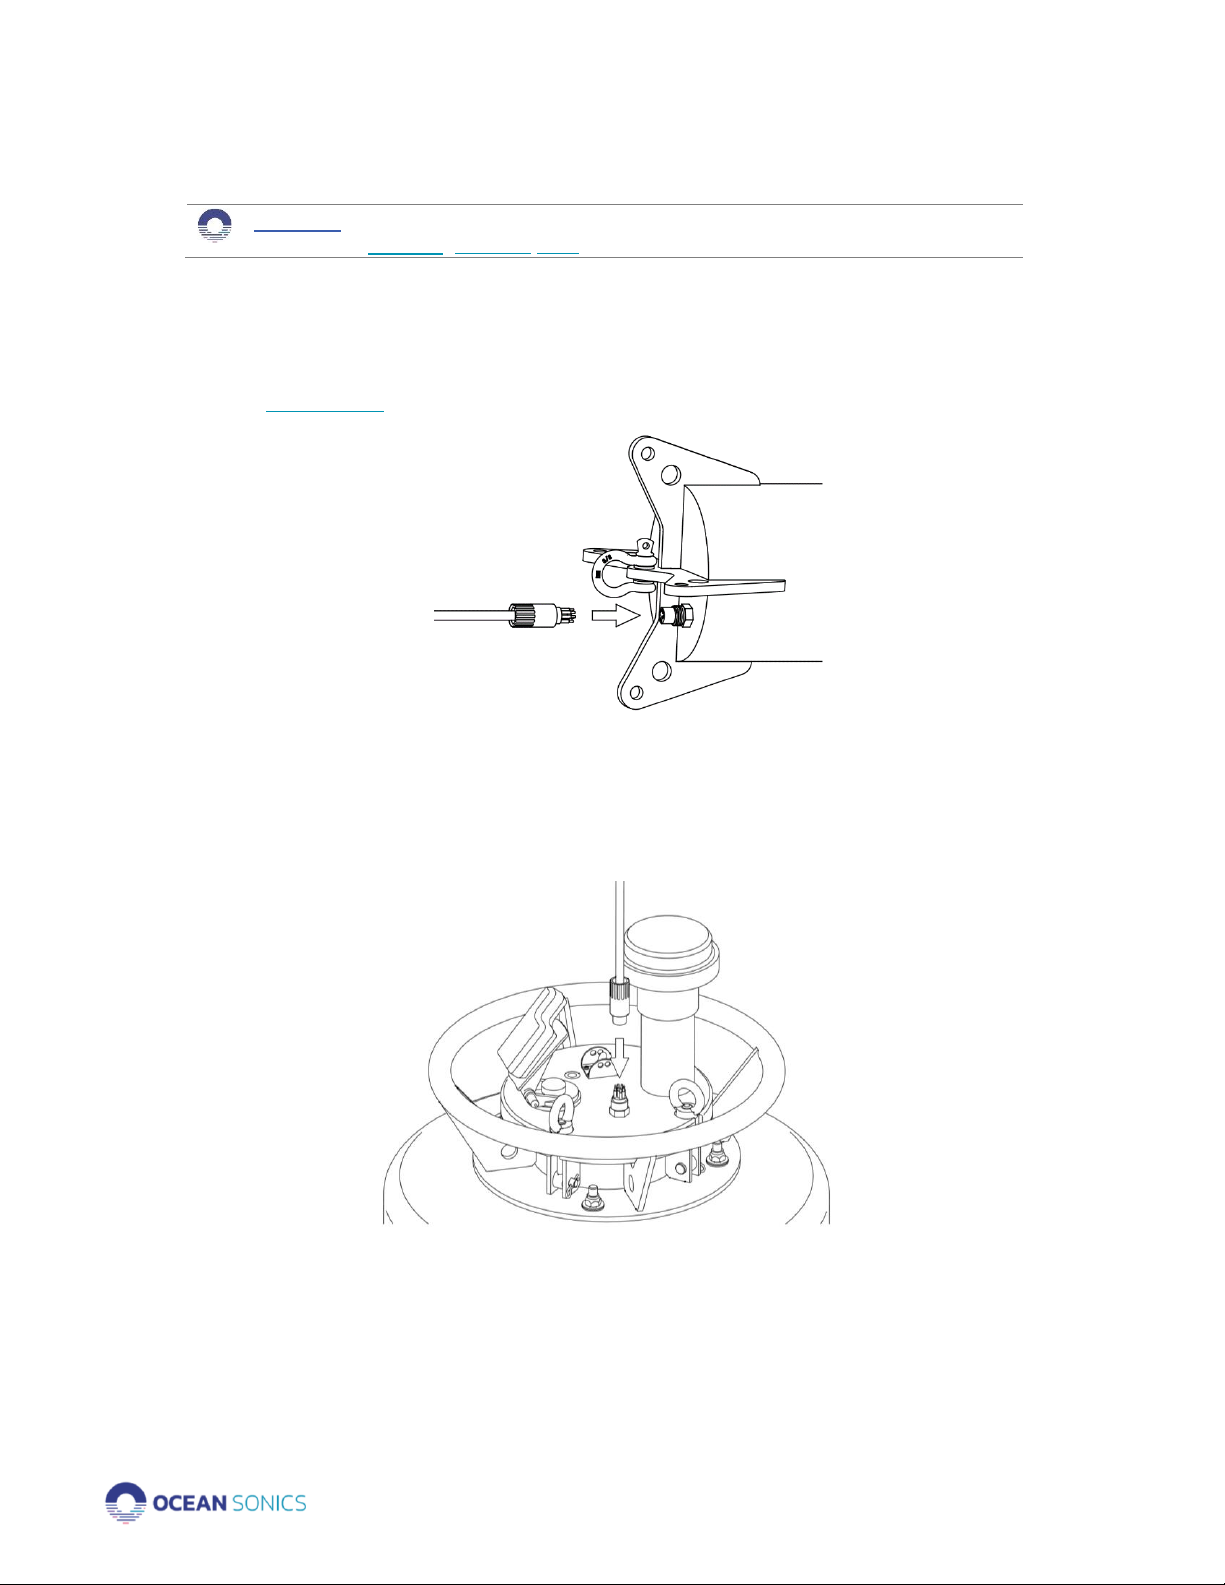
Assemble Buoy Configuration.......................................................................................................................3
Connect to Recorder Buoy..............................................................................................................................3
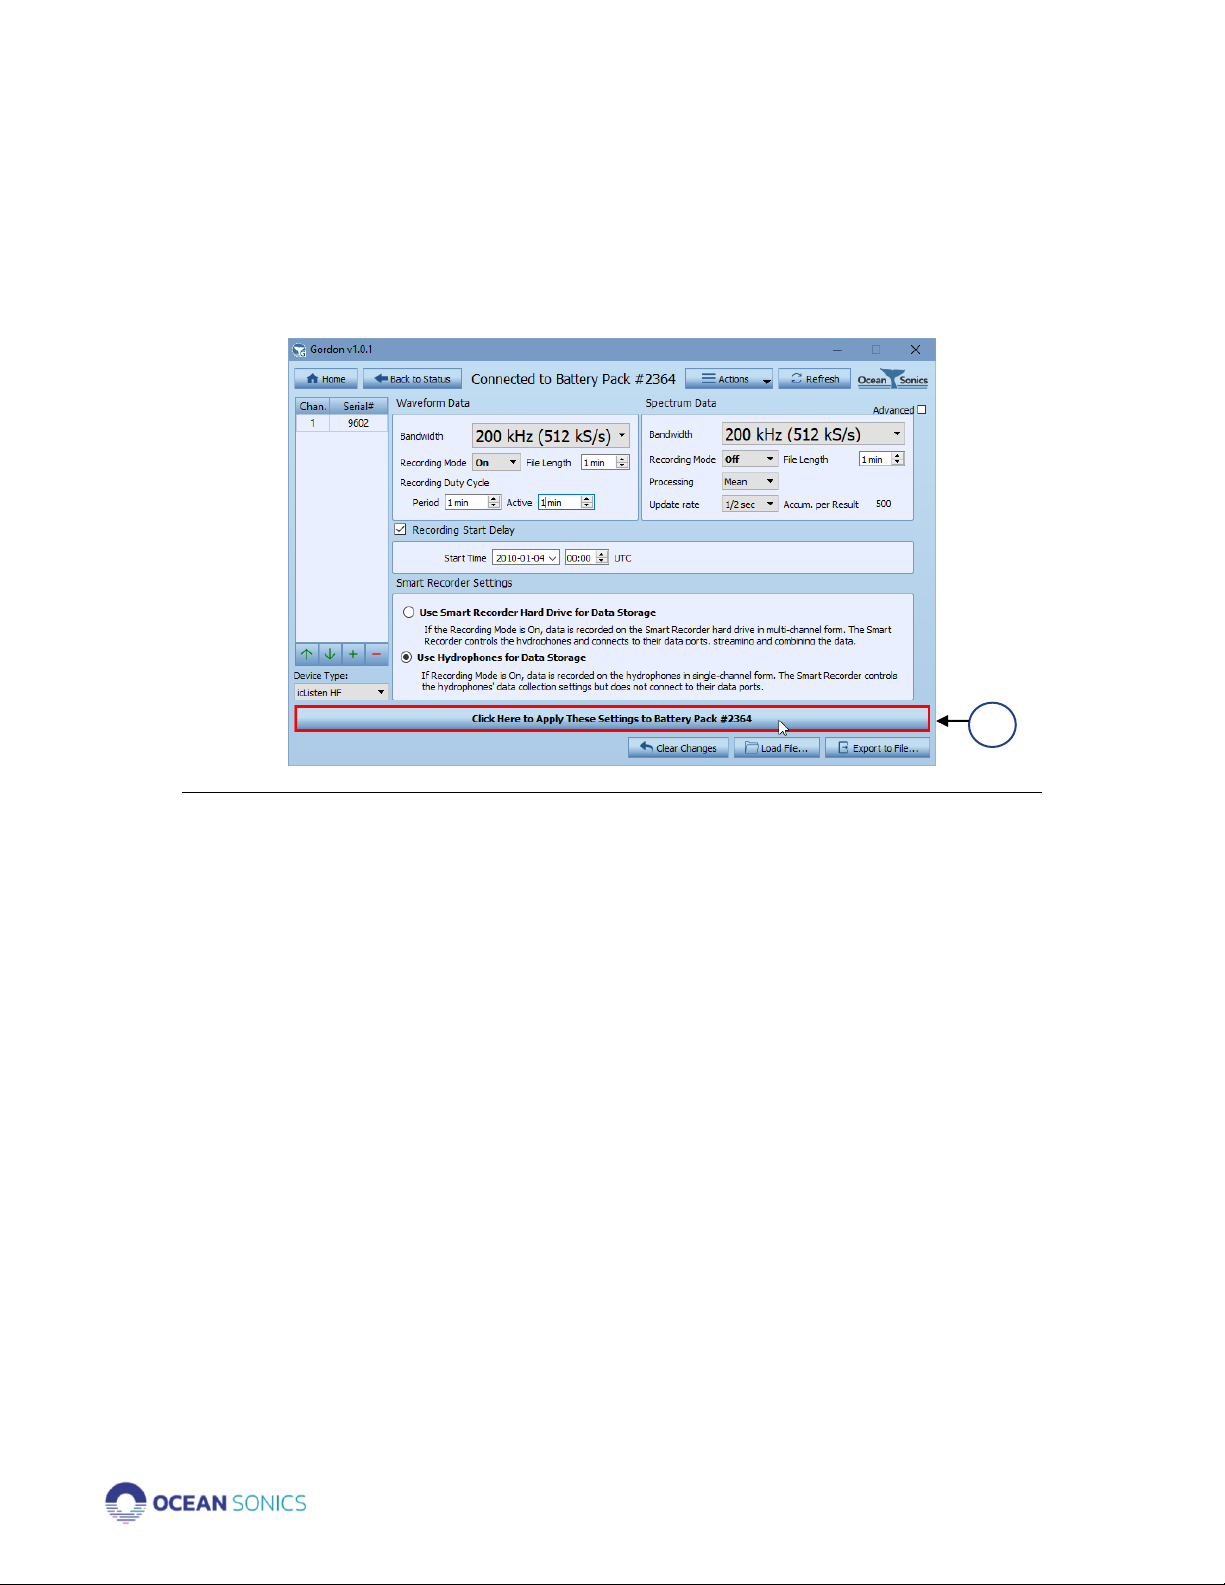
Setup Sampling on Recorder Buoy for Deployment..............................................................................4
Deployment..............................................................................................................................................................6
Recovery....................................................................................................................................................................6
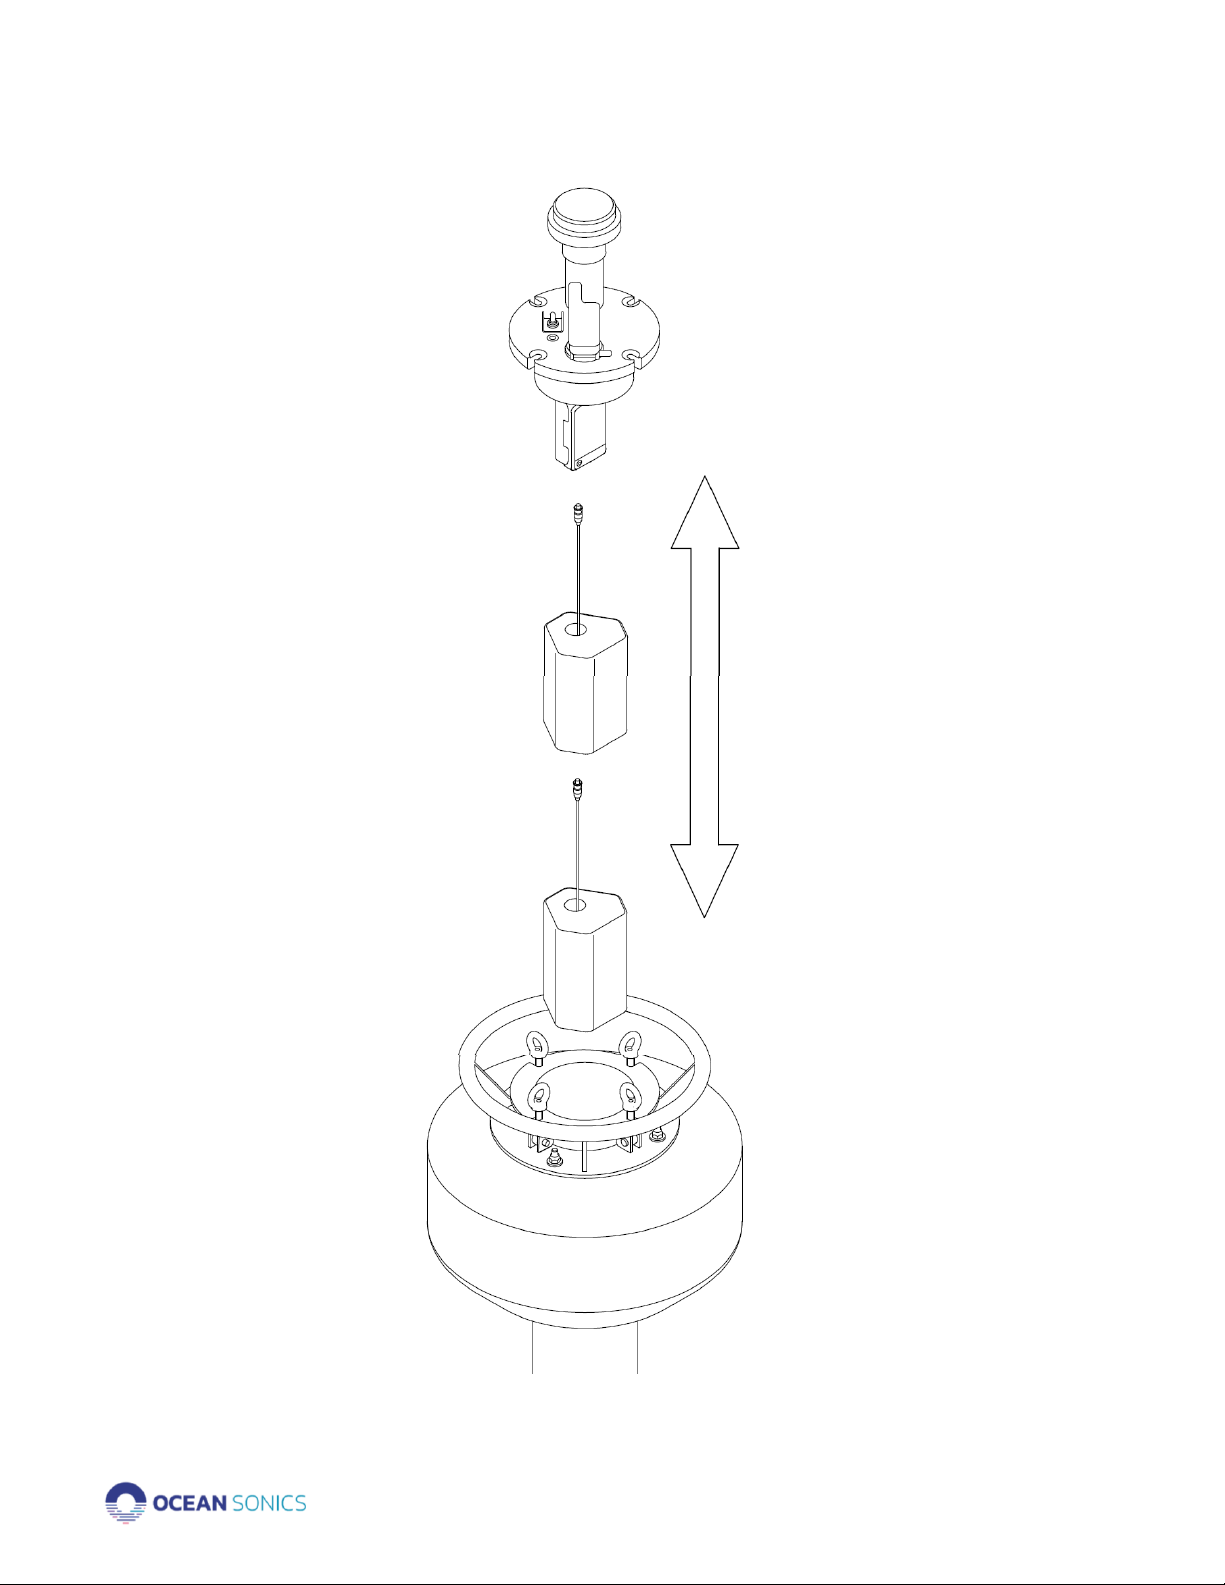
Hard Drive Retrieval..............................................................................................................................................6
Battery Replacement............................................................................................................................................7
Maintenance............................................................................................................................................................9
Testing the Buoy ................................................................................................................................................. 10
Power through Wall Outlet ......................................................................................................................... 10
Power with Buoy Batteries ......................................................................................................................... 10
Appendix A............................................................................................................................................................ 11
Buoy Assembly................................................................................................................................................ 11
Appendix B............................................................................................................................................................ 12
Battery Measurements ................................................................................................................................. 12
Appendix C ........................................................................................................................................................... 13
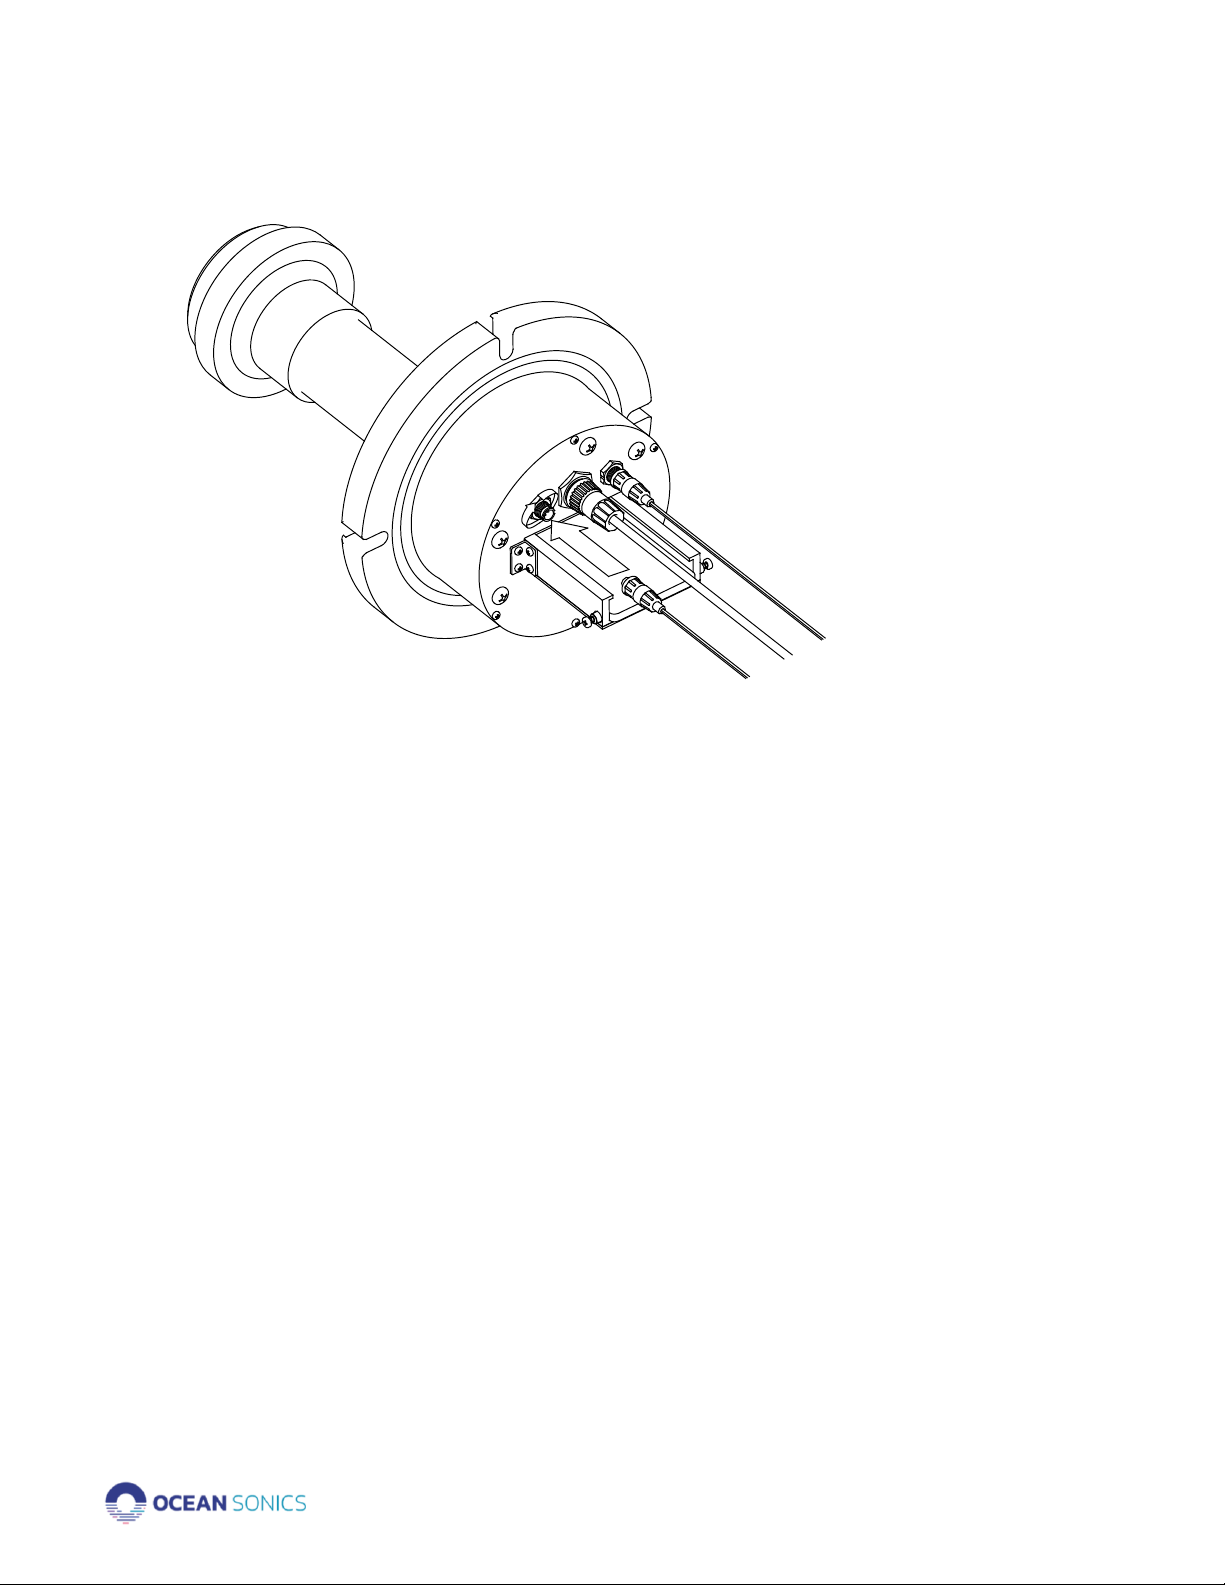
Technical Drawing......................................................................................................................................... 13

Recorder Buoy User Guide April 2020 P.2
Overview
The Ocean Sonics Recorder Buoy is an easy way to deploy one or more icListen Smart
Hydrophones while keeping them synchronized. The yellow drifting buoy is small and
lightweight, so it can be deployed from a small vessel. This solution combines power, data
storage, and time synchronization with a hydrophone array.
Create a custom array using the extension cables and Smart Cables as building blocks.
Setup and configure the hydrophones with the help of the Gordon Application to provide full
time sampling or sample periodically using the duty cycling feature.
Record data on the hydrophones or on a hard drive within the buoy increasing data storage
to 2 TB.
Important Notes
•Store the buoy upright or laying on side.
•Do NOT flip the buoy or turn upside down.
oBattery positioning is ballasted for upright position.
oTurning the buoy upside down could result in damage to batteries.
Specifications
WEIGHT
25 kg in air
DIMENSIONS
1 m x 0.5 m
Features
•Setup recording with a simple application
•ON/OFF Switch
•Synchronized data recording
•Buoy designed to be acoustically quiet
•Extra data storage hard drive in buoy
•Selectable cable lengths
•Record data continuously or duty cycled
•Ability to change configuration of cables
and hydrophones

Recorder Buoy User Guide April 2020 P.3
Ocean Sonics Buoy Quick Start
OSL Tip:
For a quick setup install Ocean Sonics’ Software Programs
Gordon, Marco &Lucy on your PC prior to setting up your buoy.
Assemble Buoy Configuration
1. Ensure the buoy has batteries properly loaded and is in the OFF position
(OFF Position: 0).
2. Attach cables, smart cables and hydrophones in configuration for deployment
(See Appendix A).
3. Turn ON Ocean Sonics Recorder Buoy (ON Position: 1).
Connect to Recorder Buoy
4. Attach the serial cable to the top of the buoy in the designated MCBH8 connector.
5. Connect the cable (USB end) into a computer USB port.
a. If the USB device is not recognized when the test cable is plugged in, run the
setup executable installation package for the driver that can be found on your
data stick (/icListen/Serial to USB Test Cable Driver).

Recorder Buoy User Guide April 2020 P.4
Setup Sampling on Recorder Buoy for Deployment
6. Open the Gordon application on your PC.
7. Choose Connect to a Smart Recorder .
8. Choose your device from the list.
a. Click on the Battery Pack.
b. Click Connect.
9. A page will be displayed with the Battery Pack Status.
a. Click Set Time.
This will set the time to be the same
as your computer. This is important
to avoid unwanted recording and for
all your data to have the proper date
and time.
b. Click Data Settings.
10. Add your hydrophone:
a. Click on the [+] button to add a channel (hydrophone).
b. Type in the serial number of the icListen hydrophone(s) connected to the
Battery Pack.
10 a.
10 c.
8 a.
8 b.
9 a.
9 b.
10 b.

Recorder Buoy User Guide April 2020 P.5
c. Choose the settings for the Waveform Data, Spectrum Data, Delay and Smart
Recorder Settings.
d. A Start Delay is useful to start the duty cycle at a designated time
(if no delay is chosen, the recording will begin at the start of the next minute
after clicking Apply).
e. Click Apply Settings ‘Click Here to Apply These Settings to Battery Pack #_’.
The Apply Button will disappear to show that settings have been applied successfully.
For more information on Gordon Application and setup see Smart Recorder User Guide on
USB stick under Gordon Folder.
10 e.

Recorder Buoy User Guide April 2020 P.6
Deployment
1. Set-up Recorder Buoy for deployment (See Appendix A.).
2. Vessel should be stopped while lowering equipment over side of vessel.
3. Start deployment with bottom of array cables.
a. Lower weight on end of cables into water.
b. Slowly feed in the hydrophones and cables of the array.
Special care should be taken with heave plates and hydrophones.
c. The Buoy will be the last instrument lowered to the water.
Recovery
1. Transit to buoy.
2. Use gaff hook to secure buoy.
3. Tie a rope to the top ring of the buoy to secure while recovering.
4. Retrieve the buoy from the water.
a. Place the buoy on deck while holding onto rope attached to cabled array
below. [Winch can be used to allow easier retrieval of buoy on deck.]
b. Slowly pull out heave plate and recover remaining array by hand, with special
care handling hydrophones.
5. Turn off buoy (OFF Position: 0).
6. Hydrophones can be Powered Down to retain battery at 100%.
For each hydrophone: Attach the test cable to the hydrophone. Insert and then remove
the hardware reset tool (9V battery) plug into the barrel connector of the test cable.
7. Rinse the buoy and equipment with fresh water.
Hard Drive Retrieval
1. Recover the Buoy (see above).
2. Dry the buoy fully.
3. In a dry environment ensure all hardware is clean and dry.
Special care should be paid to moving parts and crevasses.
4. Ensure buoy is in OFF Position: 0.
5. Unscrew the eye nuts on the top of the buoy to remove the top hat.
6. Gently pull up the top hat without pulling on the cables within the buoy.
a. The top of the buoy will only be opened momentarily, and cables should remain
attached while retrieving the hard drive.
7. Remove the hard drive by unscrewing the 2 thumbscrews securing the drive.
Before Deployment:
It is suggested that users secure top hat of buoy before deployment. This can be done with
a vinyl coated steel cable and pad lock. Thread the cable through the eye nuts and padlock
to secure in place. This will ensure the eye nuts will not become loose and it will prevent
opening of the top hat until retrieved.

Recorder Buoy User Guide April 2020 P.7
a. Slide out the hard drive along the metal base as a guide.
b. DO NOT pull up on the hard drive as it could damage the connector.
8. Replace top hat of buoy back into place until the hard drive is returned.
9. Use a SATA cable to plug the hard drive into a USB port of a computer.
10. Retrieve the data on the hard drive and remove data for next deployment.
11. After the data transfer, return the drive.
a. If you are replacing the drive with a new drive, ensure the correct formatting
has been applied to the drive (exFAT with MBR partitioning).
Battery Replacement
1. Ensure Buoy is OFF (Position: 0).
2. Unscrew eye nuts and remove top hat.
3. Remove batteries.
a. Disconnect all cables from the top hat of the buoy.
b. Remove batteries carefully from the buoy.
USB
SATA
Hard
drive

Recorder Buoy User Guide April 2020 P.8

Recorder Buoy User Guide April 2020 P.9
4. Line up new batteries to insert in same fashion batteries were removed.
5. Pull cables through the middle of the batteries.
6. Attach cables to connectors as shown above.
Note: Batteries can plug into either of the top hat connectors.
Maintenance
•The Recorder Buoy should be thoroughly rinsed with fresh water after each
deployment to remove saltwater and debris.
•The Recorder Buoy should only be opened when it is safe to do so in a clean
environment without chance of water entering the inside.
•The Recorder Buoy and hydrophones should be shut down when not in use to
conserve battery.

Recorder Buoy User Guide April 2020 P.10
Testing the Buoy
It is recommended that the buoy is tested with deployment settings before the deployment.
To prevent wasting battery power during testing the buoy can be powered through a 36V
adapter plugged into a wall outlet. This power attaches to the serial cable (MCBH8 to USB
cable) that is used for setup.
It is also recommended to perform a short test (10 minutes) on battery power to ensure there
are no problems with complete setup of system running on buoy battery power.
Power through Wall Outlet
1. Plug power cord into the wall outlet.
2. Plug the power cord into the 36V power adapter.
3. Plug the power adapter barrel connector into the serial cable.
4. Plug the serial cable USB end into a computer USB port.
5. Connect the serial cable to the MCBH8 connector on the Recorder Buoy.
6. Setup for deployment, record and review data on hard drive.
Power with Buoy Batteries
1. Setup the buoy with the field deployment configuration.
2. Allow the buoy to record a total of 10 minutes.
3. Retrieve the data.
4. Review the data to ensure all data recorded properly.

Recorder Buoy User Guide April 2020 P.11
Appendix A
Buoy Assembly
Buoy assembly and deployment should be performed by an experienced professional,
with knowledge on deploying oceanographic equipment. Strain relief on cable
connections and securing hydrophones should be done with care. Failure to follow
best practices could result in damages in equipment or personnel.

Recorder Buoy User Guide April 2020 P.12
Appendix B
Battery Measurements
Note
Ensure you are performing measurements while the recorder is set to RECORD. If the buoy
is setup to duty cycle and is in the rest/off state, you will be unable to take a measurement.
A voltmeter can be used to confirm the proper voltage is being supplied to the exterior
bulkhead connector on the bottom of the buoy where the cable is attached.
This should be done before a deployment and after replacing batteries to ensure the batteries
are in good condition.
1. Turn on Recorder Buoy running solely on interior batteries (not plugged into 36 V wall
adapter).
2. Place the negative voltmeter lead (black) into pin 1 of the MCBH8F bulkhead
connector on the battery pack end cap for the common connection (pinout below).
3. Place the positive voltmeter lead (red) into pin 7 (pinout below).
When new batteries are placed in buoy the voltage should be ~33 to 35.2 V
(full capacity of long-life alkaline batteries).
MCBH8F Bulkhead Connector Pinout

Recorder Buoy User Guide April 2020 P.13
Appendix C
Technical Drawing
Table of contents
Other Ocean Sonics Marine Equipment manuals

Ocean Sonics
Ocean Sonics Launch Box User manual

Ocean Sonics
Ocean Sonics Tow Fish User manual

Ocean Sonics
Ocean Sonics icListen HF User manual

Ocean Sonics
Ocean Sonics BL-B4-GPS-B User manual

Ocean Sonics
Ocean Sonics Processing Buoy User manual

Ocean Sonics
Ocean Sonics Coastal Acoustic Drifting Buoy User manual
Popular Marine Equipment manuals by other brands

Maretron
Maretron MBB300C user manual

COBHAM
COBHAM SAILOR 6282 user manual

MOFLASH SIGNALLING
MOFLASH SIGNALLING S00608 INSTALLATION & TECHNICAL INFORMATION

Lecomble & Schmitt
Lecomble & Schmitt VHM 26 DTP Mounting instructions

Fusion
Fusion Apollo MS-WB670 owner's manual

AUTOHELM
AUTOHELM ST4000+ Owner's handbook