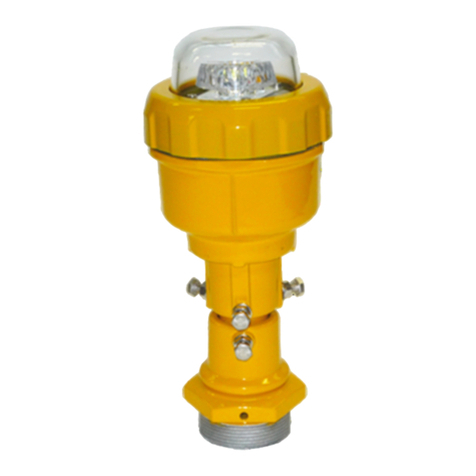
OCEM FP150 Instruction manual

Document UT-MT-0046_EN Page 1 of 18
Via della Solidariet , 2/1
40056 Valsamoggia Loc. Crespellano
BOLOGNA ITALY
Edition 04/06/2020 Supersedes edition 11/03/2014
Via Farini, 6 – 40124 Bologna - Italy
THIS COPY IS NOT SIGNED SINCE IT IS FILED AND DELIVERED BY MEANS OF THE AUTOMATIC KNOWLEDGE MANAGEMENT SYSTEM (IT CAN BE SIGNED ON REQUEST). THIS DOCUMENT AND THE DATA CONTAINED HERE IN, IS
PROPRIETARY PROPERTY AND SHALL NOT BE DUPLICATED, USED OR DISCLOSED – IN WHOLE OR IN PART – FOR ANY PURPOSE WITHOUT WRITTEN CONSENT OF OCEM.
ELEVATED RUNWAY EDGE LIGHT
FP150
INSTRUCTION MANUAL FOR USE, INSTALLATION
AND MAINTENANCE
Compiled by: Nicola Marabini Approved by: Piero Scaramagli
N° Attachments: 1 Copy n°:

Document UT-MT-0046_EN Page 2 of 18
Edition 04/06/2020 Supersedes edition 11/03/2014
ELEVATED RUNWAY EDGE LIGHT FAU
INSTRUCTION MANUAL FOR USE, INSTALLATION AND MAINTENANCE
LIMITED PRODUCT WARRANTY
THE FOLLOWING WARRANTY IS EXCLUSIVE AND IN LIEU OF ALL OTHER WARRANTIES, WHETHER EXPRESS,
IMPLIED OR STATUTORY, INCLUDING, BUT NOT BY WAY OF LIMITATION, ANY WARRANTY OF
MERCHANTABILITY OR FITNESS FOR ANY PARTICULAR PURPOSE.
OCEM - ENERGY TECHNOLOGY warrants to each original Buyer of Products manufactured by the Company
that such Products are at the time of delivery to the Buyer, free of material and workmanship defects,
provided that no warranty is made with respect to:
(a) any Product, which has been repaired or altered in such a way, in Company’s judgement, as to affect
the Product adversely;
(b) any Product which has, in Company’s judgement, been subject to negligence, accident or improper
storage;
(c) any Product which has not been operated and maintained in accordance with normal practice and in
conformity with recommendations and published specification of Company;
(d) the breaking of the warranty seals, if present, determines the immediate termination of the warranty;
and,
OCEM - ENERGY TECHNOLOGY’s obligation under this warranty is limited to use reasonable efforts to
repair or, at its option, replace, during normal working hours at the facility of the Company, any Product
which in its judgement proved not to be as warranted within the applicable warranty period. All costs of
transportation of Products claimed not to be warranted and of those repaired or replaced, to or from the
facility of the Company shall be borne by Purchaser. Company may require the return of any Product
claimed not to be as warranted to its facility, transportation prepaid by Purchaser, to establish a claim
under this warranty. The cost of labour for the installation of a repaired or replaced Product shall be
borne by Purchaser. Replacement parts provided under the terms of this warranty are warranted for the
remainder of the warranty period of the Products upon which they are installed to the same extent as if
such parts were original components thereof. Warranty services provided under the Agreement do not
assure uninterrupted operations of Products; Company does not assume any liability for damages caused
by any delays involving warranty service.
IMPORTANT: READ THIS DOCUMENT
Before proceeding to the operations of installation, commissioning, operation, maintenance or disposal,
carefully read the entire document.
SAFETY INFORMATION
Extreme caution should be exercised when working with this equipment; it is normally used or connected
to circuits that operate at dangerous voltages and can be fatal.
The following section contains important safety information that you must follow when installing and
using the apparatus.
Misuse of the equipment or lack of care in applying safety procedures and prescriptions specified in this
document, may result in a hazard.
Avoid contact with voltage or current sources.
For no reason the protections and the safety devices must be removed.
Document UT-MT-0046_EN Page 3 of 18
Edition 04/06/2020 Supersedes edition 11/03/2014
ELEVATED RUNWAY EDGE LIGHT FAU
INSTRUCTION MANUAL FOR USE, INSTALLATION AND MAINTENANCE
OPERATION ON THE EQUIPMENT - SKILLS
Operation on the equipment and access to its internal parts shall be done by experienced personnel,
adequately trained and aware of the risks related to electricity and high voltages.
Safety rules shall be adopted when operating on the equipment, or on cables and other apparatus
connected to the it
DO NOT OPERATE ON ENERGIZED CIRCUITS
Do not carry out any operation on the converter or on apparatus connected to it when the circuits are
energized.
WHEN HANDLING AND SERVICING THIS EQUIPMENT, OBSERVE PRECAUTIONS FOR HIGH VOLTAGE
EQUIPMENT.
Before any access, inspection or intervention, be sure to have switched-off the unit, opened the main
circuit breaker and removed the supply to the unit (by opening the circuit breaker/switch on the
distribution board at the beginning of the supply line).
Then wait discharge time (at least 5 minutes), ground carefully the system, and check for voltage
presence before accessing..
REANIMATION
The maintenance staff must be aware of the risks related to electricity, criteria to prevent the risk of
electric shock and resuscitation techniques
CE MARK
This equipment complies with the requirements of European regulations for the CE mark.The
user has to respect all prescriptions reported in this document.
OUT OF SERVICE
In case of dismantling, decommissioning, destruction, disposal, the user shall follow all the required
precautions for component and material elimination, according to local rules and applicable law.
EDITIONS
Date
09/29/2000 First issue
04/20/2012 General review
11/03/2014
New address of the Company
General review
Deleted § “List of the recommended spare parts” and added relevant
attachment
Added the attachment UT-MT-0770

Document UT-MT-0046_EN Page 4 of 18
Edition 04/06/2020 Supersedes edition 11/03/2014
ELEVATED RUNWAY EDGE LIGHT FAU
INSTRUCTION MANUAL FOR USE, INSTALLATION AND MAINTENANCE
REVISIONS
Index Date De cription Edited by Approved by
01 04/06/2020
Update option M.Bacciglieri M.Mazzotti
LIST OF EFFECTIVE PAGES
From page 1 to page 18

Document UT-MT-0046_EN Page 5 of 18
Edition 04/06/2020 Supersedes edition 11/03/2014
ELEVATED RUNWAY EDGE LIGHT FAU
INSTRUCTION MANUAL FOR USE, INSTALLATION AND MAINTENANCE
INDEX
LIMITED PRODUCT WARRANTY ......................................................................................................... 2
SAFETY INFORMATION ...................................................................................................................... 2
EDITIONS ........................................................................................................................................... 3
REVISIONS .......................................................................................................................................... 4
LIST OF EFFECTIVE PAGES .................................................................................................................. 4
INDEX ................................................................................................................................................. 5
INDEX OF FIGURES ............................................................................................................................. 5
LIST OF ATTACHMENTS ..................................................................................................................... 5
1
GENERAL ......................................................................................................................... 6
2
MAIN FEATURES ............................................................................................................. 6
3
INSTALLATION .............................................................................................................. 10
3.1
CIVIL WORKS ................................................................................................................. 10
3.2
INSTALLATION .............................................................................................................. 11
4
MAINTENANCE ............................................................................................................. 13
4.1
MAINTENANCE PROGRAM ........................................................................................... 13
4.1.1
Periodical Checks ................................................................................................ 13
4.1.2
Snowplow Operations ......................................................................................... 16
4.2
CLEANING OF THE OUTER LENS ................................................................................... 16
4.3
RELAMPING .................................................................................................................. 16
4.4
REPLACEMENT OF THE OUTER LENS ............................................................................ 16
4.5
REPLACEMENT OF THE CLEAR INNER LENS (ONE PIECE) ............................................. 17
4.6
REPLACEMENT OF THE TWO COLOUR INNER LENS (TWO PIECES) .............................. 17
4.7
REPLACEMENT OF THE COLUMN ................................................................................. 17
4.8
REPLACEMENT OF THE CABLE LEAD............................................................................. 18
4.9
REPLACEMENT OF THE SUPPORT FOR LAMP ............................................................... 18
INDEX OF FIGURES
Figure 1 – Exploded View .................................................................................................................. 7
Figure 2 – Part List ............................................................................................................................. 8
Figure 3 - Complete P/N identification ............................................................................................. 9
Figure 4 – Civil Works ...................................................................................................................... 10
Figure 5 – FP150 - Details …….……………………………………………………………………………………………………12
Figure 6 – FP150 - Details ………………………………..………………………….…………………………………..………..14
Figure 7 – FP150 - Details ………………………………..………………………….…………………………………..………..15
LIST OF ATTACHMENTS
UC-PU-0285 - LIST OF THE RECOMMENDED SPARE PARTS
UT-MT-0070 - FP150 – INSTALLATION USING OPTICAL DEVICE

Document UT-MT-0046_EN Page 6 of 18
Edition 04/06/2020 Supersedes edition 11/03/2014
ELEVATED RUNWAY EDGE LIGHT FAU
INSTRUCTION MANUAL FOR USE, INSTALLATION AND MAINTENANCE
1GENERAL
FP150 elevated light is high intensity, unidirectional steady burning type.
These fittings are used for runway edge lighting and provide a candlepower
distribution conforming to ICAO Specs - Annex 14 and NATO STANAG 3316 Specs.
The lights described in this manual are manufactured to be powered through
isolating transformers by series circuits, fed by constant current regulators.
The layout of the fittings has to be carried out in compliance with the
recommendations of ICAO Specs - Annex 14 or NATO STANAG 3316 Specs.
Location of these fittings shall be in compliance with ICAO - Annex 14, STANAG 3316
and FAA.
2MAIN FEATURES
The fixture consists of:
heat resistant clear glass outer Fre nel len , to optimize the horizontal
candlepower distribution; the inner surface of the lens is prismatic, the outer is
completely smooth for easy maintenance
clear glass inner Fre nel len ; when necessary the lens is supplied in two 180°
pieces, one or both coloured
aluminium body with grounding bolt, which mounts a suitable support for the
lamp. It is balanced on an aluminium column and fixed to it by means of four
levelling screws
aluminium len plate hinged to the body and secured to it by means of a stainless
steel clamping spring. The outer lens is fixed to the plate by means of three
stainless steel clips with silicone gasket; the inner lens is mounted on the plate
with silicone gasket and upper securing block
aluminium breakable coupling, meeting FAA Specs, with a lower 2” male thread.
It has to be locked by means of a stainless steel threaded ring nut
two, single-pole neoprene cable leads, size 2.5 mm2, with plug meeting FAA
Specs L-823
tungsten-halogen lamp, 150 W, 6.6 A, PK 30/d base, with male faston cable leads,
1000 hour rated life

Document UT-MT-0046_EN Page 7 of 18
Edition 04/06/2020 Supersedes edition 11/03/2014
ELEVATED RUNWAY EDGE LIGHT FAU
INSTRUCTION MANUAL FOR USE, INSTALLATION AND MAINTENANCE
Figure 1 – E ploded View

Document UT-MT-0046_EN Page 8 of 18
Edition 04/06/2020 Supersedes edition 11/03/2014
ELEVATED RUNWAY EDGE LIGHT FAU
INSTRUCTION MANUAL FOR USE, INSTALLATION AND MAINTENANCE
No. De cription Qty
1 White outer lens .................................................................................................. 1
2 180° screen .......................................................................................................... 1
3 Upper block for inner lens ................................................................................... 1
4 180° right inner lens ............................................................................................. 1
5 Gasket for inner lens ............................................................................................ 1
6 Gasket for outer lens ........................................................................................... 1
7 Breakable coupling ............................................................................................... 1
8 Ring nut ................................................................................................................ 1
9 FAA L-823 plug ..................................................................................................... 1
10 180° left inner lens ............................................................................................... 1
11 Lamp ..................................................................................................................... 1
12 Lamp support ....................................................................................................... 1
Figure 2 – Part List
spun aluminium creen suitable to be mounted between the inner lens and the
outer lens to provide a 180° beam, available on request
spun aluminium daymarker cone, available on request.
All hardware is made of stainless steel.
See “Complete P/N identification” figure for P/N information.

Document UT-MT-0046_EN Page 9 of 18
Edition 04/06/2020 Supersedes edition 11/03/2014
ELEVATED RUNWAY EDGE LIGHT FAU
INSTRUCTION MANUAL FOR USE, INSTALLATION AND MAINTENANCE
Figure 3 - Complete P/N identification
Ba ic P/N:
Compliance:
I = ICAO 60m Runway Edge
S = ICAO 45 m Runway Edge and
Instrument Threshold/End
F = FAA Runway Edge
Colour (Side “L”)/Colour (Side “R”):*
C = White
G = Green
Y = Yellow
R = Red
X = Screened
Lamp Type:
150 = 150W 6.6A PK 30/d
Option :
C = Daymarker Cone
* The beams aiming is not field adjustable
F
P
1
5
0
THRESHOLD
CENTERLINE
Threshold SIDE
Runway End SIDE
Threshold SIDE
Runway End SIDE
L
R
R
L
L
R
R
L
CENTRELINE
C / C
Y / C
C / C
C / Y
G / R R / G

Document UT-MT-0046_EN Page 10 of 18
Edition 04/06/2020 Supersedes edition 11/03/2014
ELEVATED RUNWAY EDGE LIGHT FAU
INSTRUCTION MANUAL FOR USE, INSTALLATION AND MAINTENANCE
3INSTALLATION
3.1 CIVIL WORKS
Each light is usually installed on a suitable concrete block, into which a pipe elbows is
cemented. The isolating transformer is housed into a separate concrete pit which is
normally placed close the above concrete block (Figure 4).
The pit can be placed far from the concrete block too, but in this case a suitable cable
duct has to be provided between the pit and the pipe elbow for passing the
secondary cable.
As alternative the assembly pit-pipe elbow can be replaced by a steel sheet base,
which can be used to house the isolating transformer, complete with an upper steel
plate with a threaded sleeve.
Figure 4 – Civil Works

Document UT-MT-0046_EN Page 11 of 18
Edition 04/06/2020 Supersedes edition 11/03/2014
ELEVATED RUNWAY EDGE LIGHT FAU
INSTRUCTION MANUAL FOR USE, INSTALLATION AND MAINTENANCE
3.2 INSTALLATION
For the installation of the light the following steps are suggested:
pass together the secondary cable lead with receptacle and a suitable length of
grounding wire (grounded inside the pit) through the pipe elbow
place the receptacle into the upper threaded section of the pipe elbow, by
holding it between the two plastic rings, and pass the grounding wire through the
rings (in correspondence of break point provided on the rings)
open the light, by releasing the clamping spring which secures the lens plate, and
make free the cable leads with plug from the clamping seat
pass the grounding wire through the column and then through the bottom of the
body; pull the grounding wire through the inside of the body and make a suitable
provision of wire
clamp a suitable eyelet terminal (the grounding bolt is M5 threaded) to the wire
but not connect it to the grounding bolt to avoid the wire twisting during the
installation
connect the light plug to the secondary receptacle inside the pipe elbow and be
sure the threaded ring nut is placed close to the top of the column lower
threaded section
screw the column to the pipe elbow; during this operation leave the light open
(eventually supporting by hand the assembly lens plate-lenses) and take care to
avoid the twisting of the grounding wire and the light cable leads
after the screwing completion, lock (not tighten) the column to the pipe elbow by
means of the threaded ring nut, taking care that the arrow of the outer lens is
aimed towards the runway centreline (clamping spring of the lens plate faced to
the runway)
connect the lamp cable leads to the light cable leads with plug and the eyelet
terminal of the grounding wire to the light grounding bolt. Insert the light cable
leads with plug inside the clamping seat to prevent any strain or tugging
place on the light body the levelling-alignment device (P/N 332.3250 available on
request) in fixed position, level the light body by operating the four levelling
screws and then align the light in line with the runway centreline by using the
sights of the device
tighten the threaded ring nut of the slipfitter, taking care to not modify the light
alignment. Torque the ring nut at 45 Nm
remove the levelling-alignment device and close the light, by securing the lens
plate to the body by means of the clamping spring
If provided, mount the daymarker cone on the suitable supporting plate of the
body, by fastening it by means of the four screws.

Document UT-MT-0046_EN Page 12 of 18
Edition 04/06/2020 Supersedes edition 11/03/2014
ELEVATED RUNWAY EDGE LIGHT FAU
INSTRUCTION MANUAL FOR USE, INSTALLATION AND MAINTENANCE
1
- Lamp 7 - Clamping seat for cable leads
2 - Support for lamp with plug
3 - Screws for lamp support fastening 8 - Light levelling screws
4 - Elastic mountings for lamp locking 9 - Grounding bolt
5 - Arrow marked on the lamp support 10 - Hinge between lens plate
6 - Cable leads with plug and body
11 - Levelling and alignment device
Figure 5 - FP150 light - Details
1
2
4
3
5
6
10
9
8
7
11
11

Document UT-MT-0046_EN Page 13 of 18
Edition 04/06/2020 Supersedes edition 11/03/2014
ELEVATED RUNWAY EDGE LIGHT FAU
INSTRUCTION MANUAL FOR USE, INSTALLATION AND MAINTENANCE
NOTE: take as reference the document UT-MT-0770 in case it is available the optical
device P/N 332.4401 to level and align the light.
4 MAINTENANCE
WARNING
BEFORE ANY MAINTENANCE INTERVENTION, MAKE
SURE THE POWER SUPPLY BE SWITCHED OFF.
DO NOT OPERATE ON LIVE PARTS!!!
The preferred method of maintaining these lights is replacing each fixture periodically
and systematically and return it to the maintenance shop for renovation.
Field servicing shall be limited to cleaning the prisms.
4.1 MAINTENANCE PROGRAM
In order to ensure maximum light fixture life, the installed units should be subject to
a maintenance program in accordance with the following instructions and taking as
reference the Airport Service Manual ICAO - Part 9 - Airport Maintenance Practices or
FAA AC 150 5340-30.
4.1.1 Periodical Checks
Daily Burnt-out lamps
Broken parts of lights
Monthly Cleaning of the lenses
Correct setting of the lights
Semi-Annual Painting or replacement of rusted parts
Annual
Stability of the civil works
Stability and assembly of lights
Electrical connections and insulation degree
Luminous efficiency of lamps
Condition of all the gaskets
Un cheduled
After unusual atmospheric precipitation, check
the light condition and remove any luminous
beam obstructions

Document UT-MT-0046_EN Page 14 of 18
Edition 04/06/2020 Supersedes edition 11/03/2014
ELEVATED RUNWAY EDGE LIGHT FAU
INSTRUCTION MANUAL FOR USE, INSTALLATION AND MAINTENANCE
1 - Upper securing block for inner lens 5 -
Coloured half-lens (two pieces)
2 - Clear inner lens 6 - Silicone small spacers between
3 -
Gasket for inner lens half-lenses
4 -
Gasket for outer lens 7 - Mark and arrow on the top of
the half-lenses
1 - Reference on the body for outer lens proper mounting
2 - Reference on the body for inner lens proper mounting
Figure 6 - FP150 light - Details
1
2
3
4
5
7
6
9
8

Document UT-MT-0046_EN Page 15 of 18
Edition 04/06/2020 Supersedes edition 11/03/2014
ELEVATED RUNWAY EDGE LIGHT FAU
INSTRUCTION MANUAL FOR USE, INSTALLATION AND MAINTENANCE
1 -
References on the outer lens for
proper mounting on the body
2 -
Reference/s on the internal lens/es
to mount the gasket in fixed posiiton
Figure 7 - FP150 light - Details

Document UT-MT-0046_EN Page 16 of 18
Edition 04/06/2020 Supersedes edition 11/03/2014
ELEVATED RUNWAY EDGE LIGHT FAU
INSTRUCTION MANUAL FOR USE, INSTALLATION AND MAINTENANCE
4.1.2 Snowplow Operations
Snowplow operators should exercise extra care not to strike the light fixtures with
snowplow blades. After snow removal operations, inspect all light fixtures to locate
and replace, if necessary, any damaged light assemblies.
Recommended snow removal techniques are described in Airport Service Manual
ICAO - Part 9 - Airport Maintenance Practices or FAA AC 150/5200-30.
4.2 CLEANING OF THE OUTER LENS
Clean the external surface of the outer lens with a detergent solution.
4.3 RELAMPING
Open the light by releasing the clamping spring. Remove the cable leads with plug
from the clamping seat and disconnect the faston connections between the light
cable leads and the lamp cable leads.
Remove the lamp by releasing the two elastic mountings. Mount the new lamp in
fixed position and reassembly by reversing the above procedure.
Take care the new lamp be identified by the same P/N of the old one.
CAUTION: TOUCHING THE QUARTZ BULB WITH YOUR BARE FINGERS MAY
SERIOUSLY SHORTEN THE LAMP LIFE. IF THE QUARTZ BULB HAS BEEN TOUCHED,
WIPE IT CLEAN WITH A PIECE OF LENS CLEANING TISSUE OR SIMILAR MATERIAL
MOISTENED WITH ISOPROPYL ALCOHOL.
4.4 REPLACEMENT OF THE OUTER LENS
Remove the three stainless steel clips, which locks the outer lens, by unscrewing the
relevant screws; retain the hardware. Remove the damaged outer lens and mount
the new one in fixed position. Reassembly by reversing the above procedure.
If necessary, recheck the light aiming.
IMPORTANT: IT IS SUGGESTED TO REPLACE THE OUTER LENS GASKET TO NOT
AFFECT WATERTIGHTNESS.

Document UT-MT-0046_EN Page 17 of 18
Edition 04/06/2020 Supersedes edition 11/03/2014
ELEVATED RUNWAY EDGE LIGHT FAU
INSTRUCTION MANUAL FOR USE, INSTALLATION AND MAINTENANCE
4.5 REPLACEMENT OF THE CLEAR INNER LENS (ONE PIECE)
Remove the three stainless steel clips, which locks the outer lens, by unscrewing the
relevant screws; retain the hardware. Remove the outer lens and then the damaged
inner lens complete with upper block and gasket. Mount a new gasket on the new
inner lens in fixed position and then the above assembly on the lens plate in fixed
position; place the upper block on the top of the inner lens and reassembly by
reversing the above procedure. The arrows on the top of the inner lens must be
directed as the arrow of the outer lens.
IMPORTANT: IT IS SUGGESTED TO REPLACE THE INNER LENS GASKET TO NOT
AFFECT WATERTIGHTNESS.
4.6 REPLACEMENT OF THE TWO COLOUR INNER LENS (TWO PIECES)
Remove the three stainless steel clips, which locks the outer lens, by unscrewing the
relevant screws; retain the hardware. Remove the outer lens and then the inner lens
(in two pieces) complete with upper block and gasket. Recover the eventual half-lens
not damaged and the two silicone small spacers placed between the two half-lenses.
Replace the damaged half-lens with a new one of the same colour and top mark.
NOTE
Each half-len i top marked with the letter R (right beam) or the letter L (left beam)
to provide the proper aiming of the beam in the horizontal plane a hown in Fig. 3.
Between the two half-lenses place in low position the two silicone small spacers and
in up position the silicone securing block. To fix spacers and block use Loctite 601.
Mount a new gasket on the above assembly in fixed position and then the above
assembly on the lens plate in fixed position; reassembly by reversing the above
procedure. The arrows on the top of the two inner half-lenses must be directed as
the arrow of the outer lens
IMPORTANT: IT IS SUGGESTED TO REPLACE THE INNER LENS GASKET TO NOT
AFFECT WATERTIGHTNESS.
4.7 REPLACEMENT OF THE COLUMN
Open the light, by releasing the clamping spring, and remove the grounding
connection, by unscrewing the grounding bolt; retain the hardware.
Cut the wire to remove the eyelet terminal.
Remove the cable leads with plug from the clamping seat and disconnect the faston
connections between the light cable leads and the lamp cable leads.

Document UT-MT-0046_EN Page 18 of 18
Edition 04/06/2020 Supersedes edition 11/03/2014
ELEVATED RUNWAY EDGE LIGHT FAU
INSTRUCTION MANUAL FOR USE, INSTALLATION AND MAINTENANCE
Unscrew the four levelling screws making free the assembly body-lens plate-lenses
from the column; retain the hardware. Support the above assembly by hand and pull
the cable leads with plug and the grounding wire outside the bottom of the body.
Unscrew the broken column and pull the cable leads with plug and the grounding
wire through the column. Disconnect the light plug from the secondary receptacle.
Pass the cable leads with plug through the new column and then through the hole in
the bottom of the light body. Mount the assembly body-lens plate-lenses on the new
column and fix it to the column by means of the four levelling screw.
4.8 REPLACEMENT OF THE CABLE LEAD
Open the light, by releasing the clamping spring, and remove the grounding
connection, by unscrewing the grounding bolt; retain the hardware.
Cut the wire to remove the eyelet terminal.
Remove the cable leads with plug from the clamping seat and disconnect the faston
connections between the light cable leads and the lamp cable leads.
Unscrew the light and pull the cable leads with plug and the grounding wire through
the bottom of the body and the column. Disconnect the light plug from the
secondary receptacle.
Pass the new cable leads with plug through the column and then through the hole in
the bottom of the light body.
4.9 REPLACEMENT OF THE SUPPORT FOR LAMP
Open the light, by releasing the clamping spring, and remove the cable leads with
plug from the clamping seat; disconnect the faston connections between the light
cable leads and the lamp cable leads and remove the lamp by releasing the two
locking springs.
Unscrew the four screws which fasten the lamp support to the body; retain the
hardware.
Remove the damaged lamp support and mount the new one.
The arrow marked on the support must be aimed as the arrow of the outer lens in
the case of STANAG or ICAO-45 m lights, while it must be aimed on the contrary in
the case of ICAO 60 m lights.
Reassembly by reversing the procedure.
Table of contents
Other OCEM Lighting Equipment manuals

OCEM
OCEM Multi Electric LRTH04 Instruction manual

OCEM
OCEM LIMS Instruction manual

OCEM
OCEM MULTI ELECTRIC LETG User manual

OCEM
OCEM LSDS Instruction manual

OCEM
OCEM LHE Instruction manual

OCEM
OCEM LHI Instruction manual

OCEM
OCEM LERA P-001 User manual

OCEM
OCEM LIRE Series Instruction manual

OCEM
OCEM MULTI ELECTRIC LTHE04 Instruction manual

OCEM
OCEM SLTH Instruction manual