manuals.online logo
Brands
  1. Home
  2. •
  3. Brands
  4. •
  5. Olympus
  6. •
  7. Microscope
  8. •
  9. Olympus FV1200 MPE User manual

Olympus FV1200 MPE User manual

Olympus FV1200 User guide June 23, 2015
Olympus FV1200 MPE Microscope User Guide
A. Microscope Start Up
1. Sign-in to the log book with the start time.
2. Turn on mercury lamp power supply by pushing the
ON/OFF button and releasing it (The light should lights
up in Blue).
3. Turn on microscope controller and XY stage
controller.
4. Turn on the touch panel controllerand touch “Start
Operation”.
5. Turn on both scanner controllers (MAIN and SIM) ;
switch ON and then turn the key ON.
6. Turn on the computer if it is not on.
7. Enter user name/password to log on to Windows7.






Olympus FV1200 User guide June 23, 2015
B. Laser start up
1. Turn on laser power supplies
a) Multi Ar laser : Switch to ON and turn the Key to ON.
b) MCPSU (405/440/473/559/635nm): Switch ON.
c) LD559 laser: Switch on and WAIT UNTIL THE TEMPERATURE LIGHT STOPS BLINKING and THEN turn the Key
to ON.
Double click FV10-ASW program and enter User ID and password.



Olympus FV1200 User guide June 23, 2015
C. Outline of Acquisition Setting / Image Acquisition/ Image Viewer Windows
Before taking images, let’s get familiar with buttons and sliders on the
Acquisition Setting Window (such as scan mode, scan speed, image
size etc).
Scan mode: the default is unidirectional .
Scan Speed: The higher value, the slower, the better image. Around
12.5~20 us/pixel (microsecond per pixel) is a good speed.
Image size (number of x,y pixel): 512x512 pixel is the default.
Area: the image field can be optically zoomed in and rotated.
To rotate the viewing area, click on the red dot and drag clock- or
counter-clockwise (or click ). Zoom the imaging area with the
slider (click to return to 1x). With zoomed view, you can select the
scanning area by moving the blue-lined box around.
Laser power control: Checking the box will activate the laser. The
power can be adjusted by pointing the mouse pointer to the slider
area and clicking (large change), clicking the arrow heads (small
change), or rolling the mouse wheel on the slider area.
Lambda Scan: for spectral imaging.
Microscope: Objective selection is displayed. Also selecting the
objective on the dropdown list will automatically change the objective.
Z position setting: Clicking the large arrow heads will move the
objective up or down to focus onto the sample. The extent of
movement is determined by the Step size. Clicking small arrow heads
will move objective in half the Step size.
Start Set and End Set determine the z series range.
Time Scan: set up the time lapse series condition (interval and number of image acquisition.

Olympus FV1200 User guide June 23, 2015
D. Overview of Image Acquisition Control window
: Click Transmission light or Epifluorescent light to turn it on and off.
: Click on Focus x2, Focus x4, or XY Repeat begins scanning without
image acquisition.
XY Repeat scans at the imaging speed that you set with scan speed on Mode
panel.
Focus x2 automatically scans the sample at 2us/pixel –because of its fast
display refreshing rate, this will be good for focusing and searching for ROIs
without bleaching your sample.
Focus x4 will be faster, but the display quality may be too rough. Click Stop
scanning.
To acquire image, click XY (LZt) .
: Click Lambda to acquire lambda scan imaging (XYL).
Click Depth for z-series image acquisition (XYZ). Click Time for time-lapse
image series (XYt).
: Click on this will open the Spectral Setting window, where the range of
emission wavelength can be adjusted to prevent overlap between
fluorescences.
Olympus FV1200 User guide June 23, 2015
E. Viewing with Transmitted or Epifluorescence Light
Before scanning the sample with laser light, look at the sample and find
the region of interest first with either transmitted or fluorescent light.
MAKE SURE THE SLIDE AND COVERGLASS ARE CLEAN AND SEALED. Place the slide on
the microscope stage.
Move the stage using the joystick on the XY stage controller. Push the
speed (Fast/Med/Slow) buttonto change how fast the stage moves.
(You can also use the side wheels to control x and y separately by pushing
the XY/Z button to select XY on screen.)
Press Esc button (on LED touch panel or on FV10 program) to move
the objective completely away from the sample and press again to bring
the objective to the original position.
Fluorescent image observation
1. Select an objective lens using the touch panel controller (TPC).
2. Click of the FV10-ASW program or [EPI] button of TPC.
3. Select the appropriate fluorescence filter by touching a mirror button on
TPC. Adjust focus using the focusing knob.
4. After finding area of interest, click or [EPI] button on the TPC to
close the fluorescence light shutter and change the light path to the laser
scanner.
Transmitted light image observation
1. Click or [DIA] button of the TPC to turn on bright field light.
2. Click on [BF], [DIC], or [Phase] button on the TPC. Adjust the light intensity with the lamp
controller or by touching Lamp arrows on [DIA] tab.
3. For DIC viewing, insert the DIC slider and adjust the DIC contrast using the prism
controller.



Olympus FV1200 User guide June 23, 2015
4. After observation, click or [DIA] button on the TPC to close the shutter.
F. Image Acquisition (Multicolor imaging)
1. Click on Dye list button on the Image Acquisition Control Window and double click on the fluorescent
dyes you want to observe from the list. Click Apply button (if the Assign Dye Manually check box is
checked, uncheck it before pressing Apply button). It will activate the laser lines and the detection
channels according to the dyes you selected.
If the Selected dyes upon opening the program are not ones that you want to use, click the All Clear button
first before selecting your dyes.
2. Choose Image size (default- 512x512) from Size panel .
3. Press button (if not pressed) to automatically adjust HV and Offset values according to the scan
speed. . Slide the scan speed knob to select the image
scan speed (around 20 us/pixel).
4. Click button to scan the sample. It will scan fast at 2 us/pixel and show low-quality (pixelated)
image in a Live View window. While scanning, focus onto the region of interest with the remote focus
controller or by clicking arrowhead buttons ( ) in the Microscope window.
5. Click Stop button to stop scanning.

Olympus FV1200 User guide June 23, 2015
6. Set up proper acquisition condition each fluorescence colors by adjusting laser power, PMT detector
sensitivity, and offset. The following procedure is for Alexa Fluor 405, EYFP, and Alexa 633 as an example.
a) Check the Laser 405 only (check off other lasers, i.e. 515 and 635) to set up the imaging condition for
Alexa 405.
b) Click and focus onto the brightest focal plane of your
sample.
c) Press Ctrl-H keys to change the color LUT to Hi-Lo; the live display
will change to blue/white/red color scheme, where red pixels
represent saturated intensity (beyond scale), blue ones complete darkness (0 intensity),
and white in between.
d) Adjust the laser power (at least 5%) and HV and Offset of CHS1 to obtain some
brightest pixels in red and the background in blue.
e) Click to stop the fast scanning and click to scan at the imaging speed
and to check the image quality. Adjust more if needed.
7. Repeat the above procedure for 515 nm (EYFP) and for 635 nm (Alexa fluor 633).
8. Check on all the selected lasers.
9. Set the Zoom and Rotation as required.
10. Click button to capture images. When acquisition scanning is done, a 2D view window will
appear.
11. Save the image in .oib or .oif format. (.oib format is more convenient.)
(Optional Spectral Setting for Multicolor Imaging).
Often excitation/emission profiles of fluorophores in multicolor imaging
may be close, so there could be possible bleed-through of a fluorophore
emission to neighboring channels. To minimize this artifact, the emission
detection range of each channel can be adjusted by changing Spectral
Setting.
Click on , it will bring Spectral Setting window. Change the range of
spectrum for each channel (CHS1 and CHS2) by sliding, widening, or
narrowing the tabs or arrowheads.
Olympus FV1200 User guide June 23, 2015
Sequential Scanning Mode
In many cases, the bleed-through between multicolor can’t be eliminated by a spectral setting. It can be
avoided by sequentially scanning the sample with one laser and one detector at a time.
1. Check the Sequential box and it will bring up the sequential scan information window. Choose between
Line or Frame mode.
Line: by line-by-line, it scans one channel with only a specific laser line and detector on and then sequentially
scans the next channel with only a another laser line and detector on.
Frame: it scans sequentially frame-by-frame; it finishes scanning one channel first and then scans the next
channel.
If there is no bleed-through
between the emissions of some
fluorophores you are using, you
can group them together to scan
them simultaneously as a group. Simply click on the fluorophore name on the list and drag to the other group.
(Note: it will be good to set up the acquisition condition for each channel before using the Sequential mode. To
do so, first in simultaneous mode (unchecked Sequential box), set the acquisition condition by turning on only
the specific laser for the specific channel. Once you set the imaging condition for each colors, check the
Sequential box.)
2. Scan with Focus x2 or XY Repeat button to see to check if there is any bleed-through. If
not, stop scanning, and set the Scan speed at a slower rate and click button to acquire the image.
3. Save the image.
Olympus FV1200 User guide June 23, 2015
G. Z-Series (xyz) Image Acquisition
Use this mode to obtain optical section through the depth (z dimension) of your sample that can be used for
3D visualization. Before starting the following procedure, make adjustment for xy multicolor imaging
condition as described above.
1. Click button to scan.
2. Use the arrowheads buttons or the focus knob on the
remote controller to focus into different Z-axial planes (large
arrowhead buttons shift a full step size and small ones a half
step size that you define).
3. When you find an upper limit of your sample by moving the
objective up, click Start Set button. Bring the objective down
until you find lower limit and click End Set button.
4. Determine the Step Size and the number of Slices, which correlate with each other. It is recommended to
set the step size similar to the optical section thickness of the objective you are using, so that there is no
gap between the optical sections upon projection into 3D. The step size can be fixed by checking the box.
5. Click Stop button. Adjust the Scan Speed if needed, click Depth button (“Z”
will be appear on the XY button to become XYZ), and then click XYZ button.
6. When acquisition is done, Append
Next/SeriesDone button will appear over the
Stop button. If you need add additional sections,
click Append Next button (enter the number of
sections you want to add into the Append box
) or click SeriesDone to finish the
acquisition.
7. Save the image.
H. Time-Series (xyt) Image Acquisition
Use this mode for imaging time-lapse of live specimens. Before
starting time series imaging, make adjustment for xy imaging as usual.
1. Click Time button . It becomes XY_t.
2. In the TimeScan option, enter the interval time (in second)
between one acquisition start and the next acquisition start (for
example; to set up a 1 min interval, type 60 and press Enter key. If
you put 0 and enter (FreeRun), the interval will be the acquisition
time that is required for each frame).
Olympus FV1200 User guide June 23, 2015
3. Enter the number of acquisition frame in Num box.
4. Click button to start the timelapse.
5. Click SeriesDone button to finish the sequence and save the image.
I. Saving and Exporting Images
1. Click on the image window to be saved.
2. Click on icon or select File/Save or Save as from
menu.
3. ASave as window will appear. In case the image should
be saved in the Image folder of a Log-in user, click on
button and it will direct to your image folder.
Select Olympus Image Binary Format *.oibfile type,
type file name, and click on Save button. (Log-in user
and its associate folder will be created as you become
self-user).
4. To set up your image folder where you can jump directly by
clicking My Image Folder button, select Tools/Option menu.
Click Generaltab and specify the path of your image folder
with Browse..button. [Upon creating a user account, each
user will have its own folder in Ddrive (Do not create any
folder in Cdrive.). Click OK button.
5. Oib file type contains all the metadata including all the
acquisiotn parameters and it can be opened in FV10-ASW
program. The light version of this program is available for
installing in user’s own computer. Otherwise, the image
file can be exported as other file format so that it can be opened and processed in other imaging software.
To export images:
1. Select File/Export or File/Export Multi-Tiff menu. Click My
Image Folder button if the current folder is not yours.
2. With Export Multi-Tiff option, it saves the image as a
single tiff file that can contain multiple frames, like z- or
timelapse- series. This file type can be opened in Image J
software.
Olympus FV1200 User guide June 23, 2015
Check the Save Properties As ASCII Text box to save the metadata that contain information about the
image acquisition setting. This data will be useful to find out the imaging condition later with other
programs.
3. File/Export command brings a window with
different options.
This command will export images into a
folder that contain individual images of each
channel, z-steps, or time-points.
Select File typefor export.
ROI Overlay section allows saving the file
with ROI information.
Output Format :
RGB Color: the red, green, and blue channel
will be saved in color as individual *.tif files in
a folder.
RGB Color + Gray Scale box checked: the
color channels will be saved in gray scale as
*.tif files in a folder.
Merge Channel:a single merged color image
will be saved as a *.tif file.
Frame Ratedetermine the play speed of
the movie when the file is exported as AVI.
Check the AVI box to compress the movie file.
4. Check the Save Properties As ASCII Text button if you export the metatdata. Click Save button.
5. Transfer your image data to CD or USB flash memory.




Olympus FV1200 User guide June 23, 2015
J. System Shut-Down Procedure
Wipe off the oil or water from any oil objectives you
have used during your session with lens paper.
Logging off and transferring data.
1. Exit the FV10-ASW program.
2. Make sure that you transfer your image file to
USB flash memory. All image files more than 6-
month old will be removed during monthly
clean-up.
3. Log off Windows. If someone signs up for use
within a next 1 hour or so, leave the microscope
system ON. If not, shut down the system as
described below.
Shutting Off the system.
1. Shut down the computer .
2. Turn the mercury lamp off by pushing ON/OFF
buttonfor two seconds and release it.
3. Turn the microscope controller OFF and the XY
stage controller.
4. Turn off the touch panel controller with the switch
on the back.
5. Turn off the Mulit Ar-laserby turning the key off
and then the I/O switch off.
6. Turn off MCPSU.
7. Turn off LD559 laser by turning the key off first and
then the I/O switch off .
8. Turn off the two laser combiners, Mainand
SIM by turning the key off first and then the I/O
switch off.












Other Olympus Microscope manuals

Olympus DP74 User manual

Olympus

Olympus DP74 User manual

Olympus SZ2-ILA User manual

Olympus

Olympus SZ2-ILA User manual

Olympus GX41 User manual

Olympus

Olympus GX41 User manual

Olympus CX41 User manual

Olympus

Olympus CX41 User manual

Olympus DP80 User manual

Olympus

Olympus DP80 User manual

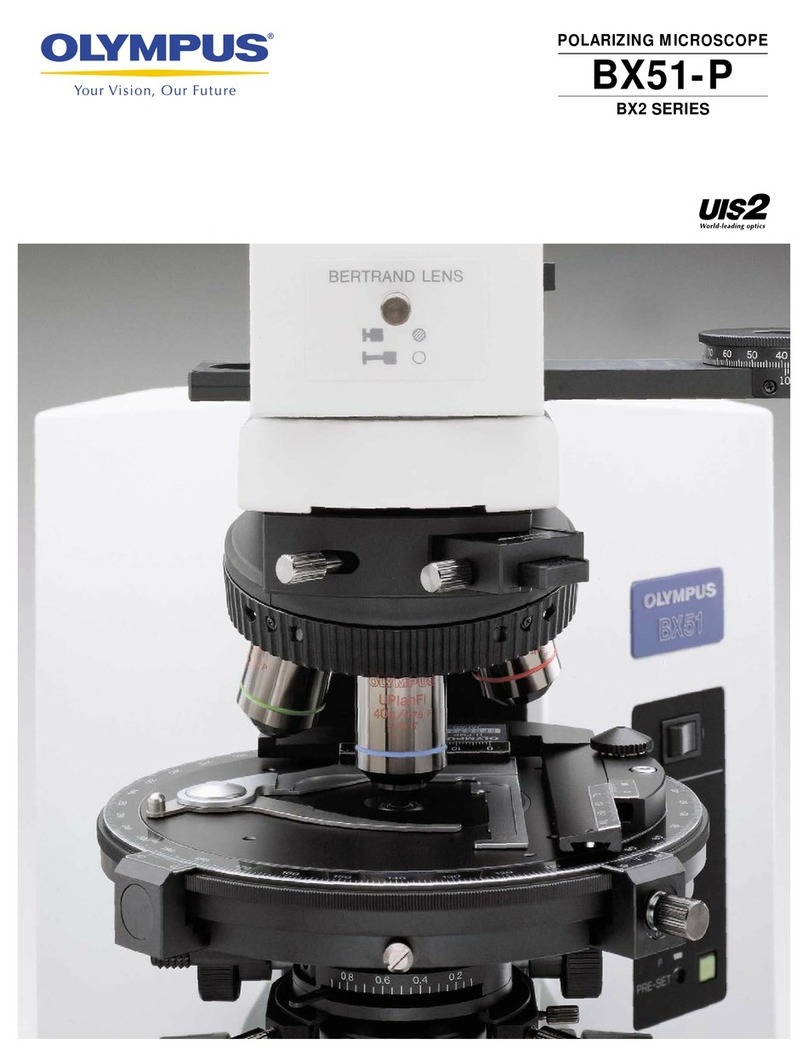
Olympus BX51-P User manual

Olympus

Olympus BX51-P User manual

Olympus CHA User manual

Olympus

Olympus CHA User manual

Olympus BX3-URA User manual

Olympus

Olympus BX3-URA User manual

Olympus SZX9 User manual

Olympus

Olympus SZX9 User manual

Olympus AL120-12 Series User manual

Olympus

Olympus AL120-12 Series User manual

Olympus IX71 User manual

Olympus

Olympus IX71 User manual

Olympus SZX2-LTTR User manual

Olympus

Olympus SZX2-LTTR User manual

Olympus CX22LED User manual

Olympus

Olympus CX22LED User manual

Olympus DP73 User manual

Olympus

Olympus DP73 User manual

Olympus BX51WI User manual

Olympus

Olympus BX51WI User manual

Olympus BHT-111 User manual

Olympus

Olympus BHT-111 User manual

Olympus CX41 User manual

Olympus

Olympus CX41 User manual

Olympus SZ3060 User manual

Olympus

Olympus SZ3060 User manual

Olympus SZ4045TR User manual

Olympus

Olympus SZ4045TR User manual

Olympus IX73 User manual

Olympus

Olympus IX73 User manual

Olympus MIC-D User manual

Olympus

Olympus MIC-D User manual

Olympus Discover FV10i Owner's manual

Olympus

Olympus Discover FV10i Owner's manual

Olympus BX53 User manual

Olympus

Olympus BX53 User manual

Olympus VM Series User manual

Olympus

Olympus VM Series User manual

Popular Microscope manuals by other brands

BestScope BS-2080MH4 user manual

BestScope

BestScope BS-2080MH4 user manual

Accu-Scope 3025 Supplemental instructions

Accu-Scope

Accu-Scope 3025 Supplemental instructions

Levenhuk 69731 user manual

Levenhuk

Levenhuk 69731 user manual

CoolLED pE-340fura user manual

CoolLED

CoolLED pE-340fura user manual

Xiaomi DDL-M1 Operating	 instruction

Xiaomi

Xiaomi DDL-M1 Operating instruction

Levenhuk 900 Series user manual

Levenhuk

Levenhuk 900 Series user manual

Leica M320 user manual

Leica

Leica M320 user manual

ViTiny UM20D-CSZ064 user guide

ViTiny

ViTiny UM20D-CSZ064 user guide

ViTiny UM12 user guide

ViTiny

ViTiny UM12 user guide

Meade 900X instruction manual

Meade

Meade 900X instruction manual

Motic BA210 series instruction manual

Motic

Motic BA210 series instruction manual

Nexcope NIB600 Series Manual instruction

Nexcope

Nexcope NIB600 Series Manual instruction

National Geographic LCD Microscope user manual

National Geographic

National Geographic LCD Microscope user manual

3B SCIENTIFIC PHYSICS 1005440 instruction manual

3B SCIENTIFIC PHYSICS

3B SCIENTIFIC PHYSICS 1005440 instruction manual

Digitus Digital Viewer DA-70351 user manual

Digitus

Digitus Digital Viewer DA-70351 user manual

Leica DMi8 user manual

Leica

Leica DMi8 user manual

Bresser 91-19501 operating instructions

Bresser

Bresser 91-19501 operating instructions

Prior Lux POL operating instructions

Prior

Prior Lux POL operating instructions

manuals.online logo
manuals.online logoBrands
  • About & Mission
  • Contact us
  • Privacy Policy
  • Terms and Conditions

Copyright 2025 Manuals.Online. All Rights Reserved.