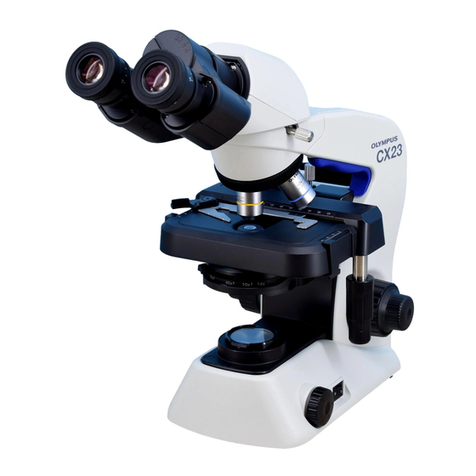
Olympus VANOX User manual

OLYMPUS
UNIVERSAL
RESEARCH
MICROSCOPE
MODEL
INSTRUCTION
MANUAL
1


Olympus
Universal
Research
Microscope
Model
VANOX
Table
of
Contents
I.
System
Chart
af
Various
Units
...........
2
I
I
.
Standard
Equipment
...................
4
I
II
.
Specifications
.........................
6
I
.
Principal
Components
and
Light
Path
Diagram
...
7
V
.
Identification of
Microscope
Components
.....
8
A
.
Microscope
Stand
...................
8
B
. Binocular
Observation
Tube
with
Photo
Tuba
...
9
C
. Revolving
Nosepiece
.................
10
D
.
Square
Mechanical
Stage
with
low
Drive
Controls
10
E
.
Achmmatic/Aplanatir:
Condens~r
........
11
...................
F
.
Condenser
Mount
11
...............
.
G
Auxiliary
Lens
System
11
H
.
Light
Source
.....................
12
...
.
VI
A~qernbly
Diagram
and
Instrument
Aswmhly
13
.................
VI
I
.
Operating
the
Microscope
16
...............
A.
EImrica! hnnecticrn
16
...............
B.
Center
the
Light
Bulb
17
...............
.
C
Center
th~!
Condenser
17
...
.
0
Operation of
the
Auxiliary
Lens
System
18
.......................
E
.
Condenser
19
.................
F
.
Focusing
Procedure
20
...............
.
G
Use
of
Iris Diaphragms
21
H
. Operation
of
the
Binocular
Observation
Tube with
Photo
Tube
22
...
.
1
Use
of
Immersion
Optical
Components
23
.....................
VI
I
I
. Photomicrography 23

I.
System
Chart
of
Various
Units
The
various units
in
the
chart
below
are
based
on
the
modular
building-block
system
of
interchangeable
accessories
for
a
wide
range
of
applications.
The
standard
cam-
ponents
are
linked
by
bold lines.
The
optional
accessories
are
linked
by
fine
lines.
Super
Wide
field
Binocular
Tube
Binocular Tube
with
Photo
Tub
with Photo
Tube
I
P
Analyzer
Revolv~
ng
Nosepiece
Vertical
11
lurninator Filter
Turret
Vertical
I
I
luminazor
for
for
Brightf
ield Bright
a~d
Darkfield Fluorescence
Vertical
l
lluminator
Stage
Insert
for
Biological
Work
M~tal
slid^!
Plate
for
Reflected
Light,
Vertical
Illuminator
for
Phase
Contrast
Attachment
~omarski*
Reflected
Light
13
~fferentiaI Interference
Stage
Insertfor
Contrast
A
ttachrnent
Fluorescence Work
I
Circular Rotatable
I
RotatableSquare
Polarizing
Stage
Mechanical
Stage
with
Low
Dr~ve
Cross
Movement Controls
Mechamical
Stage
I
~chromatict
1
mrners~on
Fluorescence
Aplanatic
SwinQ-aut
Super
Widef ield
Polarir
ing
Dry
Darkfield
Darkf
ield
Phase
Contrast
Phas
Contrast
Condenser
Co
ndencer
Condenser
Condenser
Condenser
Condenser
Condenser
Auxiliary
Lens
System
Condenw
Mount
I
Counterweight
Block

-
Viewing
Screen
Attachment
Projection screen
Barrier Filter
Attachment
Photomicrographic
System
Camera
Fluorescence
Magnification Light
Source
Changer
Nomarski
Transm
~tted
Light Differential
Interference Contrast Attachment
Auxiliary Collector
Lens
for
Fluorescence
Microscope
Stand
Nomarski Transmitted
Light
Differential
l
nterference Contrast
Condenser
Polariter
Halogen
L~ght
Source
for
Transmitted
and
Reflected Light
*"Sub-Licenced
from
Union
Optical CO!'

I
I.
Standard
Equipment
Before
assembly,
please
check
your
standard
outfit,
which
comprises
the
following
items:
Microscope
Stand
1
Binocular
Tube
with
Photo
Tube
1
Revolving
Nosepiece
1
Rotarable
Square
Mechanical
Stage
with
Low
Drive
Cantrals
Condenser Mount
1
Auxiliary
Lens
System
1
Tungsten
Lamp
Mouse
1
Lamp
Socket
1
Collector
(transmitted light)
1
AchromaticlAplanatic Condenser
1
Centering
Frosted
Glass
1
Objectives:
Plan
4X
Plan
10X
Plan
20X
Plan
40X
1
Plan
100X
1
Eyepieces;
BiWF
IQX,
paired
1
Orthochromatic
filters
:
E-533
(Green)
1
Y-48
{Yellow)
C
(Cobalt)

Bulb
(6V
5A)
Immersion oil (bottled)
Dust
Cover
Optional
Accessories
1.
Phase
Contrast
Attachment Model
A-PC
2.
F
luorescence
I
I
luminator Attachment Model
A-F
L-2
3.
Fluorescence
Phase
Contrast Attachment
Model
A-F
LPC
4.
Polarizing
Attachments
for
Transmitted
Light
Models
A-P-1
&
A-P-2
5.
Vertical lilluminater
Model
A-M
6.
Incident
Phase
Contrast
Attachment
Model
A-MPC
7.
Vertical Illuminator
for
Bright and Darkfield Model
A-RLB
8. Halogen tight Source for Transmitted
Light
Model
A-LSH
9.
Halogen
Light
Source
for
Reflected
Light
Model
A-M-LSH
10.
Nomarski*
Reflected
Liqht
Differential
3
nterferenceContrast Attachment Model
A-M-N
I
C
11.
MagnificationChangerforTransmittedLightModelA-CA
12.
Low
Power
Condenser
N.A.
0.06
Model
A-ULC
13.
Dry
Darkfield Condenser
N.A.
0-810.92Model
A-DCD
1
lmmersion
Darkf
ield
Condenser
N.A.
1.4/1.2
Model
A-DCW
15.
Swing-out
Condenser
N.A.
0.85
Model
A-SC
16.
Super
Widefield
Attachment
Model
A-SW
17.
F
Buoresence Vertical I
Iturninator
Attachment
Mode! A-R
F
L
18.
Nomarski Transmitted
Light
Differential InterferenceContrast Attachment Model
A-NIC
*
"Sub-Licenced
from
Union
Optical
Co."

Ill.
Specifications
Microscope
Stand
:
Standard
Observation
Tube:
Revolving
Nosepiece:
Mechanical
Stage:
Condenser:
Condenser Mount:
Light
Source:
Auxiliary Lens
System:
Height position
of
observation
tubes
is
variable.
Various
types
of
light sources
are
attachable.
Focusing: Vertical
stage
movement.
Coaxial
coarse
and
fine adjustment
knobs,
with
automatic
pre-focusing
lever.
Coarse
Adjustment
:
Dovetail
slideways,
rackand-
pinion
type,
adjusfment
range
49mm.
Fine Adjustment: Roller guide,
gear
train
type;
adjustment
range
2.3mm, graduated
in
increments of
1
micron.
,
Binocular
observation
tube
with
photo tube, with
constant
tube
length adjustment. Tube inclination
30".
Three-position light
path
selector lever.
A
choice
of
intermediate adapters for special methods
of
observation is available. Interpupillary adjustment:
54-74rnm.
Field
of
view
eyepieces
for
photo-
micrography
are
available.
Quintuple,
on
ball
bearings.
Square
stage
(170
X
172rnrn),
with
low positioned
coaxial
control
knobs.
Rotatable.
Rack-and-pinion
drive.
Movements
on ball
races,
for
both
vertical
and
horizontal excursions. Working range
:
vertical
52mm,
horizontal
76mm.
Vernier
scales
reading
to
0.1
mm.
Adjustable
and
removable specimen holder; inter-
changeable
stage
inserts.
Aplanatic/achromatic
condcnscr,
N.
A.
1.40,
with
decenterable
aperture
iris diaphragm and
graduated
sale.
With condenser
centering
dcvicc
and
rack-and-pinion
height adjustment.
Height
displacement
30rnrn.
Tungsten lamp, 6V,
5A,
w~th
bulb centering
device.
Bui
It-in
collector, heat absorbing filter and transformer,
variable
0-9.5V.
Slot
for
insertion
of
light
f~lters.
Flip-over type. Fitted with field iris diaphragm.
For
optimum illumination from low power
to
oil immersion
objectives. Flips
180°.
Knurled ring for operation
of
field
iris
diaphragm.
IV.
Principal
Components
and
Light
Path
Diagram
Eyepiece
Photomicrographic
Sysfem
Camera
i
B~nocular
Observation
Tube
w~th
Phnta
Tube
7
Microscope
Stand
Revotvi
nq
Nosepiece
Conrrul
Un~t
Aux~llary
L~ns
System
I
Swing-out
Auxiliary
Lens

V.
ldentif
ication
of
Microscope Components
A.
Microscope
Stand
a
Selector Turret for height adjustment
of
observation
tube.
This
turret
ensures
correct
height positioning
of
the observation
tube.
It
permits
vertical
tube
adjustment
in
3
positions
and
can
be
engaged
in
3
positions,
depending
on
the
choice
of
accessories,
as
listed below.
@
@I
Tube
Clamping
Levers.
Use
lever
@
when
the
selector
turret
is
in position
"S",
and
lever
@
when
the
turret
is
in
position
"M.
P"
o~
"F.
C".
@
Tube
Dovetail
Mount.
The
mount
accepts
various types of observation
tubes.
@
Stage
and
Condenser
Mount
Clampifig Block: This block
accepts
various
types
of
stages
and the condenser mount.
@
Positioning Pin
for
Condenser
Mount.
@
Coarse
Adjustment
Knob.
Coarse
adjustment
range:
49mm.
Fine
Adjustment
Knob.
Fine
adjustment
range:
2.3mm.
graduated
in
increments
of
1
p.
@
Automatic ?re-focusing Lever.
this
lever
prevents
accidental
damage
to
specimen
or
objective
front
lens.
(See
page
20.)
@
Light
Exit.
@
Filter
Mount.
The
mount accepts
various
types
of
filters, auxiliary
lenses,
centering
frosted
glass,
etc.
@
Lever
for
Swing-out Frosted Glass.
Selector Turret
@
S
M.
P
F.
C
Application
Standard
Microscopy
Metallurgical and
polarized
light microscopy
Fluorescent
light
rnicro-
scopy,
Magnification changer
Clamping
Lever
to
be
Used
0
0

Lever
for Swing-out Auxiliary lens. Inserted into light path
(pos.
"'UL")
only
when
using
very
low
magnification
objectives
(PI
1.3
x
and
PI
2
x).
Screw
Mount
for
Transmitted Light
Lamp
House: The mount
accepts
tungsten, fluorescent,
and
other light sources.
Positioning
Groove.
To
correctly
orient
the
lamp house.
Opening
for
Incident
Light
Source.
Voltage Adjustment
Knob. As
sliding the
knob toward
the
microscope
arm
along
the slit, voltage rises.
The
knob
must
be
set
at
the
nearer
end
to
you,
when
you
turn
on
or
off
the
main
switch.
MainSwitch (withbuilt-in pilot lamp)
Voltmeter
Output Socket
(to
supply
SOOVAC
toextraelectric appliances)
Power
frequency
selection
between
50Hz
and
60Hz
is
provided ~nside
the
base
behind
the
SOOVAC
output
socket.
When
the Fnstrument
is
transferred
from the
50Hz
area
to
the
60Hz
area
or
vice
versa,
change
the
freq, selection
accordingly.)
Line Cord
Socket
GroundingTerminal
Line Voltage
Adjustment
Screw
Low
Voltage Outlet
6.
Binocular
Obsenration
Tube
with
Photo
Tuba
Eyepiece
Tubes,
Diopter
Adjustment.
lnterpupillary Distance
Scale.
Light Path
Selector
Knob.
Indicator Platefor
Light
Path Selector.
(See
gage
22.).
Eyepiece
Tube
for
Photo Eyepieces.
Accepts
F
K photo eyepieces, designed
exclusively
for
photomicrography.
Camera
Ring
Dovetail
Mount.
Accepts
the
Photographic Equipment
Model
PM-10-A.
Dovetail
Slide.
Positioning Pin.
Nosepiece Dovetail Mount.
Accepts
various
types
of
revolving nosepieces
or
intermediate adapters.

C.
Revolving
Nosepiece
a
Clamping
Screw.
@
Threaded
Hole
for
Objective.
@
Knurled Ring.
@
Engravings.
The
engravings,
coded
A
to
E,
are
a
guide
for
mounting
the
objectives in ascending
order
of
magnification.
@
Opening
for
Analyzer.
D.
Square
Mmhanical
Stage
with
Low
Drive Controls
Specimen Holder.
By
loosening
the
clamping screw<
@,
th~!
distance
between
the
holders
can
be
adjusted
or
the
entire
holder
can
be
removed.
Adjustment
is
made
according
to
the
size
of
th~!
specimen
slirl~
Clamping Screws
for
Specimen Holder.
North-South Movement
Knob.
Range
52mm.
East-Wat
Movement Knob.
Range
76mm.
Graduated
Scale for North-SouthMovement. With vernier
reading
to
0.1
mm.
Graduated
Scale
for
East-West
Movement.
WFth
vernier
reading
to
0.1
mm.
Clamping
Screw
for
Stage
Rotation.
Pin
for
Stage
Rotation.
Dovetail
Mount.
Clamping
Lever.
Stage
Insert.
In
addition
to
the
standard
insert (with longitudinal slot),
inserts
for
metallurgical, fluorescent
and
polarized
light
observations
are
available.

E.
Achromatic/
Aplanatic
Condenser
@
Dovetail Slide.
@
Knurled Ring. Permirs
adjustment
of
the aperture iris diaphragm.
@
Graduated
Aperture
Scale.
The
scale, engraved twice symmetrically,
indicates numerical aperture values
corresponding
to the opening
of
the
aperture iris diaphragm.
@
Slide Lever.
This
lever
allows
the center
of.
the
aperture iris diaphragm
to
be
moved
off
the optical axis and rotated through
150°,
thus
obtaining
oblique
illumination.
(See
page
19.)
@
Clamping Screw. Permits
simultaneous
locking
of
slide
and
rotation.
F.
Condenser
Mount:
G.
Auxiliary
Lenssystem
Dovetail
for
Condenser
Slide.
Condenser Clamping
Screw.
Condenser Centering Knobs.
Condenser
Height
Adjustment
I<nob.
Dovetail Mount
for
Auxiliary
Lens
System.
Mounting Bracket.
Clamping
Levcs.
Stop
Pin
for
Auxiliary
tens
Systcm.
a
Mounting Dovetail.
@
Clamping
Lever.
@
Stop Pin. {Provided beneath
the
dovetail)
@
Lens
Rotating
Knob.
The
knob
is
used
to reverse the auxiliary
lens
system
according
to
the
objective magnification
in
use.
@
Knurled
Ring. To
adjust
the
@'
field iris diaphragm.

El.
Light
Source
Collector.
Attached
to
lamp
house
by
screw
threads.
Knurled
Ring.
To
attach
lamp
house
to
the
microscope
stand.
Lamp
House.
Filter
Slot.
Ldmp
Socket
Clamping
Screw.
Low
Voltage
Bulb,
6V
5A.
(See
page
17.1
Lamp
Socket.
Lamp
Centering
Knobs.
Coaxial
knob
arrangement
for
bulb
centration.
(See
page
17.1
Positioning
Pin.
The
pin
correctly
orients
the
lamp
house
to
the
microscope
stand.

VI.
Assembly
Diagram and
Instrument
Assembly
Eyepiece
>
-
-
--
Object
Fve
r
...
I
Condenser
Mount
Ill
Condenser
Auxiliary
Lens
~isxern
Microscope
Stand
#
4-A
1
Light
Source

Remove
dust
caps
before mounting various components.
All clamping levers have arrows indicating their clamping dire.ction.
1,
Attachment
of
L~ght
Source
(Fig.
2)
lnsert the Fight source
into
the
flange
of
the opening provided
on
the
microscopestand,
aligning positioning groove
and
positioning pin,and lock
by
turning
the
knurled clamping
ring.
2.
Attach the Condenser Mount. (Fig.
3)
First
loosen
clamping lever
a
,
then
fit
the mounting bracket
of
the
condenser
mount
correctly
into the clamping block
@
of
the stand from above, slide
the
condenser
mount
down all
the
way
and
lock
with
the
clamping
lever.
The
arrow
mark
on
the
clamping lever
shows
the locking direction.
3.
Attach
the
Auxiliary
Lens
System.(Fig.
4)
Loosen
clamping lever
@
of
the
lens
system,
press
the
unit
onto
the dovetail slide
@
of
the condenser mount, left side first and lock with clamping
lever
@.
Fig.
2
Fig.
3
Fig.
4
4.
Insert the Condenser.
{F
is.
51
Turn
the
arrow
mark
@
on
top
of
the condenser slide towards the condenser mount
0,
slide
the
condenser
into
the
dovetail and lock
with
clamping
screw
@
.
*
The
condenser
can
also
be
inserted
or
removed with
the
mechanical
stage
in place.
In
that
case,
lower
the
condenser
with
the
condenser height
adjustment
until it can
easily
be
removed without hitting the
stage.
5.
Mount
the Mechanical
Stage.
Insert
the
stage
into
the
mounting
block
of
the microscope stand in
the
same
manner
as
lhe
condenser
mount,
slide
down
the
stage
all
the
way,
and
lock
w~thclamping
lever
/Fig.
6).
Stage
insert and
specimen
holder are
packed
separately from the mechanical
stage; therefore,
attach
the
insert
by
aligning
the
positioning pin
and
groove,
the
holder
by
inserting into
the
slide provided on the stage.
(Fig.
7.8)
8
If
the
mechanical
stage
is intended
to
be
used
as
a
plain
stage,
the
speclmen holder
need
not
be
mounted.
Fig.
5
Fig.
6

6.
Attach
the
Observation
Tube.
11
First
turn
the
selector
turret
on
top
of
the microscope
s?and
to position
"S".
2)
Check
that
the two clamping levers
on
the
right
hand
side
of
the
dovetail
mount
are unclarnped (levers pointing upwards).
31
Insert
the
tube
dovetail slide into the dovetail
mount
on
the
microscope stand
and
lower
the
tube
as
far
as
possible.
4)
Lock
the
tube
with
the
lower clamping lever. {Fig.
9)
*
If
the
tube
is
used
in
standard
position (selector turret at position
"S"),
be
sure
to
clamp
the
lower clamping lever only.
Fig.
7
Fig.
8
Fig.
9
7.
Insert Revolving Nosepiece
11
Lower
the
stage
as
far
as
possible
2)
Unscrew
the
clamping
screw
@
of
the
nosepiece until
it
clears
the
thread
@-
Pull spring-toaded clamping
screw.
This
will
cause
the
locating
pin
@
to
withdraw.
(Fig.
10)
3)
With clamp~ng
scrcw
,@
pullcd
out,
insert
the
nosepiece
into
the
ring dovetail
@
on
the
tube,
aligning locating
pin
@
with
the
locating groove
@an
ring
dovcta~l.
Rclcasc
clamping
screw
@
slowly
and
the locating pin will drive
home
into the
locating
groove.
Tighten clamping
screw
@
(Fig.
11)
*
Locating
groovc
10
and
pin
@
are
in
alignment if
the
nosepiece carrier stays
in
place
when slightly
moved
to
the right
and
left before tightening
knob
.
Fig.
10
Fig.
1
1
8.
Mount
the Objectives.
The
objectives
are
mounted
in
ascending
order
of
rnagnification according
to
the
engravings
A
to
E
on the nosepiece.
9.
Insert the Eyepieces.
Insert
a
pair
of
WFl
OX
eyepieces
into
the
eyepiece
tubes
of
the
binocular observation
tube.
Use the
field
of
view
eyepiece
for
photomicrography only. {See page
24.)

V11.
Operating
the
Microscope
It
is
good
policy
to
keep
the
microscope irnmaculatel
y
clean.
Remove
visible
spots,
specks
of
dirt,
dust
or
grease
from
all
exposed
glass surfaces.
A
blower brush is a handy aid for
this
purpose.
How
to
put
the
microscope
in
operation:
1.
Switch
on
tungsten light source.
2.
Center
the
light bulb.
(See
page
17.
)
3.
Place
a
specimen slide
on
the mechanical
stage.
4.
Push in the light path selector
knob
on
the
binocular
tube
all the
way
(white
band;
100%
of
the light is directed towards
the
eyepieces).
5.
Make
interpupillary and dioptric adjustments.
{See
page
22.)
6.
Swing
in
the
desired
objective.
7.
Select the auxiliary lens system according
to
the
objective
in
use.
(See
page
18.
)
8.
Coarse
focus
with the coarse adjustment
knobs.
9.
Fine
focus
with
the
fine adjustment
knobs.
10.
Center
the
condenser.
(See
page
17.1
11.
Adjust
aperture
iris diaphragm
and
field iris diaphragm.
(See
page
21
.I
12.
Adjust
light
intensity.
A.
Electrical
Connection
1
)
Insert
the
two
plugs
of
the lamp cord
into
the lowvoltage outlet.
2)
Insert
the
plug
of
the
line
cord
into the line
cord
socket.
3)
Make
sure
that
the
voltage
adjustment
knob
is
set
at the nearer
end
to
you
(low
voltage),
then
push the main switch to supply
AC
pawer
to
the
instru-
ment.
When
power
is
on,
power pilot lamp
lights.
*
As
you
push
the mainswitch again, the light
is
off,
and
all
pawer is
cut
off.
4)
By vaising
the
voltage progressively,
you
can
ascertain that the bulb is
on.
Adjust light intensity
to
suit your requirement.
o
Line
Voltage
Adjustment
1
)
Voltage Selector Switch
At
thc
bottom
of
thc
base
is
a
voltage
selector
switch, which
can
be
turned
with
a
coin,
to
correspond
with
the
voltage
of
main
supply
(1
10V,
120V,
220V
or
240V).
2)
Line
Voltage
Adjustment Screw
Thc
minimum voltage required for light source
can
be
varied
by
means
uf
the
line
voltage adjustment
screw
provided
at
the
side
of
microscope
base
Ion
your left-hand
side),
since
a
silicon controlled rectifier
ISCR)
is
adopted in
rhe
dimmer circuitry.
If
the
bulb is dirnmly lit
upon
switching
on
light source,
the
line voltage is
proper, and
you
have
only
to manipulate the voltage adjustment knob
in
order
to
obtain
optimum
light
intensity. However,
in
case
the
bulb
does
not
light
at
all
or
does
light
up
bright immediately after switching
on,
rotate gradually
the
line
voltage
adjustment
screw
with
a
coin,
until the bulb dims.
NOTE:
For
low voltage adjustment
(0-9.5VJ
after dimming
the
bulb,
use
the
voltage
adjustment knob.
Voltmeter
Reading
As
the
voltage
adjustment
knob
IS
moved along
the
slit, the
red
zone
shifts
as
shown
schematically.
The left-side
picture
indicates
4V,
and
the
right-side picture
8V.
Avoid
prolonged
use
of
the
light
source
at
readingsin the red
zone.
4-
16
8
-8

€3.
Center
the
Light
Bulb
1)
First,
make
sure
that the swing-out frosted
glass
at
the
Fight
exit
on the microscope
base
is
disengaged,
and
that
the
swing-out auxiliary
lens
inside
the
base
IS
in the light path (lever
invertical position).
2)
Insert thecenteringfrosted glassinto thefilter
mount
at
the
light exit.
3)
Loosen
the
clamping
screw
of
the
lamp
socket
m
F
IS.
12
and move
the
socket
back
and
forth
to
focus
the
bulb
filament
on
the
frosted glass.
Adjust
the light intensity,
so
that the
filament
can
be
easily recognized. Clamp
the
lamp
socket.
4)
Center
the
filament image with
the
two
coaxial centering knobs
on
the
lamp
socket.
(Fig.
12)
5)
Removecenteringfrostedglass.
Repeat
the
above
procedure
after
installat~on
of
a
replacement
bu
Ib.
Rulb Replacement
Procedure
1)
Loosen the
sockct
clamplng
screw
and
sf~de
out
the
socket.
21
Remove
the
bulb
by
slightly
depress~ng
~t
agalnst
the
wat
and
then
rotating
~t
In
a
counterclockw~se
direct~on
31
Insert
replacement
bulb
In
rcvprsed
order,
Before
use,
wipe
off
thororlghly
any
f~ngerprrnrs
or
stains
on
tne
bulb
Fuse
Replacement
At
the
back
of
the
SOOVAC
ourput
sock~t,
a
fuse
holder
1s
posit~oned.
When
the
fuse
rs
burned,
slide
the
mlcroscope
to
the
desk
edge
on
whlch
the
rnlcrwcope
IS
placed,
unt~l
there
IF
an
openrng
at
the
bottom
of
the
microxope
base
enouqh
to
realace
rhe
burned
fu~e
with
a
new
one
from
'beneath
the
bm
Or
lay
Onwn
the
mlcroscope
*
Remove
the
observat~on
tube,
stage,
etc,
prlor
to
replacement
of
the
fuse
C.
Center the
Condenser
1)
The
frosted glass at the light exit
should
be
swung out
of
the light
path
and
the
swing-out auxiliary
lens
should be engaged {lever
in
vertical
position}.
2)
Push in
the
light path selector
knob
on
the
binocular
tube
all the
way
(white
band).
3)
Place
a
specimen
on
the mechanical
stage
and
use
the
objective
1bX
to
bring
the
specimen in
focus.
4)
Raise
the
condenser all
the
way with the
condenser
height adjustment
knob.
5)
Swing
the auxiliary lens
system
to position
L
and stop down
the
field
iris diaphragm with
the
knurled ring.
A
slightly blurred image
of
the
field diaphragm
can
now
be
seen
in
the eyepiece.
6)
Move
the
condenser
up
and down
to
focus
on
the
image
of
the field iris
diaphragm.
7)
While widening
the
diameter
of
the
field progressively, use the
condenser
centering knobs to bring
the
diaphragm image into
the
center
of
the
field
of
vim. If the polygonal
image
of
the iris diaphragm
becomes
inscribed
in
the
field
it
means
that
the
field diaphragm
is
centered. Slightly increase
diameter
of
field iris diaphragm until it is
just
outside
the
field
of
view.

D.
Operation
of
the
Auxiliary
Lens
System
-
1
The auxiliary lens
system
helps
in achieving
perfect
Koehfer
illumination
at
all magnifications
by
manip-
0-
#
ulation
of
the auxiliary lens
system
@
,
the
frosted
glass
@
,
and the swing-out auxiliary lens
@
,
@
_
-
-z+-mflv
eL-
"
+
respectively, Lens
man
ipulat~onis achieved
by
means
6
of levers
or
knobs
as
shown in the photograph.
/@
(Fig.
13)
The
correct lens positions
for
various
objective
powers
are
summarized
in
the
following:
Fig.
13
Condenser
Frosted
Glass
Lever
Objective
Auxiliary
(
Inser- Position
Lens
tion
in70
Magnif
i- Achromatic/-
Low
of
Swing-
'
cation
System
or
remov-
out
Aplanatic
power
I
N.A.
1.4
al
from Auxiliary
I
Light Lens
I
Path)
------
I)
I
4X
1
ox
VERTICAL
40X
1
OOX
*
The objectives
1.3X
and
2X
and
the
low
power condenser
are
optional
accessories
.
Principle
of
Kaehler
Illumination
Koehler
illumination
may
be
described
as
follows: "If an image
of
a
light
source
is
conjugate
with
the
rear
focal
plane of an
objective
and
the
field
iris diaphragm
of
the
light
source
is
conjugate with the field
ef
view
of the objective/eyepiece combination, maximum light
intensity
of
the
light
source
is
obtained
and
the
field
of
view
is
free from
'illurninatiorl
irregularities', irrespective
of
the
shape of
the
light source,"
As
shown
in
the drawing
below,
the filament
of
the
light
source
(6
V,
5A)
forms, through the collector,
an
image
at
the
aperture iris
diaphragm.
This
image,
located
at
about
the same place
as
the front focal point
of
the
condenser,
is
projected
by
the
objective
to
the
rear focal point
of
the
objective,
that
is,
in the exit pupil
of
the
objective. Since this image is
then
projected Into
the
observer's
pupil,
it
is
completely invisible to
the
observer, hence, illumination
fre
from 'irregularities'
is
obtained.
The
field iris diaphragm,
as
will
be
noted from
the
drawing, freely controls,
by
its
opening and closing,
/
~Aapa.pt.m
i
the diameter
of
the
cone
of
light entering
the
Obletllvsrsarhlpdnt
condenser
from
the
light
source.
spaam
P~W
ad
thmd~mLgeof~lp19um
Correct
Koehler illumination with the
VANOX
can
~~mdsy~ma~a~m-
be
ob
t'ai
ned
by
appropriate positinning
of
rhe
auxiliary
lens
system
and
adjustment
of
aperture
hx"mh6-
-i--
FlsP
I~d'sphrn
and
field irisdiaphragms.
Other manuals for VANOX
1
Table of contents
Other Olympus Microscope manuals

Olympus
Olympus ORBEYE Manual

Olympus
Olympus CX43 User manual

Olympus
Olympus Lext OLS3100 User manual

Olympus
Olympus IX70 User manual

Olympus
Olympus BX3-SSU User manual

Olympus
Olympus SZX7 User manual

Olympus
Olympus MIC-D Operating instructions

Olympus
Olympus Fluoview FV1000 User manual

Olympus
Olympus SZX-DA User manual

Olympus
Olympus bx40 User manual

Olympus
Olympus U-CBS User manual

Olympus
Olympus SZX-AR1 Reference guide

Olympus
Olympus BX51M User manual

Olympus
Olympus BHS User manual

Olympus
Olympus BH2 Series User manual

Olympus
Olympus DP73 User manual

Olympus
Olympus BX53M-P User manual

Olympus
Olympus CHA-P User manual

Olympus
Olympus FV1200 MPE User manual

Olympus
Olympus V60 User manual