Omega 18207 Instructions for use

AirActuatedHydraulic
Bottle Jack w/Wheels
OperatingInstructions
& Parts Manual
Model Number
18207 Capacity
20 Ton
OIPM#18207-ABJ3
Printedin Taiwan
SFACompanies©2003
10939 N.PomonaAvenue
KansasCity, MO 64153

Save these instructions. Foryour safety, read and understand the information contained within. The owner and
operatorshall have an understandingof this product andsafe operating procedures beforeattempting to use this
product. Instructionsand Safety information shall be conveyed in the operators native language before use of this
product is authorized. Make certain that the operator thoroughly understands the inherent dangers associated with
the use and misuse of the product. If any doubt exists as to the safe and proper use of this product as outlined in
this factory authorized manual, remove from service until which time it is clear. Inspect before each use. Do not
use if broken, bent, cracked or otherwise damaged parts are noted. If the jack has been or suspected to have been
subjected to a shock load (a load dropped suddenly, unexpectedly upon it), discontinue use until checked out by an
authorized factory service center. Owners and operators of this equipment shall be aware that the use and
subsequent repair of this equipment may require special training and knowledge. It is recommended that an annual
inspection be done by qualified personnel and that any missing or damaged parts, decals, warning / safety labels or
signs be replaced with factory authorized replacement parts only. Any jack that appears to be damaged in any way,
isworn or operates abnormally shall be removed from service immediately until such timeas repairs can bemade.
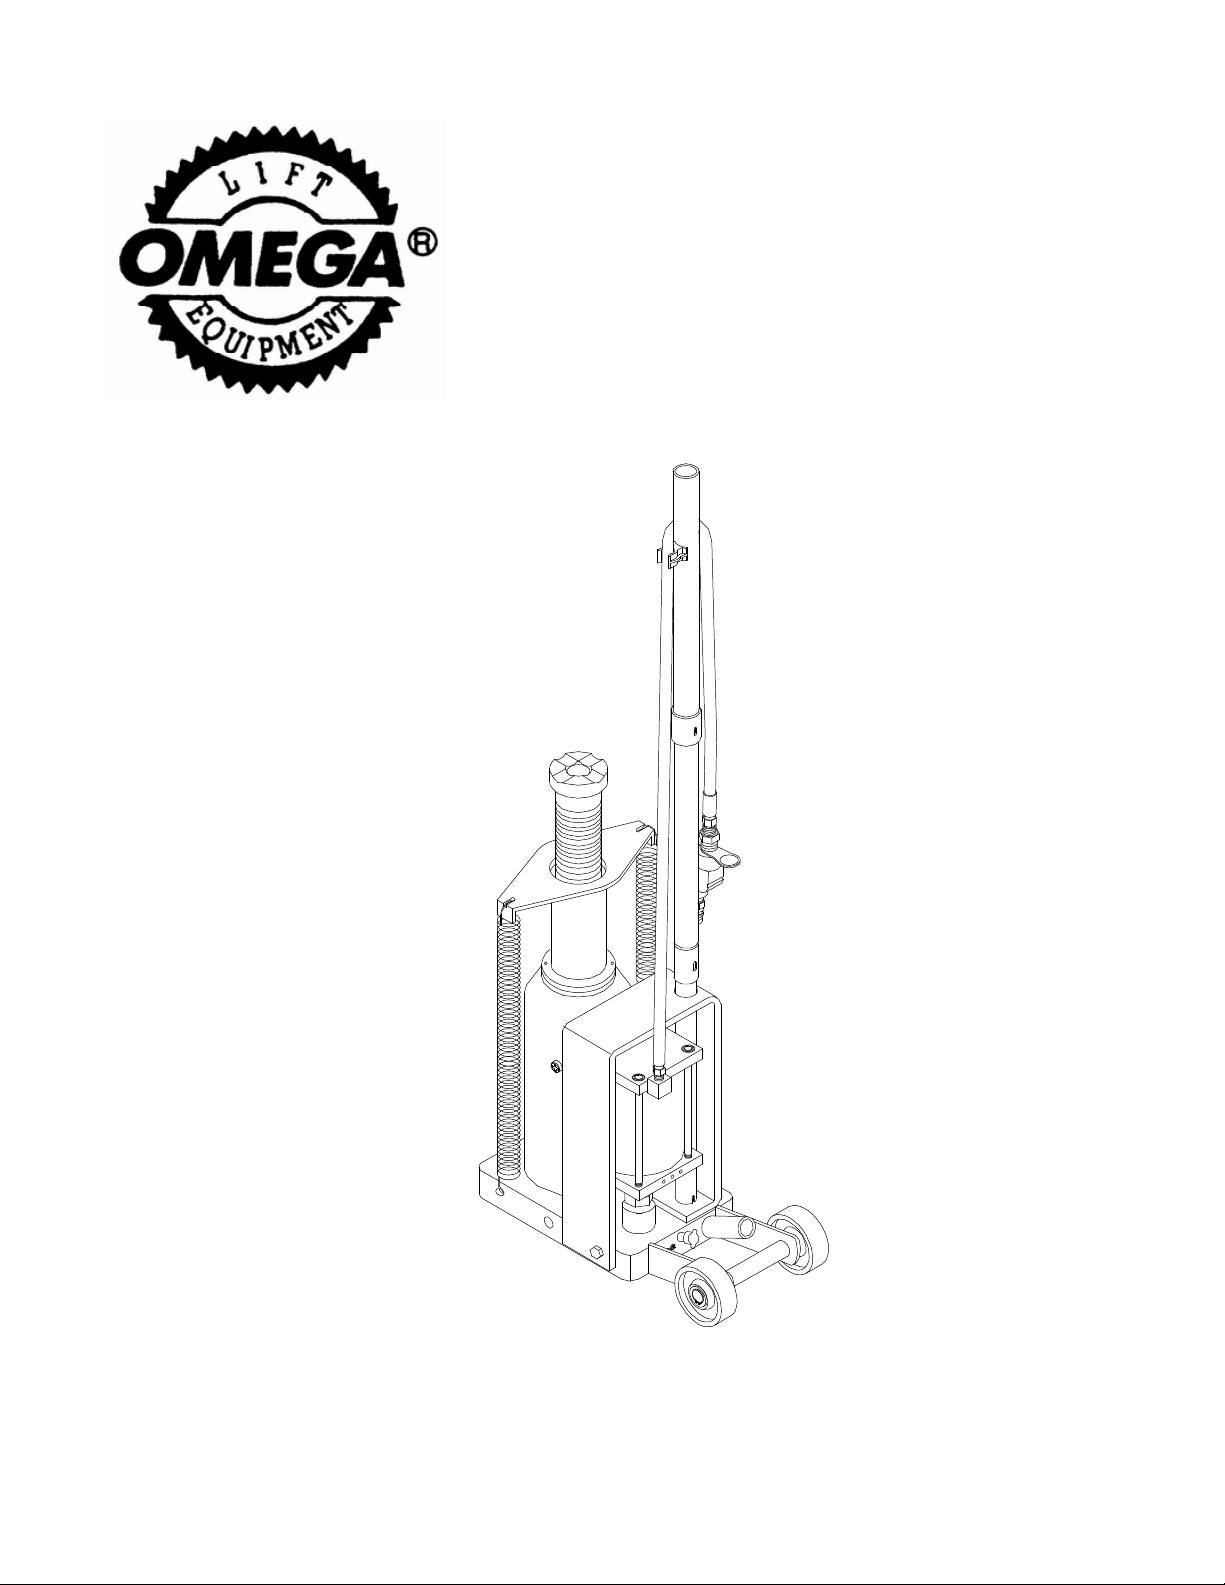
PRODUCT DESCRIPTION
Omega Air Actuated Hydraulic Bottle Jack with wheels is designed forlifting, but not sustaining, loads ranging up to
20 tons. After lifting, loads must be immediately supported by appropriate means. It is suitable for use in an
appropriately rated and designed vertical or bench press structure. This jack isnot recommended foruse in lifting
or positioning houses and/or other building structures. This jack complies with applicableASME / ANSI - PALD
Standards. For air actuated use, ensure that your air source can dedicate 7.8 CFM @ 90 - 175PSI to each jack
operated.To ensure dependable,troublefree operation an air dryer and oileris recommended.
BEFORE USE
1. Verify that the product and the application are
compatible, if in doubt callOmegaTechnical
Service(888)332-6419.
2. Before using this product, read the operator's
manualcompletely and familiarizeyourself
thoroughly with the product and the hazards
associated with its improper use.
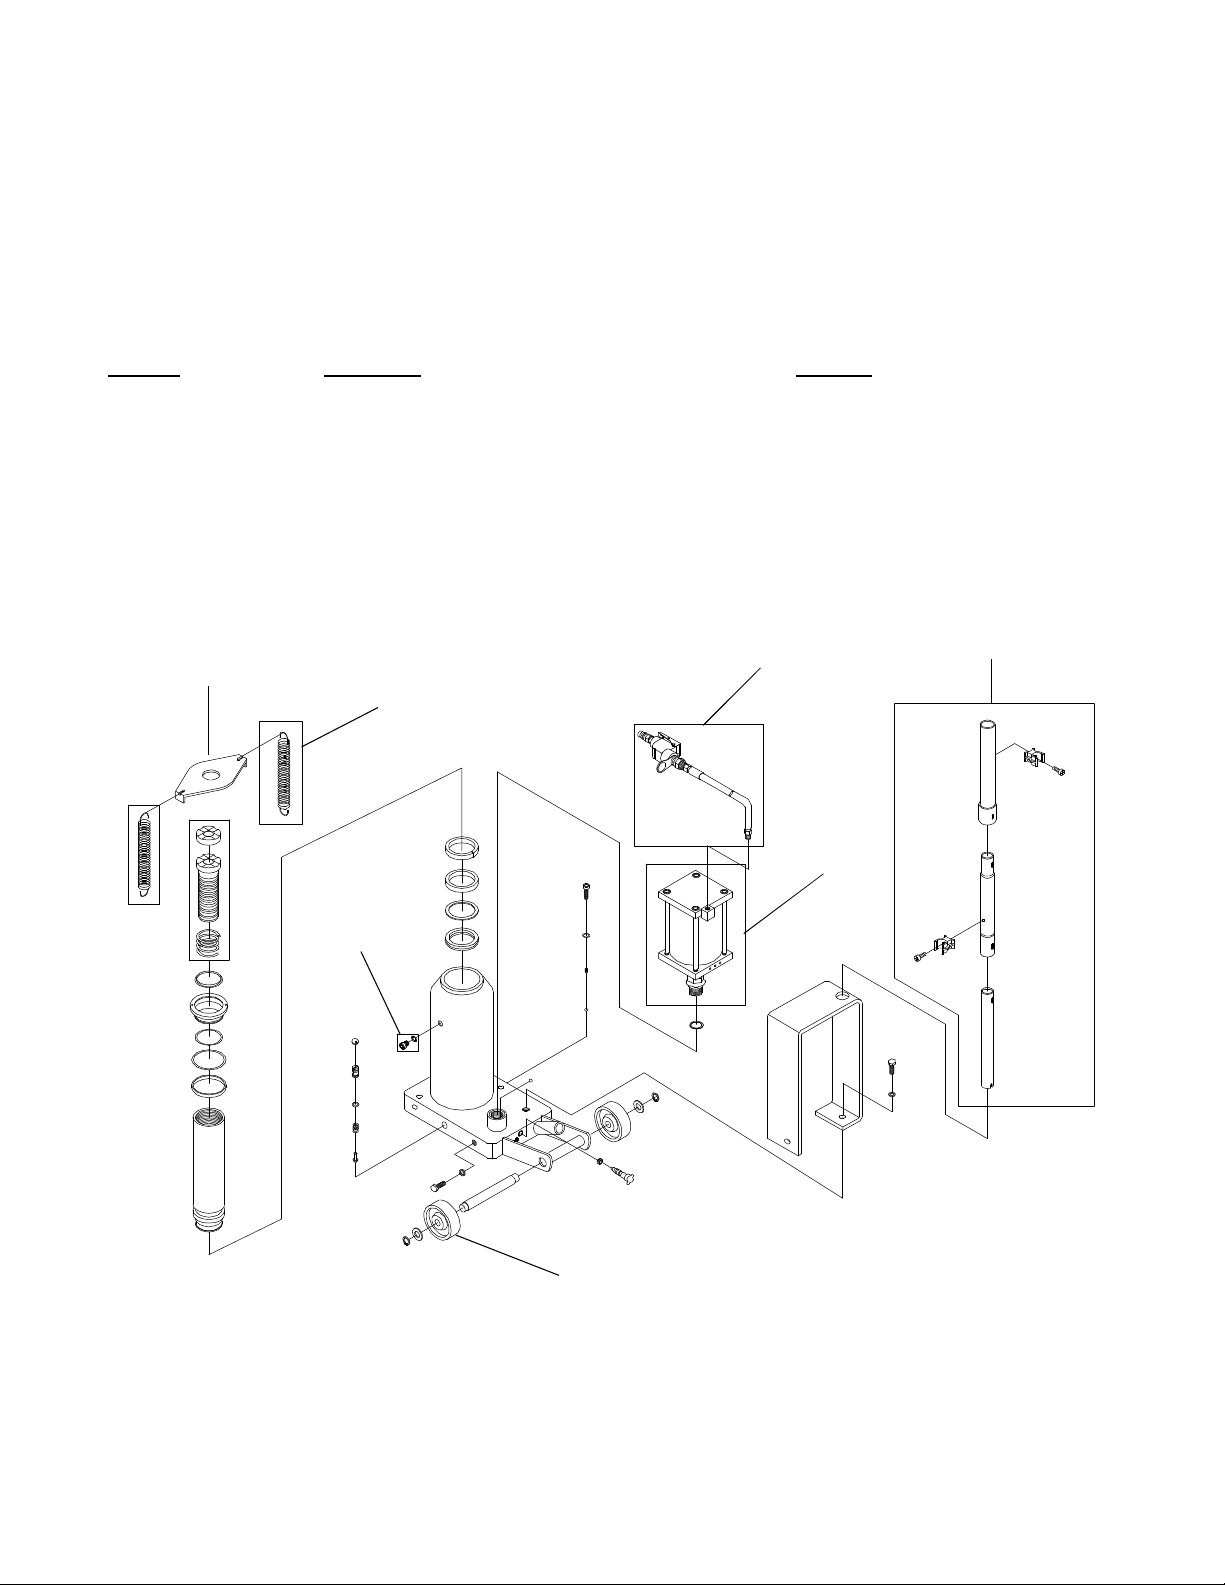
3.Withthe providedhandle,open thereleasevalve
(counter-clockwiseno more than2 fullturns).
4.With ramfully retracted,locate and remove the oil
fillerscrew. This will helprelease any pressurized
air which may be trapped within the reservoir.
Ensure the oil level is just below the oil filler screw
hole. Re-install the oil filler screw.
2
SPECIFICATIONS
5.Pour a teaspoon of good quality, air tool lubricant
intothe air supply inlet of the lift control valve.(See
Illustration) Connect to air supply and operate for 3
seconds to evenly distribute lubricant.
6. Check to ensure that jack rolls freely and that the
pumpoperates smoothly beforeputting intoservice.
Replaceworn ordamaged parts and assemblies
withOmegaAuthorized ReplacementPartsonly.
7. This product is fitted to accept the popular 1/4" PT
airnipple. Wheninstalling 1/4"PT nippleof your
choice, ensure that thread tape or compound is
used when servicing connections.
8. Inspect before each use. Do not use if bent, broken
orcracked components arenoted.
Base Size (L x W)
Model Capacity Min.Height Max. Height
20Ton 6 7/8" X 4 7/8" 18 3/4"18207 9 3/4"

OPERATION
Lifting (referto Figure1)
1. Assemble 3 pc. handle, ensure that each spring clip
aligns with and is secure in the corresponding
handle slot.
2.Chock the loadto preventinadvertent shiftingand
movement.
3. Insert the handle into the positioner receptacle, tilt
jack and wheel it into position near the lift point.
4.With slottedend ofhandle, close the release valve
byturning it clockwiseuntil the threaded valve offers
firmresistance to furthertightening.
5. Insert and secure handle into positioner receptacle.
Squeeze the lift control valve until saddle contacts
load.To end air operation, simply release the grip
onthelift control valve.Neverwire, clamporother-
wisedisable the thelift control valveto function by
any means other than by using the operator's hand.
6. Raise load to desired height, then immediately
transferthe load to appropriately rated support
devices such as jack stands.
3
Figure1- Model18207Nomenclature
liftcontrolvalve
handle
airmotor
releasevalve
saddle
oil filler screw
airhose
extension
screw
returnspring
positioner
receptacle
wheel
Study, understand, and follow all instructions
provided with and on this device. Do not exceed
ratedcapacity. This is alifting device only. After
lifting,immediately transferthe load to appropri-
atelyrated vehicle stands. Neverwork on, under, or
around a load supported by this device. Use only
onhard, level surfaces capable ofsustaining rated
capacity loads. Do not move or dolly loads with
this device. Do not modify this device. Failure to
heed these markings may result in personal injury
and/orpropertydamage.
!
WARNING
To avoid crushing and related injuries:
NEVER work on, under or around a load supported
only by a jack. ALWAYS use adequately rated jack
stands.
WARNING
!
!SAFETY MESSAGE !
Use only the handle provided with this product or an
authorizedreplacement to ensureproper release
valve operation.Donot useanextender on the air
hose nor the operating handle. When using to lift
vehicle, lift only on the manufacturer’s recommended
lift points and in accordance with the published
guidelines in your vehicle owners manual.

4
Lowering
1.Raise load enoughto carefully remove jack stands.
2.Insert handle onto releasevalve and slowly turn
handlecounter-clockwise, but no more than2 full
turns.If loadfails to lower, carefully transferthe load
toanother lifting device and jackstands. Carefully
removeaffected jack, and thenthe jack stands.
Lowerthe load, again byslowly turning the release
valveno more than2 fullturns.
3.Afterremoving jackfrom undertheload, ensureram
lowers completely to reduce exposure to rust and
contamination.
MAINTENANCE
Important: Use only a good grade hydraulic jack oil.
Avoidmixing different types offluid and NEVER use
brakefluid, turbine oil, transmissionfluid, motor oil or
glycerin.Improper fluidcan causepremature failureof
thejack and the potentialfor sudden and immediate
loss of load. We recommend Mobil DTE 13M or
equivalent.
Adding oil
1.With saddlefully loweredand releasevalve open,
set jack in its upright, level position. Remove oil filler
screw.
2. Fill until oil is level with the filler screw hole,
re-install oil filler screw.
Changing oil
Forbest performance and longest life,replace the
complete fluid supply at least once per year.
1.With saddlefully loweredand releasevalve open,
removethe oil fillerscrew.
2. Lay the jack on its side and drain the fluid into a
suitablecontainer.
Note: Dispose of hydraulic fluid in accordance
with local regulations.
3. Fill with good quality jack oil. Reinstall oil filler
screw.
Lubrication
1. A coating of light lubricating oil to axles and saddle
screwextension will helpto preventrust.
2. Periodically check the ram for signs of rust or
corrosion.Clean as needed andwipe with an oily
cloth.
Never usesandpaper or abrasivematerial onram
surface!
3. When not in use, store the jack with ram fully
retractedand airdisconnected.
!SAFETY MESSAGE !
Be sure all tools and personnel are clear before
lowering load. No alterations shall be made to this
device.Only attachmentsand/or adapterssupplied
by the manufacturer shall be used.

5
ONE YEAR LIMITED WARRANTY
For a period of one (1) year from date of purchase,SFA Companies will repair or replace, at its option,
without charge, any of its products which fails due to a defect in material or workmanship, or which fails to conform
to any implied warranty not excluded hereby.
Performanceof anyobligation underthis warranty may be obtainedby returningthe warrantedproduct,
freight prepaid, toSFA Companies Warranty ServiceDepartment, 10939N. PomonaAve.,KansasCity,MO 64153.
Exceptwhere such limitations and exclusionsare specifically prohibitedby applicablelaw, (1) The
CONSUMER'SSOLEAND EXCLUSIVE REMEDYSHALLBE THEREPAIROR REPLACEMENT OFDEFECTIVE
PRODUCTS ASDESCRIBED ABOVE,and(2) SFA Companies SHALLNOTBELIABLEFORANY
CONSEQUENTIALORINCIDENTALDAMAGEORLOSSWHATSOEVER,and(3)THEDURATIONOFANYAND
ALLEXPRESSEDANDIMPLIEDWARRANTIES,INCLUDINGWITHOUTLIMITATION,ANYWARRANTIESOF
MERCHANTABILITYANDFITNESSFORAPARTICULARPURPOSE,ISLIMITEDTOAPERIOD OFONE(1)YEAR
FROMDATE OFPURCHASE.
Some states do not allow limitations on how long an implied warranty lasts, so the above limitation may not
apply to you. Some states do not allow the exclusion or limitation of incidental or consequential damages, so the
above limitation or exclusion may not apply to you. This warranty gives you specific legal rights, and you may also
have other rights which vary from state to state.
Symptom PossibleCauses Corrective Action
Jack will not lift load
Jack will lift, but not maintain
pressure
Will not lift to full extension
•Release valve not tightly closed
•Overload condition
•Air supply inadequate
• Fluid level low
• Fluid level low
•Air trapped in system
•Release valve not tightly closed
•Overload condition
•Hydraulic unit malfunction
• Ensure release valve tightly closed
•Remedy overload condition
•Ensure adequate air supply
•Ensure release valve tightly closed
•Remedy overload condition
•Contact Omega Tech. Service
•Ensure proper fluid level
• Ensure proper fluid level
•With ram fully retracted, remove oil filler
screw/plug to let pressurized air escape,
then reinstall oil filler screw/plug
Poor lift performance
Jack will not lower after unloading • Reservoir overfilled •Ensure load is removed, then drain fluid
to proper level
TROUBLESHOOTING

6
Figure2 - Model 18207 ReplacementParts Illustration
Model# 18207
Part No. Description Quantity
1handle assembly 1
2airhose 1
3airmotor 1
4wheel 2
5plate 1
6returnspring 2
7oil filler screw 1
-- label(s) (notshown) 1
-- manual(OIPM#18207-ABJ3) 1
REPLACEMENT PARTS
Available Parts: Please refer to the Parts drawing when ordering parts. Not all components of the jack are
replacement items, but are illustrated as a convenient reference of location and position in the assembly sequence.
Whenordering parts,give modelnumber, serialnumber and description below. Call or writefor currentpricing:
SFACompanies, 10939N. PomonaAve. KansasCity, MO64153, U.S.A. Tel:(888)332-6419 Fax:(816)891-6599
1
2
3
4
56
7

Notes
SFA Companies
10939 N. Pomona Ave. Kansas City, MO 64153, U.S.A.
Tel:(888)332-6419 Fax:(816)891-6599 E-Mail:[email protected] Omega Website: http://www.omegalift.com

Notes
SFA Companies
10939 N. Pomona Ave. Kansas City, MO 64153, U.S.A.
Tel:(888)332-6419 Fax:(816)891-6599 E-Mail:[email protected] Omega Website: http://www.omegalift.com
Table of contents
Other Omega Jack manuals
Popular Jack manuals by other brands

Rocks
Rocks OK-08.0004 user manual

Monzana
Monzana DBWH003 manual

DURHAND
DURHAND C20-040 Assembly instruction

Racine Railroad Products
Racine Railroad Products 910192 Operating and maintenance manual

HWH
HWH 625 Series Operator's manual

HEIN-WERNER AUTOMOTIVE
HEIN-WERNER AUTOMOTIVE HW93735 Operating instructions & parts manual

Power Fist
Power Fist Trailer Jack user manual

Black Hawk Automotive
Black Hawk Automotive PLATINUM BP225 Operating instructions & parts manual

Bend-Pak
Bend-Pak RBJ25000 Service manual

Black Hawk Automotive
Black Hawk Automotive BH6011 Operating instructions & parts manual

Power Fist
Power Fist 8516684 manual

OEM Tools
OEM Tools 24843 Operating instructions and parts manual