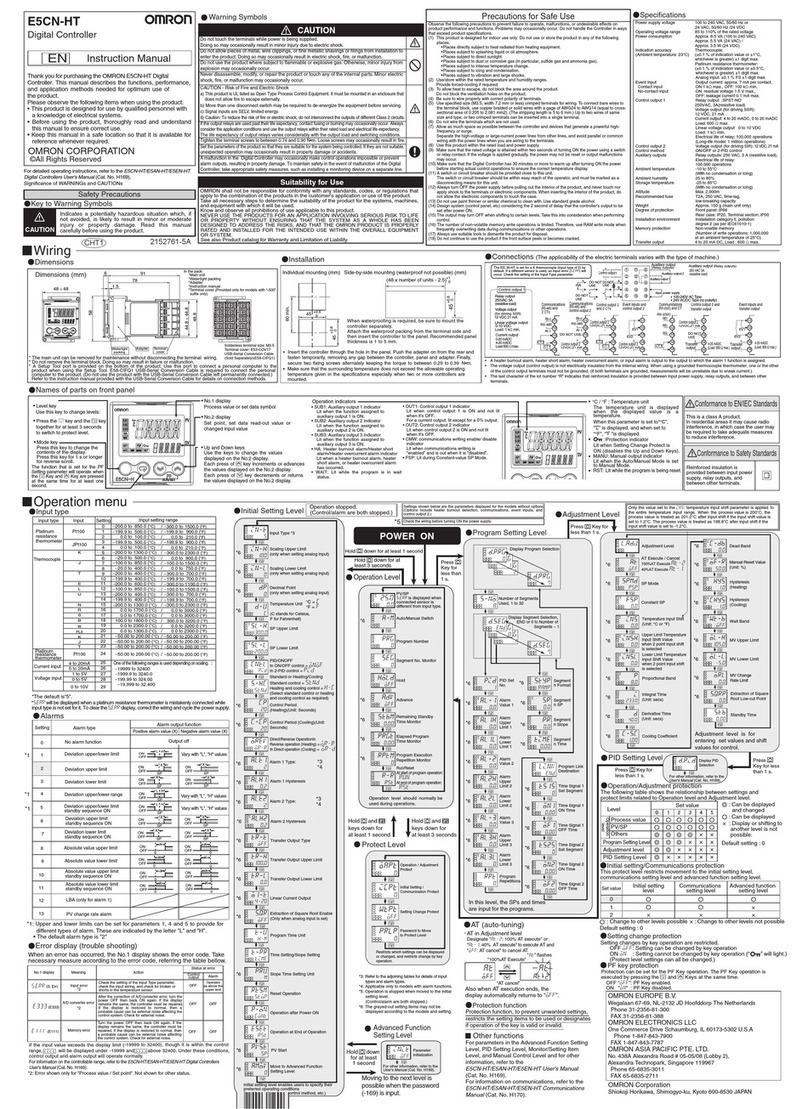
Omron SmartController EX User manual

I602-E-03
SmartController EX
User’s Guide

Copyright Notice
The information contained herein is the property of Omron Adept Technologies, Inc., and shall not be
reproduced in whole or in part without prior written approval of Omron Adept Technologies, Inc. The
information herein is subject to change without notice and should not be construed as a commitment by
Omron Adept Technologies, Inc. The documentation is periodically reviewed and revised.
Omron Adept Technologies, Inc., assumes no responsibility for any errors or omissions in the
documentation. Critical evaluation of the documentation by the user is welcomed. Your comments assist
us in preparation of future documentation. Please submit your comments to: techpubs@adept.com.
Copyright 2013, 2014, 2016, 2019 by Omron Adept Technologies, Inc. All rights reserved.
Any trademarks from other companies used in this publication
are the property of those respective companies.
Created in the United States of America

Table of Contents
Chapter 1: Introduction 7
1.1 Product Description 7
Optional T20 Pendant 7
1.2 How Can I Get Help? 9
Related Manuals 9
Chapter 2: Safety 11
2.1 Dangers, Warnings, and Cautions 11
Alert Levels 11
Alert Icons 11
Special Information 12
2.2 What to Do in an Emergency / Abnormal Situation 12
Stopping the Robot 12
Fire Response 12
2.3 Safety Precautions 12
2.4 Additional Safety Information 12
Manufacturer’s Declarations 12
Robot Safety Guide 13
Emergency Stop Circuit and Buttons 13
Manual Control Pendant 13
2.5 Disposal 13
Chapter 3: Installation 15
3.1 Controller Installation 15
Before Unpacking 15
Upon Unpacking 15
Repacking for Relocation 16
Space Around the Chassis 16
Mounting the SmartController EX Motion Controller 16
Mounting Kits 16
Memory Card 20
3.2 Connecting Power 22
24 VDC Power Specifications 22
24 VDC Power Cabling 23
DCPower Connectors 24
Chassis Grounding 24
Installing 24 VDC Connectors 25
3.3 System Cable Installation 26
11069-000 Rev. H SmartController EX User's Guide 3

Table of Contents
IEEE 1394 Cable Specifications 26
Chapter 4: Operation 27
4.1 Connectors and Indicators 27
4.2 Front Panel 31
4.3 Installing the ACE Software 32
4.4 Configuring the SmartController 33
Configuring Serial Ports 33
RS-232 Connectors 34
RS-422 / 485 Connector 34
4.5 Connecting User-Supplied Safety and Power-Control Equipment 35
Emergency Stop Circuits 41
Remote Manual Mode 43
User Manual / Auto Indication 43
User High Power On Indication 43
Remote High Power ON / OFF Control 43
High Power ON / OFF Lamp 44
Remote Front Panel or User-Supplied Control Panel Usage 44
Remote Pendant Usage 45
4.6 Connecting User-Supplied Digital I/O Equipment 45
DeviceNet Connector 45
XDIO Connector 45
4.7 Belt Encoder Interface 51
Chapter 5: Technical Specifications 55
5.1 SmartController EX Motion Controller Dimensions 55
5.2 Front Panel Dimensions 56
5.3 T20 Pendant Dimensions 57
Chapter 6: DeviceNet 59
6.1 DeviceNet Specifications 59
6.2 Limitations of the DeviceNet Scanner 60
6.3 DeviceNet Port on the Controller 60
Connecting DeviceNet Hardware to the Controller 60
Configuring DeviceNet 61
6.4 DeviceNet Physical Layer and Media 61
DeviceNet Connectors 65
Termination of the DeviceNet Network 66
Power Supply and the DeviceNet Bus 67
4 SmartController EX User's Guide 11069-000 Rev. H

Revision History
Revision
code Date Revised Content
01 June,
2016
Original release
02 October,
2016
Added OAT part number for non-Omron sales channels, updated
Omron logo in graphics
03 March,
2019
lAdded WEEEdisposal information.
lUpdated all www.adept.com references to www.ia.omron.com.
lUpdated copyright for 2019.
lAdded information about optional Mounting Kits.
lRemoved references to obsolete sDIOunit.
lRemoved daisy-chaining power supply details.
lUpdated ACESoftware installation procedure.
lUpdated illustrations with call-outs for translation compatibility
and other minor improvements.
lUpdated Chapter 2: Safety with new format and information.
lReplaced discontinued S8JX-G power supply with replacement
S8FS-G series.
11069-000 Rev. H SmartController EX User's Guide 5


Chapter 1: Introduction
1.1 Product Description
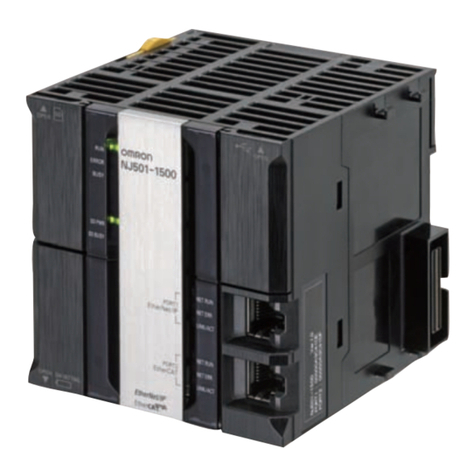
The SmartController EX motion controller is a member of the Omron Adept Technologies, Inc.
family of high-performance distributed motion controllers. The SmartController is designed for
use with Quattro, Hornet, eCobra, and Viper robots.
Figure 1-1. SmartController EX Motion Controller
Optional T20 Pendant
The optional T20 pendant provides a user interface and teach pendant in an ergonomic and
rugged package. The pendant is designed for right- or left-handed use. All gripping and hold-
ing positions enable comfortable and fatigue-free operation.
The safety features include:
lEmergency-stop switch (dual-channel circuit)
l3-position enable switch (dual-channel circuits)
See the T20 Pendant User’s Guide, shipped with each pendant, for complete information on
the product.
11069-000 Rev. H SmartController EX User's Guide 7

8 SmartController EX User's Guide 11069-000 Rev. H
1.1 Product Description
Figure 1-2. T20 Pendant

Chapter 1: Introduction
1.2 How Can I Get Help?
For details on getting assistance with your software or hardware, you can access the following
corporate website:
http://www.ia.omron.com
Related Manuals
This manual covers the installation and maintenance of a SmartController EX motion con-
troller. There are additional manuals that cover programming the system, reconfiguring
installed components, and adding other optional components. The following manuals provide
information on advanced configurations and system specifications.
Table 1-1. Related Manuals
Manual Title Description
Robot Safety Guide Contains safety information for Omron Adept Technologies,
Inc. robots.
T20 User’s Guide Contains information on the installation and operation of the
T20 pendant.
ACE User's Guide Describes installation and use of the ACE software.
eV+ OS User Guide Describes the eV+ operating system, including disk file oper-
ations, monitor commands, and monitor command pro-
grams.
eV+ Language User's Guide Describes the eV+ language and programming of our control
system.
11069-000 Rev. H SmartController EX User's Guide 9


Chapter 2: Safety
2.1 Dangers, Warnings, and Cautions
Alert Levels
There are three levels of alert notation used in our manuals. In descending order of import-
ance, they are:
!
DANGER: Identifies an imminently hazardous situation which, if not
avoided, is likely to result in serious injury, and might result in fatality or
severe property damage.
!
WARNING: Identifies a potentially hazardous situation which, if not avoided,
will result in minor or moderate injury, and might result in serious injury, fatal-
ity, or significant property damage.
!
CAUTION: Identifies a potentially hazardous situation which, if not avoided,
might result in minor injury, moderate injury, or property damage.
Alert Icons
The icon that starts each alert can be used to indicate the type of hazard. These will be used
with the appropriate signal word - Warning or Caution - to indicate the severity of the hazard.
The text following the signal word will specify what the risk is, and how to avoid it.
Table 2-1. Alert Icon Meaning
Icon Meaning
This is a generic alert icon. Any specifics on the
risk will be in the text following the signal word.
This identifies a hazardous electrical situation.
11069-000 Rev. H SmartController EX User's Guide 11

12 SmartController EX User's Guide 11069-000 Rev. H
2.2 What to Do in an Emergency / Abnormal Situation
Special Information
There are several types of notation used to call out special information.
IMPORTANT: Information to ensure safe use of the product.
NOTE: Information for more effective use of the product.
Additional Information: Offers helpful tips, recommendations, and best prac-
tices.
Version Information: Information on differences in specifications for different
versions of hardware or software.
2.2 What to Do in an Emergency / Abnormal Situation
Stopping the Robot
Press any E-Stop button (a red push-button on a yellow background) and then follow the
internal procedures of your company or organization for an emergency situation.
Fire Response
If a fire occurs, use CO2to extinguish the fire.
2.3 Safety Precautions
WARNING: ELECTROCUTIONRISK
During maintenance, disconnect AC power from the robot, and install a lock-
out tag-out to prevent anyone from reconnecting power.
!
WARNING: PERSONALINJURYORPROPERTYDAMAGERISK
An industrial robot can cause serious injury or death, or damage to itself and
other equipment, if the safety precautions in this manual are not observed.
2.4 Additional Safety Information
We provide other sources for more safety information:
Manufacturer’s Declarations
This lists the standards with which the robots and controllers comply. The Manufacturer’s
Declarations are in the Manufacturer's Declaration Guide.

Chapter 2: Safety
Robot Safety Guide
The Robot Safety Guide provides detailed information on safety for our robots. It also gives
resources for more information on relevant standards. It ships with each robot.
Emergency Stop Circuit and Buttons
The E-Stop provided complies with ISO 10218-1 (Clause 5.5.2), with stop category 1 (per IEC
60204). The E-stop button complies with ISO 13850. The E-Stop meets the requirements of PL-d
per ISO 13849.
If you design your own front panel, it must meet the requirements of ISO13849, and be at least
PL-d. The E-Stop button must comply with IEC 60204-1 and ISO13850, Clause 5.5.2.
If you choose to use your own E-Stop buttons, they must meet the requirements of IEC 60204-1
and ISO 13850, Clause 5.5.2.
Manual Control Pendant
The protective stop category for the pendant enable switch is category 1, which complies with
the requirements of ISO 10218-1.
The pendant is designed in accordance with the requirements of IEC 60204-1 and ISO 13849.
The E-Stop button is ISO 13850 compliant.
NOTE: Omron Adept Technologies, Inc. does not offer a cableless (wireless)
pendant.
The manual control pendant can only move one robot at a time, even if multiple robots are
connected to a SmartController EX, and the pendant is connected to the SmartController EX.
2.5 Disposal
Dispose of in accordance with applicable regulations.
Customers can contribute to resource conservation and protecting the environment by the
proper disposal of WEEE (Waste Electronics and Electrical Equipment). All electrical and elec-
tronic products should be disposed of separately from the municipal waste system via des-
ignated collection facilities. For information about disposal of your old equipment, contact your
local Omron support.
11069-000 Rev. H SmartController EX User's Guide 13


Chapter 3: Installation
3.1 Controller Installation
This equipment must be shipped and stored in a temperature-controlled environment. See the
following table. It should be shipped and stored in the original packaging, which is designed
to prevent damage from normal shock and vibration. You should protect the package from
excess shock and vibration.
Table 3-1. Environmental Specifications
Ambient temperature 5° to 40° C (41° to 104° F)
Storage and shipment temperature –25° to 55° C (-13° to 131° F)
Humidity range 5 to 90%, non-condensing
Altitude up to 1000 m (3280 ft)
Free space around controller
(for proper cooling)
10 mm at back, 13 mm on sides (0.4 in., 0.5 in.)
Chassis protection class IP20 (NEMA Type 1)
!
WARNING: Use an appropriate IP-rated enclosure.
Before Unpacking
Carefully inspect all shipping containers for evidence of damage during transit. If any damage
is indicated, request that the carrier’s agent be present at the time the container is unpacked.
Upon Unpacking
Compare the actual items received (not just the packing slip) with your equipment purchase
order, and verify that all items are present and that the shipment is correct. Inspect each item
for external damage as it is removed from its container. Contact Omron Adept Technologies,
Inc. immediately if any damage is evident.
Retain all containers and packaging materials. These items may be needed in the future to
settle a damage claim.
Perform the following steps to unpack the SmartController EX motion controller and optional
pendant. Refer to the following sections for information on mounting the equipment.
11069-000 Rev. H SmartController EX User's Guide 15

16 SmartController EX User's Guide 11069-000 Rev. H
3.1 Controller Installation
1. Remove the SmartController EX motion controller from its box. Place it near the robot or
mount it in a rack. For details, see Mounting the SmartController EX Motion Controller
on page 16.
2. Remove the optional T20 pendant from its box and place it on a flat surface near the
SmartController EX motion controller.
Repacking for Relocation
If the controller needs to be relocated, reverse the steps in the installation procedure. Reuse all
original packing containers and materials and follow all safety notes used for installation.
Improper packaging for shipment will void your warranty.
Space Around the Chassis
When the SmartController EX motion controller is installed, you must allow 10 mm at the
back of the unit and 13 mm on the sides of the unit for proper air cooling.
Mounting the SmartController EX Motion Controller
The following mounting options are available for the controller:
lRack
lPanel
lTable
lStack
The controller and compatible units can be mounted with one unit placed on top of
another.
NOTE: To maintain compliance with many standards, the mounting of the con-
troller and all terminations at the controller must be performed in accordance
with local and national regulations.
Mounting Kits
The following mounting kits are available (order separately).
Table 3-2. Mounting Kit Details
Item Part Number Contents
Table / Rack-Mounting Kit 00205-000 lbrackets (table-mount): 4 x 40356-00001
lbrackets (rack-mount): 2 x 40356-00004
lfasteners: 8 x 51052-65006
Panel-Mounting Kit 90356-40000 lbrackets: 4 x 40356-00000
lfasteners: 8 x 51052-65006

Chapter 3: Installation
Rack-Mounting the SmartController EX Motion Controller
To rack-mount the controller in a standard 19-inch equipment rack, install the optional mount-
ing brackets on the side of the controller, as shown in the following figure. These brackets must
be ordered separately. They do not come with the controller.
3X M3 x 6MM
3.8 19.1
2X 25.0
14.2
2X 40356-00004
88.1 44.4
21.8
3.6
TYP.462.0 482.8
190.0
Figure 3-1. Rack-Mounting the SmartController EX Motion Controller (Units in mm)
Panel-Mounting the SmartController EX Motion Controller
To panel-mount the controller, install two brackets on each side at the rear of the unit, as
shown in the following figure. Use the screws from the accessories kit.
11069-000 Rev. H SmartController EX User's Guide 17

18 SmartController EX User's Guide 11069-000 Rev. H
3.1 Controller Installation
27.4
14.0
200.5
4X 40356-00000
8X M3 x 6MM
273.9
8.1
16.0
44.9
6.6 346.6359.8
R3.6 TYP.
16.1
44.9
Figure 3-2. Panel-Mounting the SmartController EX Motion Controller (Units in mm)
Table-Mounting the SmartController EX Motion Controller
To table-mount the controller, install two brackets on each side near the bottom of the unit, as
shown in the following figure. These brackets must be ordered separately. They do not come
with the controller.

Chapter 3: Installation
4X M3 x 6MM
21.6
16.0
120.9
16.2
4X 40356-00001
120.9
29.5
391.8
378.6
24.9
R3.6 12.1
24.1
Figure 3-3. Table-Mounting the SmartController EX Motion Controller (Units in mm)
Stack-Mounting Components
To stack-mount the SmartController EX motion controller and a compatible unit, such as a
SmartVision MX vision controller, install two brackets on each side of the units, as shown in
the following figure. These brackets are supplied with compatible units.
11069-000 Rev. H SmartController EX User's Guide 19

20 SmartController EX User's Guide 11069-000 Rev. H
3.1 Controller Installation
162.0
328.9
225.0
52.0
14393-000
186.5
15.0
150.0
Figure 3-4. Stack-Mounting SmartController EX Motion Controller (Units in mm)
Memory Card
The SmartController EX motion controller is equipped with a Secure Digital™(SD) memory
card. The SD card is removable, and can be moved to another SmartController EX motion con-
troller for testing.
The SD card shipped with all systems is factory-configured and installed. The SD card stores
the eV+ operating system, application programs, data files, and licenses.
Only the factory-supplied SD card will work with the SmartController EX motion controller.
NOTE: This SD card is not compatible with the legacy SmartController CX or
CS motion controllers.
Table of contents
Other Omron Controllers manuals

Omron
Omron FH-1050 User manual

Omron
Omron CP1 - User manual

Omron
Omron T20 User manual

Omron
Omron E5EC-B User manual

Omron
Omron NX701-1700 User manual

Omron
Omron SYSMAC C200HS User manual

Omron
Omron CS1 - User manual

Omron
Omron E5CC-B User manual

Omron
Omron E5*D series User manual

Omron
Omron Sysmac NJ-series Instruction Manual

Omron
Omron CJ1W-SCU32 User manual

Omron
Omron SmartVision MX User manual

Omron
Omron E5EK DEVICENET User manual

Omron
Omron NXEIP202 User manual
Omron
Omron SYSMAC CJ - REFERENCE 01-2008 User manual

Omron
Omron NQ Series User manual

Omron
Omron E5 K Series User manual

Omron
Omron NJ501-1300 User manual

Omron
Omron CS1D-CPU S Series Parts list manual

Omron
Omron CPM1A User manual