16.5
38
35
1.8
35
38
1.8
28
30
31.4
30
31.4
1
2
O
N
(Factory default settings)
DIP Switch
Note: The mounting procedure of the
F39-BT is the same as the above.
Do not use the product in the following types of environments:
• Areas where oil mist or corrosive gases are present
• Areas exposed to vibration or shock levels higher than in the specification provisions
• Areas where the pollution degree is harsher than 3, such as outdoor environment.
Securely mount the product according to the torque recommended in this document.
Always turn OFF the power when you connect the product to the Safety Light Curtain.
Do not drop the product.
Dispose of the product in accordance with the relevant rules and regulations of the country or
area where the product is used.
Read and understand this document for DIP Switch setting.
The rated life of this product is 6 years.
nWiring and installation
Always use the product together with the F3SG-RA or F3SG-RR Safety Light Curtain.
lMeaning of Signal Word
Safety Precautions
Precautions for Safe Use
Precautions for Correct Use
Ratings/Specifications
Indicates a potentially hazardous situation which, if
not avoided, will result in minor or moderate injury,
or may result in serious injury or death. Additionally
there may be significant property damage.
WARNING
Do not try to disassemble, repair, or modify this product. Doing so
may cause the functions to stop working properly.
Do not use the product in environments where strong
electromagnetic field may be produced. Doing so may cause the
functions to stop working properly.
Do not use the product in close proximity to medical equipment
such as a pacemaker. Radio wave may affect the operation of such
equipment.
Mounting Procedure Troubleshooting
Setup Procedure for DIP Switch on Bluetooth Communication Unit
WARNING
*1. The LED indication of factory default setting is red solid-on with inverted signal output and
green solid-on for Safety Output information and orange blinking for Stable-state information.
*2. It depends on use environment conditions.
Status
Corrective Action
Suitability for Use
Omron Companies shall not be responsible for conformity with any standards,
codes or regulations which apply to the combination of the Product in the
Buyer’s application or use of the Product. At Buyer’s request, Omron will
provide applicable third party certification documents identifying ratings and
limitations of use which apply to the Product. This information by itself is not
sufficient for a complete determination of the suitability of the Product in
combination with the end product, machine, system, or other application or
use. Buyer shall be solely responsible for determining appropriateness of the
particular Product with respect to Buyer’s application, product or system.
Buyer shall take application responsibility in all cases.
NEVER USE THE PRODUCT FOR AN APPLICATION INVOLVING SERIOUS
RISK TO LIFE OR PROPERTY WITHOUT ENSURING THAT THE SYSTEM
AS A WHOLE HAS BEEN DESIGNED TO ADDRESS THE RISKS, AND
THAT THE OMRON PRODUCT(S) IS PROPERLY RATED AND INSTALLED
FOR THE INTENDED USE WITHIN THE OVERALL EQUIPMENT OR
SYSTEM.
See also Product catalog for Warranty and Limitation of Liability.
OMRON Corporation (Manufacturer)
Contact: www.ia.omron.com
Regional Headquarters
Shiokoji Horikawa, Shimogyo-ku, Kyoto, 600-8530 JAPAN
OMRON EUROPE B.V. (Importer in EU)
Wegalaan 67-69-2132 JD Hoofddorp
The Netherlands
Tel: (31)2356-81-300/Fax: (31)2356-81-388
OMRON ELECTRONICS LLC
OMRON ASIA PACIFIC PTE. LTD.
No. 438A Alexandra Road # 05-05/08 (Lobby 2),
Alexandra Technopark,
Singapore 119967
Tel: (65) 6835-3011/Fax: (65) 6835-2711
OMRON (CHINA) CO., LTD.
Room 2211, Bank of China Tower,
200 Yin Cheng Zhong Road,
PuDong New Area, Shanghai, 200120, China
Tel: (86) 21-5037-2222/Fax: (86) 21-5037-2200
Bluetooth
®
Communication Unit for F3SG Series
Model
F39-BT
Lamp and Bluetooth®Communication Unit for F3SG Series
Model
F39-BTLP
Instruction Sheet
EN
©OMRON Corporation
2015-2017
All Rights Reserved.
9704396-0C
Dimensions
[Unit: mm]
Reference Manuals
Document Title
Safety Light Curtain F3SG-RR Series User’s Manual
Z383-E1
Safety Light Curtain F3SG-R Series User's Manual
Z352-E1
Safety Light Curtain F3SG Configuration Tool
(SD Manager 2) User's Manual
Z357-E1
In the interest of product improvement,
specifications are subject to change without notice.
Cat. No. For more information, visit
http://www.ia.omron.com/f3sg-r_tool
Item
Applicable Sensor
LED Light Color
Power Supply Voltage
Current Consumption
Ambient Temperature
Ambient Humidity
Vibration Resistance
Shock Resistance
Type of Connection
Degree of Protection
Material
Communication System
Weight
Communication Profile
Transmission Distance
Bluetooth device
(as of Aug. 2016)
Windows-based PC
F39-BT F39-BTLP
Red/Green *1
/Orange-
24 VDC±20%, ripple p-p 10% max.
(shares sensor’s power supply)
30 mA max. (shares sensor’s power supply) 55 mA max. (shares sensor’s power supply)
Operating: -10 to 55°C, Storage: -25 to 70°C
(non-icing and non-condensing)
Operating: 35% to 85%, Storage: 35% to 95%
(non-condensing)
10 to 55 Hz, Multiple amplitude of 0.7 mm,
20 sweeps for all 3 axes
100 m/s2, 1000 shocks for all 3 axes
IP65, IP67 (when attached to F3SG)
Connectable to terminal connector of F3SG-RA or F3SG-RR
PBT Lighting element: PC,
Other body parts: PBT
61 g (when packaged) 65 g (when packaged)
Bluetooth Version 3.0
SPP (Serial Port Profile)
Windows 7 SP1 (32-bit/64-bit)
Windows 8 , 8.1 (32-bit/64-bit)
Windows 10 (32-bit/64-bit)
Approx. 10 m max. (Output power: Class 2)*2
nExample (F39-BTLP)
nF39-BT
Confirm that .NET Framework 4.5.2 or higher is already installed.
Check if Bluetooth Communication Unit is properly mounted.
Check if Bluetooth function is enabled on the device you use for SD Manager 2.
Check if Bluetooth Communication Unit is not being paired with another device.
Check if Bluetooth Communication Unit and the device you use for
SD Manager 2 are properly paired (or the connection is verified). *
Check if Bluetooth function of the device you use for SD Manager 2
supports SPP (Serial Port Profile).
Check if a COM port is properly configured.
Check the noise level in the environment.
Check if there is any device that uses 2.4 GHz band.
Check if there is any obstruction between Bluetooth Communication
Unit and the device you use for SD Manager 2. The maximum
permissible line-of-sight distance is approximately 10 m.
The F3SG is under the Setting state. Turn OFF and ON the power of the F3SG.
The sensor model in the saved file does not match the sensor
model in the file that you are about to read in.
If a file is saved by SD Manager 2 of a newer version than your SD
Manager 2, the file is not usable on your SD Manager 2.
Enter the password in single-byte alphanumeric characters.
Passwords are case-sensitive.
If you forget the password after changing it from the initial setting,
contact your sales representative with the serial number on the
nameplate of the F3SG receiver. A master password will be issued
to reset to the initial password "0000".
Log in the system at the administrator level.
Check if the DIP Switch position 8 is set ON (to Configuration Tool Enabled).
Check if Bluetooth Communication Unit is connected to the receiver.
Restart F3SG. If SD Manager 2 does not operate normally even
after restarted, use the setup recovery function to restore to the
factory default settings again.
Check if a constraint error has occurred from where you changed.
SD Manager 2 does not start up.
Communications cannot be
established
Files cannot be read from the
outside while the sensor is
connected.
Incorrect password
Settings cannot be changed
Forgot the password
F3SG does not go back to normal
state after terminating SD Manager 2
Information cannot be written in
* The procedure depends on the device you use for SD Manager 2. Refer to instruction manuals of the device.
Do not use this product in environments where flammable or
explosive gases are present. Doing so may result in explosion.
DIP Switch 1 is set to the ON position and DIP Switch 2 to the OFF position at factory default.
When you use the product, make sure the DIP Switches are at these positions.
Steps for Use of SD Manager 2
1. Download SD Manager 2 from the website below.
http://www.ia.omron.com/f3sg-r_tool
2. Install SD Manager 2.
If .NET Framework 4.5.2 or higher is not installed on your device, download
it from its website.
3. Turn on the power of the Safety Light Curtain.
4. Enable the Bluetooth function of the device you use for SD Manager 2.*
5. Pair Bluetooth Communication Unit with the device you use for SD Manager 2 (to verify the
connection).*
6. Check the communication setting and use SD Manager 2.
* The procedure depends on the device you use for SD Manager 2. Refer to instruction
manuals of the device.
nF39-BTLP
Indicates an imminently hazardous situation which,
if not avoided, is likely to result in serious injury or
may result in death. Additionally there may be
severe property damage.
DANGER
Make sure to test the operation of the product after setting with the
DIP Switch to verify that the product operates as intended.
DANGER
Make sure to test the operation of the product after setting with the
SD Manager 2 to verify that the product operates as intended.
When pairing your device with the F39-BT or F39-BTLP, make sure
that the model name and serial number of a sensor to be
configured match the information on your device.
The Bluetooth word mark and logos are registered trademarks owned by Bluetooth SIG, Inc.
Any use of such marks by Omron is under license. Windows is either registered trademarks or
trademarks of Microsoft Corporation in the United States and/or other countries.
The names of the other companies and products mentioned herein are the trademarks or
registered trademarks of their respective owners.
®
2895 Greenspoint Parkway, Suite 200
Hoffman Estates, IL 60169 U.S.A.
Tel: (1) 847-843-7900/Fax: (1) 847-843-7787
Thank you for purchasing Bluetooth® Communication Unit for F3SG Safety
Light Curtain. Read this document and user's manuals of the Safety Light
Curtain (F3SG-RA or F3SG-RR) and Configuration Tool (SD Manager 2)
thoroughly to understand and make good use of the descriptions before
installing and operating the product. Keep this document at the place where
the operator can refer to whenever necessary.
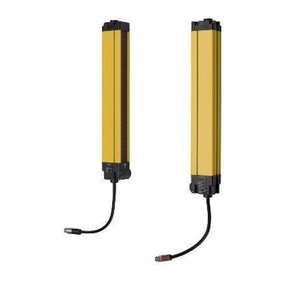
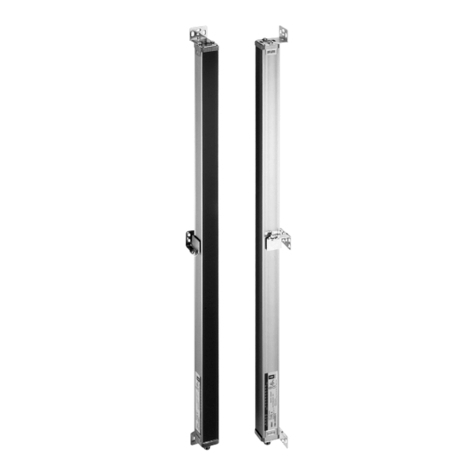
F3SG-oRA/oRR Series Safety Light Curtain (Receiver)
16.5
30
28
35
2.4
30 35
2.4
[Top view]
Screw (M2.5)
[Bottom view]
Cap
Safety Light
Curtain
Bluetooth
Communication
Unit
Cable color: Black
Spacer
For the F3SG-RA,
attach the Spacer
between the Bluetooth
Communication Unit
and the Safety Light
Curtain and fix these
with the screw (M2.5).
The Spacer can prevent
wires and others from
getting caught.
Screw (M2.5) Screw (M2.5)
[F3SG-□RA Receiver] [F3SG-□RR Receiver]
1O
N
2
3
4
5
6
7
8
1O
N
2
3
4
5
6
7
8
:
Indicates a switch position.
[DIPSwitchonF3SG-RAreceiver]
1. Make sure that the Safety Light Curtain is powered off. Remove the Cap (terminal
connector) from the socket of the receiver body of the Safety Light Curtain. Then insert the
connector of the product to the socket.
2. Securely tighten the screw (M2.5, recommended torque: 0.35N•m).
To change the settings of the F3SG-RA with SD Manager 2, also perform the steps 3 to 5
below. When you use the F3SG-RA only for monitoring statuses or checking logs or use
the F3SG-RR, the steps 3 to 5 below are not necessary.
3. Unscrew the screws (M2.5) of the DIP Switch cover of the F3SG-RA receiver and open the
cover.
4. Make sure the Position 8 of the F3SG-RA's DIP Switch is set to Configuration Tool Enabled
(ON position).
5. Close the DIP Switch cover and tighten the screws
(M2.5, recommended torque: 0.35N•m).
nStorage conditions and installation environment
• Do not install, use, or store the product for a long time at a temperature or humidity out of the
specified range.
• This is a Class A product (for industrial environments). In a residential environment, it may
cause radio interference, in which case the user may be required to take appropriate measures.
nPeriodic inspections and maintenance
Perform inspections according to the user's manual of the Safety Light Curtain (F3SG-RA or
F3SG-RR).
nSettings
• Do not operate the DIP Switch with tools that may damage the product.
• When you make any changes to the settings of the F3SG-RA, make sure the Position 8 of the
DIP Switch of the receiver is set to Configuration Tool Enabled (ON position). When you use
the F3SG-RA only for monitoring statuses or checking logs, the Position 8 may be set to OFF.
• Settings changed with the SD Manager 2 are stored in the internal memory of the Safety Light
Curtain. For the F3SG-RA, when any change is made to the settings and then the Position 8 on
the receiver is set to OFF, the F3SG-RA operates according to the settings of the DIP Switch.
When the Position 8 is switched back to ON, the F3SG-RA operates according to the settings
stored in the internal memory.
• Do not connect the F39-BT or F39-BTLP to emitters of F3SG-RA or F3SG-RR.
• Do not use the F39-BT or F39-BTLP together with the F39-GIF or F39-GIF-1.
nCleaning
Do not use thinner, benzene, or acetone for cleaning. They may affect the product's resin parts.
nBluetooth®wireless technology
The product uses radio band of 2.4 GHz. The use of the product in close proximity to the
following may cause radio interference with the product, resulting in loss of or slow connection.
• Medical equipment such as a pacemaker
• RFID premises radio stations (license required) used in factory manufacturing lines
• Specified low power radio station
• Wireless LAN device
If the product caused radio interference with an RFID premises radio station, stop radio emission,
and take actions to prevent cross talk, such as by installing a partition.The transmission distance
may be shorter depending on structures of premises or obstructions. The transmission may be
interrupted especially by reinforced concrete. Use the product within the line of sight of 10 m.Use
the product in conjunction with a Bluetooth device. I
t is not guaranteed that the product can
communicate with all Bluetooth devices.
The product can be used in Japan,the United States,
Canada, EU member states, China, Rebublic of Korea, Thailand, India, Mexico, Australia and New
Zealand, and Indonesia. The use in other countries may conflict with radio laws of the countries.
[F3SG-□RR][F3SG-□RR]
[F3SG-□RA][F3SG-□RA]
