Menu structure and features descripon Trouble shoong
Technical specicaon
Model: Digital satellite receiver DVB-S2
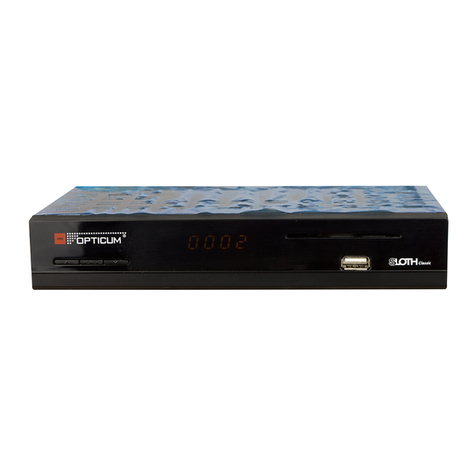
Display t ype: LED, digit s: 4, buttons:3 , micro switch
Slot: card reader
Input frequency: .................950-2150MHz
RF input connector: ..............IEC169-24, Female, 250mA
Input impedance : ................75Ω
RF loop connector : ..............IEC169-24, Female
Modulaon technique:. . . . . . . . . . . .QPSK (DVB-S), QPSK/ 8PSK/
H8PSK/ 16APSK (DVB-S2)
Modulaon technique:. . . . . . . . . . . .M PEG2 (MP@ML),
Video resoluon:.................480, 576, 720, 10 80
Audio decoding : .................MPEG-1, 2 Layer 1 & 2
Input/output : ...................HD MI, SCART, Coax ial digital
audio, US B, Ethernet
Supply voltage: ..................~ 230V/50Hz
Power consumpon:..............< 18 W
Standby consumpon:............< 1 W
Opera ng temperatur e :..........5-40C
Opera ng humidity : .............< 95%
Net weight :......................< 1,5 kg
Size: ............................260mm × 110mm × 3 5mm
The weight a nd size dimensi ons are not very a ccurate value s!
The device m ight be upgrad ed and its qual ity improved at a ny
me, ther efore the above s pecicaon s may be subject to
change (by t he manufact urer) without f urther noce .
Issues Possibile explanations Suggested solutions
Suggested solutions The power c ord is not plugge d correctly.
Plug the co rd securely in to t he wall outlet .
If there is s till no power, rebo ot the device
after 5-10 min. C heck at the rear of t he
device if t he power swi tch is on the po sition
1 ( switche d on)
The rece iver does
not decode the coded
channels
The Cona x card is not inser ted or i s inserted
incorre ctly into the c ard slot
Inser t the card into the s lot with the gold
contacts facing down.
The card h as not been act ivated. Contac t your servic e provider to fin d out
how to act ivate the card
Channe ls are not found
The sate llite dish is not adj usted well
Adjust t he aerial; make su re the signal
streng th indicator i s blue and the qua lity
indica tor - green
Searching parameters are incorrect Enter t he correct fr equency parameters/
bands
No pictu re
The outp ut cord is connec ted incorrec tly C onnect the ou tput cord corre ctly.
The vide o output mode of t he unit is differ ent
from the m ode of the monito r Reset the working mode
No colour
The output cord is connected incorrectly. Connect the output cord correctly
The vide o output mode of th e unit is differ ent from
the mode of t he monitor. Reset the wo rking mode.
The remot e control does
not work
Batteries are not inserted correctly Insert t he batteries wi th the poles in the r ight
direction
Batteries are flat Replace th e batteries in t he remote
The dist ance between th e remote contro l and the
receive r is too large Try using the r emote at a closer r ange
The remot e sensor of the uni t must not be cover ed
by other objects Relocate the receiver; remove the obstacles
Incorrect language of
audio sound or subtitles
The wrong l anguage was cho sen in the Menu
settings Reset the language.
No sound
The unit is m ute Pres s the Mute butto n to turn off the Mu te
mode
The volum e level is too low Adjust the volume as required
The cord is connected incorrectly Reconnect the cord.
Severe pi cture
distortion The sign al received is int erfered or weak
Adjust the a erial; make sure the s ignal
strength indicator is blue and the quality
indicator - green
Menu Feature Menu Feature
Menu structure and features descripon
The table below presents the most frequent issues which you can encounter when using
the receiver. Most of them can be explained and solved in a simple way. If none of these
troubleshooting tips apply, please contact the relevant service centre.
Safety precauons
CAUTION
RISKOF ELEC TRIC SHOCK.
DONOT OPEN.
ATTENTION: Warning : The symbol of a lig htening ash in t he equilatera l triangle is us ed to warn the user of
danger ous voltage and t o prevent the risk o f electric sh ock.
Warning: In order to preventthe risk of electric shock it is not recommended to open the hous-
ing of the u nit. It should b e only servic ed by the qualie d sta.
Warning: An exclamaon mark in the equilateral triangle is used to remind the user of impor-
tant ac ons and mainte nance.
Note: In order to use the device correctly, you must get familiar with the manual instrucons
and keep t hem in a secure pl ace for a future re ference.
Warning: Do not use the device in the places exposed to the risk of contact with water. Avoid
insta lling it near sin ks, washbas ins, washing m achines, wate r pools, etc
Warning : D o not place cand les or lamps on t he device to avoid th e risk of re.
Warning : The unit should be conn ected to a power supply of the type descri bed in the manual. If you are not sure of
the typ e of power supply ( e .g. 120V or 230V ) , please conta ct your local d ealer or the lo cal power plant .
Warning : Do not open the housing and do not touch anythi ng inside the devi ce. If there is need to open the housing ,
please c ontact your lo cal dealer or t he relevant ser vice centre.
Note: Use the device alw ays with its housi ng in or der to p revent the emission of elect romagnec radiaon and
exposu re to the radia on from outsid e.
Device maintenance: Disconnect the unit from the power supply. Clean the device, its panel and the remote control
with a so cl oth dapped in a s mall amount of wa ter and so deter gent.
Addional accessories: Never apply or connect addional accessories without a consent of the manufacturer as it
can cau se the risk of re , electric sh ock or other per sonal injuri es.
Placem ent: The ai m of the out lets and o penings in the device h ousing is to venlate th e unit and p revent it fr om
overheang. You must not cover these openings or hinder the heat transfer by placing the device on so surfaces
such as a so fa, bed, etc. D o not place the dev ice next to heate rs, radiator s or other source s of heat.
Power c ord: Place the power cord out of the w ay. Please, pay aeno n to the condion of the cor d at the plug,
outlet s and where it ex its the device.
Foreign bodies in the device : Do not in sert fore ign bodies through th e openings in the dev ice, as th ey can touc h
voltage p oints or shor t out parts an d cause re or el ectric shoc k. Never spray or s pill any liquid o n the receiver.
Note: Moi sture may form o n the device in the fo llowing situa ons:
When the u nit is sudden ly removed from a co ld or venlated r oom to the warm ar ea
• Aer the h eang has been t urned on
• In a steam y or humid room
If moisture condensates inside the device, it can fail to work correctly. To solve this problem, the device must be
discon nected from po wer for about two h ours, in whic h me the moistu re should evapo rate to dryne ss.
Spare parts: If some parts need replacing, please ensure that the service centre uses the spare parts recommended
by the man ufacturer or h aving the same p roperes as t he original on es.
Using un authorized pa rts can resu lt in re, elect ric shock or an other danger.
Safety check: Aer any maintenance or repair done, the user should request the service engineer to carr y out a
genera l safety check o f the device in ord er to ensure it is in p roper condi on
Environmental protecon
Aenon!
Your produ ct is marke d with this s ymbol. It indic ates that it shoul d not be disp osed of wit h other
househ old wast e at the end of i ts worki ng life. Any u sed elec tronic o r elect ric equip ment shou ld
be sepa rated f rom the gener al waste and rec ycled respo nsibly accor ding to the act o n responsib le
waste disposal.
Following the implementaons of the EU provisions concerning the responsible waste disposal,
household users can return all used electronic and electric equipment to the indicated electronic
waste collec on points free of charge . When purchasin g a new device , the old one can be returne d
to the ret ailer.
Conta ct your local gove rnment oce to re ceive more infor maon.
If the pro duct has baer ies, please re move them as requi red by law.
A proper d isposa l of elec tric and e lectr onic was te promote s the sust ainable reu se of mater ial reso urces and r ecycli ng.
In this way y ou prevent possi ble harm to the env ironment or hum an health.
Uncontrolled electric and electronic waste disposal can cause harm to the environment.
Inform aon for busine ss users in EU cou ntries
If the pro duct you wan t to disposed o f was used for bu siness pur poses, ple ase contac t your deale r to obtain inf orma-
on on the way of its collec on, disposal and rec ycling as well as on possible cost s. If you want to disposed of a small
unit, it c an be returne d to the local ele ctronic wast e collecon po int.
Inform aon for busine ss users in non -EU countries
If you want to d ispose of the use d product , please c ontact you r local g overnment o ce to obta in informa on on
appropriate form of recycling.
Channels editor
- TV cha nnels list
- Radio ch annels list
- My favour ite
- Delete A ll
Antenna installaon
- Search channels
- Scan free-to-air channels on
Astra satellite
- Advanc ed installa on of an antenna and
channels search
RED (scan satellite)
GREEN (sc an TP)
YELLOW (edi t TP)
BLUE (Blindscan)
List of satellites
System se ngs
- Informaon
- Sowa re update via OTA satel lite
- Video a nd audio
- Display s engs
- Time
- Parent al lock
- Language
- OSD
- Audio de scripon
- Others
- Factor y sengs
Access card
Drive sengs
- USB infor maon
- Recordi ng sengs
- Update v ia USB
- Safely r emove the USB disc
Recordings (oponal)
- My recordings
- My lms
- My photos
- My music
This men u manages your ch annels list s.
- manage s the TV channe ls list.
- manage s the radio chann els list.
- manage s channels adde d to My favourite
- delete s the channels f rom all lists.
This men u enables you to s can channels a nd congure
installaon.
- enable s you to search cha nnels.
- enable s you to search add ional channe ls via Astra
satellite.
- enable s you to choose the t ype of instal laon
congu raon of the conver ter/antenna para meters and
channels search.
- scans c hannels fr om one satel lite (sele cted from t he list).
- scans channels from one transponder (selected from
the list ).
- enable s you to edit list s of transponde rs for each
satell ite, enables you t o scan the selec ted transpo nders.
- scans t he whole satell ite without usi ng the list of
transponders.
- scans t he whole satell ite without usi ng the list of
transponders.
This men u enables you to s et up the feature s of the device.
- display s the informao n about the recei ver, its version
sowa re and model num ber.
- enable s you to update the s oware via sate llite.
- selec ts sengs for a udio and vi deo – denion
16:9/4:3, RGB/CVBS.
- enable s you to change its c ontrast, bri ghtness and
saturaon.
- ena bles y ou to set me, adj ust GT M me zon es; ma nual
opon available.
- enable s you to block the ac cess to the menu an d
selected Channels.
- enable s you to select th e language of the m enu, audio
track s and Teletext.
- change s transparen cy of OSD and the dur aon of the
infobar display.
- turns on t he addional a udio narraon .
- sets ot her features – au tomac power swi tch-o.
- reset s the device to its o riginal seng s.
This men u displays info rmaon about t he card and righ ts to
access the channels.
To menu umożl iwia zarządz anie funkcja mi Timeshi,
nagrywanie oraz odtwarzanie nagranych audycji.
- enable s you to set the feat ures of recordin g.
- enable s you to change sen gs of recording a nd
meshi.
- enable s you to update the rec iever’s sowar e via a USB
drive.
- enable s you to safely rem ove the USB disc fro m the
device withou t a risk of data loss .
This men u contains all m ulmedia reco rded by the user.
- display s all material re corded by the devi ce.
- display s the list of lms pr esent on a USB driv e.
- display s all photos pres ent on a USB drive.
- display s all songs pres ent on a USB dri ve.
XS65-COMBO_ENG_REV02.indd 2 2014-09-11 12:09:11
