OR
To
search
for
the
sensor,
press
and
hold
CHANNEL
and
MEM
at
the
same
time
for
2
seconds.
|§j|||i§t
If
the
sensor
is
still
not
found,
check
the
batteries,
obstruc¬
tions,
and
remote
unit
location.
I
Signals
from
household
devices
such
as
doorbells,
eiec-
to.
^arage
doors,
and
home
security
systems
may
cause
tempo¬
rary
reception
failure.
This
is
normal
and
does
not
affect
general
prod¬
uct
performance.
The
reception
will
resume
once
the
interference
ends.
CLOCK
This
product
shows
the
current
time
and
day
of
week
in
English,
Ger¬
man,
Italian,
French
and
Spanish.
Manually
set
the
clock
following
the
"Set
Clock"
instructions
(below).
1
.
2
.
Press
and
hold
MODE
for
2
seconds.
The
Clock
Area
will
blink.
Select
the
hour,
minute,
year,
month,
day,
and
weekday
language.
Press
A
or
v
to
change
the
setting.
Press
MODE
to
confirm.
ilip
plf
The
Language
settings
are
(E)
English,
(D)
German,
(F)
French,
(I)
Italian
and
(S)
Spanish.
Press
MODE
to
toggle
between
Clock
with
Seconds
and
Clock
with
Weekday.
ALARM
This
product
is
equipped
with
a
2-mlnute
crescendo
alarm.
The
Alarm
Time
and
On
/
Off
status
will
show
in
the
Calendar
/
Alarm
Area.
Press
{(.))
again
for
the
second
alarm
time
and
status.
1.
Press
((.)).
2
''-ess
and
hold
((.))
again
for
2
seconds.
The
Alarm
settings
will
k.
VoVvoK.
3.
,iect
the
hour
and
minute.
Press
^
or
y
to
change
settings.
Press
((.))
to
confirm.
ffiPjSBS
To
set
second
alarm
perform
step
1
twice,
then
perform
steps
2
and
3.
Press
AL
ON
/
OFF
to
activate,
deactivate
and
toggle
between
alarm
settings.
(Alarm
symbol
with
#1
or
#2)
shows
in
Calendar
/
Alarm
Area
whan
alerm(s)
are
activated,
This
product
can
display
the
following
temperature
Information:
•
Currant,
minimum
and
maximum
readings
•
Trend
line
for
remote
sensor
Data
Is
collected
by
the
remote
sensor
and
displayed
every
40
sec¬
onds.
Slide
the
°C
/
°F
switch
into
the
desired
location.
The
switch
is
located
on
the
back
of
the
product.
Press
MEM
to
toggle
between
current,
maximum
(MAX)
and
mini¬
mum
(MIN)
records
for
the
indoor
reading
and
the
selected
sensor.
To
clear
both
the
indoor
thermometer
and
sensor
records,
press
and
hold
MEM
for
2
seconds.
A
beep
will
sound
to
confirm
that
the
memory
has
been
cleared.
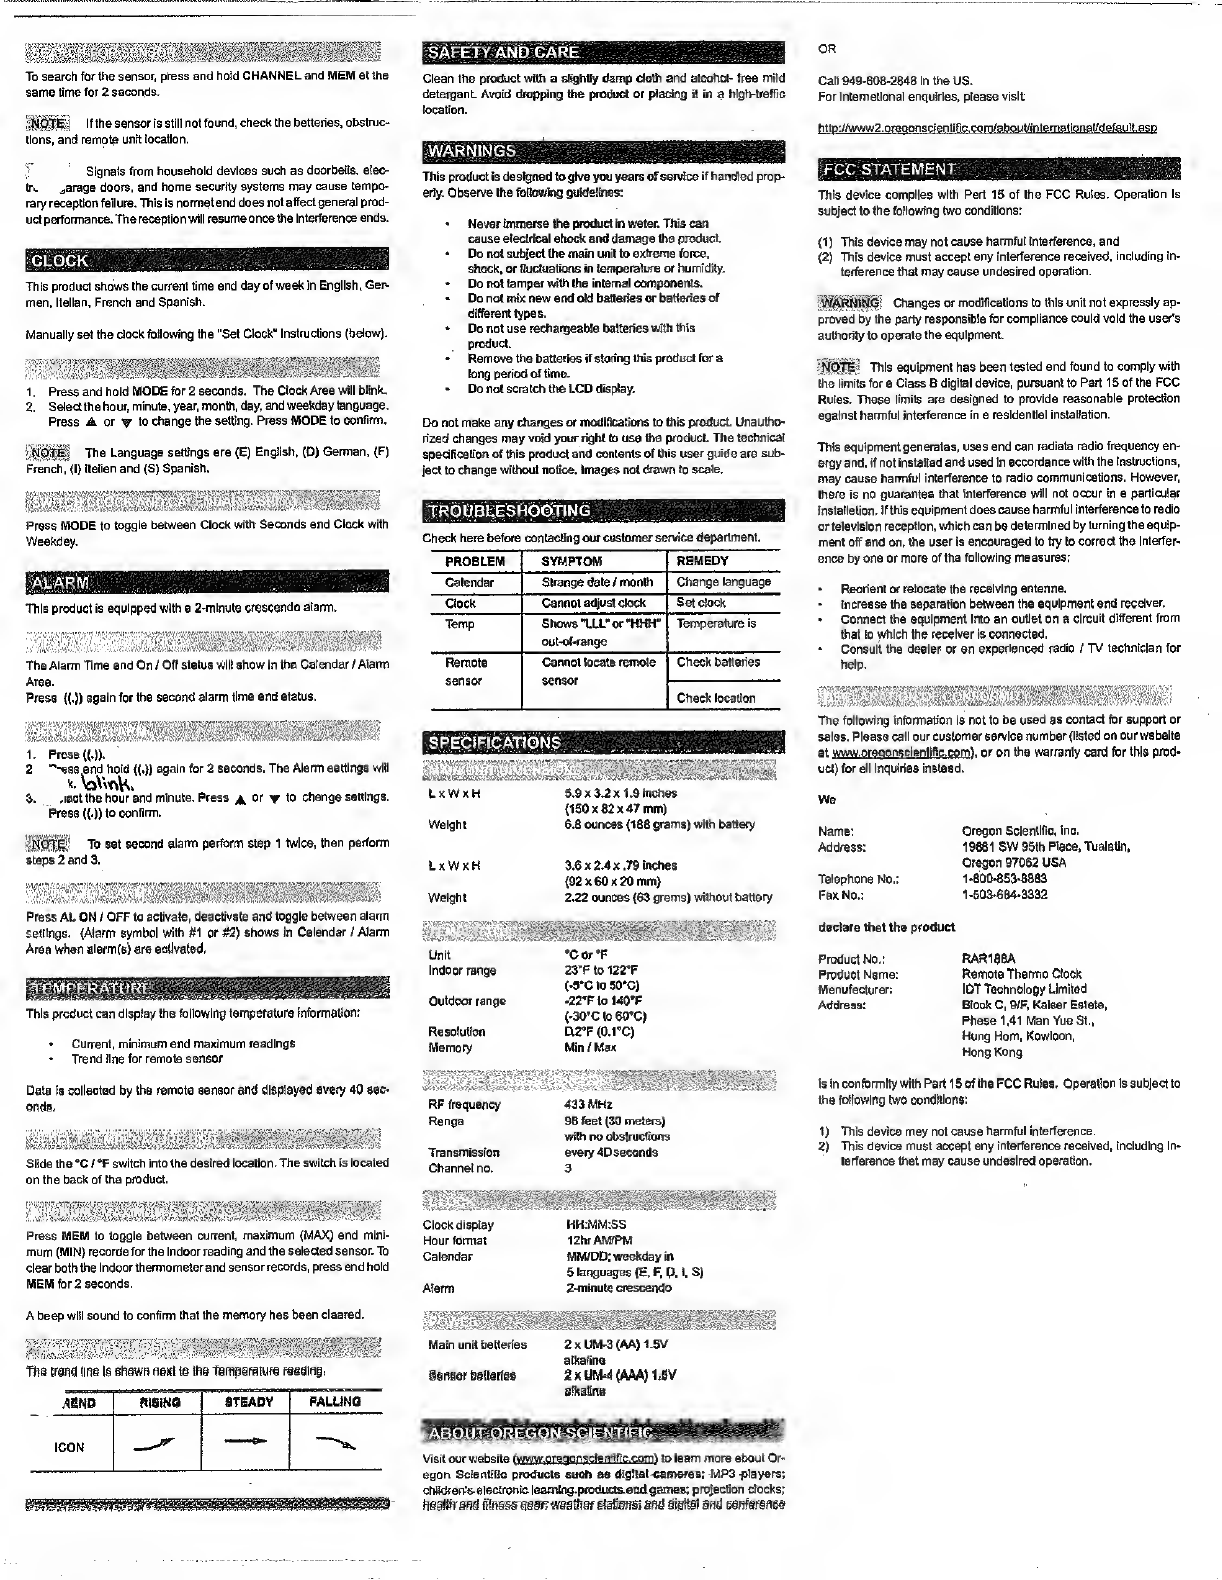
Ids
[rone
tins
15
shown
nexl
t@
tee
tgmperamre
reeding,
ABND
RISING
STEADY
PALLING
ICON
•
SAFETY
AND:QARE
Clean
the
product
with
a
slightly
damp
cloth
and
alcohol-
free
mild
detergent.
Avoid
dropping
the
product
or
placing
it
in
a
high-traffic
location.
fVARNINGS;
This
product
is
designed
to
give
you
years
of
service
if
handled
prop¬
erly.
Observe
the
following
guidelines:
•
Never
immerse
the
product
in
water.
This
can
cause
electrical
shock
and
damaga
the
product.
•
Do
not
subject
the
main
unit
to
extreme
force,
shock,
or
fluctuations
in
temperature
or
humidity.
•
Do
not
tamper
with
the
internal
components.
Do
not
mix
new
and
old
batteries
or
batteries
of
different
types.
•
Do
not
use
rechargeable
batteries
with
this
product.
•
Remove
the
batteries
if
storing
this
product
for
a
long
period
of
time.
•
Do
not
scratch
the
LCD
display.
Do
not
make
any
changes
or
modifications
to
this
product.
Unautho¬
rized
changes
may
void
your
right
to
use
the
product.
The
technical
specification
of
this
product
and
contents
of
this
user
guide
are
sub¬
ject
to
change
without
notice.
Images
not
drawn
to
scale.
TROUBLESHOOTING
Check
here
before
contacting
our
customer
service
department.
PROBLEM
SYMPTOM
REMEDY
Calendar
Strange
date
/
month
Change
language
Clock
Cannot
adjust
clock
Set
clock
Temp
Shows
TIL"
or
"HHH"
out-of-range
Temperature
is
Remote
sensor
Cannot
locate
remote
sensor
Check
batteries
Check
location
SPECIFICATIONS
LxWxH
5.9
x
3.2
x
1.9
Inches
(150
x
82
x
47
mm)
Weight
6.6
ounces
(188
grams)
with
battery
LxWxH
3.6
x
2.4
x
.79
inches
(92
x
60
x
20
mm)
Weight
2.22
ounces
(63
grams)
without
battery
Call
949-608-2848
in
the
US.
For
International
enquiries,
please
visit:
http://www2.oreeonscientific.com/about/intemational/defauH.asp
FCC
STATEMENT
j
This
device
complies
with
Part
15
of
the
FCC
Rules.
Operation
is
subject
to
the
following
two
conditions:
(1)
This
device
may
not
cause
harmful
Interference,
and
(2)
This
device
must
accept
any
interference
received,
including
in¬
terference
that
may
cause
undesired
operation.
Changes
or
modifications
to
this
unit
not
expressly
ap¬
proved
by
the
party
responsible
for
compliance
could
void
the
user's
authority
to
operate
the
equipment.
This
equipment
has
been
tested
and
found
to
comply
with
the
limits
for
a
Class
B
digital
device,
pursuant
to
Part
15
of
the
FCC
Rules.
These
limits
are
designed
to
provide
reasonable
protection
against
harmful
interference
in
a
residential
installation.
This
equipment
generates,
uses
and
can
radiate
radio
frequency
en¬
ergy
and,
if
not
installed
and
used
In
accordance
with
the
Instructions,
may
cause
harmful
interference
to
radio
communications.
However,
there
is
no
guarantee
that
interference
will
not
occur
in
a
particular
Installation.
If
this
equipment
does
cause
harmful
interference
to
radio
or
television
reception,
which
can
be
determined
by
turning
the
equip¬
ment
off
and
on.
the
user
is
encouraged
to
try
to
correct
the
Interfer¬
ence
by
one
or
more
of
the
following
measures:
Reorient
or
relocate
the
receiving
antenna.
Increase
the
separation
between
the
equipment
and
receiver.
Connect
the
equipment
Into
an
outlet
on
a
circuit
different
from
that
to
which
the
receiver
is
connected.
Consult
the
dealer
or
an
experienced
radio
/
TV
technician
for
help.
The
following
information
is
not
to
be
used
as
contact
for
support
or
sales.
Please
call
our
customer
service
number
(listed
on
our
website
at
www.oreaonsclentific.com
).
or
on
the
warranty
card
for
this
prod¬
uct)
for
all
inquiries
instead.
We
Name:
Address:
Telephone
No.:
Fax
No.:
Oregon
Scientific,
Inc.
19861
SW
95th
Place,
Tualatin.
Oregon
97062
USA
1-800-853-8883
1-503-684-3332
Unit
Indoor
range
Outdoor
range
Resolution
Memory
•Cor’F
23’F
to
122°F
(-5*0
to
50’C)
-22*F
to
140'F
(-30’C
to
60
S
C)
0.2’F
(Q.1X)
Min
/
Max
RF
frequency
Range
Transmission
Channel
no.
433
MHz
98
feet
(30
meters)
with
no
obstructions
every
40
seconds
3
^£
Clock
display
Hour
format
Calendar
Alarm
HH:MM:SS
12hr
AM/PM
MM/DD;
weekday
in
5
languages
(E,
F,
p,
1,
S)
2-minute
crescendo
IllSiilllllllSI
■
rnrnmmm
Main
unit
batteries
iensef
&§itefle§
2
x
UM-3
(AA)
1.5V
alkaline
%
*
UM--4
(AM)
1.8V
alkaline
lABOUT'OREGON
SCIENTIFIC
|§
US
iggfl
Visit
our
website
(hi
«w
nrpnonselentifie
eomi
to
leaf
n
more
about
Or-
egon
Scientific
products
suoh
as
digital
cameras;
MP3
players;
chikfrerf&electronic,
learning.products.awl
games;
projection
docks;
fteaBrsfid
fiirasraearr
westfiaf
§tefeft§;
sod
digits!
soa
eenferefiee
declare
that
the
product
RAR188A
Remote
Thermo
Clock
IDT
Technology
Limited
Blook
C,
9/F,
Kaiser
Estate,
Phase
1,41
Man
Yue
St.,
Hung
Horn,
Kowloon,
Hong
Kong
is
in
conformity
with
Part
15
of
the
FCC
Rules.
Operation
Is
subject
to
the
following
two
conditions:
1)
This
device
may
not
cause
harmful
interference.
2)
This
device
must
accept
any
interference
received,
including
In¬
terference
that
may
cause
undeslred
operation.
Product
No.:
Product
Name:
Manufacturer:
Address:


