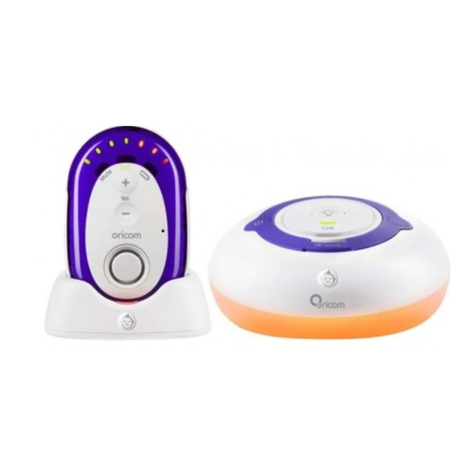
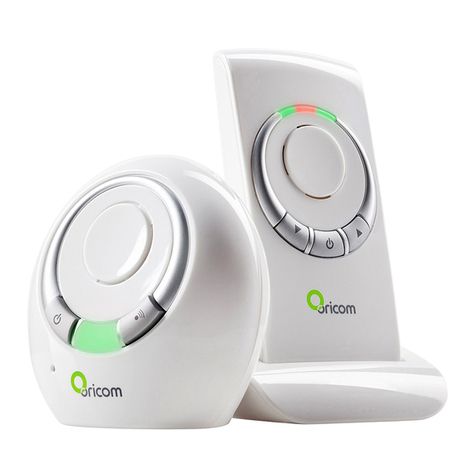
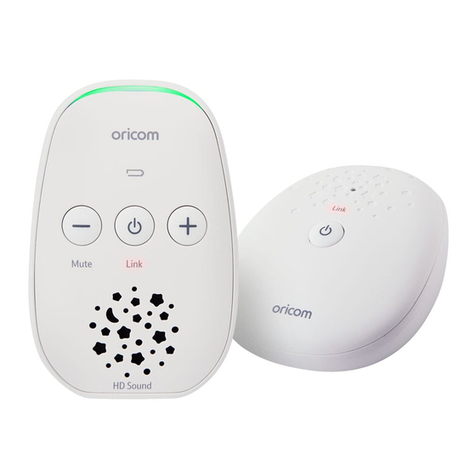
Oricom SC320 User manual

SC320 Digital
Baby Monitor
User Guide
KEEP THIS USER GUIDE FOR FUTURE REFERENCE
Always retain your proof of purchase in case of warranty service and register your product on line at:
AUSTRALIA: www.oricom.com.au NEW ZEALAND: www.oricom.co.nz

• Highdenitiondigitalsoundgivesyoucrystalclearaudio
quality and zero interference.
• Wirelessrangeofupto300moutdoorsandupto50m
indoors (in ideal conditions, where there is a clear line of
sight between the units) – giving you the freedom to move
around with clear reception and no interference from other
baby monitors
• Outofrangeandbatterylowwarnings
• LinklightprovidescontinuouscondencethattheParent
unit is receiving a signal from the Baby unit and will alert
youifthelinkislost
• Talkbackfeatureletsyouinstantlyreassureandcalmyour
baby
• NightlightonBabyunit
• CryingalertonParentunit
Welcome...
to your SC320 Digital Baby Monitor

3
This User Guide provides you with all
the information you need to get the most
fromyourSC320DigitalBabyMonitor.
Please read this guide carefully and
keepitforfuturereference.
Need help?
If you need assistance setting up or using your
Oricom product now or in the future, call Oricom
Support.
Australia1300889785or0245748888
www.oricom.com.au
Mon-Fri8am–6pmAEST
NewZealand0800674266
www.oricom.co.nz
Mon-Fri10am–8pmNZST
Got everything?
• Babyunit
• Parentunit
• 2xAANiMH1300mAh
rechargeable batteries for Parent
unitsupplied(2B0028)
• 2xpoweradaptors
(partNo.2B0027)

4Important safety information
• ItisveryimportantthatyoureadtheUserGuidecarefully
as it contains detailed information you will need to get
the most from your Oricom baby monitor. If you have
any issues setting up or using your Oricom baby monitor
please call our Customer Support team. Our dedicated
localteamaremorelikelytobeabletohelpyouthanthe
retailer where you made your purchase.
• YourOricombabymonitorisdesignedtobeanaidand
should not be used as a substitute for responsible and proper
adult supervision of a child.
• Thebabymonitorhasbeendesignedtoprovidesome
added reassurance in the form of sound transmission
for those times when you are not in the same room as
your baby provided you always stay within hearing range
ofthebabymonitorduringuse.Yourbabymonitoris
not a medical device, nor a device to prevent cases of
Sudden Infant Death Syndrome (SIDS) or "cot death",
and you should not rely on it for your baby's wellbeing.
Itisimportantthatyouregularlycheckonyourbaby
personally.
• Makesurethebabyunit,parentunitandmainsadaptor
cablesarekeptoutofreachofyourbabyandotheryoung
children at all times, at least one metre away.
• Neverplacethebabyunitorparentunitinsideyourbaby’s
cot, bed or playpen.
• Nevercovertheparentorbabyunitswithclothes,towels
orblanketsoranyotheritem.Neveruseorplaceyour
parent or baby unit in or near moisture or water (e.g. near
bath or pool). Immersing in water could cause electric
shockandevendeath.
• Theinstallationlocationplaysanimportantroleinensuring
proper operation. Therefore, maintain a distance of at
least one metre from other electronic equipment, such as
microwaveovensorhi−devices,otherwisetheycould
cause interference. During continual use the baby unit
power adaptors may become warm to the touch. This is
normal and should not be a concern.
WARNING
Riskofsuffocation!
Keepallpackagingmaterials
and protective foils out of
reach of children.

5
In this guide
Important safety information.................4
YourSC320DigitalBabyMonitor.........6
Parent unit ............................................6
Baby unit...............................................7
BackoftheBabyunit............................8
Setting up .............................................9
UsingyourSC320DigitalBabyMonitor
Switch the Baby unit on......................12
Switch the Parent unit on....................12
Switch the Baby unit off......................12
Switch the Parent unit off....................12
Baby sound level LED indicators........13
Adjust the Parent unit
loudspeakervolume ...........................14
Crying alert .........................................14
Nightlight.............................................15
Switch Baby unit nightlight on/off........15
Adjust the nightlight brightness...........15
Talkback ............................................15
Parent unit battery LED indicator........16
Find.....................................................16
List of tones ........................................17
Reset the units....................................18
Reset the Parent unit..........................18
Reset the Baby unit ............................18
Troubleshooting..................................19
General information
Cleaning .............................................22
Product disposal instructions..............22
Customer Support ..............................23
Expresswarranty................................24

YourSC320DigitalBabyMonitor
Parent unit
MuteLED
Steady red indicates
thatMutehasbeen
switched on.
-Vol.
Decreasespeakervolume.
Muteisswitchedonwhen
-Volispressedtothe
lowest level.
Talk
Presstotalktoyourbaby.
+Vol.
Increasespeakervolume.
Lanyard attach point
Youcanloopalanyard
(not supplied) through here.
Battery LED status indicator
(top of unit)
Redashinglightindicatesthe
batteries are low and need
re-charging.Solidredindicates
the Parent unit is charging.
Baby sound level LEDs
Indicates the level of received
sound. The LEDs will light up
progressively as the sound
increases.Seepage13for
further information.
Linkstatusindicator
Steady green indicates that
the Baby and Parent units
arelinked.Flashesgreen
ifnotlinkedfortherst30
seconds.
Flashesredifnotlinkedfor
longerthan30seconds.
Alsoashesgreenwhen
theTalkbuttonispressed
on the Parent unit to initiate
parentaltalkback.
Power on/off
Press and hold to switch the
power on or off.
6
Microphone

7YourSC320DigitalBabyMonitor
Baby unit
Microphone
Power on/off
Press and hold to switch
the power on or off.
Nightlight illuminates
around the base.
Nightlight
Press
or to switch the
nightlight on or off.
Press and hold
for2seconds
to switch off.
Find
Press to emit an alert beep
from the Parent unit – useful
forndingtheParentunitif
you’vemisplacedit.
Linkindicator
Steady green indicates
that the Baby and
Parentunitsarelinked.
Flashes green if no
linkestablishedfor30
seconds.
Flashesredifnolink
establishedafter30
seconds.Alsoashes
greenwhentheTalk
button is pressed on the
Parent unit to initiate
parentaltalkback.

8 YourSC320DigitalBabyMonitor
Back of the Baby unit
Powersocket
For connection to the mains
powersocketviathepower
adaptor cable supplied.

Setting up
Parent unit
1. Plug one of the power adaptor cables into the
socketmarked on the side of the Parent unit
and plug the other end into the mains power
wallsocketandswitchthepoweron.
2.Activatethebatteriesbypullingtheplastictab
awayfromthebackoftheunit.
Remove this tab and
charge batteries for
24hoursbeforeuse.
Rechargeable
batteriesalreadytted
PULL
WARNING!
Only use the power adaptors
supplied. Using incorrect
power adaptors may
permanently damage your
product.
Battery performance
Rechargeable batteries in
the Parent unit will last up
to16hoursduringnormal
operation this time may
beextendedwhenMuteis
switched on.
Please note that new
batteries do not reach full
capacity until they have
been in normal use for
several days.
The charge capacity of
rechargeable batteries will
reduce with time as they
wear out, so reducing the
performance time of the
Parent unit. Eventually they
will need to be replaced.
New batteries can be
purchased from
www. oricom.com.au.
The Parent unit rechargeable
batteries will lose charge
over a period of time, even if
switched off.
9

10 Setting up
Battery low warning –
Parent unit
When the batteries are low –
within 1 hour of running out
– the Parent unit will emit a
low battery alert and the low
battery indicator on the unit
willashred.
To speed up the charging
process turn the Parent unit
offwhenchargingifit’snot
being used.
YoucanstilluseyourParent
unit to monitor your baby
even when the batteries
are low, provided it remains
plugged in and on charge.
WARNING
Always use rechargeable
batteries in the Parent unit.
Only use the recommended
type–2xAANiMH
1300mAhbatteries.
Using other types could
permanently damage the
unit. Charge the batteries as
instructed in this user guide.
The Parent unit can still be
used when it is on charge.
Baby unit
1. Plug the remaining power adaptor cable into
thesocketmarked onthebackoftheBaby
unit and plug the other end into the mains
power and switch on.
Switch on and link the Parent and
Baby units
1. Press and hold the button on the Baby unit
for1second.Thenightlightwillbrieyilluminate
andthenthegreenLinkindicatorwillash.
2.Pressandholdthe button on the Parent
unituntilalltheLEDsontheunitbriey
illuminate.ThegreenLinkindicatorwillash.
Oncetheunitsarelinked,thegreenLink
indicators on the Parent and Baby units will
stopashingandremainasteadygreen.The
units are now ready to use.

11Setting up
Important:
Thelinkconrmationbetweenthetwounitsis
vital for use so they can communicate. If the
linkbetweentheunitsisbrokenatanytime,
theLinkindicatorsontheParentandBaby
unitswillashgreenastheytrytosearchfor
eachother.After30seconds,ifthelinkisstill
brokentheywillashredandyouwillalso
hear an alert signal from the Parent unit.
Ifthelinkisbroken:
• checkthatthemainspowerispluggedinand
switched on at the Baby unit
• checkthatbothunitsareswitchedon
• checkthatthebatteriesarechargedinthe
Parent unit
• checkthattheParentandBabyunitsare
within range of each other (in ideal conditions
therangeisupto300metresoutdoorsand
50mindoors)
Removing the batteries
If you ever need to remove
the batteries, simply
slide open the battery
compartment cover and
use the ribbon to eject the
batteries.
Positioning your units
The Baby unit should ideally
bewithin1m-2mofyour
baby for best performance.
If you place the Parent
and Baby units too close
together you will hear a high
pitched noise, this is normal.
The units are designed to be
located at a distance from
one another, e.g. in separate
rooms.

Switching on/off
Switch the Baby unit on
1. Press and hold the button for 1 second.
Thenightlightwillbrieyilluminateandthen
thegreenLEDwillashuntilitlinkswiththe
Parent unit.
OncelinkedthegreenLEDwillremainon.
Switch the Parent unit on
1. Press and hold the button on the Parent
unit until all the LEDs on the top of the unit
brieyilluminate.ThegreenLinkindicatorwill
ash.
Oncetheunitsarelinked,thegreenLink
indicators on the Parent and Baby units will
stopashingandremainasteadygreen.The
units are now ready to use.
Switch the Baby unit off
1. Press and hold the button on the Baby unit.
ThegreenLinkindicatorwillswitchoff.
Switch the Parent unit off
1. Press and hold the button on the Parent
unit until an audible alert sounds. The green
Linkindicatorwillswitchoff.
UsingyourSC320DigitalBabyMonitor
12

13
Baby sound level LED indicators
LEDs1-4=Green LEDs5-7=Red
The seven LEDs across the top of the Parent
unit light up to indicate the level of sound being
received from the Baby unit. The LEDs light up
progressively as the sound increases.
LEDs 1-2lightupGreenwhensoundsof57dB
and63dBarereceived.
LEDs 3-4lightupGreenwhensoundsof69dB
and75dBarereceived.
LEDs 5-7lightupRedwhensoundsof83dB,
89dBor95dBarereceived.
Equivalent sound level
examples:
60dB-70dB=
normal conversation
75dB=loudconversation
83-95dB=loudtrafcnoise
UsingyourSC320DigitalBabyMonitor

14
If you try and set the volume
higherorlowerthanthe5
settings available on either
unit you will hear a double
alert tone.
If the or buttons
arepressedwhileMute
hasbeensetthenMute
will be switched off and
theloudspeakervolume
willreturntoLevel3
automatically
UsingyourSC320DigitalBabyMonitor
Adjust the Parent unit
loudspeaker volume
Thereare5volumelevelsandoff(Mute).
ThedefaultloudspeakervolumeisLevel3.
1. Press or to select the required level.
Youwillhearadifferenceinvolumeasyou
keeppressingthebutton(s).
Ifyouwishtoswitchthevolumeoff,keep
pressing untiltheMuteLEDturnsred.
Crying alert
The crying alert will only be activated if the
Parentunitloudspeakervolumehasbeen
switched off.
With the volume muted, if your baby starts to
cry you will not be able to hear the cries but if
the cries sound above a certain level i.e. if they
reach83dB,whichisthe1stredBabysound
level LED, then the Parent unit will emit an
audible beep.
Thecryingalertisa‘useralert’asdescribed
onpage17.

15
The Baby unit must be
switched on for the nightlight
towork,butdoesn’tneedto
belinkedtotheParentunit.
Youwillbeabletoactivate
Talkbackmodeevenif
other functions have been
activated at the Baby unit
e.g. Nightlight on.
UsingyourSC320DigitalBabyMonitor
Nightlight
Youcansetacomfortingnightlightonthe
Baby unit. There are three levels of brightness.
Switch Baby unit nightlight on/off
1. To switch on, press either the or button.
Itwilltake3secondstoilluminatetothe
highest brightness level.
2.Toswitchoff,eitherpressandholdthe
buttonfor2secondsorkeeppressingthe
button until it reaches the level past the lowest
brightness level.
Itwilltake3secondstocompletelyswitchoff.
Adjust the nightlight brightness
1. Press the button to increase the brightness.
2.Pressthe button to decrease the
brightness.
Talk back
YoucanusetheParentunitTalkbackfeatureas
a one way intercom to comfort and reassure your
baby.ByspeakingintotheParentunityourbaby
will hear your voice from the Baby unit.
PleasenotethatwhenusingTalkbackyouwill
not be able to hear your baby until you release
the button.

16
1. Press and hold down the button on the
Parentunittospeaktoyourbaby.
Whilst the button is depressed the green
Linkindicatorswillashonbothunits.
Parent unit battery LED indicator
(top of unit)
When the Parent unit is on charge, the battery
LED will be solid red. When the power is
removed, the LED will switch off. When the
batteryislow,theLEDwillash.
Find
Youcanpressthe button on the Baby unit
tomaketheParentunitsoundanalertbeep
tohelpyounditifit’sbeenmisplaced.Ifthe
Parentunitloudspeakervolumehadbeen
muted (or set to volume off), the volume level
willberesettothedefaultsettingofLevel3.
1. Press on the Baby unit. The paging alert
will sound at the Parent unit.
2.Tostopthealert,pressanybuttononthe
Parent unit or press the button again on the
Baby unit.
Ifnobuttonispressedafter2minutesthenthe
alert will automatically stop.
UsingyourSC320DigitalBabyMonitor
Do not press the button
when the Baby unit and
Parent unit are positioned in
thesameroom.High-pitch
noise will be generated if the
button is pressed when
the Baby unit and Parent
unit are close to each other
orwithin3metresdistance.
WhenusingTalkback,
hold the Parent unit
approximately30cminfront
ofyourmouthwhentalking
to baby.

17
List of tones
YourBabyMonitorunitcanproducevarious
tones. They have the following meaning:
Tone Meaning
Single tone Conrmationtonee.g.setting
saved.
Double tone (fast) Errortonee.g.maxvolumereached
when adjusting volume.
Double tone (slow) User alert e.g. crying alert, paging
alert etc.
Triple tone (fast) Systemalerte.g.linklost,battery
low etc.
User Alert tones can be silenced by pressing
any button on the Parent unit.
SystemAlertscanbesilencedfora5minute
period by pressing any button on the Parent
unit.
UsingyourSC320DigitalBabyMonitor

18
Reset the units
Resetting either units will return the settings at
thatunitbacktoitsdefaultsettings.
Reset the Parent unit
1.Within3secondsoftheParentunitbeing
switched on, press and hold the button
foratleast10seconds.Youwillheara
conrmationbeeponcetheresethasbeen
performed.
Reset the Baby unit
1.Within3secondsoftheBabyunitbeing
switched on, press the button for at least
10seconds.Youwillhearaconrmationbeep
once the reset has been performed.
Resetting the units is
only advisable if you are
experiencingdifcultieswith
your product. It is a useful
feature that ensures your
BabyMonitorisreturned
toitsnew“outofthebox”
settings.
UsingyourSC320DigitalBabyMonitor

ShouldyouexperiencedifcultiesoperatingtheSC320pleasereferto
thetroubleshootingguidebelow.Ifyoustillexperiencedifcultiesplease
contactOricomCustomerSupporton1300889785forassistance.
Troubleshooting
Problems Solutions
Parent Unit is
beeping
−Pleaseseepage17forthelistoftonestheParent
unitmakes.
The Parent unit will beep for a number of reasons:
−Thelinkhasbeenlostbetweenyourunits,see
page11.CheckthattheBabyunitLinkindicator
is illuminated. If not, please ensure that the power
adaptor is still connected and if this still does not
switchon,pleasetestintoadifferentelectricalsocket.
−Thecryingalertisswitchedon,seepage14.
−Thebatteriesarelow,seepages9-10.
−The Find button has been pressed on the Baby unit,
seepage16.
IftheParentunitstillbeepsaftercheckingtheabove,
please try switching the Baby unit off at the power.
Ensure the Parent unit is clean by wiping with a damp
cloth. If the problem persists call the Oricom Customer
Support for advice.
Troubleshooting 19

20
Problems Solutions
Linkindicator
does not come
on
−CheckthatboththeBabyandParentunitsare
switched on.
−CheckthatthebatteriesintheParentunitare
correctly installed and that they are charged.
−Checkthattheunitsarewithinrangeofeachother.
−Checkthatthemainspowerispluggedinand
switched on at the Baby unit.
Linklightis
ashinggreen
−Ifyouhavepressed tousetheTalkBack
feature,theLinklightwillashtoindicateone-way
communication between the units.
−Theunitsaresearchingforacommunicationlink.
−Checkunitsarewithinrangeofoneanother.
−Checkbothunitsareturnedon.
Linkindicator
isashingred
−TheLinkbetweenyourunitsisbroken.Youwill
alsohearanalertontheParentunittoletyouknow
there is no communication between the units. If this
happens,checkthatthemainspower(orbatteries)is
correctly connected and that the units are within range
ofoneanother.Seepage10forinstructionsonlinking
the units.
Troubleshooting
Table of contents
Other Oricom Baby Monitor manuals

Oricom
Oricom 08BUN User manual

Oricom
Oricom Secure745 User manual

Oricom
Oricom OBH36T User manual

Oricom
Oricom Secure 700 User manual

Oricom
Oricom secure 210 User manual

Oricom
Oricom OBH930PTZ User manual

Oricom
Oricom SC520 User manual

Oricom
Oricom CU875 User manual

Oricom
Oricom Secure 510 User manual

Oricom
Oricom Secure875 User manual

Oricom
Oricom OBH650P User manual

Oricom
Oricom Secure 610 User manual

Oricom
Oricom Secure 310 User manual

Oricom
Oricom Secure 850 User manual

Oricom
Oricom Secure 500 User manual

Oricom
Oricom secure 910 User manual

Oricom
Oricom Secure 100 User manual

Oricom
Oricom Secure 300 User manual

Oricom
Oricom Secure 700 User manual

Oricom
Oricom Babysense 7 User manual