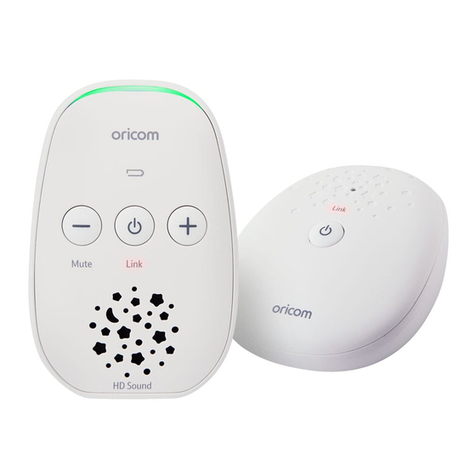
Oricom secure55 User manual

TM Baby Monitor
SECURE55
User Guide
KEEP THIS USER GUIDE FOR FUTURE REFERENCE
Always retain your proof of purchase in case of warranty service and register your product on line at:
AUSTRALIA: www.oricom.com.au NEW ZEALAND: www.oricom.co.nz

TABLE OF CONTENTS
ImpOrTANT SAFETy INFOrmATION .................................................................................................. 1
GETTING STArTED ............................................................................................................................. 3
OrICOm DIGITAL BABy mONITOr ..................................................................................................... 6
SETTING Up ........................................................................................................................................ 7
USING yOUr DIGITAL BABy mONITOr............................................................................................ 10
TrOUBLESHOOTING......................................................................................................................... 12
CUSTOmEr SUppOrT ...................................................................................................................... 14
WArrANTy ....................................................................................................................................... 15
Need Help?
If you need assistance setting up or using your Oricom product now or in the future, call Oricom Support.
Australia 1300 889 785 or (02) 4574 8888
www.oricom.com.au
Mon-Fri 8am – 6pm AEST
New Zealand 0800 67 42 66
www.oricom.co.nz
Mon-Fri 10am – 8pm NZST

1
Important Safety Information
• It is very important that you read the User Guide
carefully as it contains detailed information you
will need to get the most from your Oricom Baby
Monitor. If you have any issues setting up or
using your Oricom Baby monitor please call our
Customer support team. Our dedicated local team
are more likely to be able to help you than the
retailer where you made your purchase.
•
Your Oricom Baby Monitor is designed to be an
aid and should not be used as a substitute for
responsible and proper adult supervision of a child.
• The Baby Monitor has been designed to provide
some added reassurance in the form of sound
transmission for those times when you are not in
the same room as your baby provided you always
stay within hearing range of the baby monitor
during use. Your Baby Monitor is not a medical
device, nor a device to prevent cases of Sudden
Infant Death Syndrome (SID'S) or "cot death", and
you should not rely on it for your baby's wellbeing.
It is important that you regularly check on your
baby personally.
• Make sure the Baby unit, Parent unit and mains
adaptor cables are kept out of reach of your baby
and other young children at all times, at least one
metre away.
• Never place the baby unit or parent unit inside your
baby’s cot, bed or playpen.
• Never cover the Parent or baby units with clothes,
towels or blankets or any other item. Never use or
place your Parent or Baby unit in or near moisture
or water (e.g. near bath or pool). Immersing in
water could cause electric shock and even death.
• The installation location plays an important role in
ensuring proper operation. Therefore, maintain a
distance of at least one meter from other electronic
equipment,suchasmicrowaveovensorhi−fi
ImpOrTANT SAFETy INFOrmATION

2
devices, otherwise they could cause interference.
During continual use the Baby unit power adaptors
may become warm to the touch. This is normal and
should not be a concern.
Battery safety
• Batteries represent a hazard to health and the
environment!
• They contain toxic, ecologically hazardous heavy
metals.Donotdisposeofbatteriesinafireasthey
may explode. Dispose of batteries according to
local regulations, never in your household rubbish.
• Do not dismantle, cut, open, crush, bend, puncture,
!Riskofsuffocation!
Keepallpackagingmaterialsandprotectivefoilsoutof
reachofchildren.
DonotplacetheACAdaptorcableinahigh"wearand
tear"location.Neveruseafrayedorcompromisedcord.
Warning
or shred cells or batteries. If a battery leaks, do
not let the battery liquid touch skin or eyes. If this
happens,immediatelyflushtheaffectedareaswith
water, and seek medical assistance.
•
Do not modify, remanufacture, attempt to insert
foreign objects into the battery, or immerse or
expose it to water or other liquids. Batteries may
explode if damaged.
• Use only the batteries supplied with the product.
Improper use, or use of unapproved batteries may
presentariskoffire,explosion,orotherhazard,
and may invalidate any approval or warranty.
•
If you believe the batteries are damaged, remove
product from the charger and stop using the
product. Contact Oricom for assistance. Never use
a damaged battery.
ImpOrTANT SAFETy INFOrmATION
3
Disposal
• Always dispose of your products at the end of
their life in accordance with your local waste
disposal requirements. Packaging materials all
cardboard and paper packaging should be recycled
in accordance with your local council waste
regulations.
This User Guide provides you with all the
information you need to get the most from your
Oricom Digital Baby Monitor.
Please read this guide carefully and keep it for
future reference.
Need help?
If you need assistance setting up or using your
Oricom Digital Baby Monitor call our Support team
on 1300 889 785. If you would like any additional or
replacement rechargeable batteries for the parent
unit (Part No. BAT550MAH) order online at
www.oricom.com.au.
GETTING STArTED
Our dedicated advisors are more likely to be able
to help you than the retailer where you made your
purchase.
Alternatively, you may find the answer in the 'help'
section at the back of this guide.
Addition answer to Frequently Asked Questions are
also available from www.oricom.com.au
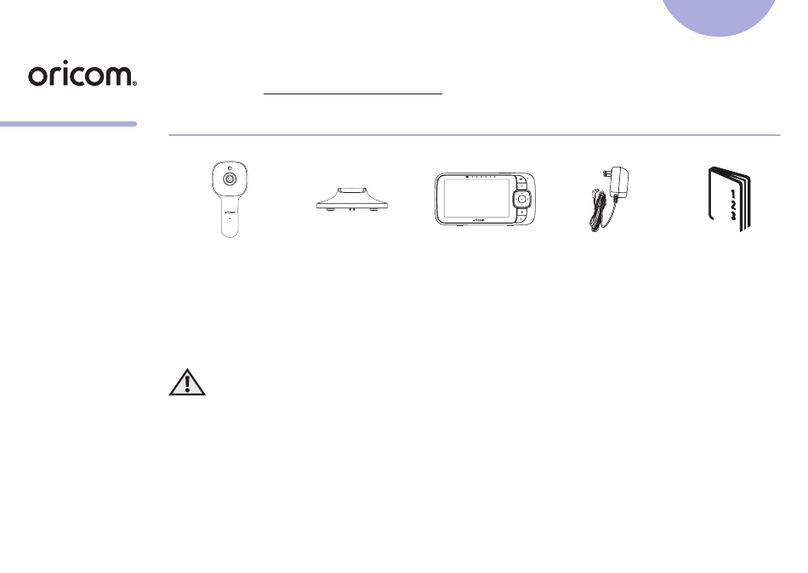
Got everything?
Baby unit
• Parent unit
• 2 X AAA NiMH 550mAh rechargeable batteries for
Parent unit
• 2 X power adaptors
• User Guide

4
Getting to know your SC55
Parent Unit
1. Talk- Press to talk to your baby
2. Power on/ off - Press and hold to switch the
power on or off
3. Volume down(-) - Decrease speaker volume
4. Power Socket - for connection to the mains
power socket via the power adaptor supplied
5. Volume up (+) - Increase speaker volume
6. Speaker
7. Microphone
8. Indicator Lamp - Indicates the power and link
stat us of the parent unit
9. VOX switch - To turn the VOX function on or
off. See page 11 for further information
10. Baby sound level LEDs - Indicates the level
of received sound. The LEDs will light up
progressively as the sound increases. See
page 15 for further information.
11. Battery cover
12
3
6
7
8
9
10
11
4
5
GETTING TO KNOW yOUr SC55

5
Getting to know your SC55
Baby Unit
12 13 14 19
20
21
22
15
16
1718
12. Search function
13. Indicator Lamps - Indicates the link status of the
baby unit
14. Power on/ off - Press and hold to switch the
power on or off
15. Volume down (-) - Decrease speaker volume
16. Night light - Press to switch the night light on or
off
17. Microphone
18. Volume up (+) - Increase speaker volume
19. Power Socket - For connection to the mains
power socket via the power adaptor supplied
20. Speaker
21. Rechargeable batteriesx2
22. Power adaptor cablex2
GETTING TO KNOW yOUr SC55

6
Parent Unit
1. Remove the battery cover from the rear of
the parent unit. Insert the 2 x AAA batteries
(supplied) observing the polarity instructions in
the battery compartment. Replace the battery
cover.
2. Plug one of the power adaptor cables into the
socket marked ‘DC6V 500mA’ on the top of the
parent unit. Plug the other end into the mains
power wall socket. The indicator lamp on the
parentunitwillflashredtoindicatetheunitis
charging.
3. Leave the batteries to charge for 16 hours to
reach maximum charge.
4. To turn on the parent unit, press and hold the
power button. The parent until will beep unit the
baby unit is detected. To stop the unit beeping,
press and hold the power button to turn the unit
off, or turn baby unit on.
Only use the power adaptors supplied. Using an
incorrect power adaptor may permanently
damage your product. This product is designed for
indoor use only.
Warning
OrICOm DIGITAL BABy mONITOr

7
Battery Performance
Rechargeable batteries in the parent unit will last
up to 8 hours in normal use. Please note that new
batteries do not reach full capacity until they have
been in normal use for several days.
The charge capacity of rechargeable batteries will
reduce with time as they wear out, so reducing the
performance time of the parent unit. Eventually
they will need to be replaced. New batteries can be
obtained from Oricom.
www.oricom.com.au or 1300 889 785.
The parent unit rechargeable batteries will lose
charge over a period of time, even if switched off.
Battery Low Warning
When the batteries are low the parent unit will emit
a low battery alert and the low battery indicator on
the unit will turn red. Place the parent unit back on
the charger to charge the batteries. To speed up
the charging process, turn the parent unit off when
charging if it is not being used.
You can still use the parent unit to monitor your baby
even when the batteries are low, provided it remains
connected to the charger to re-charge the batteries.
Replacing the Batteries
To replace the batteries, simply remove the battery
cover on the parent unit and remove the batteries.
Ensure new batteries are inserted observing the
polarity indicators in the battery compartment.
• Only use rechargeable NiMH 1.2V, 550mAh AAA
batteries. Do not use alkaline batteries in this unit.
• Do not mix used batteries with new batteries
• Remove the batteries when the appliance is
unused for a long period of time.
• Remove the power adaptor before replacing
batteries.
SETTING Up

8
Baby Unit
1. Plug the remaining power adaptor into the
socket on the baby unit labelled DC6V 500mA.
2. Thread the cable through the cable clips on
the rear of the unit to hold the charger cable in
place.
3. Plug the end of the charger cable into the mains
power and switch on.
4. To turn on the baby unit, press and hold the
power button. The green indicator lamp will
flashuntiltheparentunitisdetected.
Starting Up
1. Power on the parent and baby units by pressing
and holding the power button .
2. Thegreenindicatorlampwillflashonbothunits
whilst the connection is being established.
3. Once the parent unit and the baby unit are
linked, the indicator lamp will become a solid
green light.
NOTE: The indicator lamp on the parent unit will
continuetoflashredwhilstitisoncharge,afterthe
link has been established.
If the link is broken:
• Check that the mains power is plugged in and
switched on at the baby unit
• Check that both units are powered on
• Check that the batteries are charged in the parent
unit
• Check that the parent and baby units are within
range of each other (in ideal conditions the range is
up to 300 metres outdoors and 50 metres indoors)
SETTING Up
Thelinkconfirmationbetweenthetwounitsisvitalfor
use so they can communicate. If the link between the
units is broken at any time, the indicator lamps will
flashgreenontheparentandbabyunitsastheytryto
search for each other. After 30 seconds, if the link is
still broken, an alert tone will sound on the parent unit
until the link is re-established.
IMPORTANT

9
Positioning Your Units
The baby unit should ideally be within 1m-2m of your
baby for best performance.
If you place the parent unit and baby unit too close
together you will hear a high pitched noise (feedback);
this is normal. The units are designed to be located
at a distance from one another e.g. in separate
rooms. If you experience feedback, increase the
distance between the units, or turn down the volume
of the parent unit.
SETTING Up

10
Switching On/Off
Switch the baby unit on
Press and hold the power button on the baby unit for
3seconds.Thegreenlinkindicatorwillflashuntilit
links with the parent unit. Once linked, the green link
indicator will remain on.
Switch the parent unit on
Press and hold the power button on the parent unit
for 3 seconds. The green link indicator will flash.
Once the units are linked the green link indicators
ontheparentandbabyunitswillstopflashingand
remain a steady green. The units are now ready to
use.
Switch the baby unit off
Press and hold the power button on the baby unit for
3 seconds. The green link indicator will switch off.
Switch the parent unit off
Press and hold the power button on the parent unit
for 3 seconds. The green link indicator will switch off.
Adjusting the Volume
To adjust the volume, press the volume up (+) or
volume down (-) buttons on the parent or baby unit.
There are 10 sound levels. Each sound level is
signalled by a beep. When maximum or minimum
volume has been reached, the unit will beep 3 times.
Baby Sound Level LED Indicators
The three LEDs on the left of the parent unit indicate
the level of sound being received by the baby unit.
The LEDs light up progressively as the sound
increases.
USING yOUr DIGITAL BABy mONITOr

11
USING yOUr DIGITAL BABy mONITOr
Talk Back
You can use the parent unit Talk Back feature as a
one way intercom to comfort and reassure your baby.
Press and hold down the ‘Talk’ button on the parent
unit to talk to your baby. By speaking into the parent
unit your baby will hear your voice through the baby
unit. Please note that when using Talk Back you will
not be able to hear your baby until you release the
‘Talk’ button. When using Talk Back, hold the parent
unit approximately 30cm in front of your mouth whilst
speaking.
Nightlight
You can set a comforting nightlight on the baby unit.
- To switch the nightlight on or off press the nightlight
button on the baby unit.
The baby unit must be switched on for the nightlight
to work, but need not be linked to the parent unit.
Search
The search function allows you to locate the parent
unit from the baby unit. When the parent and baby
units are linked, press the search button for one
second to activate the search function. The parent
unit will emit a double beep at 2 second intervals to
assist in locating the unit. To turn off the alert, press
any button on the parent unit. If no button is pressed
after 2 minutes, the alert will automatically stop.
VOX
When the VOX function is turned on, the parent
unit will be activated when a certain noise level is
reached(thefirstsoundlevelLED).Thismeansthat
low level sounds will not be heard through the parent
unit. When the VOX function is turned off, lower level
sounds are transmitted to the parent unit.
1. To turn the VOX function ‘on’, slide the VOX
button to ‘on’ on the parent unit.
2. To turn the VOX function ‘off’, slide the VOX
button to ‘off’ on the parent unit.

12
ShouldyouexperiencedifficultiesoperatingyourSC55pleaserefertothetroubleshootingguidebelow.Ifyou
stillexperiencedifficultiespleasecontactOricomCustomerSupporton1300889785forassistance.
Troubleshooting
Issue possible Solution
Parent unit not functioning
• Check batteries are inserted correctly in the parent unit as per the user
guide.
• Check the correct batteries are being used.
• Check the batteries are charged.
• Check the power cable is connected correctly and the power outlet is
turned on.
• Check the unit is turned on by holding down the power button.
Baby unit not functioning
• Check the power cable is connected correctly and the power outlet is
turned on.
• Check the unit is turned on by holding down the power button.
• Check baby unit is withing 1-2metres of baby.
TrOUBLESHOOTING

13
TrOUBLESHOOTING
Issue possible Solution
Greenlightflashingoneitherunit
• The units are not linked. Check both units are turned on.
• The units are out of range. Bring both units closer together until light
stopsflashing.
Parent unit is beeping
• If LED light on parent unit is red, the unit needs charging. Connect
charger.
• If LED light on parent unit is green, the unit is out of range. Bring it
closer to the baby unit.
Parent unit remains silent
• Increase the volume on the parent unit.
• VOX may be turned on. Turn this feature off.
High pitched noise through parent
unit
• Increase the distance between the baby and parent units.
• Reduce the volume on the parent unit.
Talkback feature not working
• Ensure the baby unit is turned on.
• Increase the volume on the baby unit.

14
Customer Support
If you have any problems setting up or using this
productyouwillfindusefultipsandinformationinthe
Troubleshooting section of this user guide as well as
“Frequently Asked Questions” on our website
www.oricom.com.au.
If you have further questions about using the product
after reviewing the resources above or would like to
purchase replacement parts or accessories please
call our Customer Support Team. Our dedicated
local support team are more likely to be able to help
you than the retailer where you made your purchase.
Important
Please retain your purchase receipt and attach to
the back page of this user guide as you will need to
produce this if warranty service is required. Take a
few moments to register your product online:
www.oricom.com.au
CUSTOmEr SUppOrT

15
Warranty
Oricom has a simple warranty process for you to
follow:
• Please call or email our Customer Support Team,
contact details follow.
• A Customer Support Team member will verify after
troubleshooting with you if your product qualifies
under warranty. If so, they will give you a Product
Return Authorisation number.
• We will then email or fax a Return Authorisation
form and a Repair Notice (if necessary), together
with instructions on how to return the goods for
warranty service.
Please note that if a Customer Support Team
member advises that your product does not qualify
for return, this warranty does not apply to your
product.
Products that are authorised to be returned to
Oricom in Australia must include all of the following:
• A completed Return Authorisation form
• A copy of your Proof of Purchase (please keep
your original copy)
• The faulty product, including all accessories.
Send the approved returns to:
Oricom International Pty Ltd
Locked Bag 658
South Windsor NSW 2756 Australia
Please note that this warranty excludes expenses
incurred by you in returning any faulty product to us.
You must arrange and pay any expenses incurred
(including postage, delivery, freight, transportation or
insurance of the product) to return the faulty product
to us, however, we will arrange delivery of the
repaired or replaced faulty product to you.
WArrANTy

16
Important Information
Repair Notice
Please be aware that the repair of your goods may
result in the loss of any user-generated data (such
as stored telephone numbers, text messages and
contact information). Please ensure that you have
made a copy of any data saved on your goods before
sending for repair.
Please also be aware that goods presented for repair
may be replaced by refurbished goods or parts of the
same type rather than being repaired.
Warranty Information (Australia)
This Warranty is provided by Oricom International
Pty Ltd ABN 46 086 116 369, Unit 1, 4 Sovereign
Place, South Windsor NSW 2756, herein after
referred to as “Oricom”.
Oricom makes no other warranties or conditions,
express or implied, including as to acceptable quality
andfitnessforaparticularpurpose,exceptasstated
in this Warranty. Any implied warranties that may
be imposed by law are limited in duration to the
Warranty Period. Oricom warrants that the product is
free from defects in materials or workmanship during
the Warranty Period. This Warranty does not extend
to any product from which the serial number has
been removed or was purchased outside of Australia.
This warranty in no way affects your statutory
warranty rights under the Competition and Consumer
Act 2010 or any other similar legislation.
The Warranty Period will be 3 years from the date
of purchase of the product evidenced by your dated
sales receipt. You are required to provide proof
of purchase as a condition of receiving warranty
services. You are entitled to a replacement product
or repair of the product according to the terms and
conditions of this document if your product is found to
be faulty within the Warranty Period. This Warranty
WArrANTy

17
extends to the original purchaser only and is not
transferable.
Batteries or battery packs (if supplied) with this
product are covered under this warranty for a period
of 6 months.
Products distributed by Oricom are manufactured us-
ing new materials or new and used materials equiva-
lent to new in performance and reliability. Spare
parts may be new or equivalent to new. Spare parts
are warranted to be free from defects in material or
workmanship for thirty (30) days or for the remainder
of the Warranty Period of the Oricom branded prod-
uct in which they are installed, whichever is longer.
During the Warranty Period, Oricom will where pos-
sible repair and if not replace the faulty product or
part thereof. All component parts removed under this
Warranty become the property of Oricom. In the un-
likely event that your Oricom product has a recurring
failure, Oricom may, subject to the Competition and
Consumer Act 2010, at its discretion, elect to provide
you with a replacement product of its choosing that is
at least equivalent to your product in performance.
Oricom does not warrant that the operation of the
product will be uninterrupted or error free.
Oricom is not responsible for damage that occurs as
a result of your failure to follow the instructions that
came with the product. These terms and conditions
together with any specific terms and conditions
contained in the user guide to the product purchased
constitute the complete and exclusive agreement
between you and Oricom regarding the product.
No change to the conditions of this Warranty is
valid unless it is made in writing and signed by an
authorised representative of Oricom.
Oricom will not be in breach of a warranty expressly
set out in this User Guide or under the Competition
and Consumer Act 2010 and excludes any liability
for damages or any other remedy arising under any
WArrANTy

18
other legislation or the common law if the damage
occurs as a result of:
1. failure by you to adhere to the warnings and
follow the instructions set out in this user
guide for the proper installation and use of the
product;
2. negligence on your part or misuse by you of the
product;
3. an uncontrollable external cause which results
in the product not functioning including but
not limited to power failure, lightning or over
voltage; and
4. modificationtotheproductorservicescarried
out on the product by anyone other than Oricom
or Oricom’s authorised service provider.
Oricom will not be liable for any damages caused
by the product or the failure of the product to per-
form,includinganylostprofitsorsavingsorspecial,
incidental or consequential damages. Oricom is not
liable for any claim made by a third party or made
by you on behalf of a third party. This limitation of
liability applies whether damages are sought, or a
claim made, under this Warranty or as a tort claim
(including negligence and strict product liability), a
contract claim or any other claim. However, this limi-
tation of liability will not apply to claims for personal
injury. Nothing in this Warranty excludes, restricts
ormodifiesanycondition,warranty,rightorremedy
which pursuant to the Competition and Consumer
Act 2010 applies to this Warranty and which may
not be so excluded, restricted or modified. For
warranties that cannot be excluded, restricted or
modified, Oricom limits the remedies available to
thosespecifiedintherelevantlegislation.
Oricom products come with guarantees that can-
not be excluded under the Australian Consumer
Law. You are entitled to a replacement or refund
for a major failure and compensation for any other
WArrANTy
Table of contents
Other Oricom Baby Monitor manuals

Oricom
Oricom OBH36T User manual

Oricom
Oricom Secure 710 User manual

Oricom
Oricom Secure 100 User manual

Oricom
Oricom SC320 User manual

Oricom
Oricom Secure 310 User manual

Oricom
Oricom OBH930PTZ User manual

Oricom
Oricom OBH36T User manual

Oricom
Oricom OBHGPLUS User manual

Oricom
Oricom Secure740 User manual

Oricom
Oricom Secure 700 User manual

Oricom
Oricom 200 User manual

Oricom
Oricom Secure 850 User manual

Oricom
Oricom OBH500-2 User manual

Oricom
Oricom Secure 50 User manual

Oricom
Oricom secure 210 User manual

Oricom
Oricom Secure740 User manual

Oricom
Oricom 200 User manual

Oricom
Oricom Secure 610 User manual

Oricom
Oricom SC330 User manual

Oricom
Oricom Secure 110 User manual