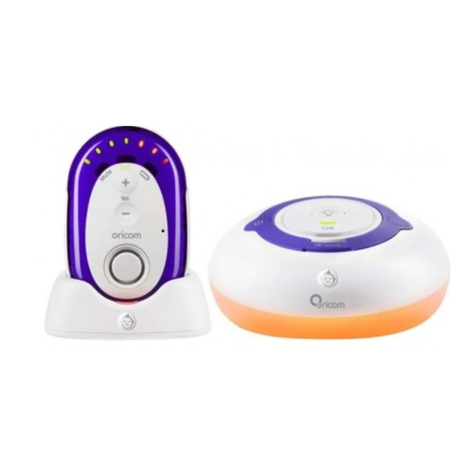
Oricom Secure 110 User manual

Contact Details for Oricom Support and Express Warranty Claims in Australia
Oricom International Pty Ltd
Locked Bag 658
South Windsor, NSW 2756
Australia
Email: [email protected]
Phone: 1300 889 785 or (02) 4574 8888
(Monday to Friday 8am to 6pm AEST)
Web: www.oricom.com.au
Fax: (02) 4574 8898
Contact Details for Oricom Support and Express Warranty Claims in New Zealand
Email: [email protected]
Phone: 0800 674 266
(Monday to Friday 10am to 8pm NZST)
Web: www.oricom.co.nz
Ref: 27042016
OR006417 SC110 user manual_04-27-16.indd 1 2016/4/27 17:30:44

Baby Monitor
Secure 110
User Guide
OR006417 SC110 user manual_04-27-16.indd 2 2016/4/27 17:30:45

TABLE OF CONTENTS
WARNINGS AND SAFETY INFORMATION 1
GETTING STARTED 3
OpERATING ELEMENTS 5
OpERATION 7
TROuBLEShOOTING 9
pRODuCT SpECIFICATIONS 10
CuSTOMER SuppORT 11
WARRANTY 12
Need Help?
If you need assistance setting up or using your Oricom product now or in the future, call Oricom Support.
Australia 1300 889 785
www.oricom.com.au
Mon-Fri 8am – 6pm AEST
New Zealand 0800 67 42 66
www.oricom.co.nz
Mon-Fri 10am – 8pm NZST
OR006417 SC110 user manual_04-27-16.indd 3 2016/4/27 17:30:45

1WARNINGS AND SAFETY INFORMATION
IMPORTANT
• ItisveryimportantthatyoureadtheUserGuide
carefully as it contains detailed information you will need
to get the most from your Oricom Baby Monitor. If you
haveanyissuessettinguporusingyourOricomBaby
monitor please call our Customer support team. Our
dedicated local team are more likely to be able to help
you than the retailer where you made your purchase.
• YourORICOMBabyMonitorisdesignedtobeanaid
and should not be used as a substitute for responsible
andproperadultsupervisionofachild.
• TheBabyMonitorhasbeendesignedtoprovidesome
added reassurance in the form of sound transmission
for those times when you are not in the same room
asyourbabyprovidedyoualwaysstaywithinhearing
rangeofthebabymonitorduringuse.YourBaby
Monitorisnotamedicaldevice,noradevicetoprevent
cases of Sudden Infant Death Syndrome (SID'S) or "cot
death", and you should not rely on it for your baby's
wellbeing. It is important that you regularly check on
your baby personally.
• MakesuretheBabyunit,Parentunitandmainsadaptor
cables are kept out of reach of your baby and other
young children at all times, at least one metre away.
• Neverplacethebabyunitorparentunitinsideyour
baby's cot, bed or playpen.
• NevercovertheParentorbabyunitswithclothes,
towelsorblanketsoranyotheritem.Neveruseorplace
your Parent or Baby unit in or near moisture or water
(e.g. near bath or pool). Immersing in water could cause
electricshockandevendeath.
• Theinstallationlocationplaysanimportantrolein
ensuring proper operation. Therefore, maintain a
distance of at least one meter from other electronic
equipment,suchasmicrowaveovensorhi−fidevices,
otherwise they could cause interference. During
continual use the Baby unit power adaptors may
become warm to the touch. This is normal and should
not be a concern.
Risk of suffocation!
Keepallpackagingmaterialsandprotectivefoilsoutof
reach of children.
!
WARNING
OR006417 SC110 user manual_04-27-16.indd 1 2016/4/27 17:30:45


2WARNINGS AND SAFETY INFORMATION
Battery safety
• Batteriesrepresentahazardtohealthandthe
environment!
• Theycontaintoxic,ecologicallyhazardousheavy
metals.Donotdisposeofbatteriesinafireasthey
may explode. Dispose of batteries according to local
regulations,neverinyourhouseholdrubbish.
• Donotdismantle,cut,open,crush,bend,puncture,
or shred cells or batteries. If a battery leaks, do not let
the battery liquid touch skin or eyes. If this happens,
immediatelyflushtheaffectedareaswithwater,and
seek medical assistance.
• Donotmodify,remanufacture,attempttoinsertforeign
objects into the battery, or immerse or expose it to water
or other liquids. Batteries may explode if damaged.
• Useonlythebatterysuppliedwiththeproduct.Improper
use,oruseofunapprovedbatteriesmaypresentarisk
offire,explosion,orotherhazard,andmayinvalidate
anyapprovalorwarranty.
• Ifyoubelievethebatteryisdamaged,removeproduct
from the charger and stop using the product. Contact
Oricomforassistance.Neveruseadamagedbattery.
Disposal
Always dispose of your products at the end of their life in
accordance with your local waste disposal requirements.
Packaging materials all cardboard and paper packaging
should be recycled in accordance with your local council
waste regulations.
Do not place the AC Adaptor cable in a high "wear and
tear"location.Neveruseafrayedorcompromisedcord.
!
WARNING
OR006417 SC110 user manual_04-27-16.indd 2 2016/4/27 17:30:45

3
Thank you for choosing this monitor from Oricom.
YourSecure110BabyMonitoroffersthebestDigital
Technology.
INTERFERENCE
FREE
FREQUENCY
DECT (Digital Enhanced Cordless Telecommunications) is the
most widely used worldwide digital cordless technology, offering
amazinglyclearsound,longrangeandmaximumvoicesecurity.
DECToperatesonthe1.8Ghzfrequencywhicheliminatespotential
interferencefromothercommonwirelessdevicessuchascordless
telephones, wireless networks (Wi-Fi), Bluetooth and cordless
computerdevices.
Pack Contents
• Parentunit(receiver)
• Babyunit(sender)
• Mainsadaptorwithchargerpod
• 2xNiMHRechargeableBatteries(1.2V450mAh)
• Mainsadaptorwithpowercord
GETTING STARTED
Installation
For the Parent Unit
1. RemovetheBeltClipbylifting
the clip at the top and sliding it
downwards.
2. Thenremovethebatterycover
on the back of the Parent
Unitbypressingandslidingit
downwards.
Note:
Observethecorrectpolarityanddirection ofthebatteries
when inserting. The unit will not operate if the batteries are
inserted incorrectly.
3. Insert the rechargeable batteries (supplied) and close
thebatterycoveragain.
4. PlacetheParentUnitintotheChargerPod.
5. Plug the mains adaptor into a mains power socket.
clip
batterycover
DONOTUSESTANDARD/ALKALINEBATTERIES
INTHEPARENTUNIT,ASTHEREISARISKOF
EXPLOSIONAND/ORINJURY.USEONLYNi-MH
RECHARGEABLEBATTERIESASSUPPLIED.
!
WARNING
OR006417 SC110 user manual_04-27-16.indd 3 2016/4/27 17:30:46

4GETTING STARTED
6 Press [ ]toturntheParentUniton.
• Beforefirstuse,orifithasbeenoutofuseforalong
time,theParentUnitwillneedtobechargedfor16
hoursbeforeuse.Afterthistime,theParentUnitwill
operate from the Charger pod when switched on. Note
thattheParentUnitcannotbeusedwithoutbatteries,
evenifitisplacedinthecharger.
For the Baby Unit
1 Plug the power cord into the power input at the side of
theBabyUnitandplugtheadaptorplugintoamains
power socket.
2 Press [ ]toturnontheBabyUnit.
• TheBabyUnitshouldbeplacedabout1metre
to 1.5 metres away from the baby's cot on a flat
surface.NeverplacetheBabyUnitinsidethecot,
bed or playpen. Make sure the unit, cords and mains
adaptor are out of reach of the baby and other
youngchildren.NeverplaceeitherUnitonantique
or polished surfaces (as slippage or scuffing may
occur). The unit may cause harm if it falls onto baby
or other young children.
Note:
If you place the Parent and Baby units too close together
you will hear a high pitched noise called "feedback", this is
normal. The units are designed to be located in separate
rooms.
Topreventfeedback,donottaketheparentunitintothe
nursery/baby's room.
OR006417 SC110 user manual_04-27-16.indd 4 2016/4/27 17:30:46

5OpERATING ELEMENTS
Operating Elements
Sender (Baby unit)
1 On/Off key
Press to switch on the unit.
Press and hold down for approx. 2 seconds to switch off
the unit.
2 Power on LED / Night light
3 Paging key
Press and hold for 2 seconds to “page” the parent unit
withanaudiblealert.Usefultocallforassistanceorto
locate a missing parent unit.
OR006417 SC110 user manual_04-27-16.indd 5 2016/4/27 17:30:46

6OpERATING ELEMENTS
Operating Elements
Receiver (Parent unit)
1 Noise indicator
Flashes when noise is detected.
2 Power LED
Lights steady when power is on. Flashes during
charging the batteries.
3 Link indicator
GreenlightONmeans“Linked”tothebabyunit.A
flashinglightmeansthe“Link”hasbeenlost.
4 key
-Volumedown
5 On/Off key
Press and hold down for approx. 2 seconds to switch on
the unit.
Press and hold down for approx. 2 seconds to switch off
the unit.
6 key
-Volumeup
7 Belt clip (rear)
8 Battery compartment cover (rear)
Compartment for Batteries.
OR006417 SC110 user manual_04-27-16.indd 6 2016/4/27 17:30:46

7OpERATION
Operation
Onceyouhavesetupyourbabymonitor,youwillbe
able to hear the sounds in your baby´s room through
theparentunit.Youwillalsobeabletoseethose
sounds as the green sound sensor lights around the
top of the parent unit, which rise and fall with the
volumelevel.
Note:
UseonlythemainspoweradaptorssuppliedwiththisIf
the connection between the parent unit and baby unit is
broken at any time the green “Link” light on the parent
unit will flash and the green sensor light will cease to
reacttoanysounds.Tore−establishthe“Link”,followthe
directions in the “Troubleshooting” chapter.
Powering on/off the baby monitor
Afterhavingconnectedthebabymonitoryouwill
havetoswitchonbothunits.PresstheOn/Off key
on each unit. To switch off the unit press and hold
down the On/Off key.
Volume
Youcanadjustthevolumeatwhichyouhearyour
baby by using the keys and on the parent
unit.Thiswillnoteffectthesensitivityofyourbaby
monitor,onlythevolumeatwhichyouhearthose
sounds through the parent unit.
Battery charge indicator and battery low warning
The parent unit will work up to 10 hours out of the
chargerpod,butthisdependsonthelevelofcharge
in the batteries. If the charge becomes low, a “battery
low warning beep” will sound and the power LED on
theparentunit’swillbegintoflash.Ifthisoccursyou
should return the parent unit to the charger pod to
re−chargethebatteries.Youcanstilluseyourparent
unit from the charger pod.
OR006417 SC110 user manual_04-27-16.indd 7 2016/4/27 17:30:46

8OpERATION
Paging
Usefulifoneparentisinthebaby’sroomandneeds
tocontacttheother.Alsohelpstofindamislaid
parent unit.
At the baby unit
Press
Page Keybriefly.Theparentunitwillemita
tone. The tone can be switched off by pressing any
key on the parent unit or by pressing the page key on
the baby unit once again.
Night light
The baby unit has a night light which emits a soft
glow,providingcomfortandre−assuranceforyour
baby and allowing you to see them in a darkened
room.
OR006417 SC110 user manual_04-27-16.indd 8 2016/4/27 17:30:46

9
Problem Possible cause(s)
The red power lights do not turn on when you plug in the
power.
1. Check if the units are properly connected to the power supply.
2. Check if the power is turned on. If not, Press [ ] to turn on the power.
ThegreenLinklightontheParentUnitisflashingand
cannot hear the sounds from your baby's room.
1.Youmayhavemovedoutofrange.MoveclosertotheBabyUnitandwait5secondsfor
the Link to establish.
2.Youmayneedtore−establishtheLinkbetweenthetwounits.Turnbothunitsoffby
pressing and holding the [ ] and then turn on again by pressing the [ ].
Can'thearyourbabyontheParentUnitbuttheLink
light is still glowing steadily. CheckifthevolumeisturnedupontheParentUnit.
TheRedPowerlightisflashingontheParentUnit Yourre-chargeablebatteryisrunninglow.ReturntheParentUnittotheChargerPodto
recharge it.
TwoLED'sflashontheparentunit.
1. The battery in the parent unit is not fully charged. Charge the parent unit for 16 hours
before use.
2. The power to the baby unit may be turned off or disconnected, and or the Baby unit may
be turned off. Reconnect the AC power adaptor to the baby unit and or turn on the baby
unit.
3.Youmayhavetore-establishthelinkbetweenthetwounits.Youwillneedtoremovethe
battery from the parent unit and register the parent unit back to the baby unit by following
the instructions below:
Disconnectthepowercablefromthebabyunit,removethebatteriesfromtheparentunit.
Press and hold the power button on the baby unit and connect power to baby unit whilst
youarestillholdingthepowerbuttonuntilthenightlightflashesrapidlythenrelease
thebutton.Within3secondspushandholdthePagebuttonuntilthenightlightflashes
slowly, the baby unit is now in registration mode.
Within 30 seconds hold the power button on the parent unit while inserting the batteries
keepholdingthebuttonuntiltheLINKPOWERandNOISELED’sflash.Releasethe
powerbuttonandwaitforbothparentandbabyunitstostopflashing(upto30seconds)
the parent unit will be registered to the baby unit.
A high pitched ear piercing noise will be heard from the
units (feedback). CheckiftheParentandBabyUnitsaretooclosetogether.Movethemfurtherapart.
TROuBLEShOOTING
OR006417 SC110 user manual_04-27-16.indd 9 2016/4/27 17:30:46

10
Feature Specifications
Operating Frequency DECT1.8GHz
Range
Upto300munderoptimumconditions.Therangeis
reduced in buildings (up to 50m) as a result of walls,
doors etc.
Power supply (baby unit) Input:100~240VAC50/60Hz
Output:7VDC, 420 mA,
Transmitting power Average:10mWMaximum:250mW
Power supply (parent unit) Input:100~240VAC50/60Hz
Output:7VDC, 420 mA
Rechargeable batteries (parent unit)
(included in the package contents) Type:2X1.2VAAA,450mAhNi-MHBatteries
Operating time with charged battery Approx. up to 10 hours
pRODuCT SpECIFICATIONS
OR006417 SC110 user manual_04-27-16.indd 10 2016/4/27 17:30:46

PACK CONTENTS
11CuSTOMER SuppORT
Customer Support
Ifyouhaveanyproblemssettinguporusingthisproductyouwill
findusefultipsandinformationintheTroubleshootingsectionof
this user guide as well as “Frequently Asked Questions” on our
website www.oricom.com.au.
Ifyouhavefurtherquestionsaboutusingtheproductafter
reviewingtheresourcesaboveorwouldliketopurchase
replacement parts or accessories please call our Customer
Support Team. Our dedicated local support team are more likely
to be able to help you than the retailer where you made your
purchase.
Important
Please retain your purchase receipt and attach to the back page
of this user guide as you will need to produce this if warranty
serviceisrequired.Takeafewmomentstoregisteryourproduct
online: www.oricom.com.au
OR006417 SC110 user manual_04-27-16.indd 11 2016/4/27 17:30:46

WARRANTY12
Express Warranty (Australia)
ThisExpressWarrantyisprovidedbyOricomInternationalPtyLtd
ABN46086116369,Unit1,4SovereignPlace,SouthWindsor
NSW 2756, herein after referred to as “Oricom”.
Oricom products come with guarantees that cannot be excluded
undertheAustralianConsumerLaw.Youareentitledtoa
replacement or refund for a major failure and compensation
foranyotherreasonablyforeseeablelossordamage.Youare
alsoentitledtohavethegoodsrepairedorreplacedifthegoods
fail to be of acceptable quality and the failure does not amount
to a major failure. Oricom warrants that the product is free
from defects in materials or workmanship during the Express
Warranty Period. This Express Warranty does not extend to any
productfromwhichtheserialnumberhasbeenremovedorwas
purchased outside of Australia.
NothinginthisExpressWarrantyexcludes,restrictsormodifies
any condition, warranty, guarantee, implied term, right or remedy
pursuant to the Australian Consumer Law and which may not be
soexcluded,restrictedormodified.Forsuchconditions,terms,
guarantees and warranties that cannot be excluded, restricted or
modified,Oricomlimitstheremediesavailabletoextentpermitted
intherelevantlegislation.
The Express Warranty Period will be 3 years from the date of
purchaseoftheproductevidencedbyyourdatedsalesreceipt.
Youarerequiredtoprovideproofofpurchaseasaconditionof
receivingExpressWarrantyservices.
Youareentitledtoareplacementproductorrepairoftheproduct
at our discretion according to the terms and conditions of this
document if your product is found to be faulty within the Express
Warranty Period.
This Express Warranty extends to the original purchaser only and
is not transferable.
Products distributed by Oricom are manufactured using new
materialsornewandusedmaterialsequivalenttonewin
performanceandreliability.Sparepartsmaybeneworequivalent
to new. Spare parts are warranted to be free from defects in
material or workmanship for thirty (30) days or for the remainder
of the Express Warranty Period of the Oricom branded product in
whichtheyareinstalled,whicheverislonger.
During the Express Warranty Period, Oricom will where possible
repair and if not replace the faulty product or part thereof. All
componentpartsremovedunderthisExpressWarrantybecome
the property of Oricom.
IntheunlikelyeventthatyourOricomproducthasarecurring
failure, Oricom may always, subject to the Competition and
ConsumerAct2010,atitsdiscretion,electtoprovideyouwitha
replacementproductofitschoosingthatisatleastequivalentto
your product in performance.
No change to the conditions of this Express Warranty is
validunlessitismadeinwritingandsignedbyanauthorised
representativeofOricom.
OR006417 SC110 user manual_04-27-16.indd 12 2016/4/27 17:30:46

WARRANTY 13
Oricom will not be liable under this Express Warranty, and to
the extent permitted by law will not be liable forany defect, loss,
damage or injury arising out of or in connection with a:
1. Failure by you to adhere to the warnings and follow the
instructions set out in this user guide for the proper installation
and use of the product;
2. Wilful misconduct or deliberate misuse by you of the product;
3. Any external cause beyond our control, including but not
limitedtopowerfailure,lightningorovervoltage;or
4. Modificationtotheproductorservicescarriedoutonthe
product by anyone other than Oricom or Oricom’s authorised
serviceprovider.
How to make a claim under your Express
Warranty in Australia
Oricom has a simple warranty process for you to follow:
• PleasecalloremailourCustomerSupportTeam,
• ACustomerSupportTeammemberwillverifyafter
troubleshootingwithyouifyourproductqualifiesunder
warranty.Ifso,theywillgiveyouaProductReturn
Authorisation number.
• WewillthenemailorfaxaReturnAuthorisationformanda
Repair Notice (if necessary), together with instructions on how
toreturnthegoodsforwarrantyservice.
PleasenotethatifaCustomerSupportTeammemberadvises
that your product does not qualify for return, this warranty does
not apply to your product. Products that are authorised to be
returned to Oricom in Australia must include all of the following:
• AcompletedReturnAuthorisationform
• AcopyofyourProofofPurchase(pleasekeepyouroriginal
copy)
• Thefaultyproduct,includingallaccessories.
OR006417 SC110 user manual_04-27-16.indd 13 2016/4/27 17:30:46

WARRANTY14
Sendtheapprovedreturnsto:
Oricom International Pty Ltd
Locked Bag 658
South Windsor NSW 2756 Australia
Please note that this Express Warranty excludes expenses
incurredbyyouinreturninganyfaultyproducttous.Youmust
arrange and pay any expenses incurred (including postage,
delivery,freight,transportationorinsuranceoftheproduct)to
returnthefaultyproducttous,however,wewillarrangedelivery
of the repaired or replaced faulty product to you.
OR006417 SC110 user manual_04-27-16.indd 14 2016/4/27 17:30:46

OR006417 SC110 user manual_04-27-16.indd 15 2016/4/27 17:30:47
This manual suits for next models
1
Table of contents
Other Oricom Baby Monitor manuals

Oricom
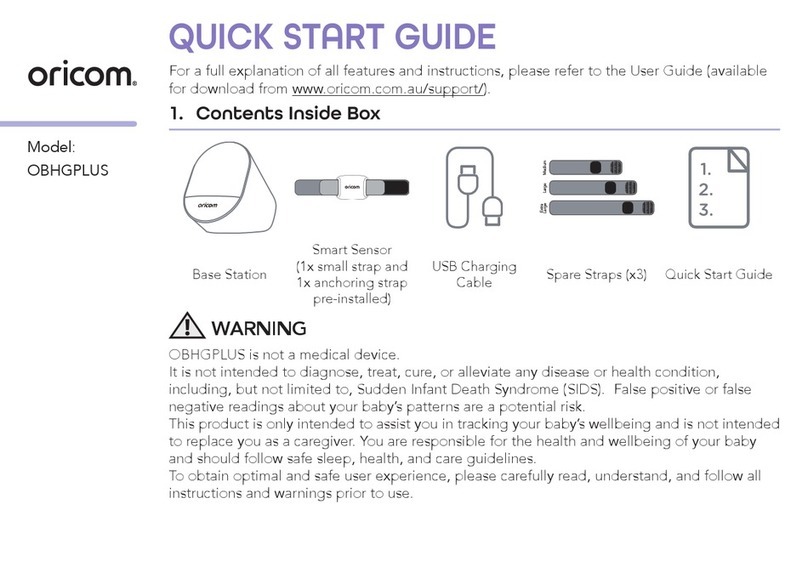
Oricom OBHGPLUS User manual

Oricom
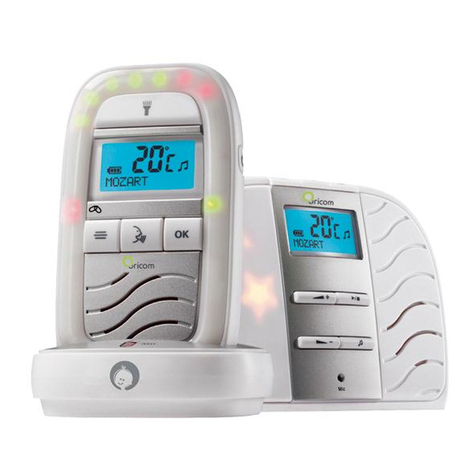
Oricom Secure 510 User manual

Oricom
Oricom Secure740 User manual

Oricom
Oricom OBH36T User manual

Oricom
Oricom Secure 710 User manual

Oricom
Oricom Secure 700 User manual

Oricom
Oricom OBH930 User manual

Oricom
Oricom Secure 310 User manual

Oricom
Oricom 870 User manual

Oricom
Oricom Secure 610 User manual

Oricom
Oricom OBH500 User manual

Oricom
Oricom Secure 500 User manual

Oricom
Oricom Secure 700 User manual

Oricom
Oricom Secure745 User manual

Oricom
Oricom babysense 2 User manual

Oricom
Oricom 200 User manual

Oricom
Oricom OBH36T User manual

Oricom
Oricom Secure715 User manual
Oricom
Oricom OBH650P User manual

Oricom
Oricom Babysense 7 User manual