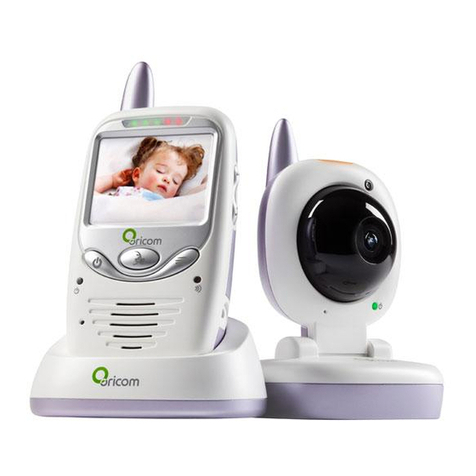
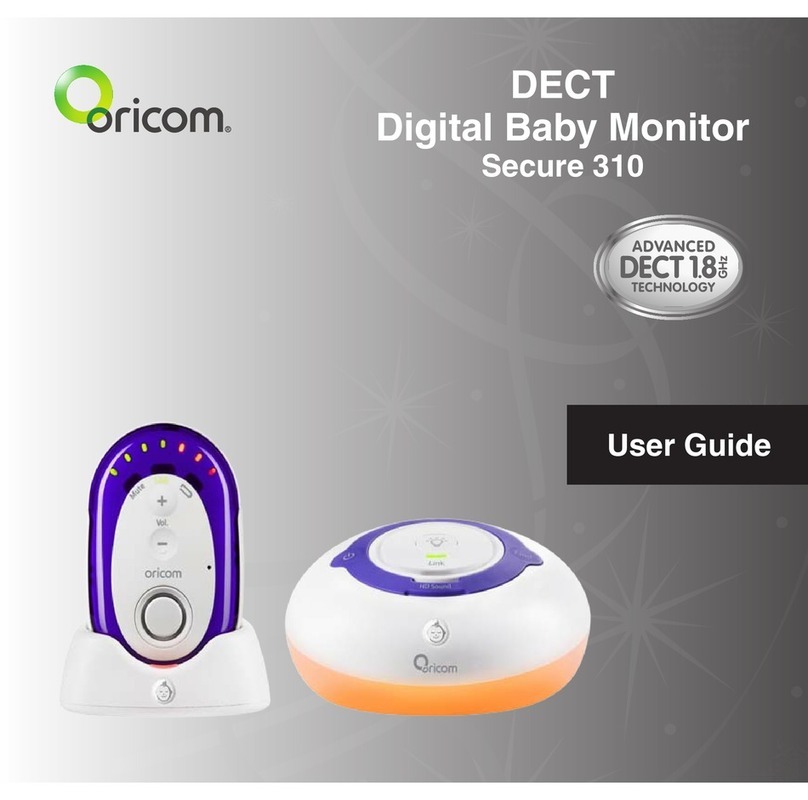
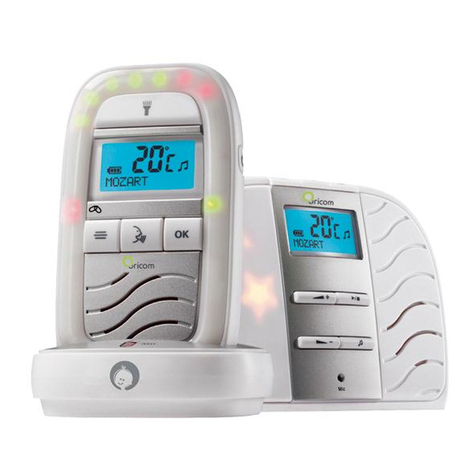
Oricom secure 210 User manual

Contact details for Oricom support and warranty claims in Australia
Oricom International Pty Ltd
Locked Bag 658
South Windsor, NSW 2756
Australia
Email: suppor[email protected]
Phone: 1300 889 785
(Monday to Friday 8am to 6pm AEST)
Web: www.oricom.com.au
Fax: (02) 4574 8898
Contact details for Oricom support and warranty claims in New Zealand
Email: suppor[email protected]
Phone: 0800 674 266
(Monday to Friday 10am to 8pm NZST)
Web: www.oricom.co.nz
Ref: 15122011
SC210 User Manual.indd 1 2011-12-15 11:56:07

Baby Monitor
Secure 210
User Guide
SC210 User Manual.indd 2 2011-12-15 11:56:15

TABLE OF CONTENTS
SAFETY INFORMATION 1
GETTING STARTED 3
YOUR BABY MONITOR 5
LCD DISPLAY OF BABY MONITOR 7
OPERATION 8
SETTINGS 10
TROUBLESHOOTING 14
PRODUCT SPECIFICATIONS 15
CUSTOMER SUPPORT 16
WARRANTY 17
Need Help?
If you need assistance setting up or using your Oricom product now or in the future, call Oricom Support.
Australia 1300 889 785
www.oricom.com.au
Mon-Fri 8am – 6pm AEST
New Zealand 0800 67 42 66
www.oricom.co.nz
Mon-Fri 10am – 8pm NZST
SC210 User Manual.indd 3 2011-12-15 11:56:16

1
• Neverplacethebabyunitorparentunitinsideyour
baby's cot, bed or playpen.
• NevercovertheParentorbabyunitswithclothes,
towelsorblanketsoranyotheritem.Neveruseorplace
your Parent or Baby unit in or near moisture or water
(e.g. near bath or pool). Immersing in water could cause
electricshockandevendeath.
• Theinstallationlocationplaysanimportantrolein
ensuring proper operation. Therefore, maintain a
distance of at least one meter from other electronic
equipment,suchasmicrowaveovensorhi−fidevices,
otherwise they could cause interference. During
continual use the Baby unit power adaptors may
become warm to the touch. This is normal and should
not be a concern.
SAFETY INFORMATION
1 Important Safety Information
• ItisveryimportantthatyoureadtheUserGuide
carefully as it contains detailed information you will need
to get the most from your Oricom Baby Monitor. If you
haveanyissuessettinguporusingyourOricomBaby
monitor please call our Customer support team. Our
dedicated local team are more likely to be able to help
you than the retailer where you made your purchase.
• YourORICOMBabyMonitorisdesignedtobeanaid
and should not be used as a substitute for responsible
andproperadultsupervisionofachild.
• TheBabyMonitorhasbeendesignedtoprovidesome
added reassurance in the form of sound transmission
for those times when you are not in the same room
asyourbabyprovidedyoualwaysstaywithinhearing
rangeofthebabymonitorduringuse.YourBabyMonitor
isnotamedicaldevice,noradevicetopreventcasesof
Sudden Infant Death Syndrome (SID'S) or "cot death",
and you should not rely on it for your baby's wellbeing.
It is important that you regularly check on your baby
personally.
• MakesuretheBabyunit,Parentunitandmainsadaptor
cables are kept out of reach of your baby and other
young children at all times, at least one metre away.
Risk of suffocation!
Keepallpackagingmaterialsandprotectivefoilsoutof
reach of children.
!
WARNING
SC210 User Manual.indd 1 2011-12-15 11:56:16

2SAFETY INFORMATION
Battery safety
• Batteriesrepresentahazardtohealthandthe
environment!
• Theycontaintoxic,ecologicallyhazardousheavy
metals.Donotdisposeofbatteriesinafireasthey
may explode. Dispose of batteries according to local
regulations,neverinyourhouseholdrubbish.
• Donotdismantle,cut,open,crush,bend,puncture,
or shred cells or batteries. If a battery leaks, do not let
the battery liquid touch skin or eyes. If this happens,
immediately flush the affected areas with water, and
seek medical assistance.
• Donotmodify,remanufacture,attempttoinsertforeign
objects into the battery, or immerse or expose it to water
or other liquids. Batteries may explode if damaged.
• Useonlythebatterysuppliedwiththeproduct.Improper
use,oruseofunapprovedbatteriesmaypresentarisk
offire,explosion,orotherhazard,andmayinvalidate
anyapprovalorwarranty.
• Ifyoubelievethebatteryisdamaged,removeproduct
from the charger and stop using the product. Contact
Oricomforassistance.Neveruseadamagedbattery.
Disposal
Always dispose of your products at the end of their life in
accordance with your local waste disposal requirements.
Packaging materials all cardboard and paper packaging
should be recycled in accordance with your local council
waste regulations.
Do not place the AC Adaptor cable in a high "wear and
tear"location.Neveruseafrayedorcompromisedcord.
!
WARNING
SC210 User Manual.indd 2 2011-12-15 11:56:16

3
Thank you for choosing this monitor from Oricom.
YourSecure210BabyMonitoroffersthebestDigital
Technology.
INTERFERENCE
FREE
FREQUENCY
DECT (Digital Enhanced Cordless Telecommunications) is the
most widely used worldwide digital cordless technology, offering
amazinglyclearsound,longrangeandmaximumvoicesecurity.
DECToperatesonthe1.8Ghzfrequencywhicheliminatespotential
interferencefromothercommonwirelessdevicessuchas cordless
telephones, wireless networks (Wi-Fi), Bluetooth and cordless
computerdevices.
Pack Contents
• Parentunit(receiver)
• Babyunit(sender)
• Mainsadaptorwithchargerpod
• 2xNiMHRechargeableBatteries(1.2V,750mAh)
• Mainsadaptorwithpowercord
GETTING STARTED
Installation
For the Parent Unit
1. RemovetheBeltClipbylifting
the clip at the top and sliding it
downwards.
2. Thenremovethebatterycover
on the back of the Parent
Unitbypressingandslidingit
downwards.
Note:
Observethecorrectpolarityanddirectionofthebatteries
when inserting. The unit will not operate if the batteries are
inserted incorrectly.
3. Insert the rechargeable batteries (supplied) as illustrated
andclosethebatterycoveragain.
4. PlacetheParentUnitintotheChargerPod.
5. Plug the mains adaptor into a mains power socket.
clip
batterycover
DONOTUSESTANDARD/ALKALINEBATTERIES
INTHEPARENTUNIT,ASTHERE ISARISKOF
EXPLOSIONAND/ORINJURY.USEONLYNi-MH
RECHARGEABLEBATTERIESASSUPPLIED.
!
WARNING
SC210 User Manual.indd 3 2011-12-15 11:56:17

4GETTING STARTED
6. Press [ ]toturntheParentUniton.
• Beforefirstuse,orifithasbeenoutofuseforalong
time,theParentUnitwillneedtobechargedfor16
hoursbeforeuse.Afterthistime,theParentUnitwill
operate from the Charger pod when switched on. Note
thattheParentUnitcannotbeusedwithoutbatteries,
evenifitisplacedinthechargerpod.
For the Baby Unit
1. Ineventofapowerfailure,yourBabyMonitorcanswitch
to battery power. It is therefore recommended that you
insertnon-rechargeablebatteriesintheBabyUnit.
2. Removethebatterycoveronthe
backoftheBabyUnitbypressing
and sliding it down. Insert 4
alkaline batteries of the type AAA
(notprovided)asmarkedonthe
unitandclosethecoveragain.Do
not use rechargeable batteries in
theBabyUnit.
3. Plug the power cord into the power input at the side of
theBabyUnitandplugtheadaptorplugintoamains
power socket.
Push
4. Press and hold [ ] key to turn on the baby unit.
• TheBabyUnitshouldbeplacedabout1metreto1.5
metres away from the baby's cot on a flat surface.
NeverplacetheBabyUnitinsidethecot,bedor
playpen. Make sure the unit, cords and mains adaptor
are out of reach of the baby and other young children.
NeverplaceeitherUnitonantiqueorpolished
surfaces(asslippageorscuffingmayoccur).Theunit
may cause harm if it falls onto baby or other young
children.
Note:
If you place the Parent and Baby units too close together
you will hear a high pitched noise called "feedback", this is
normal. The units are designed to be located in separate
rooms.
Topreventfeedback,donottaketheParentunitintothe
nursery/baby'sroom.
Do not Press Talk button when the Baby unit and Parent
unit are positioned in the same room. Feedback will be
generated if the talk button is pressed when the Baby unit
and Parent unit are within 3 metres of each other.
Only use the AC power adaptor supplied with the product
as other power adaptors could damage the product. This
product is designed for indoor use only.
!
WARNING
SC210 User Manual.indd 4 2011-12-15 11:56:18
5YOUR BABY MONITOR
Baby unit (Sender)
1 Power On/Off Key
Press to turn ON the Baby unit.
Press and hold to turn OFF.
2 Nightlight
3 Microphone
Picks up the sounds from your baby's room.
4 Page key
Pressandholdfor2secondstoPagetheParentUnit
withanaudiblealert.Usefultocallforassistanceorto
locateamissingParentUnit.
5 Speakerphone
6 Battery Cover
For non rechargeable batteries (not supplied).
7 DC 7V input
Connecting to Power Adaptor.
5
4
6
2
1
3
7
SC210 User Manual.indd 5 2011-12-15 11:56:18

6YOUR BABY MONITOR
Parent unit (Receiver)
8 Belt Clip
9 Battery Cover
Rechargeable batteries.
10 Power Light
11 Noise level indicators
12 Display
Indicates the current settings of your Baby Monitor,
including:Batterylevel,DateandTime,Temperature,
Lullabyon/off,Lullabymelody.
13 Talk key
Press and hold to talk to your baby or partner in the
baby'sroomviatheBabyUnit.
14 Menu key
Press to enter the menu options.
15 Volume Up/Down Keys
Adjustthevolumeatwhichyouhearthesoundsinyour
Baby's room, and scroll through the menu during setting.
16 Link Light
GreenlightONindicates"Linked"toBabyUnit.Flashing
light indicates "Link" is lost.
17 Power On/Off Key
Press to turn the parent unit ON. Press and hold to turn OFF.
18 OK key
Press to select options in the menu.
19 Microphone
12
11
10
8
9
13
14
15
17
16
18
19
SC210 User Manual.indd 6 2011-12-15 11:56:19

7LCD DISPLAY OF BABY MONITOR
Parent Unit
1.Numbers/Charactersindicator
2. Night light indicator
3.Batterylevelindicator
4.Sensitivityindicator
5. Temperature indicator
6. Feed time Alarm indicator
7.Lullabyon/offindicator
3
1
2
5
6
7
4
SC210 User Manual.indd 7 2011-12-15 11:56:20

8OPERATION
Operation
Onceyouhavesetupyourbabymonitor,youwillbeable
to hear the sounds in your baby's room through the parent
unit.Youwillalsobeabletoseethosesoundsasthegreen
sound sensor flashes.
Powering on/off the baby monitor
Afterhavingconnectedthebabymonitoryouwillhave
to switch on both units. Press the On/Off key on each
unit. To switch off the unit press and hold down the
On/Off key.
Volume
Youcanadjustthevolumeatwhichyouhearyourbaby
by using the keys and on the parent unit. This will
noteffectthesensitivityofyourbabymonitor,onlythe
volumeatwhichyouhearthosesoundsthroughthe
parent unit.
Battery charge indicator and battery low warning
The parent unit will work up to 10 hours out of the
chargerpod,butthisdependsonthelevelofcharge
inthebatteries.Thechargelevelisindicatedbythe
battery icon on the Display. If the charge becomes low,
a "battery low warning beep" will sound and the battery
icon on the parent unit's Display will begin to flash. If this
occurs you should return the parent unit to the charger
podtore−chargethebatteries.Youcanstilluseyour
parent unit from the charger pod.
On the display you can see the charging status:
Batteryiconfilled = full capacity
Batteryicon2/3filled = approx.half capacity
Batteryicon1/3filled = batteries nearly exhausted
Batteryiconnotfilled/
frame flashes = batteries must be charged
Sound alert
Youcansetyourparentunittogiveanextrawarning
"beep"shouldthenoiselevelsinyourbaby'sroom
activatethelightonthesoundsensor.Thisisparticularly
usefulifthevolumeofyourparentunitisturneddown
and you are just using the sensor light to monitor the
noiselevelsinyourbaby'sroom.
Note:
If the connection between the parent unit and baby unit is
broken at any time the green "Link" light on the parent unit
will flash and the green sensor light will cease to react to
anysounds.Tore−establishthe"Link",followthedirections
in the "Troubleshooting" chapter.
SC210 User Manual.indd 8 2011-12-15 11:56:20

9OPERATION
Parent to parent paging
Usefulifoneparentisinthebaby'sroomandneeds
tocontacttheother.Alsohelpstofindamislaidparent
unit.
At the baby unit
Press and hold the Page Key for 2 seconds. The parent
unit will emit a tone. The tone can be switched off by
pressing any key on the parent unit or by pressing the
page key on the baby unit once again.
Night light
The baby unit has a night light which emits a soft glow,
providingcomfortandre−assuranceforyourbabyand
allowingyoutoseetheminadarkenedroom.Youmay
also turn the night light on and off from the parent unit.
SC210 User Manual.indd 9 2011-12-15 11:56:20

10
Settings
Youcanmakeseveralsettingsusingthemenu.
Press the Menu key to open the menu.
Usetheand key to scroll through the menu.
Press OKtoopenasubmenuortoconfirmasetting.
Press the Menu keyseveraltimesifnecessary,toleave
the menu.
Date and time
Press the Menu key.
Select Clock and press OK.
Select Hour Format and press OK.
- If 24 hours is set 12Hrs? appears. Press OK to
activate12hourformat.
- If 12 hours is set 24Hrs? appears. Press OK to
activate24hourformat.
Select Set Time and press OK.
Useand to adjust the year and press OK.
Useand to adjust the month and press OK.
Useand to adjust the day and press OK.
Useand to adjust the hour and press OK.
Useand to adjust the minute and press OK.
Selectanothermenuitemorleavethemenubypressing
the Menu key.
SETTINGS
Language
Press the Menu key.
Select Language and press OK.
Select a language and press OK.
Selectanothermenuitemorleavethemenubypressing
the Menu key.
Feed timer
Ifyourbabyisinaroutineofregularfeedingintervals,
you may wish to set your Baby Monitor to alert you
whenyourbaby'sfeedsaredue.Youhavethechoice
to either set an alert just for your baby's next feed time,
or for your baby's next feed time plus subsequent feeds
basedontheintervaltimebetweenthem.
Press the Menu key.
Select Feed Time and press OK.
Select Set Time and press OK.
Useand to adjust the hour and press OK.
Useand to adjust the minute and press OK.
Select Alarm and press OK.
- If the function is switched on (bell icon on the display)
Off? is shown.
Note:
Makesureyouhavesetthecorrectdateandtime.If
youonlywanttogetasinglealarmsettheintervalto
00:00.
SC210 User Manual.indd 10 2011-12-15 11:56:21

11SETTINGS
Useand toadjusttheupperlimit(UpLimit)and
press OK.
Useand to adjust the lower limit (Low Limit) and
press OK.
Select Temp. Alert and press OK.
- If the function is switched on (bell icon on the display)
Off? is shown.
To switch the function off press OK.
- If the function is switched off On? is shown.
To switch the function on press OK.
or
Useand to select Volume and press OK.
Useand toadjustthealarmvolumeandpressOK
and the Menu key.
Press
or to change the temperature unit (degrees
Celsius or Fahrenheit).
- If "Celsius" is set, Degree F? is shown. To set to
"Fahrenheit" press OK.
- If "Fahrenheit" is set, Degree C? is shown. To set to
"Celsius" press OK.
Selectanothermenuitemorleavethemenubypressing
the Menu key.
To switch the function off press OK.
- If the function is switched off On? is shown.
To switch the function on press OK.
Useand to select Volume and press OK.
Useand toadjustthealarmvolumeandpressOK
and the Menu key.
Select Set Interval and press OK.
Useand to adjust the hour and press OK.
Useand to adjust the minute and press OK.
Selectanothermenuitemorleavethemenubypressing
the Menu key.
Temperature
Press the Menu key.
Select Temperature and press OK.
Select Set Range and press OK.
Note:
Itisveryimportantforyourbaby'shealthtoensurethat
they are kept at a safe temperature. This includes the
room temperature, baby's temperature, baby clothing
and bedding (contact your local health authority to
ensure you are aware of the current recommendations
andguidelines).YourBabyMonitorcanshowthecurrent
roomtemperatureontheBabyUnitandtheParentUnit,
andcanevenbesettoalertyouifthetemperaturefalls
outsideofadefinedrange. Note:
Please note the baby monitor cannot manipulate the
temperatureinyourbaby’sroom,itonlyprovidesa
temperature reading.
SC210 User Manual.indd 11 2011-12-15 11:56:21

12
Sound alert
Press the Menu key.
Select Sound Alert and press OK.
- If the function is switched on (bell icon on the display)
Off? is shown.
To switch the function off press OK.
- If the function is switched off On? is shown.
To switch the function on press OK.
Useand toselectVolumeandpressOK.
Useand toadjustthealarmvolumeandpressOK
and the Menu key.
Selectanothermenuitemorleavethemenubypressing
the Menu key.
Note:
Youcansetyourparentunittogiveanextrawarning
"beep"shouldthenoiselevelsinyourbaby'sroom
activatethesoundlevelLEDonthesoundsensor.
Thisisparticularlyusefulifthevolumeofyourparent
unit is turned down and you are just using the sensor
lighttomonitorthenoiselevelsinyourbaby'sroom.
SETTINGS
Sensitivity
Press the Menu key.
Select Sensitivity and press OK.
Useand toselectthedesiredlevelandpressOK.
Selectanothermenuitemorleavethemenubypressing
the Menu key.
Lullaby
Press the Menu key.
Select Lullaby and press OK.
Select Select new and press OK.
Useand to select a lullaby and press OK.
Select Play? and press OK.
- The selected lullaby is played in the baby's room (for
approx. 15 minutes).
On the display appears a musical note icon.
- To stop playing select Stop? and press OK.
Select Volume and press OK.
Useand toadjustthevolumeandpressOK.
Selectanothermenuitemorleavethemenubypressing
the Menu key.
SC210 User Manual.indd 12 2011-12-15 11:56:21

13SETTINGS
Night light
Press the Menu key.
Select Night Light and press OK.
- If the function is switched on (lightbulb icon on the
display) Off? is shown.
To switch the night light off press OK.
- If the function is switched off On? is shown.
To switch the night light on press OK.
Selectanothermenuitemorleavethemenubypressing
the Menu key.
SC210 User Manual.indd 13 2011-12-15 11:56:21

14
Problem Possible cause(s)
The red power lights do not turn on when you plug in
the power.
1. Check if the units are properly connected to the power supply.
2. Check if the power is turned on. If not, Press [ ] to turn on the power.
ThegreenLinklightontheParentUnitisashing
and cannot hear the sounds from your baby's room.
1.Youmayhavemovedoutofrange.MoveclosertotheBabyUnitandwait5seconds
for the Link to establish.
2.Youmayneedtore−establishtheLinkbetweenthetwounits.Turnbothunitsoffby
pressing and holding the [ ] and then turn on again by pressing the [ ].
Can'thearyourbabyontheParentUnitbuttheLink
light is still glowing steadily. CheckifthevolumeisturnedupontheParentUnit.
The battery icon on the Display is flashing on the
ParentUnit.
Yourre-chargeablebatteryisrunninglow.ReturntheParentUnittotheChargerPodto
recharge it.
Two horizontal bars flash centre of the display on the
parent unit and "Not Linked" is shown.
1. The battery in the parent unit is not fully charged. Charge the parent unit for 16 hours
before use.
2. The power to the baby unit may be turned off or disconnected, and or the Baby unit
may be turned off. Reconnect the AC power adaptor to the baby unit and or turn on
the baby unit.
3.Youmayhavetore-establishthelinkbetweenthetwounits.Youwillneedtoremove
the battery from the parent unit and register the parent unit back to the baby unit by
following the instructions below:
Disconnectthepowercablefromthebabyunit,removethebatteriesfromthe
parent unit.
Press and hold the power button on the baby unit and connect power to baby unit
whilst you are still holding the power button until the night light flashes rapidly then
release the button. Within 3 seconds push and hold the Page button until the night
light flashes slowly, the baby unit is now in registration mode.
Within 30 seconds hold the power button on the parent unit while inserting the
batteries keep holding the button until the LINK POWER and NOISE LED’s flash.
Release the power button and wait for both parent and baby units to stop flashing
(up to 30 seconds) the parent unit will be registered to the baby unit.
A high pitched ear piercing noise will be heard from
the units (feedback). CheckiftheParentandBabyUnitsaretooclosetogether.Movethemfurtherapart.
TROUBLESHOOTING
SC210 User Manual.indd 14 2011-12-15 11:56:22

15PRODUCT SPECIFICATIONS
Feature Specifications
Operating Frequency DECT1.8GHz
Range
Upto300munderoptimumconditions.Therangeis
reduced in buildings (up to 50m) as a result of walls, doors
etc.
Powersupply(BabyUnit) Input:100~240VAC50/60Hz
Output:7VDC, 420 mA,
Non rechargeable batteries, baby unit
(not included in the package contents) Type:AAA,1.5VAlkaline
Transmitting power Average:10mWMaximum:250mW
Powersupply(ParentUnit) Input:100~240VAC50/60Hz
Output:7VDC, 420 mA
Re-chargeablebatteries(ParentUnit)
(included in the package contents) Type:2X1.2VAAA750mAhNi-MHbatteries
Operating time with charged battery Approx. up to 10 hours
SC210 User Manual.indd 15 2011-12-15 11:56:22

CUSTOMER SUPPORT16
Customer Support
Ifyouhaveanyproblemssettinguporusingthisproductyouwill
findusefultipsandinformationintheTroubleshootingsectionofthis
user guide as well as “Frequently Asked Questions” on our website
www.oricom.com.au.
Ifyouhavefurtherquestionsaboutusingtheproductafterreviewing
theresourcesaboveorwouldliketopurchasereplacementpartsor
accessories please call our Customer Support Team. Our dedicated
local support team are more likely to be able to help you than the
retailer where you made your purchase.
Important
Please retain your purchase receipt and attach to the back page of
thisuserguideasyouwillneedtoproducethisifwarrantyservice
is required. Take a few moments to register your product online:
www.oricom.com.au
SC210 User Manual.indd 16 2011-12-15 11:56:22

WARRANTY 17
How to make a claim under Warranty in Australia
Oricom has a simple warranty process for you to follow:
• PleasecalloremailourCustomerSupportTeam,contact
details follow.
• ACustomerSupportTeammemberwillverifyafter
troubleshooting with you if your product qualifies under
warranty.Ifso,theywillgiveyouaProductReturnAuthorisation
number.
• WewillthenemailorfaxaReturnAuthorisationformanda
Repair Notice (if necessary), together with instructions on how
toreturnthegoodsforwarrantyservice.
PleasenotethatifaCustomer SupportTeammemberadvises
that your product does not qualify for return, this warranty does not
apply to your product.
Products that are authorised to be returned to Oricom in Australia
must include all of the following:
• AcompletedReturnAuthorisationform
• Acopyof yourProofofPurchase(pleasekeepyouroriginal
copy)
• Thefaultyproduct,includingallaccessories.
Sendtheapprovedreturnsto:
Oricom International Pty Ltd
Locked Bag 658
South Windsor NSW 2756 Australia
Please note that this warranty excludes expenses incurred by
youinreturninganyfaultyproducttous.Youmustarrangeand
payanyexpensesincurred(includingpostage,delivery, freight,
transportation or insurance of the product) to return the faulty
producttous,however, wewillarrangedeliveryoftherepairedor
replaced faulty product to you.
Important Information
Repair Notice
Please be aware that the repair of your goods may result in the loss
of any user-generated data (such as stored telephone numbers,
text messages and contact information). Please ensure that you
havemadeacopyofanydatasavedonyourgoodsbeforesending
for repair.
Please also be aware that goods presented for repair may be
replaced by refurbished goods or parts of the same type rather
than being repaired.
SC210 User Manual.indd 17 2011-12-15 11:56:22
Table of contents
Other Oricom Baby Monitor manuals

Oricom
Oricom Secure 510 User manual

Oricom
Oricom SC520 User manual

Oricom
Oricom OBH930 User manual

Oricom
Oricom OBH500-2 User manual

Oricom
Oricom Secure 710 User manual

Oricom
Oricom secure 910 User manual

Oricom
Oricom secure55 User manual

Oricom
Oricom babysense 2 User manual

Oricom
Oricom 200 User manual

Oricom
Oricom Secure 850 User manual

Oricom
Oricom OBH500 User manual

Oricom
Oricom OBH930PTZ User manual

Oricom
Oricom Babysense2 User manual

Oricom
Oricom SC330 User manual

Oricom
Oricom OBH36T User manual

Oricom
Oricom Secure895 User manual

Oricom
Oricom CU875 User manual

Oricom
Oricom Secure 310 User manual

Oricom
Oricom OBH36T User manual

Oricom
Oricom OBHGPLUS User manual