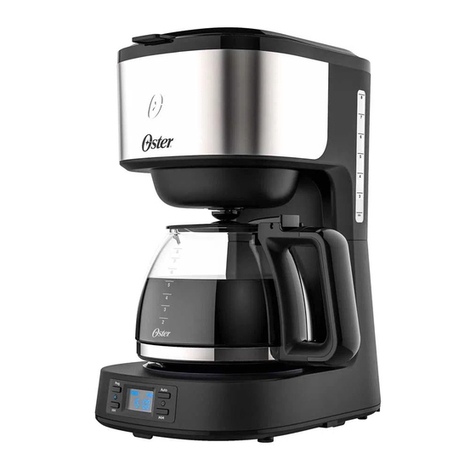
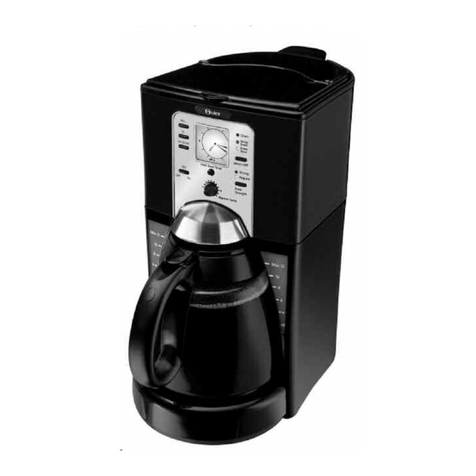
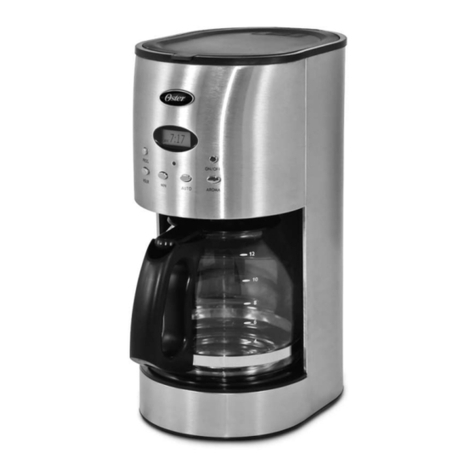
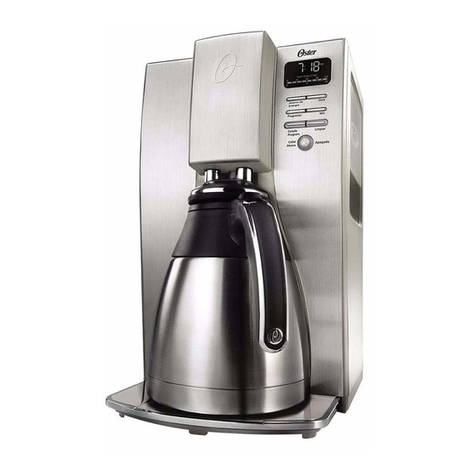
Oster BVSTDC4410 User manual

Instruction Manual
10 CUP PROGRAMMABLE THERMAL COFFEE MAKER
READ ALL INSTRUCTIONS BEFORE USING THIS APPLIANCE
Manuel d’Instructions
CAFETIERE THERMIQUE PROGRAMMABLE A 10 TASSES
LIRE TOUTES LES INSTRUCTIONS AVANT D ’ UTILISER CET APPAREIL
Manual de Instrucciones
CAFETERA TÉRMICA PROGRAMABLE DE 10 TAZAS
LEA TODAS LAS INSTRUCCIONES ANTES DE USAR ESTE APARATO
Manual de Instruções
CAFETEIRA TÉRMICA PROGRAMÁVEL PARA 10 XÍCARAS
LEIA TODAS AS INSTRUÇÕES ANTES DE USAR ESTE APARELHO
MODELS/MODÈLES
MODELOS
BVSTDC4410
MODELS/MODÈLES
MODELOS
BVSTDC4410
Programar
Colado
Program. Limpiar
Hora
Min
Colar
Ahora
Apagado
temporizador de frescura
0 30 60 90 120
0 15 30
Ahorro de
Energia

English-1
IMPORTANT SAFEGUARDS
To reduce the risk of fire, electric shock and/or injury to persons, basic safety
precautions should always be followed when using electrical appliances, including
the following:
1. READ ALL INSTRUCTIONS BEFORE USING THE COFFEE MAKER.
2. !DO NOT touch the coffee maker’s hot surfaces. Use handles or knobs.
3. To protect against electric shock, DO NOT immerse the power cord, power plug or
coffee maker in water or in any other liquid.
4. Turn the coffee maker off and unplug the power cord from the power source when
the coffee maker and clock are not in use and before cleaning. Allow the coffee
maker parts to cool before putting on or taking off parts and before cleaning the
appliance.
5. DO NOT operate any appliance with a damaged power cord or power plug, or
operate it after the appliance malfunctions, or has been damaged in any manner.
Take this appliance only to the nearest Authorized Oster®Service Center for
examination, repair or adjustment.
6. The use of accessory attachments other than those recommended by the
manufacturer may cause hazards or injuries.
7. DO NOT use the coffee maker outdoors.
8. DO NOT let the power cord hang over edge of table or counter, or allow it to come
into contact with hot surfaces.
9. DO NOT place this coffee maker on or near a hot gas stove or electric burner or in a
heated oven.
10. To disconnect the coffee maker, turn it off, then remove the power plug from the
power supply.
11. Place the appliance on a hard, flat level surface to avoid interruption of airflow
underneath the coffee maker.
12. Avoid contact with any moving parts.
13. This coffee maker is designed for household use only.
14. DO NOT use appliance for other than intended use.
15. This appliance is not intended for use by persons (including children) with reduced
physical, sensory or mental capabilities, or lack of experience and knowledge,
unless they have been given supervision or instruction concerning use of the
appliance by a person responsible for their safety. Children should be supervised to
ensure that they DO NOT play with the appliance.
16. Close supervision is necessary when any appliance is used by or near children,
or incapacitated individuals.
THERMAL CARAFE USE AND CARE
Follow the instructions below to reduce or eliminate the chance of breaking the thermal
carafe:
• ThisthermalcarafewasdesignedforuseonlywithyourOster®coffee maker and
therefore must never be used on a range top or in any oven, including a microwave
oven.
• DO NOT set a hot thermal carafe on a wet or cold surface.
• DO NOT use a cracked carafe or a carafe having a loose or weakened handle.
• DO NOT clean the carafe with abrasive cleaners, steel wool pads or other abrasive
materials.
• Discardthecarafeimmediatelyifitiseverboileddry.
•Protectthecarafefromsharpblows,scratchesorroughhandling.
NOTE: Scalding may occur if the lid is removed during brewing cycles.

English-2
WARNING! To reduce the risk of fire or electric shock, do not remove any
service covers. There are no user serviceable parts inside the coffee maker.
Only authorized personnel should repair the coffee maker. Please read ALL of the
instructions in this manual carefully before you begin to use this appliance.
Proper care and maintenance will ensure a long life and a trouble-free operation for
this appliance. Please save these instructions and refer to them for cleaning and
care tips.
SAVE THESE INSTRUCTIONS
SPECIAL CORD SET INSTRUCTIONS
1. A short power supply cord is provided to reduce the hazards resulting from a
person or pet becoming entangled in, or tripping over, a longer cord.
2. An extension cord may be purchased and used if care is exercised in its use.
3. If an extension cord is used, the marked electrical rating of the extension cord
must be at least the same or higher than that of your appliance. The resulting
extended cord must be arranged so that it will not drape over a countertop or
tabletop where it can be pulled on by children or tripped over accidentally.
4. (For 120 & 127V with two flat pins only) This appliance has a polarized plug
(one blade is wider than the other). To reduce the risk of electric shock, this plug
will fit in a polarized outlet only one way. If the plug does not fit fully in the outlet,
reverse the plug. If it still does not fit, contact a qualified electrician. Do not
modify the plug in any way.
You can customize the length of the power cord so that it is the exact length
you desire. To increase the length of the power cord: grasp the power cord (not
the power plug) and gently lift it out of the slot, then pull it away from the coffee
maker. To decrease the length of the power cord: grasp the power cord (not the
power plug), lift it out of the slot and gently feed it into the coffee maker.
Lock the cord in the slot when finished.

English-3
temporizador de frescura
0 30 60 90 120
0 15 30
1
2
7
5
a
b
c
d
e
f
g
h
3
4
6
1. Removable Water Reservoir
2. Brew Basket Drawer
3. Control Panel
4. Thermal Carafe
5. Platform
6. Permanent Filter
7. Water Filter
Control Panel
a. Clock Display / Fresh Brew
Timer Display
b. Hour
c. Minute
d. Clean Cycle
e. Brew Now/Off Button
f. Dim/Energy Saving Mode
g. Set Delay
h. Delay Brew
DESCRIPTION OF THE APPLIANCE

English-4
COFFEE MAKER FEATURES AND BENEFITS
Your new Oster®coffee maker has the following features:
• Brewing Capacity – 10 Cups – thermal carafe.
• Removable Filter Basket – The filter basket pulls out for fast and easy
cleaning and filling.
• Removable Water Reservoir – Allows you to take the water reservoir out for
easy filling. Prevents the thermal decanter from cooling down prior to brewing
cycle.
• Pause ‘n Serve – Can’t wait for the coffee to finish brewing? The Pause ‘n
Serve feature allows you up to 30 seconds to pour a cup of coffee while the
coffee maker is still brewing. Carefully remove the carafe and the Pause ’n
Serve feature will be automatically activated, temporarily stopping the flow of
coffee into the carafe.
• Dim/Energy saving mode – Save energy by reducing the brightness of the
display.
• Water Filtration System – Great tasting coffee begins with great water!
Improves the taste of your coffee by removing 97% of the chlorine from the
water you use for brewing.
• Cord Storage – Safely stores excess cord to keep your countertop neat.
• Programmable Controls:
Clock – The clock serves as a handy kitchen clock and allows you to set
the delay brew feature and functions as the fresh brew timer feature.
Fresh Brew Timer feature – Lets you know how long your coffee has
been waiting for you.
Audible Signal – Alerts you at the end of a brew or clean cycle.
Delay Brew – Would you like to wake up to a fresh pot of coffee?
The timer allows you to preset when you would like the coffee maker to
automatically begin brewing your coffee, up to 24 hours in advance.
Special Cleaning Cycle – Enables you to easily maintain and clean
mineral deposits from your coffee maker.

English-5
To Set the Clock:
1. Plug the power cord into a standard electrical outlet.
The clock will flash on the control panel to indicate that the time
has not been set yet.
2. Press and hold the hour “Hora” and minute “Min” buttons until
you reach the current time. The AM or PM indicator will light at
the bottom of the display (Figure 1).
The clock is now set!
NOTE: Pressing any button before setting the clock will cause the
clock to start keeping time from 12:00 a.m. You must set the clock if
you want to use the Delay Brew feature.
To Set the Delay Brew Time:
While the display is in the clock mode, simply press the set delay
“Programar” button (Figure 2) and, set the brew time by pressing
the hour “Hora” and minute “Min” buttons (Figure 3). The AM or PM
indicator will light at the bottom of the clock display.
Within a few seconds the display will change to the current time.
The Delay Brew Time is now set!
NOTE: To activate the delay brew cycle, see the Brewing Coffee
Later section.
To check the programmed time, push the set delay “Programar”
button. The display will show the time you have programmed the
coffee to brew. If you press the set delay “Progamar” button again
or wait a few seconds, the display will switch back.
MakesureyourrstcupofcoffeeisasgoodascanbebycleaningyourOster®coffee
makerbeforeitsrstuse.Justfollowthesesimplesteps:
1. Washthethermalcarafe,thermalcarafelidandthelterbasketinamixtureofmild
detergent and water. Rinse each thoroughly (please refer to the Description of the
Appliance).
2. Replace all the parts and attach the water reservoir. Then, run a brew cycle with
wateronly,withoutaddingcoffeeandcoffeelter.
3. When brewing is complete, turn your coffee maker off, discard the water in the
thermalcarafeandrinsethecarafe,carafelid,andlterbasket.
Your coffee maker is now ready to use. Enjoy it!
BEFORE USING YOUR COFFEE MAKER FOR THE FIRST TIME
SETTING THE CLOCK AND DELAY BREW TIME
temporizador de frescura
0 30 60 90 120
0 15 30
temporizador de frescura
0 30 60 90 120
0 15 30
temporizador de frescura
0 30 60 90 120
0 15 30
Figure 1
Figure 2
Figure 3

English-6
PREPARING FOR USE
Selecting and Measuring Ground Coffee
For best results, use a level tablespoon for ground coffee measurement.Make
sure you use medium grind coffee for a perfect brew.
A. Suggested Coffee Measurement Chart
To Brew Ground Coffee
10 Cups 7.5 tbsp.
8 Cups 6.5 tbsp.
6 Cups 4.5 tbsp.
4 Cups 3 tbsp.
1 level tablespoon (tbsp) = 5 gr./0.17 oz.
1 cup = 5 fl. oz. (148 mL) of brewed coffee
Use more or less coffee to suit your taste.
B. Water Filtration System
Congratulations! You are the owner of a Oster®water
filtration system. This carbon-based water filter improves the
taste of your coffee by removing up to 97% of the chlorine
from the water you may use to brew your coffee.
To use the water filtration system in your Oster®Coffee
maker, please follow these steps:
1. Align the red indicator on the frame to the letter that
corresponds with the month that you are using the disk
for the first time. This serves to remind you to change
the disk every month (approx. 30 brewing cycles).
NOTE: For optimum results, use the water filtration
system with the permanent filter.
2. Rinse the water filter in fresh water before first use.
3. Follow Adding Water and Coffee instructions.
4. When you are done brewing your coffee, rinse the water
filter with fresh water. Do not put your water filter in the
dishwasher.
To replace the water filter disks, twist the gray disk cover
from your water filtration system. Remove the used disk.
Insert the new disk into the frame and twist the cover back
into place.

English-7
C. Adding Water and Ground Coffee
1. Open the brew basket drawer (Figure 4).
2. Place a 10–12 cup paper basket-style filter or the
permanent filter into the brew basket.
NOTE: If using paper filters, it is important that the
sides of the filter fit flush against the side of the filter
basket. If filter collapse occurs, dampen the filter
before placing in the filter basket and adding ground
coffee and water.
3. Add the desired amount of coffee and gently shake
to level the coffee. See the Suggested Coffee
Measurement Chart (Figure 5).
4. Slide the brew basket back into place (Figure 6).
5. Fill the removable water reservoir with cold, fresh
water to the desired capacity (1 cup equals 148 mL).
For easy and accurate filling, the water markings on
the removable water reservoir show the amount of
water needed to make the corresponding desired
number of cups. Do not fill past the “10-cup MAX line”
or water will flow out of the coffee maker.
NOTE: The amount of coffee brewed will always be
slightly less than the amount of water poured in the water
reservoir. This is due to the minimum absorption of water
by the coffee grounds.
NOTE: If the thermal carafe is not in place then the coffee
maker will not brew. The brew now “Colar Ahora” LED will
flash to signal that there is an error.
CAUTION: Do not place the thermal carafe in the
dishwasher.
Figure 4
Figure 6
Figure 5

English-8
1. After completing the steps in the Adding Water and Coffee
section and with the thermal carafe and the filter basket
securely in place, turn the coffee maker on by pressing the
brew now “Colar Ahora” button once (Figure 7). The brew
now “Colar Ahora” light will turn on and pulse to signal that
the coffee maker is on and brewing.
2. After the used coffee grounds have cooled, carefully remove
the filter basket and discard them.
NOTE: The brew basket drawer is hot after brewing. Always allow
the coffee maker to cool down before cleaning.
3. Prior to making a second pot of coffee, turn the coffee maker
off. This will reset the fresh brew timer feature. To turn the
coffee maker off, press the brew now/off “Colar Ahora/
Apagado” button until all lights turn off.
4. Make sure the thermal carafe is empty before starting to
brew coffee.
5. Be sure to turn your coffee maker off when no longer using it.
The Fresh Brew Timer Feature
The fresh brew timer feature lets you know how long your coffee
has been waiting for you. At the start of the brew cycle, the fresh
brew timer feature will automatically be activated. The timer will
appear in the lower part of the display under the clock (Figure
8). This display will be visible any time you are brewing coffee.
The display will change to show the time since brewing began in
15-minute intervals.
1. You must first set the time for when you would like the coffee
maker to begin brewing your coffee as described in Setting
the Clock and the Delay Brew Timer section.
2. Prepare your coffee maker as described in Adding Water and
Ground Coffee section.
3. To activate the delay brew function and program your coffee
maker to brew coffee at a later time, press the delay brew
“Colado Program.” button once. The delay brew “Colado
Program.” light will illuminate. The coffee maker is now set to
automatically brew coffee at the pre-set time (Figure 9).
BREWING COFFEE NOW
BREWING COFFEE LATER
temporizador de frescura
0 30 60 90 120
0 15 30
temporizador de frescura
0 30 60 90 120
0 15 30
temporizador de frescura
0 30 60 90 120
0 15 30
Figure 7
Figure 8
Figure 9

English-9
4. At the pre-set time, the brew now “Colar Ahora” light will turn on and the
delay brew “Colado Program.” light will turn off, indicating the brewing has
started. The fresh brew timer feature will start.
As a safety feature, your coffee maker will NOT start again automatically the
next day. If you want your coffee to brew at the same time the following day,
simply add a new filter, coffee and water and set delay brew, by repeating Steps
2 and 3 above.
NOTE: If the thermal carafe is not in place then the coffee maker will not brew.
To cancel delay brew:
Press the delay brew “Colado Program.” button until all lights turn off (Figure 9).
Daily Cleaning
Always unplug the coffee maker and allow it to cool before cleaning.
Remove the filter basket, permanent filter, thermal carafe and thermal carafe lid
and wash them in a solution of hot water and mild liquid soap.
Never use abrasive cleansers, steel wool pads or other abrasive materials.
CAUTION! Never immerse the coffee maker itself in water, in any other liquid or
place in the dishwasher.
Regular Cleaning and Maintenance
Decalcifying your Oster®coffee maker minerals (calcium/limestone)
found in water will leave deposits in your coffee maker and affect
its performance. It’s recommended that you regularly remove these
deposits using vinegar.
1. Prepare a solution using 1 L of undiluted white household
vinegar may be used to clean.
2. Pour the vinegar into the water reservoir. Before decalcifying,
remove the water filtration disk from the machine.
3. Place an empty 10–12 cup basket-style paper filter or the
permanent filter that came with the unit into the filter basket
and slide the brew basket in place.
4. Place the empty thermal carafe back in the unit.
5. Press the clean “Limpiar” button until the clean “Limpiar”
indicator light turns on (Figure 10). For your convenience the
cleaning cycle is automatic. The entire cycle will take 45–60
minutes to complete.
During the cleaning your coffee maker will:
a. Slow brew approx. 750 mL of cleaning solution.
b. Pause for 30 minutes (the clean “limpiar” light will remain
on to alert you that the process is active).
CLEANING AND MAINTAINING YOUR COFFEE MAKER
temporizador de frescura
0 30 60 90 120
0 15 30
Figure 10

English-10
c. After 30 minutes, your coffee maker will brew the remainder of the
cleaning solution.
d. When complete, the clean “Limpiar” light will turn off and your coffee
maker will turn off.
6. Discard the cleaning solution and rinse the thermal carafe thoroughly with
clean water.
7. Fill the water reservoir with clean, fresh water.
8. Place the empty thermal carafe back on the coffee maker.
9. Remove and discard the paper filter used during the cleaning cycle. If the
permanent was used during cleaning, remove it and rinse it thoroughly
before replacing it in the filter basket.
10. Begin brewing and allow the full brew cycle to complete.
11. Repeat steps 5 through 9 one more time.
Your coffee maker is now clean and ready to brew the next pot of delicious, hot
coffee!
Suggested Decalcifying Interval
Type of Water Cleaning Frequency
Soft Water Every 80 Brew Cycles
Hard Water Every 40 Brew Cycles
or when red light is flashing
Water Filtration Disk Replacement
Your water filtration disk will need to be replaced once a month (approx. 30 brew
cycles). If the unit will not be in use for an extended period of time, rinse the
water filter with running water and clean the coffee maker before use.
Cleaning the Thermal Carafe
Hard water can leave a whitish stain inside the thermal carafe, and coffee may
then turn this stain brown.
To remove thermal carafe stains:
1. Fill the carafe with a solution of equal parts water and vinegar and let the
solution stand in it for approximately 20 minutes.
2. Discard the solution, then wash and rinse the thermal carafe.
DO NOT use harsh abrasive cleaners that may scratch the thermal carafe.

English-11
Your coffee maker has been carefully designed to give you many years of
trouble-free service. In the unlikely event that your new coffee maker does not
operate satisfactorily, please review the following potential problems and try the
steps recommended BEFORE you call or take it to an Authorized Oster®Service
Center.
PROBLEM POSSIBLE CAUSE SOLUTION
The brew now “Colar
Ahora” light does not
light up
•Theapplianceisunplugged.
•There’sapoweroutage. •Plugunitin.
•Waitforpowertoberestored.
The coffee is not brewing
•Theapplianceisunplugged.
•There’sapoweroutage.
•Notenoughwaterinwater
reservoir.
•Thelterbasketisnot
properly inserted.
•Thethermalcarafeisnot
placed all the way on the
platform.
•Plugunitin.
•Waitforpowertoberestored.
•Fillwaterreservoirabove
minimum level marking.
•Insertlterbasketcorrectly.
•Placethermalcarafecorrectly
on platform.
The coffee maker only
brews water
•Therearenocoffeegrounds
inthelterbasket. •Addthedesiredamountof
coffeetothelter.
The coffee maker brews
slowly
•Thecoffeemakerneeds
cleaning. •Cleancoffeemakeras
described in “cleaning and
maintaining” section.
The filter basket
overflows
•Thelterbasketisnot
properly inserted.
•Thethermalcarafeisnot
placed all the way on the
platform.
•Toomanycoffeegrounds
wereplaceinthelter.
•Thethermalcarafewas
removed from the platform for
more than 30 seconds.
•Insertlterbasketcorrectly.
•Placethermalcarafecorrectly
on platform.
•Removelteranddiscard
ground.Ifusingpaperlter,
replace it. If using permanent
lter,rinseit.Beginbrewing
process again.
•Turnoffandunplugtheunit.
Allow it to cool. Wipe up spill
The coffee is not hot
•Thereisapoweroutage. •Waitforpowertoberestored.
The coffee tastes bad •Coffeegroundsotherthan
for an automatic drip coffee
maker was used.
•Thegroundcoffee-to-water
ratio was unbalanced.
•Thecoffeemakerneeds
cleaning.
•Usecoffeegrounds
recommended for automatic
drip coffee makers.
•Usecorrectgroundcoffee-to-
water ratio.
•Cleancoffeemakeras
described in “Maintaining your
coffee maker” section.
The grounds are in the coffee •Thelterisnotproperly
seated in the basket.
•Theltercollapsed.
•Seatlterproperlydescribed
withinthelterbasket.
•Removelterandreplace.
The“brewnow”ledisashing
fast •Thermalcarafeisnotplaced
all the way on the platform.
•Notenoughwaterinwater
reservoir.
•Placethermalcarafecorrectly
on platform.
•Fillthewaterreservoirabove
minimum level marking.
TROUBLESHOOTING YOUR COFFEE MAKER

Fraçais-1
CONSIGNES IMPORTANTES
Afin de réduire tout risque d’incendie, d’électrocution et/ou de blessures, certaines
précautions essentielles doivent être observées lors de l’utilisation d’appareils
électroménagers, en particulier:
READ ALL INSTRUCTIONS BEFORE USE
1. LIRE TOUTES LES CONSIGNES D’EMPLOI AVANT D’UTILISER LA CAFETIÈRE.
2. NE PAS toucher les surfaces chaudes de la cafetière. Servez-vous des poignées ou des
boutons.
3. Pour se protéger de toute électrocution, NE PAS plonger le cordon, la fiche ou la
cafetière dans l’eau ou dans tout autre liquide.
4. Eteindre la cafetière et la débrancher entre utilisations, lorsque l’horloge ne sert pas,
et avant de la nettoyer. Laisser se refroidir les éléments avant de les démonter ou
remonter, et avant de nettoyer l’appareil.
5. NE PAS utiliser un appareil avec un cordon ou une prise abimée, ou un appareil qui
ne fonctionne pas correctement, ou qui a été endommagé d’une manière quelconque.
Apporter l’appareil à un Centre de Service Agréé Oster®le plus proche pour lui faire
subir les contrôles, réparations ou réglages nécessaires.
6. L’utilisation d’accessoires non recommandés par le fabricant peut entrainer danger ou
blessures corporelles.
7. NE PAS utiliser la cafetière à l’extérieur.
8. NE PAS laisser pendre le cordon sur le bord du plan de travail ou de la table et veiller à
ce qu’il ne soit en contact avec aucune surface chaude.
9. NE PAS placer la cafetière sur ou près de foyers de cuisson électriques ou à gaz
chauds, ou bien dans un four chaud.
10. Pour débrancher la cafetière, tourner le bouton sur arrêt puis tirer délicatement la fiche
hors de la prise de courant.
11. Placer la cafetière sur une surface dure, plane pour ne pas entraver la circulation de l’air
sous l’appareil.
12. Éviter tout contact avec les pièces mobiles.
13. Cette cafetière n’est destinée qu’à un usage domestique.
14. N’utiliser cette cafetière qu’aux fins auxquelles elle est destinée.
15. Cet appareil n’est pas destiné à être utilisé par des personnes (enfants y compris) dont
les capacités physiques, sensorielles ou mentales sont diminuées, ou qui ne disposent
pas des connaissances ou de l’expérience nécessaire, à moins qu’elles n’aient été
formées et encadrées pour l’utilisation de cet appareil par une personne responsable
de leur sécurité. Les enfants doivent être surveillés pour s’assurer qu’ils NE jouent PAS
avec l’appareil.
16. Les enfants et personnes handicapées doivent être surveillés lorsqu’ils utilisent l’appareil
ou que l’appareil est utilisé à côté d’eux.
UTILISATION ET ENTRETIEN DE LA CARAFE THERMIQUE
Suivre les instructions ci-dessous pour réduire ou éliminer le risque de casser la carafe thermique
• CettecarafethermiqueaétéconçuepourêtreutiliséeuniquementaveclacafetièreOster®et
ne doit donc jamais être utilisée sur une plaque de cuisson ou dans un four, y compris un four à
micro-ondes.
• NE PAS placer une carafe thermique sur une surface froide ou mouillée.
• NE PAS utiliser une carafe craquelée ou ayant une poignée lâche ou affaiblie.
• NE PAS nettoyer la carafe avec des produits abrasifs, de la paille de fer ou d’autres matériaux
abrasifs.
• Jeterlacarafeimmédiatementsielleajamaisbouilliàsec.
• Protégerlacarafecontrelescoupsetlesérailluresetmanipuleravecsoin.
REMARQUE : On peut se brûler si on enlève le couvercle pendant les cycles d’infusion.

Fraçais-2
ATTENTION! Pour éviter tout risque d’incendie ou d’électrocution, ne pas retirer
le couvercle du moteur. Il n’y a pas de pièces dans la cafetière que vous puissiez
réparer vous-mêmes. Seulement un technicien agréé est en droit de réparer la
cafetière. Veuillez lire attentivement TOUTES les consignes de ce mode d’emploi
avant de commencer à utiliser cet appareil. Utilisé avec soin et bien entretenu, cet
appareil vous servira pendant très longtemps.
SAUVEGARDER CES INSTRUCTIONS
INSTRUCTIONS SPÉCIALES D’USAGE DU CORDON
1. Cette cafetière comprend un cordon court afin de ne pas risquer de s’y
enchevêtrer et de trébucher, comme cela serait le cas avec un cordon plus long.
2. Une rallonge peut être utilisée à condition d’agir avec prudence.
3. Si une rallonge est employée, ses caractéristiques électriques doivent être
égales ou supérieures à celles de l’appareil. Cette rallonge ne doit pas pendre
au bord de la table ou du plan de travail, afin que les enfants ne puissent pas s’y
enchevêtrer et trébucher accidentellement.
4. (Seulement pour appareils de 120 & 127 V avec deux fiches plates) Cet appareil
est équipé d’une fiche polarisée (une lame est plus large que l’autre).
Pour réduire les risques de choc électrique, la fiche ne s’enfonce dans les prises
de courant que dans un sens. Si la fiche ne rentre pas totalement dans la prise,
inversez la fiche. Si elle ne pénètre toujours pas entièrement, contactez un
électricienqualifié.Nemodifiezlaficheenaucunefaçon.
Vous pouvez modifier la longueur du cordon d’alimentation au besoin.
Pour augmenter la longueur, tenez le cordon (et non la fiche) du bout des doigts,
levez-le délicatement pour le sortir de la fente puis tirez la longueur requise
hors de la cafetière. Pour réduire la longueur du cordon, tenez le cordon (et
non la fiche) du bout des doigts, levez-le délicatement pour le sortir de la fente
puis repoussez-le dans la cafetière. Bloquez le cordon dans la fente après avoir
modifié sa longueur.

Fraçais-3
DESCRIPTION DE L’APPAREIL
1. Réservoir d’eau amovible
2. Tiroir du panier-filtre
3. Panier-filtre
4. Panneau de commande
5. Carafe thermique
6. Plateforme
7. Filtre à eau
Panneau de commande
a. Affichage d’horloge/Café frais/
Affichage minuterie
b. Heure
c. Minute
d. Cycle de nettoyage
e. Faire le café maintenant/Bouton d’arrêt
f. Veilleuse/mode d’économie d’énergie
g. Réglage du délai
h. Délai pour faire le café
temporizador de frescura
0 30 60 90 120
0 15 30
1
2
7
5
a
b
c
d
e
f
g
h
3
4
6

Fraçais-4
CARACTÉRISTIQUES ET AVANTAGES DE LA CAFETIÈRE
Votre nouvelle cafetière Oster®présente les caractéristiques suivantes:
• Capacité – 10 Tasses – Verseuse Thermique.
• Porte-filtre amovible – Facile à sortir de la cafetière, il simplifie et accélère
le nettoyage et l’addition de mouture de café.
• Réservoir d’eau amovible - permet de sortir le réservoir pour le remplir plus
facilement. Empêche la verseuse thermique de se refroidir avant que le café
se fasse.
• Arrêt temporaire - Vous avez hâte de déguster votre première tasse de
café? Cet arrêt temporaire vous donne jusqu’à 30 secondes pour vous servir
pendant que le café est en train en passer. Automatiquement activé au retrait
de la verseuse, le système d’arrêt temporaire interrompt temporairement
l’écoulement du café dans la verseuse.
• Affichage faible intensité - Conserve de l’énergie en réduisant la brillance
de l’affichage
• Système de filtration d’eau - Un excellent café commence avec de l’eau
excellente! Améliore le gout du café en enlevant 97% du chlore de l’eau
utilisée.
• Range cordon – Accueille l’excédent de cordon pour réduire le fouillis sur le
plan de travail.
• Commandes Programmables:
Horloge – Peut servir d’horloge de cuisine, permet de différer la mise en
marche et remplit la fonction de minuterie de fraîcheur d’infusion.
Minuterie de fraîcheur – Vous indique depuis combine de temps le café
est prêt à déguster.
Réglage marche arrêt du signal sonore – Vous avertit quand le cycle
d’infusion ou de nettoyage se termine.
Infusion différée – Aimeriez-vous que le café soit prêt au saut du lit?
La minuterie permet de programmer l’heure à laquelle vous désirez que
la cafetière commence automatiquement à faire votre café – jusqu’à 24
heures à l’avance.
Cycle spécial de nettoyage – Automatique, il permet d’entretenir et de
détartrer facilement et efficacement la cafetière.

Fraçais-5
Réglage de l’horloge:
1. Branchez le cordon d’alimentation sur une prise de courant
standard. L’horloge clignote sur le panneau de commande,
indiquant qu’elle n’est pas réglée.
2. Appuyez sans les relâcher sur les touches des heures « Hora »
et des minutes « Min » jusqu’à ce que l’heure du jour s’affiche.
Le voyant AM ou PM s’allumera au bas de l’afficheur (figures 1).
L’horloge est maintenant réglée!
REMARQUE: Si vous appuyez sur n’importe quelle touche avant
de régler l’horloge, l’horloge commencera à indiquer l’heure à partir
de 12 :00 a.m. Il est indispensable de régler l’horloge pour la mise
en marche différée.
Réglage de mise en marche différée:
Pendant que l’affichage est au mode horloge, appuyez sur la
touche réglage d’infusion différée « Programar » (figure 2) et,
pendant que le voyant jaune d’infusion différée clignote, réglez
l’heure de mise en marche en appuyant sur les touches des
« Hora » et des minutes « Min » (figure 4). Le voyant AM ou PM
s’allumera. L’heure du jour s’affichera sous quelques secondes.
En quelques secondes l’affichage se mettra à l’heure.
L’heure d’infusion différée est maintenant réglée !
REMARQUE: Voyez comment activer la mise en marche différée
sous infusion différée du café. Pour vérifier l’heure programmée,
appuyez sur la touche « Programar ». L’heure de mise en marche
de la cafetière s’affichera. Pour revenir à l’heure du jour, vous
pouvez appuyer de nouveau sur la touche « Programar » ou
attendre un instant.
Assurez-vous que le goût de la première tasse de café est aussi bon que possible en
nettoyant votre cafetière Oster®avant de la mettre en service. Observez pour ceci les
simples directives qui suivent.
1. Lavezlaverseuse,soncouvercleainsiqueleporte-ltreàl’eauadditionnéed’un
détergent liquide doux. Rincez chaque pièce à fond. (consultez la description de
l’appareil).
2. Replacez toutes les pièces puis fermez le couvercle. Soumettez alors la cafetière à
uncycledefonctionnement,maissansvousservirdeltreoudemouturedecafé
3. Àlanducycle,arrêtezlacafetière,jetezl’eauquiacoulédanslaverseuse,puis
rincezlaverseuse,soncouvercleainsiqueleporte-ltre.
Votre cafetière est alors prête à servir. Prenez plaisir à l’utiliser!
AVANT D’UTILISER LA CAFETIÈRE POUR LA PREMIERE FOIS
RÉGLAGES DE L’HORLOGE ET D’INFUSION DIFFÉRÉE
temporizador de frescura
0 30 60 90 120
0 15 30
temporizador de frescura
0 30 60 90 120
0 15 30
temporizador de frescura
0 30 60 90 120
0 15 30
Figure 1
Figure 2
Figure 3

Fraçais-6
PREPARER A UTILISER
Choix et quantité de mouture de café
Pour obtenir les meilleurs résultats possible, utilisez des cuillerées à soupe rases
de mouture. Assurez-vous aussi que le café est moyennement moulu.
1. Tableau de Mesure du Café
Pour passer Le café moulu
10 Tasses 7.5 cuillerées à soupe
8 Tasses 6.5 cuillerées à soupe
6 Tasses 4.5 cuillerées à soupe
4 Tasses 3 cuillerées à soupe
1 cuillerées à soupe rase = 5 gr./0.17 oz.
1 tasse = 5 fl. oz. (147.86 mL) de café passé
Utilisez plus ou moins de café selon votre goût.
2. Système de filtration d’eau
Félicitations! Vous êtes propriétaire d’un système de filtration
d’eau Oster®. Le filtre à eau à base de charbon améliore
le gout du café en enlevant jusqu’à 97% du chlore de l’eau
utilisée pour faire le café.
Pour utiliser le système de filtration d’eau dans la cafetière
Oster®, suivez ces étapes:
1. Alignez l’indicateur rouge sur le cadre à la lettre
correspondant au mois pendant lequel vous utilisez le
disque pour la première fois. Cela sert à vous rappeler
de changer le disque chaque mois (environ 30 cycles de
café).
REMARQUE : Pour obtenir les meilleurs possible, utilisez le
système de filtration d’eau avec un filtre permanent.
2. Rincez le filtre à eau dans l’eau propre avant d’utiliser pour
la première fois.
3. Suivre les instructions Ajouter de l’eau et Café
4. Une fois le café fini, rincer le filtre à eau à l’eau propre.
Ne mettez pas le filtre à eau dans le lave-vaisselle.
Pour replacer le disque de filtre à eau, tournez le couvercle du
disque gris du système de filtration d’eau. Enlevez le disque
usagé. Insérez le disque neuf dans le cadre et tournez le
couvercle en place.

Fraçais-7
3. Ajouter l’Eau et le Café Moulu
1. Ouvrez le tiroir du panier-filtre (figure 4).
2. Placez le filtre permanent Oster®ou, si vous préférez,
un filtre en papier de 10 tasses dans le panier.
REMARQUE: Si vous utilisez des filtres en papier, il est
important que les côtés du filtre soient bien à plat contre
les côtés du panier. Si le filtre n’est pas stable, humidifiez
les bords du filtre avant de le placer dans le panier et
avant d’ajouter le café et l’eau.
3. Ajoutez la quantité désirée de café et secouez
doucement pour aplanir la surface du café. Vous
reporter au tableau de Mesure du Café (Figure 5).
4. Remettez le panier-filtre en place (Figure 6).
5. Remplissez le réservoir d’eau amovible avec de
l’eau douce froide à la quantité désirée (1 tasse est
l’équivalentde150mL).Pourremplirdefaçonexacte
et facile, les marques sur le réservoir d’eau amovible
montrent la quantité d’eau nécessaire pour faire le
nombre désiré correspondant de tasses. Ne pas
remplir au-delà de la « ligne 10 tasses MAX » ou
l’eau débordera.
REMARQUE : La quantité de café sera toujours
légèrement inférieure à la quantité d’eau versée dans le
réservoir d’eau. Cela est dû à l’absorption minimale d’eau
par le café moulu.
REMARQUE : Si la carafe thermique n’est pas en place,
le café ne se fera pas. Le DEL café maintenant “colar
ahora” clignotera pour signaler qu’il y a une erreur.
AVERTISSEMENT : Ne pas le placer dans un
lave-vaisselle.
Figure 4
Figure 6
Figure 5

Fraçais-8
1. Après avoir suivi les indications du paragraphe ajoutez L’eau
et Le Café Moulu et après avoir bien mis en place la verseuse
et le panier à filtre, appuyez une fois sur la touche sélection
« Color Ahora » (Figure 7). Le voyant lumineux préparation
immédiate « Colar Ahora » s’allumera, signalant que la
cafetière est sous tension et qu’elle fait passer le café.
2. Une fois que la mouture déjà utilisée est refroidie, enlever
soigneusement le panier-filtre et jeter.
REMARQUE : Le tiroir du panier-filtre est chaud après avoir fait le
café. Toujours laisser refroidir la cafetière avant de la nettoyer.
3. Éteignez la cafetière avant de préparer le second pot de café
– vous relancerez ainsi la minuterie de fraîcheur d’infusion «
fresh brew timer ». Pour ceci, réglez la cafetière à l’arrêt puis
appuyez sur la touche sélection « Colar Ahora/Apagado »
jusqu’à ce que tous les voyants soient éteints.
4. Assurez-vous que la verseuse est bien vide avant de remettre
la cafetière en marche.
5. N’oubliez pas de régler votre cafetière sur arrêt quand vous
avez fini.
Minuterie de fraîcheur d’infusion
La fonction minuterie pour faire le café vous indique depuis
combien de temps votre café vous attend. Au début du cycle
d’infusion, la fonction minuterie café frais se met en route
automatiquement. La minuterie apparaîtra dans la partie inférieure
de l’affichage sous l’horloge (Figure 8). Cet affichage sera visible
chaque fois que vous faites du café. L’affichage changera pour
montrer la durée depuis que le café a commencé en intervalles de
15 minutes.
1. L’’heure de mise en marche désirée de la cafetière doit
être réglée tel qu’il est décrit dans la rubrique Réglages De
L’horloge Et De Mise En Marche Différée.
2. Préparez la cafetière comme il est indiqué dans la rubrique
«Ajouter l’eau et le café moulu».
3. Pour activer la fonction infusion différée et programmer la
cafetière afin qu’elle passe le café à une heure choisie,
appuyez une fois sur le délai « Colado Program. ». Le
voyant de délai COLADO PROG. s’allumera. La cafetière
est maintenant réglée pour faire automatiquement le café à
l’heure préréglée (Figure 9).
PRÉPARATION IMMÉDIATE DU CAFÉ
PRÉPARATION DIFFÉRÉE DU CAFÉ
temporizador de frescura
0 30 60 90 120
0 15 30
temporizador de frescura
0 30 60 90 120
0 15 30
temporizador de frescura
0 30 60 90 120
0 15 30
Figure 7
Figure 8
Figure 9
Table of contents
Languages:
Other Oster Coffee Maker manuals

Oster
Oster BVSTDCP12B User manual

Oster
Oster Designer 3272 User manual

Oster
Oster BVSTEM8000RD User manual

Oster
Oster 3308 User manual

Oster
Oster BVSTDC01G-014 User manual

Oster
Oster BVSTEM3199 User manual

Oster
Oster BVSTDC3390 User manual

Oster
Oster 3291 User manual

Oster
Oster 7982-33 User manual

Oster
Oster BVSTEM5501B User manual

Oster
Oster 3301 User manual

Oster
Oster BVSTDC03B User manual

Oster
Oster BVSTDCDW12B User manual

Oster
Oster BVST-RDXSS43 User manual

Oster
Oster 3304 User manual

Oster
Oster BVSTEM6701B User manual

Oster
Oster BVSTEM6601R User manual

Oster
Oster 3301 User manual

Oster
Oster PSTX Series User manual

Oster
Oster BVSTPSTX95-033 User manual