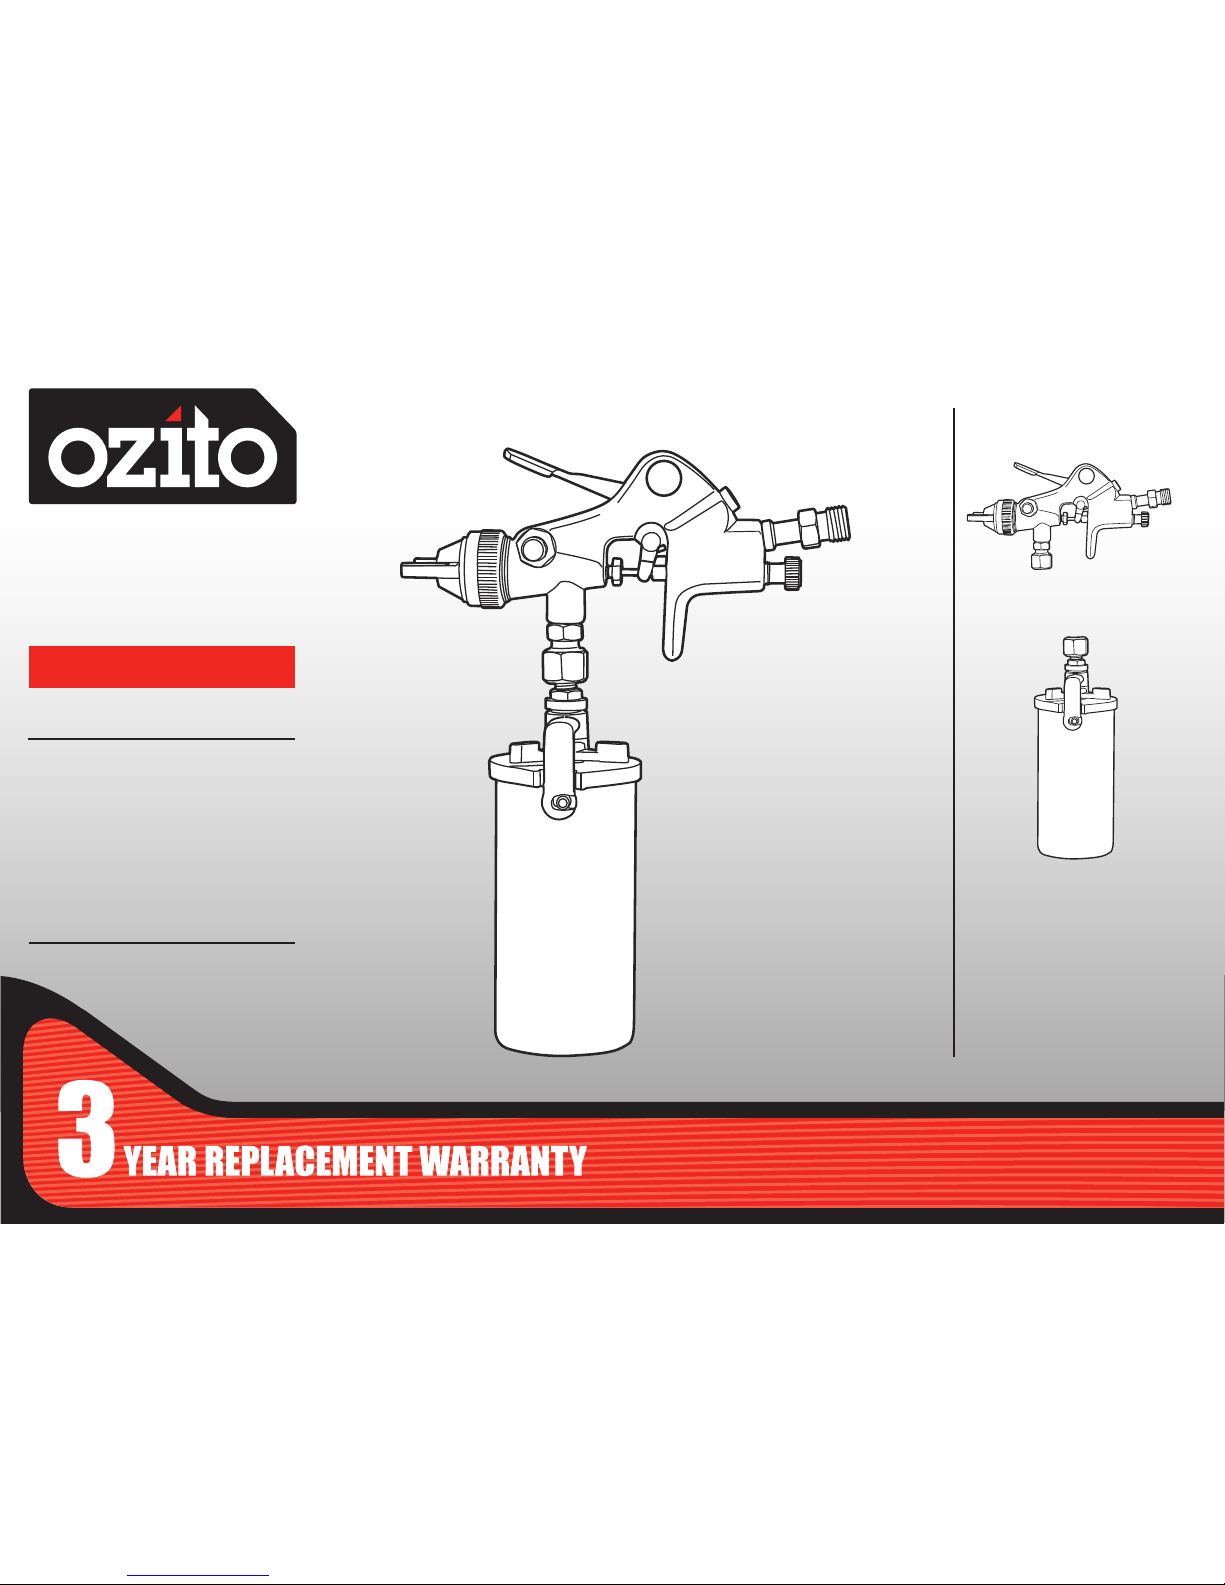
SPRAY GUN SAFETY WARNINGS
WARNING! Read all safety warnings and all instructions. Failure to follow the warnings
and instructions may result in electric shock, re and/or serious injury.
Save all warnings and instructions for future reference. The term “power tool” in the
warnings refers to your mains-operated (corded) power tool or battery-operated (cordless) power
tool.
1. Work area safety
a. Keep work area clean and well lit. Cluttered or dark areas invite accidents.
b. Do not operate power tools in explosive atmospheres, such as in the presence of ammable
liquids, gases or dust. Power tools create sparks which may ignite the dust or fumes.
c. Keep children and bystanders away while operating a power tool. Distractions can cause you to lose
control.
d. Dress properly. Do not wear loose clothing or jewellery. Keep your hair, clothing and gloves away
from moving parts. Loose clothes, jewellery or long hair can be caught in moving parts.
e. Check the maximum pressure rating of any tools or accessories that you intend using with the
compressor. The output pressure of the air from the compressor must be regulated so that it never exceeds
the rated pressure of the tool or accessory.
f. Always wear safety goggles or glasses when using the air compressor. Never point the nozzle of an
accessory towards any part of your body or towards another person.
g. Drain the moisture from the tank daily. It will help prevent corrosion.
h. Use safety equipment including safety goggles or shield, ear protection, breathing or respirator mask and
protective clothing.
i. The tool must be used only for its prescribed purpose. Any use other than those mentioned in this Manual
will be considered a case of misuse. The user and not the manufacturer shall be liable for any damage or
injury resulting from such cases of misuse.
WARNING! In the event that an air line is cut or broken, the air supply must be turned off at the
compressor. A broken air line which is not supported is extremely dangerous and can whip around
very quickly, both with the capability of striking people, and blowing foreign particles into the air.
• Do not attempt to catch the air line but immediately keep bystanders well clear and turn off the air supply to
the hose, turn off the compressor at the On / Off button, and then remove the hose from the compressor.
• This appliance is not intended for use by persons (including children) with reduced physical, sensory or
mental capabilities, or lack of experience and knowledge, unless they have been given the supervision or
instruction concerning use of the appliance by a person responsible for their safety.
• Children should be supervised to ensure that they do not play with the appliance.
GENERAL AIR TOOL SAFETY WARNINGS
WARNING!
This appliance is not intended for use by persons (including children)
with reduced physical, sensory or mental capabilities, or lack of experience and
knowledge, unless they have been given supervision or instruction concerning use of
the appliance by a person responsible for their safety.
Using an Extension Hose
Always use an approved extension hose suitable for the air input of this tool. Before
use, inspect the hose for signs of damage, wear and ageing. Replace the extension
hose if damaged or defective.
When using an hose on a reel, always unwind the lead completely.
It is recommended that the hose is a maximum of 25m in length.
NEVER under any circumstances aim the nozzle at another person or animal.
• In the event of an injury occurring, seek medical advice immediately.
• The spray gun must not be used for spraying ammable paints and solvents with a
ash point of less than 21ºC.
• Always ensure there is adequate ventilation when spraying.
• The use of ear protection is recommended.
• Eye protection is recommended to keep hazardous vapours and liquids out of eyes.
• Always wear a face mask when spraying.
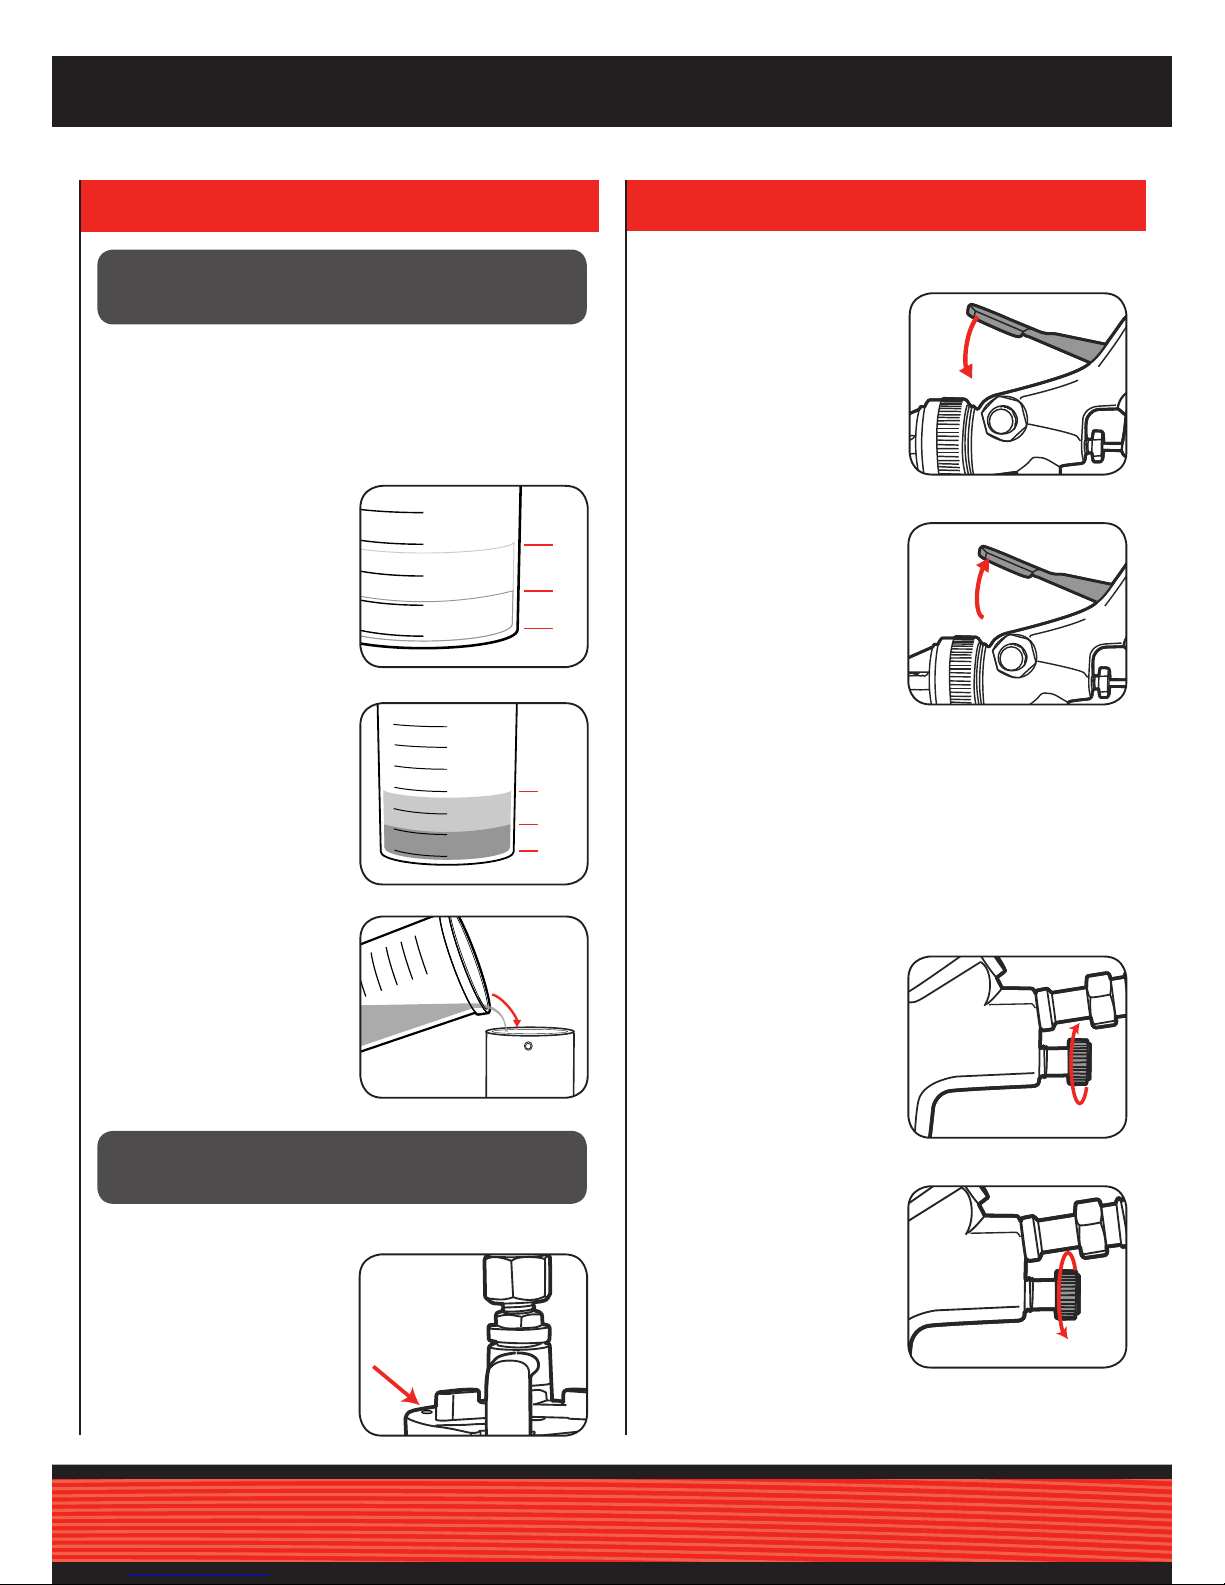
• Always read the paint manufacturers thinning instructions before using.
• Always keep the spray nozzle in place during use. Never allow the spray to come in
direct contact with the skin.
• Never immerse the spray gun in liquid.
• The spray gun must not be cleaned by using ammable liquids with a ash point of
less than 21ºC.
NEVER spray near a naked ame, including an appliance pilot light.
NEVER smoke whilst spraying.
NEVER allow children to operate or play with the spray gun.
• Before cleaning, always disconnect the appliance from the air supply.
• Always disconnect from air supply when relling the paint pot.
• After every use ensure you clean your spray gun thoroughly.
NEVER use the spray gun outside when it is raining.