manuals.online logo
Brands
  1. Home
  2. •
  3. Brands
  4. •
  5. Ozito
  6. •
  7. Power Tools
  8. •
  9. Ozito WSS-200 User manual

Ozito WSS-200 User manual

WET STONE
SHARPENER
120W 200mm
INSTRUCTION MANUAL
SPECIFICATIONS
Voltage: 230-240 ~ 50Hz
Motor: 120W
No load speed: 120 RPM
Grinding Wheel: Ø200 x 40mm, 220 grit
Honing Wheel: Ø200 x 30mm
Spindle: Ø12mm
Weight: 8.5kgs
IP Number: IP23
WSS-200
WHAT’S IN THE BOX
IN ORDER TO MAKE A CLAIM UNDER THIS
WARRANTY YOU MUST RETURN THE PRODUCT
TO YOUR NEAREST BUNNINGS WAREHOUSE WITH
YOUR BUNNINGS REGISTER RECEIPT. PRIOR TO
RETURNING YOUR PRODUCT FOR WARRANTY
PLEASE TELEPHONE OUR CUSTOMER SERVICE
HELPLINE:
Australia 1800 069 486
New Zealand 0508 069 486
3 YEAR REPLACEMENT WARRANTY
Your product is guaranteed for a period of 36 months from
the original date of purchase. If a product is defective it will
be replaced in accordance with the terms of this warranty.
Warranty excludes consumable parts, for example: Lapping paste,
sharpening wheel, honing heel & bearings
WARNING
The following actions will result in the warranty being void.
• If the tool has been operated on a supply voltage other
thanthatspeciedonthetool.
• If the tool shows signs of damage or defects caused
by or resulting from abuse, accidents or alterations.
• Failure to perform maintenance as set out within the
instruction manual.
• If the tool is disassembled or tampered with in any way.
• Professional, industrial or high frequency use.
MAINTENANCE DESCRIPTION OF SYMBOLS
CARING FOR THE ENVIRONMENT
Power tools that are no longer usable should not be disposed of
with household waste but in an environmentally friendly way. Please
recycle where facilities exist. Check with your local council authority
for recycling advice.
Recycling packaging reduces the need for landll and raw materials.
Reuse of recycled material decreases pollution in the environment.
Please recycle packaging where facilities exist. Check with your
local council authority for recycling advice.
WARRANTY
TO ENSURE A SPEEDY RESPONSE PLEASE
HAVE THE MODEL NUMBER AND DATE OF
PURCHASE AVAILABLE. A CUSTOMER SERVICE
REPRESENTATIVE WILL TAKE YOUR CALL
AND ANSWER ANY QUESTIONS YOU MAY
HAVE RELATING TO THE WARRANTY POLICY
OR PROCEDURE.
OZITO Australia/NewZealand(HeadOfce) 1-23 Letcon Drive, Bangholme, Victoria, Australia 3175.
Thebenetsprovidedunderthiswarrantyareinaddition
to other rights and remedies which are available to you at law.
Our goods come with guarantees that cannot be excluded
at law. You are entitled to a replacement or refund for a major
failure and for compensation for any other reasonably foreseeable
loss or damage. You are also entitled to have the goods repaired
or replaced if the goods fail to be of acceptable quality and the
failure does not amount to a major failure.
Generally you will be responsible for all costs associated with
a claim under this warranty, however, where you have suffered
any additional direct loss as a result of a defective product you
may be able to claim such expenses by contacting our customer
service helpline above.
Sharpening Wheel SPWSS200-19
Leather Honing Wheel SPWSS200-27
Knob SPWSS200-21
Power Switch SPWSS200-34
Honing Paste SPWSS200-43
Water Reservoir Tray SPWSS200-41
Angle Gauge SPWSS200-42
Spare parts can be ordered from the Special Orders Desk
at your local Bunnings Warehouse.
For further information, or any parts not listed here, visit
www.ozito.com.au or contact Ozito Customer Service:
Australia 1800 069 486
New Zealand 0508 069 486
E-mail: [email protected]
SPARE PARTS
ozito.com.au
Note. It is recommended to use in conjunction with this appliance a Residual Current Device
(RCD) of rating not exceeding 30mA.
a) Always remove the plug from the mains socket before making any adjustments or
maintenance, including changing the wheel.
b) Always turn the sharpener off when it is not in use and never leave it unattended
without rst switching off and removing the power plug. Never leave the sharpener until
the wheels have come to a complete stop.
c) Make sure that any replacement wheel is rated at 120rpm or higher.
d) Do not let anyone under 18 years operate this tool.
e) Rags, cloths, cord, string and the like should never be left around the work area.
f) If you are interrupted when operating the tool, complete the process and switch off
before looking up.
g) Periodically check that all nuts, bolts and other xings are properly tightened.
h) Do not use a wheel that has received a blow, especially to the side of the wheel.
i) Replace a cracked or suspect wheel.
j) Always allow a new wheel to run for a few minutes at full speed before using it.
Stand to one side at start up.
k) Check that the wheel rotates freely each time before start up.
l) Check that the tool rests are properly adjusted before commencing use.
m) Do not overload the sharpener. Allow the sharpener to run at full speed, or close to full
speed during use.
n) Never apply excessive pressure to the wheel. It might shatter causing personal injury.
o) Make sure that the wheel is not in contact with the work when you start the sharpener.
p) When using the sharpener, use safety equipment including safety goggles or shield,
ear protection, dust mask and protective clothing including safety gloves.
Wear goggles
Wear ear muffs
Wear a breathing mask
Note. The machine is Class 1 Category (earthed) and is tted with a 3-core cable and plug.
Should the cable or plug be damaged, the product should be serviced by an authorized Service
Centre to avoid a hazard.
WET STONE SHARPENER SAFETY WARNINGS
WARNING! When using mains-powered tools, basic safety precautions, including
the following, should always be followed to reduce risk of re, electric shock,
personal injury and material damage.
Read the whole manual carefully and make sure you know how to switch the tool off in an
emergency, before operating the tool.
Save these instructions and other documents supplied with this tool for future reference.
The electric motor has been designed for 230V and 240V only.Always check that the power supply
corresponds to the voltage on the rating plate.
Note: The supply of 230V and 240V on Ozito tools are interchangeable for Australia and
New Zealand.
If the supply cord is damaged, it must be replaced by an electrician or a power tool repairer in order
to avoid a hazard.
Using an Extension Lead
Always use an approved extension lead suitable for the power input of this tool. Before use, inspect
the extension lead for signs of damage, wear and ageing. Replace the extension lead if damaged
or defective.
When using an extension lead on a reel, always unwind the lead completely. Use of an extension
lead not suitable for the power input of the tool or which is damaged or defective may result in a risk
of re and electric shock.
WARNING! Read all safety warnings and all instructions. Failure to follow the
warnings and instructions may result in electric shock, re and/or serious injury.
Save all warnings and instructions for future reference. The term “power tool” in the
warnings refers to your mains-operated (corded) power tool or battery-operated (cordless)
power tool.
1. Work area safety
a. Keep work area clean and well lit. Cluttered or dark areas invite accidents.
b.
Do not operate power tools in explosive atmospheres, such as in the presence of ammable
liquids, gases or dust. Power tools create sparks which may ignite the dust or fumes.
c. Keep children and bystanders away while operating a power tool. Distractions can cause
you to lose control.
2. Electrical safety
a. Power tool plugs must match the outlet. Never modify the plug in any way.
Do not use any adapter plugs with earthed (grounded) power tools. Unmodied plugs and
matching outlets will reduce risk of electric shock.
b. Avoid body contact with earthed or grounded surfaces, such as pipes, radiators, ranges
and refrigerators. There is an increased risk of electric shock if your body is earthed or
grounded.
c. Do not expose power tools to rain or wet conditions. Water entering a power tool will
increase the risk of electric shock.
d. Do not abuse the cord. Never use the cord for carrying, pulling or unplugging the power
tool. Keep cord away from heat, oil, sharp edges or moving parts. Damaged or entangled
cords increase the risk of electric shock.
e. When operating a power tool outdoors, use an extension cord suitable for outdoor use.
Use of a cord suitable for outdoor use reduces the risk of electric shock.
f. If operating a power tool in a damp location is unavoidable, use a residual current device
(RCD) protected supply. Use of an RCD reduces the risk of electric shock.
3. Personal safety
a. Stay alert, watch what you are doing and use common sense when operating a power
tool. Do not use a power tool while you are tired or under the inuence of drugs, alcohol
or medication.
A moment of inattention while operating power tools may result in serious personal injury.
b. Use personal protective equipment. Always wear eye protection. Protective equipment
such as dust mask, non-skid safety shoes, hard hat, or hearing protection used for appropriate
conditions will reduce personal injuries.
c. Prevent unintentional starting. Ensure the switch is in the off-position before connecting
to power source and/or battery pack, picking up or carrying the tool. Carrying power
tools with your nger on the switch or energising power tools that have the switch on invites
accidents.
d. Remove any adjusting key or wrench before turning the power tool on.
A wrench or a key left attached to a rotating part of the power tool may result in personal injury.
e. Do not overreach. Keep proper footing and balance at all times. This enables better control
of the power tool in unexpected situations.
f. Dress properly. Do not wear loose clothing or jewellery.Keep your hair, clothing and gloves
away from moving parts. Loose clothes, jewellery or long hair can be caught in moving parts.
g. If devices are provided for the connection of dust extraction and collection facilities,
ensure these are connected and properly used. Use of dust collection can reduce dust-
related hazards.
4. Power tool use and care
a. Do not force the power tool. Use the correct power tool for your application. The correct
power tool will do the job better and safer at the rate for which it was designed.
b. Do not use the power tool if the switch does not turn it on and off. Any power tool that
cannot be controlled with the switch is dangerous and must be repaired.
c. Disconnect the plug from the power source and/or the battery pack from the power tool
before making any adjustments, changing accessories, or storing power tools. Such
preventive safety measures reduce the risk of starting the power tool accidentally.
d. Store idle power tools out of the reach of children and do not allow persons unfamiliar
with the power tool or these instructions to operate the power tool. Power tools are
dangerous in the hands of untrained users.
e. Maintain power tools. Check for misalignment or binding of moving parts, breakage of
parts and any other condition that may affect the power tool’s operation. If damaged,
have the power tool repaired before use. Many accidents are caused by poorly maintained
power tools.
f. Keep cutting tools sharp and clean. Properly maintained cutting tools with sharp cutting
edges are less likely to bind and are easier to control.
g. Use the power tool, accessories and tool bits etc. in accordance with these instructions,
taking into account the working conditions and the work to be performed. Use of the
power tool for operations different from those intended could result in a hazardous situation.
5. Service
a. Have your power tool serviced by a qualied repair person using only identical
replacement parts. This will ensure that the safety of the power tool is maintained.
b. If the supply cord is damaged, it must be replaced by the manufacturer,
its service agent or similarly qualied persons in order to avoid a hazard.
GENERAL POWER TOOL SAFETY WARNINGS
ELECTRICAL SAFETY
0813
4. HONING 5. MAINTENANCE
OPERATION
Honing is often used on a blade after sharpening has taken place.
The polishing action of the leather wheel and honing paste results in a
ne, razor sharpness.
Honing can only be carried out with the rotational direction of the
leather wheel. Mounting the tool support in the rear mounting holes
will ensure that the rotational direction is correct for honing.
Honing tips
1. Always keep the honing wheel
saturated with mineral oil (not
supplied) and honing paste (see
“Setting up for honing”).
2. Move the blade evenly across
the face of the honing wheel.
Do not use excessive force.
Make sure that at least half of
the width of the honing wheel
is always in contact with the
blade to be honed.
3. On the completion of the
honing, turn OFF (0) the
sharpener at the on/off switch.
Wait for the sharpener to come
to a complete stop and remove
the plug from the power point.
Replacing the sharpening wheel
Note. Make sure that the specications of the replacement
wheel are the same as the old wheel.
1. Remove the water reservoir tray
(see “Fitting and removing the
water reservoir tray”).
2. Remove the wheel nut with a
19mm spanner by turning in
an anti-clockwise direction.
Remove the outer washer.
3. Remove the old sharpening
wheel from the spindle.
5. Fit the new wheel on to the
spindle (see “Fitting the
sharpening wheel”).
6. Re attach the water reservoir tray
(see “Fitting and removing the water reservoir tray”).
CAUTION!: NEVER HONE AGAINST THE DIRECTION OF
THE ROTATING HONING WHEEL. THIS WILL RESULT IN
THE LEATHER HONING WHEEL BEING CUT INTO.
WARNING!: SAFETY GLASSES MUST BE WORN
DURING BOTH SHARPENING AND HONING.
WARNING!: SAFETY GLASSES MUST BE WORN
WHILE DRESSING THE STONE.
VVolts Hz Hertz
~Alternating current WWatts
RPM Revolutions or
reciprocation per minute noNo load speed
Regulator compliance
mark
Wear eye protection
Read instruction manual
IMPORTANT! BEFORE CLEANING YOUR WET STONE
SHARPENER OR CARRYING OUT ANY MAINTENANCE
PROCEDURE, MAKE SURE THAT THE MOTOR IS OFF
AND THE TOOL DISCONNECTED FROM THE POWER
SUPPLY TO PREVENT ACCIDENTAL STARTING.
Dressing the stone
Dressing a stone results in an even surface on the face of the
sharpening wheel. A stone leveller (not supplied) is required to
dress the stone.
1. Adjust the tool support so that
it sits close to the sharpening
wheel. Make sure that the
knobs are tightened.
2. Switch on the machine and
wait until it reaches full speed.
Lower the stone leveller evenly
onto the face of the stone, while
resting part of it on the tool
support. Excessive pressure is
unnecessary.
Cleaning
Remove dust and dirt regularly from the machine, including the water
reservoir tray. Cleaning is best carried out with a ne brush or a cloth.
Never use caustic agents to clean plastic parts.
General inspection
Before use, check for cracked or broken parts, damaged electrical
wiring, damaged sharpening or honing wheel and any other condition
that may effect safe operation. Do not use damaged equipment.
Regularly check that all the xing screws are tight. They may vibrate
loose over time.
Wet Stone Sharpener
Honing Paste &
Angle Gauge
Blade Holder
Water Reservoir Tray
Tool Holder & Tool
Support Bar
3
ONLINE MANUAL
Scan this QR Code with your
mobile device to take you to
the online manual.
Fitting and removing the water reservoir tray
1. Position the water reservoir
tray below the sharpening
wheel, with the support hooks
of the tray facing the side of
the housing. Lift the tray until
the support hooks sit in the
corresponding slots in the
housing. Check that the tray is
horizontal and steady.
2. A water level indicator line
shows how high the water
reservoir tray should be lled
with water.
Note: The rst time the sharpener
reservoir is lled with water, the
sharpening stone may absorb some
of the water, regularly monitor and
ll reservoir as required.
3. To remove the
water reservoir
tray, disengage the
support hooks from
their corresponding
slots by lifting and
moving the tray
away from the side
of the housing.
When the hooks
are clear, lower the
tray.
Note. After use, the water reservoir tray should be emptied of water
and cleared of any debris that remain from the sharpening process.
Fitting the tool support for sharpening
Loosen the front tool support
clamps and insert the tool support
bar into the holes on top of the
housing. Ensure that the tool
support bar points to the left of the
unit, above the sharpening wheel.
Adjust the tool support to the
desired position and tighten the
clamp knobs.
Fitting the tool support for honing
Loosen the rear tool support clamp
knobs and insert the tool support
bar into the holes at the rear of
the housing. Ensure that the tool
support bar points to the right of
the unit (when looking at the front
of the unit). It should sit behind
the honing wheel. Fully insert the
tool support and tighten the clamp
knobs. While the tool support can
be adjusted, most honing will be
done with the tool support fully inserted.
Fitting the tool holder
Slide the adjustable tool holder onto the long bar of the tool support.
Position the adjustable tool holder above the sharpening wheel (if
sharpening), or to the rear of the honing wheel (if honing). Ensure that
the clamping area of the tool holder is positioned towards the centre of
the unit.
1 Tool support bar
2 Tool holder
3 Spindle
4 Sharpening wheel
5 Water reservoir tray
6 Motor housing
7 Tool support bar clamp knobs
8 ON/OFF switch
9 Leather honing wheel
10 Tool holder clamp knobs
11 Angle gauge
12 Knife/blade holder
13 Honing paste
WET STONE SHARPENER
KNOW YOUR PRODUCT
75 64 8
WSS-200
1. ASSEMBLY 2. SET UP AND ADJUSTMENTS 3. SHARPENING
Prior to using the wet stone sharpener, the sharpening wheel, tool
support bar, tool holder and water reservoir will need to be installed.
1. Open carton and remove top packing
material.
2. Carefully lift the wet stone sharpener
from the packaging and place it on a
level work surface.
3. While carefully tilting the wet
stone sharpener, remove the foam
packaging from the underside.
Fitting the sharpening wheel
1. On the left hand side of the unit,
remove the wheel nut and outer
washer from the spindle by rotating
in an anti-clockwise direction. The
cardboard spacer may be discarded.
2. Ensure that the spindle protrudes
to the left of the housing as far as
it will go. This can be achieved
by applying pressure to the outer
side of the leather honing wheel.
The small spindle spacer and inner
washer must sit on the spindle and
against the housing bearing.
3. Slide the sharpening wheel onto
the spindle against the inner
washer and spacer. Hold the
honing wheel to stop the spindle
from sliding into the housing.
4. Fit the outer washer, then the wheel
nut. Tighten the nut with a 19mm
spanner in a clockwise direction.
(Hold the honing wheel steady to
prevent the main spindle from
rotating).
Setting up for sharpening
When sharpening, position the tool support bar in the top
mounting holes.
Note. Sharpening is performed against the direction of rotation.
1. Fit the adjustable tool holder to the
tool support bar (See “Fitting the
tool holder” section). Loosen the tool
support clamps. Adjust the height of the
tool support until there is a small gap
between the surface of the sharpening
wheel and the lower guides of the
adjustable tool holder.
2. Tighten the tool support clamps.
3. To ensure that no part of the adjustable
tool holder comes into contact with the
sharpening wheel, complete these two
checks:
a. Slide the adjustable tool holder back
and forth along the tool support bar.
b. With the bottom of the adjustable tool
holder positioned directly above the
wheel, rotate the sharpening wheel
one full rotation by hand.
4. Loosen the two clamps on the
adjustable tool holder enough to insert
the blade to be sharpened. Manoeuvre
the blade until it touches the sharpening
wheel at the desired sharpening angle.
5. Manoeuvre the blade within the
adjustable tool holder until the angle
of the blade sits at on the face of the
sharpening wheel.
6. Ensure that the blade is square across
the full width of the sharpening wheel.
7. When you are satised that the blade is
correctly positioned, tighten the clamps
knobs on the adjustable tool holder.
Setting up with the angle gauge
1.
The angle gauge is used to determine
the cutting edge angle of a tool. You can
determine what is the appropriate angle
required for your blade by reading the
label on the angle gauge. Alternatively,
you can test and select the blade angle
by inserting the blade into the notches
on the sides of the gauge.
2. After determining which notch best
suits the blade angle required, set
the support bar and adjustable tool
holder. Insert the blade within the
tool holder, so that it touches the
sharpening wheel. (See “Setting up
for sharpening”). Rotate the clamp
knobs on the adjustable tool holder
until the blade is secure, but can still
be moved.
3. Position the gauge on the sharpening
wheel, with the selected notch closest
to the tool tip. Manoeuvre the blade
within the tool holder until the back
face of the blade aligns with the angle
gauge.
4. Check that the blade is square across
the width of the sharpening wheel and tighten the adjustable clamp
knobs. Remove the angle gauge.
Setting up for honing
1. Fit the tool support to the rear of the
unit (see “Fitting the tool support
for honing”)
Note: Initially you will need to condition
the honing wheel. Apply mineral oil (not
supplied) to bring the leather honing
wheel to a darker slightly wet colour on all
it’s surface. Following this apply an initial
layer of honing paste covering the entire
surface and work it into the wheel.
2. Apply mineral oil to the leather honing
wheel, followed by some of the honing
past.
3. Switch on the machine. While the
honing wheel is rotating, evenly
distribute the honing paste into the
leather with a at object such as a
ruler or spatula.
4. Set the adjustable tool holder
(see “Setting up for sharpening”).
SETUP & PREPARATION OPERATION
WARNING!: ENSURE THE TOOL IS DISCONNECTED
FROM THE POWER SUPPLY BEFORE ASSEMBLY.
On/off switch
Note: It is recommended to use in conjunction with this appliance a
Residual Current Device (RCD) of rating not exceeding 30mA.
1. To turn the sharpener on, press
the green ON (I) button. Allow the
sharpening wheel to reach full
speed before beginning to sharpen.
2. To turn the sharpener off, press the
red OFF (0) button.
The knife/blade sharpening holder
The knife/blade sharpening holder assists in the sharpening of small
knives and blades.
1. When tting a blade in the knife/blade
holder, rst unscrew the two knurled
screws on the knife holder clamp. Slide
the knife/blade in between the holder
and the top clamp.
2. Finger-tighten the front screw rst.
3. Finger-tighten the rear screw next to ensure
the blade is rmly clamped in place. The
atter the top plate of the clamp sits, the
greater the clamping area on the knife/blade.
4. Fit the tool support bar into the
sharpening position (see “Fitting the
tool support for sharpening”), and
adjust its height to achieve the desired
sharpening angle.
5. The knife holder also has an adjustable
resting heel, which rests on the tool
support bar when sharpening. By
loosening its knob, it can be moved up
and down the shaft of the knife/blade
holder. This enables further adjustment
of the sharpening angle. These
adjustments should be made before
the machine is in operation.
Using the adjustable tool holder
Note. New sharpening wheels are often not true and can also
become misshapen after use. Check the surface of the sharpening
wheel before each operation. To correct this situation, the stone
may require dressing (see “Dressing the stone”).
1. Ensure the water reservoir tray is correctly tted and lled with
water (see “Fitting and removing the water reservoir tray”).
2. Mount the tool into the tool holder and t it to the tool support
bar, remembering that sharpening occurs against the direction of
rotation (see “Setting up for sharpening”).
3. Set the sharpening angle (see
“Setting up with the angle gauge”).
4. Switch the sharpener on and wait
until it reaches full speed.
5. Evenly press the tool down onto the
sharpening wheel. Move the blade
from side to side across the stone,
this will result in an even wearing of
the stone. Sharpening only requires
a light pressure.
6. On the completion of the sharpening, turn off the wet stone
sharpener at the on/off switch. Wait for the sharpener to come
to a complete stop and remove the plug from the power point.
7. After removing the water reservoir tray, empty it and clean out
any debris.
32 10
9
CAUTION!: DO NOT SHARPEN WITHOUT WATER. THE
SHARPENING WHEEL MUST BE PARTIALLY SUBMERGED
IN WATER WHENEVER IN USE. CHECK AND REFILL THE
TRAYAS THE WATER IS ABSORBED.
CAUTION!: THIS SHARPENER WAS DESIGNED FOR
SHARPENING STEEL. IT SHOULD NOT BE USED FOR ANY
OTHER PURPOSE.
ON
OFF
WARNING!: SAFETY GLASSES MUST BE WORN
DURING BOTH SHARPENING AND HONING.
WARNING!: DO NOT SHARPEN WITHOUT WATER. THE
SHARPENING WHEEL MUST BE PARTIALLY
SUBMERGED IN WATER WHENEVER IN USE. CHECK AND
REFILL THE TRAY AS THE WATER IS ABSORBED.
11 12 13

Other manuals for WSS-200

1

Other Ozito Power Tools manuals

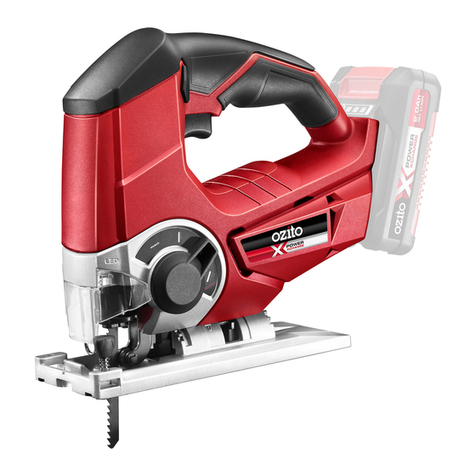
Ozito POWER X CHANGE PXCJS-018 User manual

Ozito

Ozito POWER X CHANGE PXCJS-018 User manual

Ozito OZCCS85WA User manual

Ozito

Ozito OZCCS85WA User manual

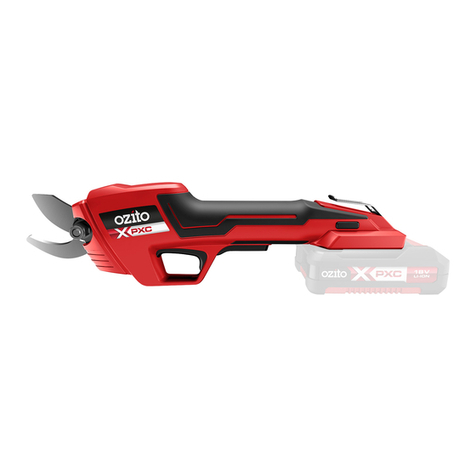
Ozito XPXC PXHDIS-018 User manual

Ozito

Ozito XPXC PXHDIS-018 User manual

Ozito WSS-200 User manual

Ozito

Ozito WSS-200 User manual

Ozito RTR-2000 User manual

Ozito

Ozito RTR-2000 User manual

Ozito ACG-PRO User manual

Ozito

Ozito ACG-PRO User manual

Ozito ZLRTS-012 User manual

Ozito

Ozito ZLRTS-012 User manual

Ozito PXCMFTS-018 User manual

Ozito

Ozito PXCMFTS-018 User manual

Ozito MFT-012 User manual

Ozito

Ozito MFT-012 User manual

Ozito OZJS400A User manual

Ozito

Ozito OZJS400A User manual

Ozito HVAP-240 User manual

Ozito

Ozito HVAP-240 User manual

Ozito LRT-4100 User manual

Ozito

Ozito LRT-4100 User manual

Ozito RTR-040 User manual

Ozito

Ozito RTR-040 User manual

Ozito HOME ZLRWS-040 User manual

Ozito

Ozito HOME ZLRWS-040 User manual

Ozito PXC PXPRU-018 User manual

Ozito

Ozito PXC PXPRU-018 User manual

Ozito RTR-3100 User manual

Ozito

Ozito RTR-3100 User manual

Ozito DP-350 User manual

Ozito

Ozito DP-350 User manual

Ozito MFR-2100 User manual

Ozito

Ozito MFR-2100 User manual

Ozito PRR-1200 User manual

Ozito

Ozito PRR-1200 User manual

Ozito OPCS-036 User manual

Ozito

Ozito OPCS-036 User manual

Ozito XPXC PXMFTS-018 User manual

Ozito

Ozito XPXC PXMFTS-018 User manual

Ozito PXHDIS-240 User manual

Ozito

Ozito PXHDIS-240 User manual

Ozito PXCCSSS-018 User manual

Ozito

Ozito PXCCSSS-018 User manual

Ozito CDL-144 User manual

Ozito

Ozito CDL-144 User manual

Popular Power Tools manuals by other brands

Euro Shatal PC1214 Operating instructions/spare parts list

Euro Shatal

Euro Shatal PC1214 Operating instructions/spare parts list

Acument Avdel TX2000 Avdelok instructions

Acument

Acument Avdel TX2000 Avdelok instructions

Westfalia 85 93 12 instruction manual

Westfalia

Westfalia 85 93 12 instruction manual

Grizzly G3616 owner's manual

Grizzly

Grizzly G3616 owner's manual

Virutex AB111N operating instructions

Virutex

Virutex AB111N operating instructions

Defort BHG-2000L-KL 98291582 user manual

Defort

Defort BHG-2000L-KL 98291582 user manual

Würth BST MA-75 Translation of the original operating instructions

Würth

Würth BST MA-75 Translation of the original operating instructions

Kurtz Ersa MULTI-TIP 30 S operating instructions

Kurtz Ersa

Kurtz Ersa MULTI-TIP 30 S operating instructions

Matatakitoyo Torque Tools PR-5N Operation manual

Matatakitoyo Torque Tools

Matatakitoyo Torque Tools PR-5N Operation manual

Mitox 28MT Operator's manual

Mitox

Mitox 28MT Operator's manual

EINHELL Bavaria BJS 360 E operating instructions

EINHELL Bavaria

EINHELL Bavaria BJS 360 E operating instructions

Fein 7 229 43 Original instructions

Fein

Fein 7 229 43 Original instructions

Clarke CAT171 User instructions

Clarke

Clarke CAT171 User instructions

Bosch JS120 Operating/safety instructions

Bosch

Bosch JS120 Operating/safety instructions

Makita XWT15 instruction manual
Makita

Makita XWT15 instruction manual

Applifast AirPower4 Z-14026001 Repair manual

Applifast

Applifast AirPower4 Z-14026001 Repair manual

Atlas Copco ETDST101-150-20-T40 Product instructions

Atlas Copco

Atlas Copco ETDST101-150-20-T40 Product instructions

ASG BLCA-9010 Operation and maintenance manual

ASG

ASG BLCA-9010 Operation and maintenance manual

manuals.online logo
manuals.online logoBrands
  • About & Mission
  • Contact us
  • Privacy Policy
  • Terms and Conditions

Copyright 2025 Manuals.Online. All Rights Reserved.