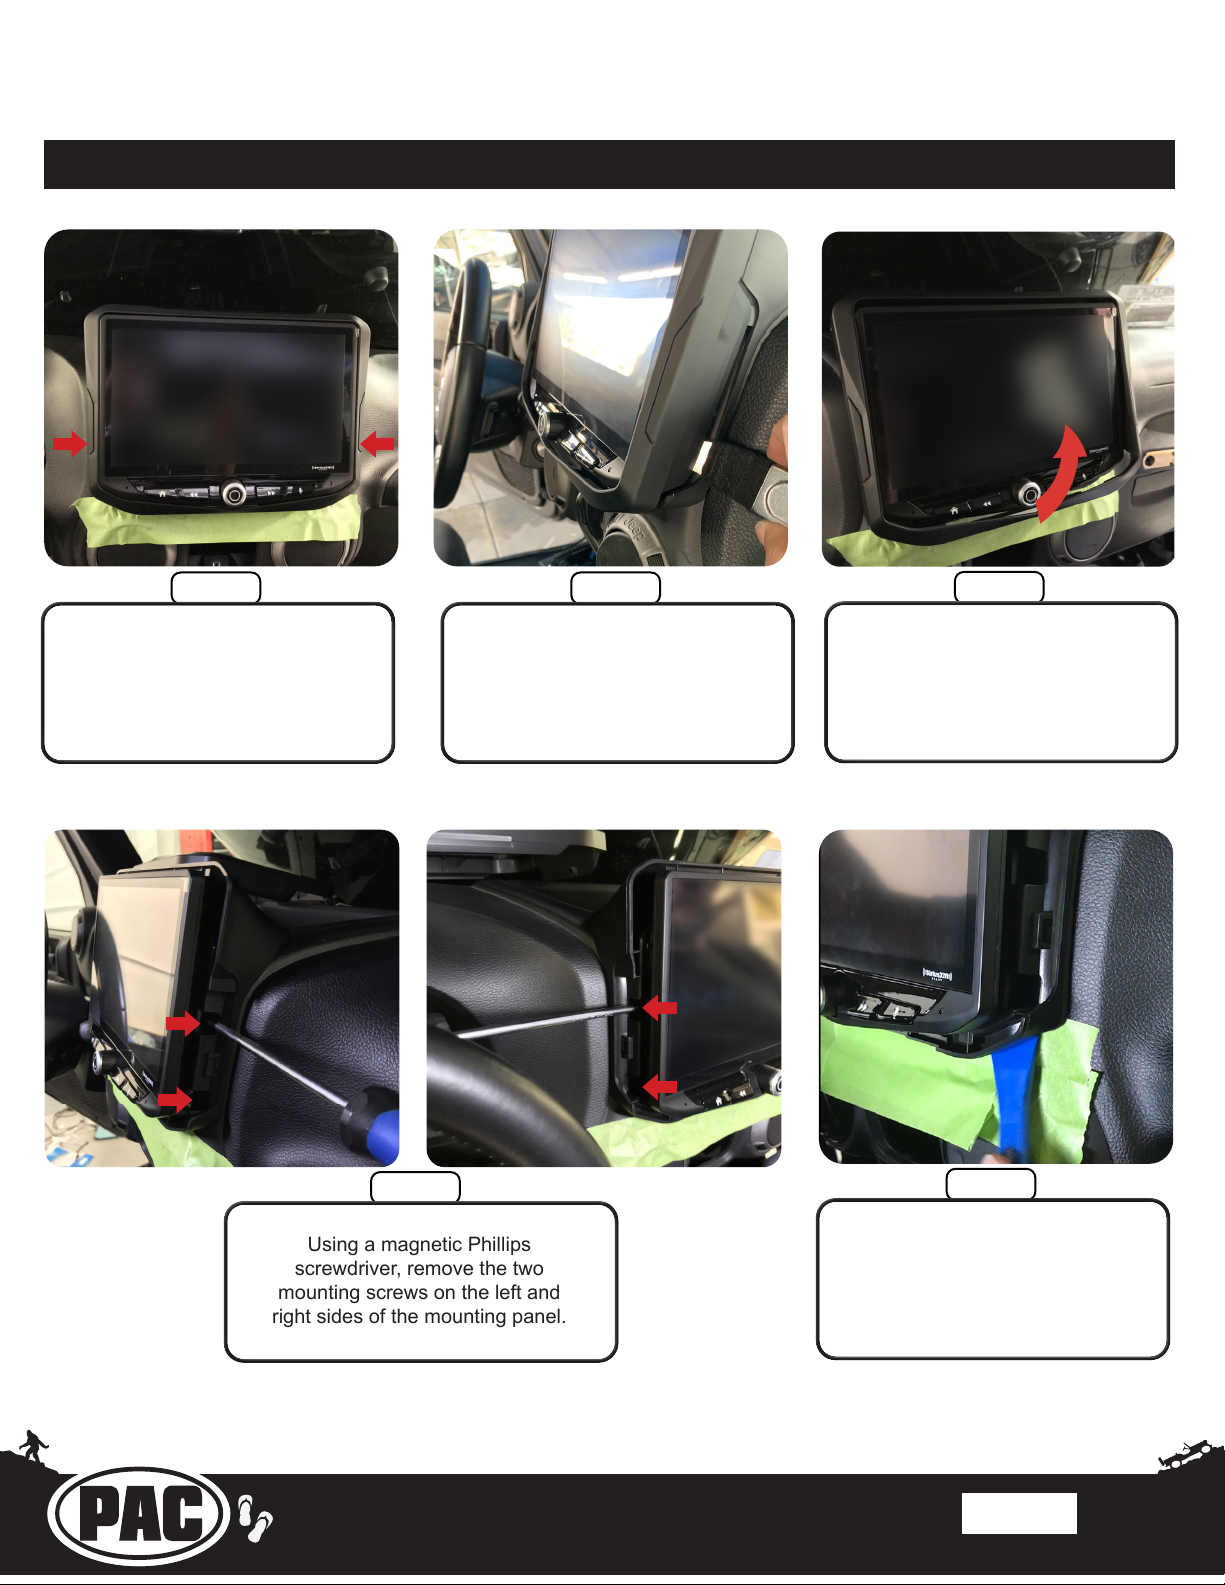
Vehicle Integration Upgrade Kit for
SR-JK11H / Stinger HEIGH10®
2011-2018 Jeep®Wrangler JK
CH1AJKIT
© 2022 AAMP Global. All rights reserved. PAC is a Power Brand of AAMP Global.
AAMP Global is not aliated with FCA US LLC. Jeep® is a registered trademark of FCA US LLC. The terms
OEM, Jeep®, Wrangler®, and Gladiator® all terms are used strictly for identication purposes only. It is not
implied that any part listed is a product of, or approved by, Fiat Chrysler Automobiles.
Pacific Accessory Corporation
Page 1
Rev: V1
Date:102622
®
Introduction and Features
The CH1AJKIT is a feature upgrade kit for Jeep Wrangler JK’s equipped with the PAC SR-JK11H Installation Kit and Stinger
HEIGH10. All modules and cables are included to retain factory features and add additional vehicle information. Plug & Play wiring
harnesses allow for quick and easy installation without the need to cut or splice any wiring. Data integration with the vehicle and
the HEIGH10 radio allows for the retention and addition of the following features: vehicle performance gauges and information,
o-road information, factory amplier retention and steering wheel controls.
Important Notes
Recommended Tools
We recommend reading this manual thoroughly to familiarize yourself with the entire process prior to
beginning the installation. Although this kit does not require any modications to the vehicle, it does
require following the steps as shown to ensure it is installed correctly with no damage to the vehicle.
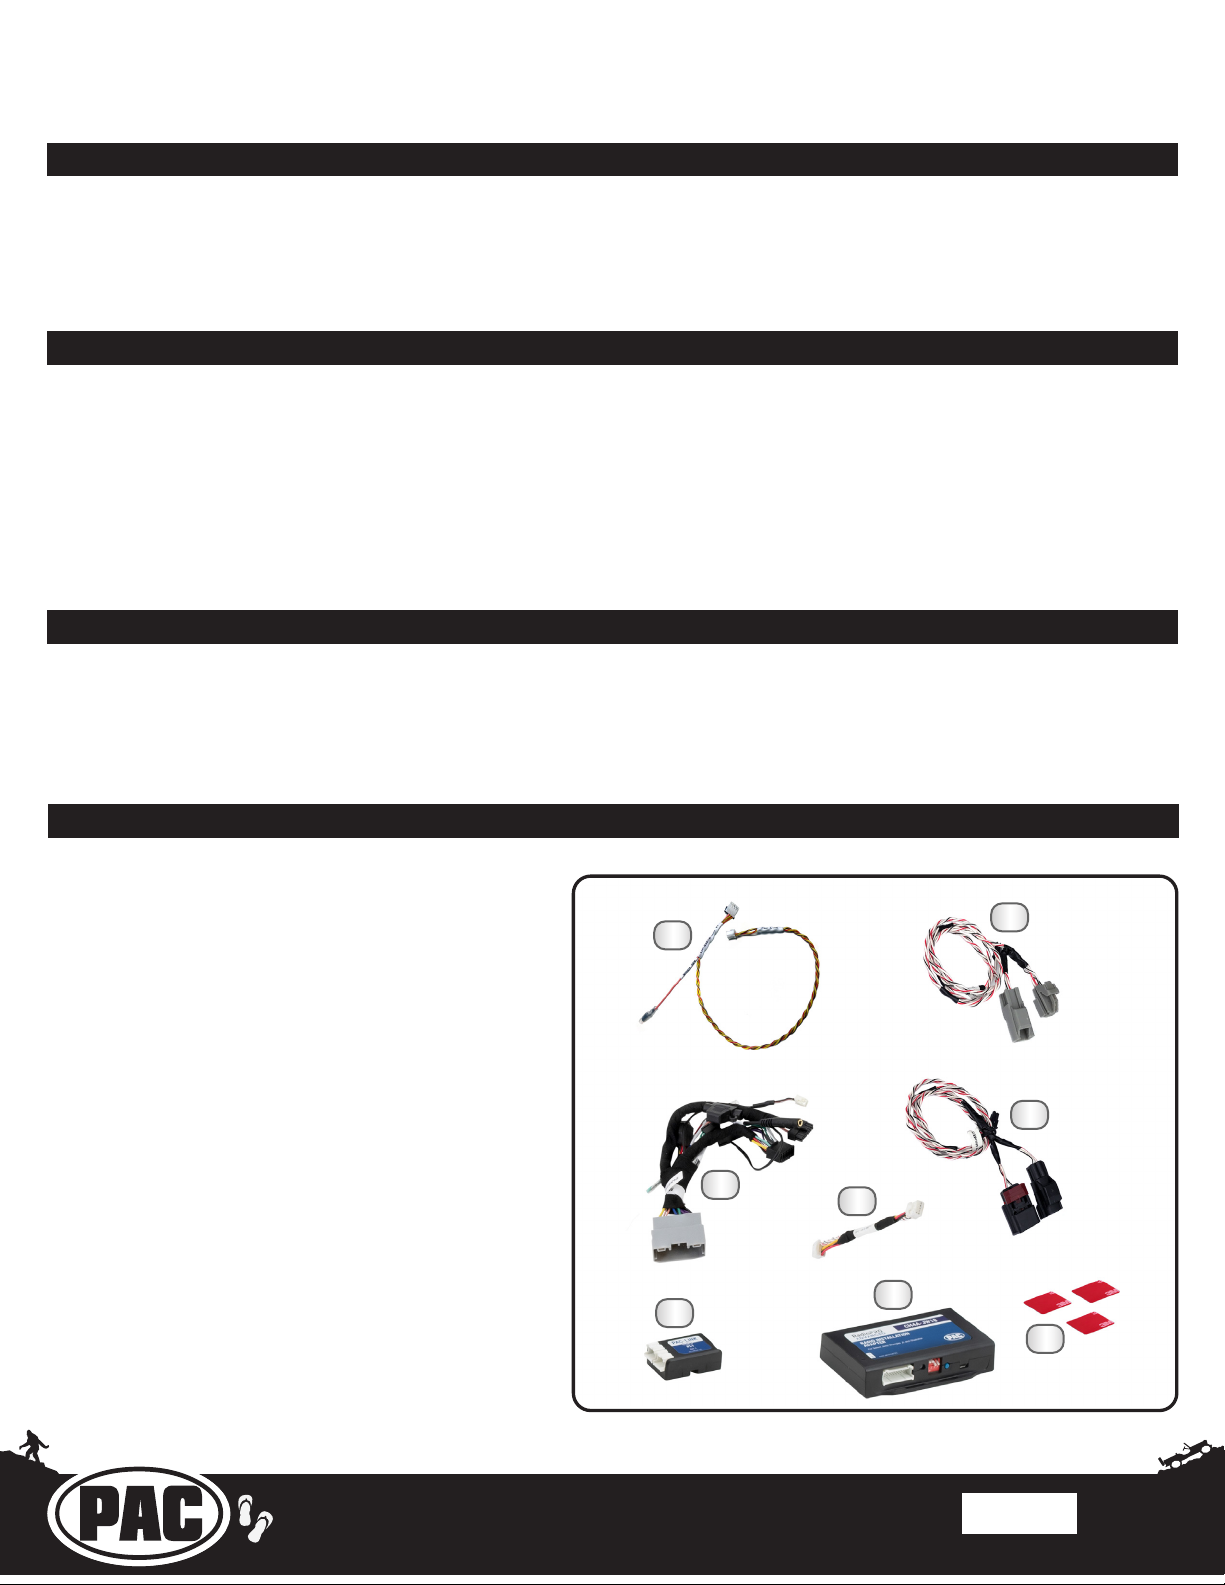
1. PAC-LINK/Speed Sen Harness (10P-RADIO-HAR)
2. 2014-2018 CAN Harness (JK14-CAN-HAR)
3. Main Wiring Harness (SRK-CH1A-HAR)
4. 6” Data Harness (10P-2-10P-6)
5. 2011-2013 CAN Harness (JK07-CAN-HAR)
6. PAC-LINK Module (PL1)
7. Radio Replacement Interface Module (CH1A-SRK)
8. Two-Sided Tape (3x)
Included Components
1
4
6
8
5
2
3
7
1. This kit is designed for vehicles that currently have a Stinger HEIGH10 installed using the PAC SR-JK11H Wrangler
Installation Kit. For new installations of the HEIGH10, the PAC SRK-JK11H Installation Kit is recommended.
2. For HEIGH10 installations that are “universally” installed (not using the SR-JK11H kit) in JK’s, the CH1AJKIT
upgrade will work, although some components mentioned in this guide may not be present.
Plastic Panel Tool
7mm, 10mm Sockets
Ratchet
Ratchet Extension
Phillips Screwdriver
NOTE: Along with the CH1AJKIT components,
additional previously installed wire harnesses and
adapters from the PAC SR-JK11H kit and Stinger
HEIGH10 (UN1810) kit will also be re-used in the
installation.