manuals.online logo
Brands
  1. Home
  2. •
  3. Brands
  4. •
  5. PaloAlto Networks
  6. •
  7. Network Hardware
  8. •
  9. PaloAlto Networks ION 1200-C-5G-WW User manual

PaloAlto Networks ION 1200-C-5G-WW User manual

Page 1 of 2
ION 1200-C5G-WW Quick Start Guide
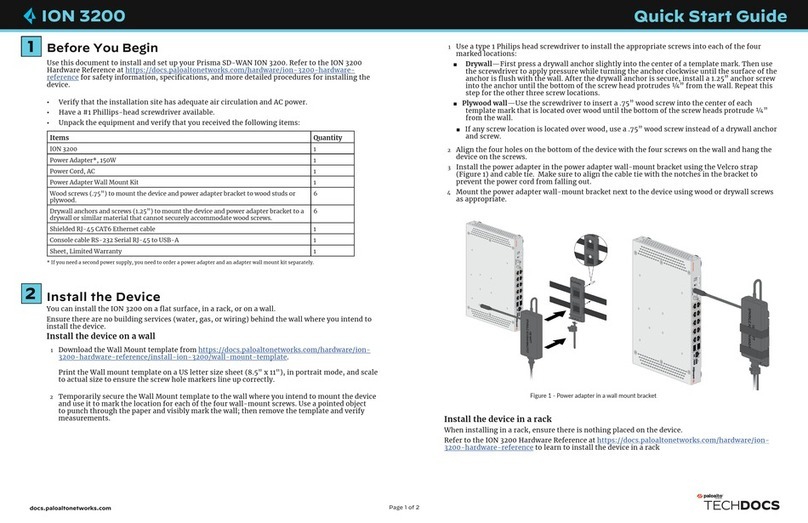
Before You Begin
Use this document to install and set up your Prisma SD-WAN ION 1200-C5G-WW. Refer to the ION
1200 Hardware Reference at https://docs.paloaltonetworks.com/hardware/ion-1200-hardware-
reference for safety information, specifications, and more detailed procedures for installing the
device.
• Verify that the installation site has adequate air circulation and AC power.
• Have a #1 Phillips-head screwdriver available.
• Unpack the equipment and verify that you received the following items:
Items Quantity
ION 1200-C5G-WW 1
Power Adapter, 40W 1
Power Cord, AC 1
USB 2.0 to RJ45 Console cable 1
Shielded RJ-45 CAT6 Ethernet cable 1
Wood screws (.75”) to mount the device and power adapter bracket to wood studs or
plywood. 6
Drywall anchors and screws (1.25”) to mount the device and power adapter bracket to a
drywall or similar material that cannot securely accommodate wood screws. 6
Power adapter wall-mount kit (includes one each of the following: a power adapter
bracket, a Velcro strap, and a plastic cable tie). 1
Sheet, Limited Warranty 1
Multi-band indoor antennas 4
Install the Antennas
1 Assemble the antennas.
2 Connect the antennas to the SMA connectors on the device (Figure 3).
3 Secure the antennas (Figure 4) to the connectors.
Insert the SIM Card/s
1 Remove the SIM cover by unfastening the two M3 screws (Figure 1) using a type 1 Phillips
screwdriver.
2 Insert the nano SIM card by pushing it into the slot. (Figure 2)
3 Place the SIM cover back on the device using the M3 screws.
On activation, the blinking cellular LED on the device indicates cellular connectivity.
docs.paloaltonetworks.com
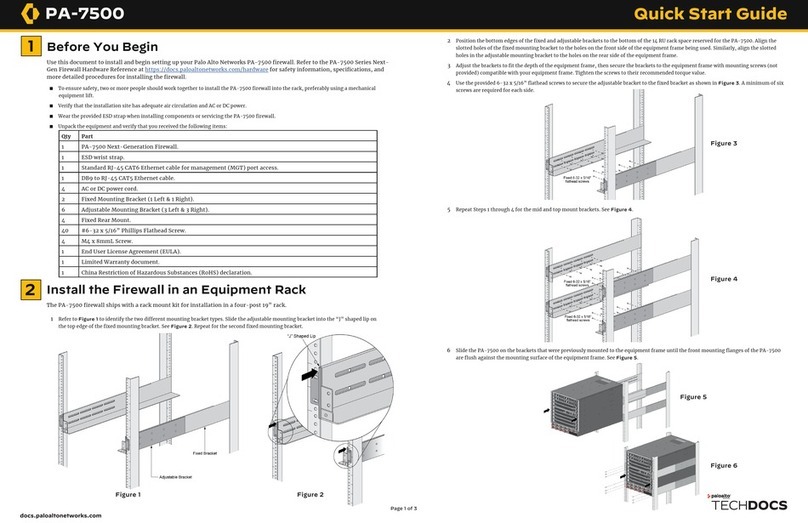
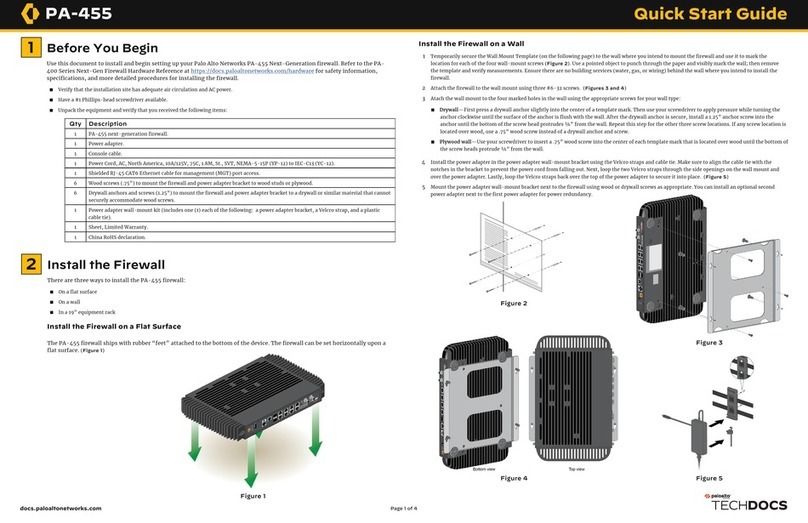
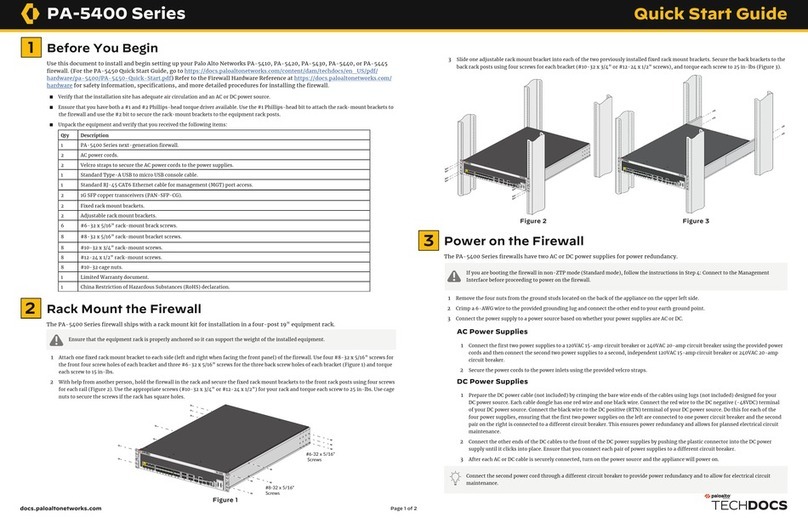
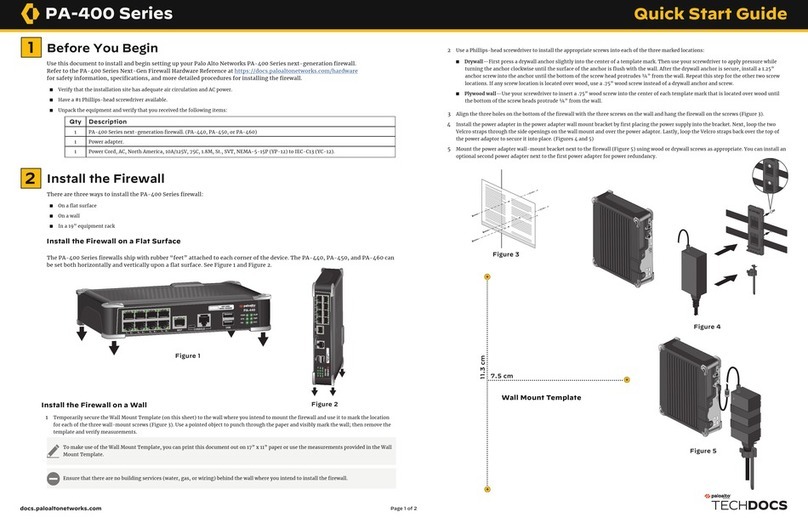
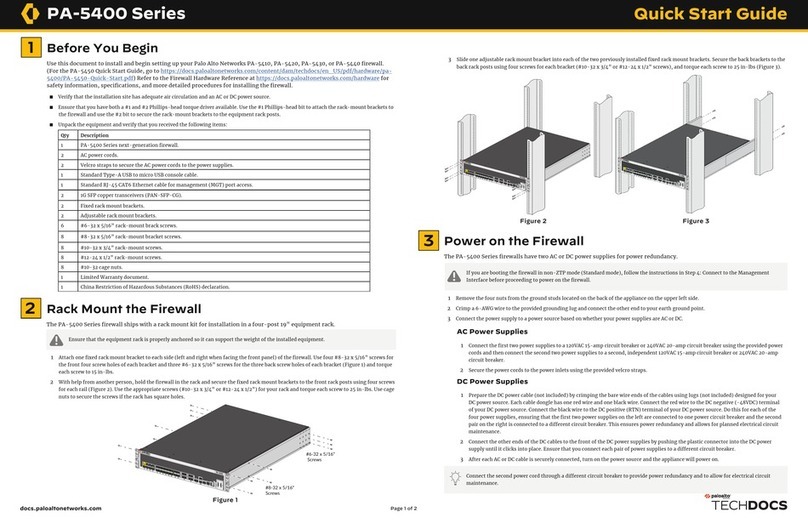
Install the Device
You can install the ION 1200 on a flat surface, in a rack, or
on a wall.
Ensure there are no building services (water, gas, or wiring)
behind the wall where you intend to install the device.
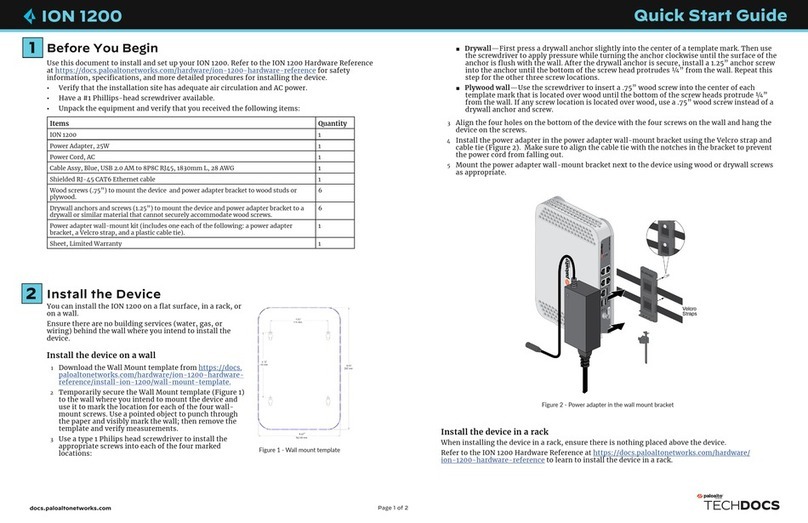
Install the device on a wall
1 Download the Wall Mount template from https://docs.
paloaltonetworks.com/hardware/ion-1200-hardware-
reference/install-ion-1200/wall-mount-template.
2 Temporarily secure the Wall Mount template (Figure 5)
to the wall where you intend to mount the device and
use it to mark the location for each of the four wall-
mount screws. Use a pointed object to punch through
the paper and visibly mark the wall; then remove the
template and verify measurements.
3 Use a type 1 Philips head screwdriver to install the
appropriate screws into each of the four marked
locations:
◼Drywall—First press a drywall anchor slightly
into the center of a template mark. Then use the
screwdriver to apply pressure while turning the
anchor clockwise until the surface of the anchor
is flush with the wall. After the drywall anchor is
secure, install a 1.25” anchor screw into the anchor
until the bottom of the screw head protrudes ¼”
from the wall. Repeat this step for the other three
screw locations.
◼Plywood wall—Use the screwdriver to insert a .75”
wood screw into the center of each template mark
that is located over wood until the bottom of the
screw heads protrude ¼” from the wall.
Figure 3 - Connect the antennas
Figure 4 - Secure the antennas
Figure 1 - Remove the SIM cover
Figure 2 - Insert the SIM
Figure 5 - Wall mount template
1
2
3
4
Page 2 of 2
ION 1200-C5G-WW Quick Start Guide (Continued)
Power on the Device
1 Connect the power cable to the device.
2 Plug the device power cable into an AC power outlet. When the device is powered on, the power
indicator turns green.
Connect the Device to the Controller
1 Connect the ION device port 1 or port 2 to a DHCP-enabled network that has access to the
internet, such as an Internet Service Provider (ISP) cable modem.
2 If you do not wish to connect via DHCP-enabled network, access the console and set a static IP
on port 1 or port 2.
Refer to Configure Static IP Using a Console at:
https://docs.paloaltonetworks.com/prisma/prisma-sd-wan/prisma-sd-wan-ion-cli-
reference/access-the-ion-cli-commands/assign-a-static-ip-address-using-the-console.
html. Where To Go Next
To learn more about the device, refer to the ION 1200 Hardware Reference Guide:
https://docs.paloaltonetworks.com/hardware /ion-1200-hardware-reference.
To learn how to configure the device, refer to the Prisma SD-WAN Administrator's Guide:
https://docs.paloaltonetworks.com/prisma/prisma-sd-wan/prisma-sd-wan-admin.
Contact PaloAlto Networks Support to get help.
Customer Support at https://www.paloaltonetworks.com/company/contact-support.
For Technical Support: US: 866 898 9087 | International: +1 408 738 7799
docs.paloaltonetworks.com | © 2022 | Palo Alto Networks, Inc. | Part Number: 810-000318-00D
Connect to the Portal
1 Log in to the Prisma SD-WAN portal using the provided login credentials.
2 Navigate to Map > Unclaimed Devices to verify that your ION device is listed as Online under
Unclaimed Devices.
3 Select the device and click the option Claim the device.
4 Assign the device to a site and configure it.
Refer to the Prisma SD-WAN Administrator's Guide at https://docs.paloaltonetworks.com/
prisma/prisma-sd-wan/prisma-sd-wan-admin.html.
◼If any screw location is located over wood, use a .75”
wood screw instead of a drywall anchor and screw.
3 Align the four holes on the bottom of the device with
the four screws on the wall and hang the device on the
screws.
4 Install the power adapter in the power adapter wall-
mount bracket using the Velcro strap (Figure 6) and cable
tie. Make sure to align the cable tie with the notches in
the bracket to prevent the power cord from falling out.
5 Mount the power adapter wall-mount bracket next to the
device using wood or drywall screws as appropriate.
Power LED
Figure 7 - Power LED
Figure 8 - DHCP-enabled ports
Figure 9 - Controller connecvity LED
Figure 10 - Prisma SD-WAN portal
Figure 6 - Power adapter in the wall mount bracket
Controller Connecvity LED
Install the device in a rack
When installing in a rack, ensure there is nothing placed
above the device.
Refer to the ION 1200 Hardware Reference at https://docs.
paloaltonetworks.com/hardware/ion-1200-hardware-
reference to learn to install the device in a rack.
Verify Device Connection to the Controller
◼Upon successful connection, the controller connectivity LED on the ION device turns green.
◼The ION device is now connected to the Controller and displays on the portal under
Unclaimed Devices.
5
6
7
8

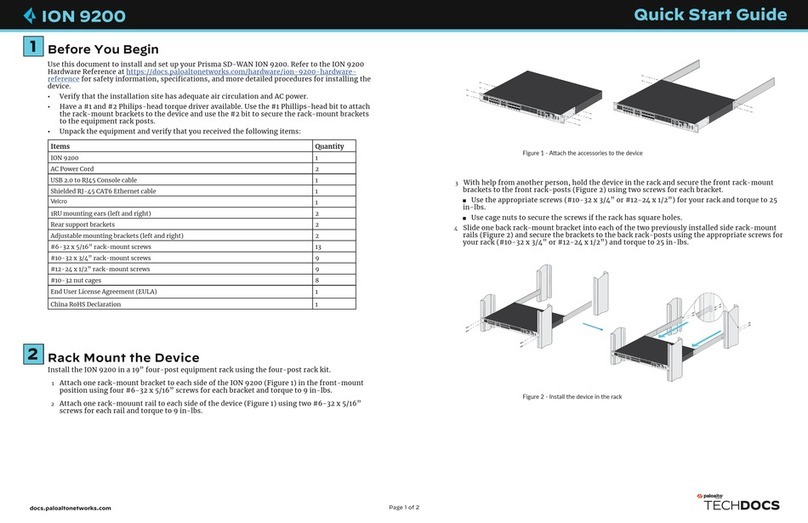
Other PaloAlto Networks Network Hardware manuals
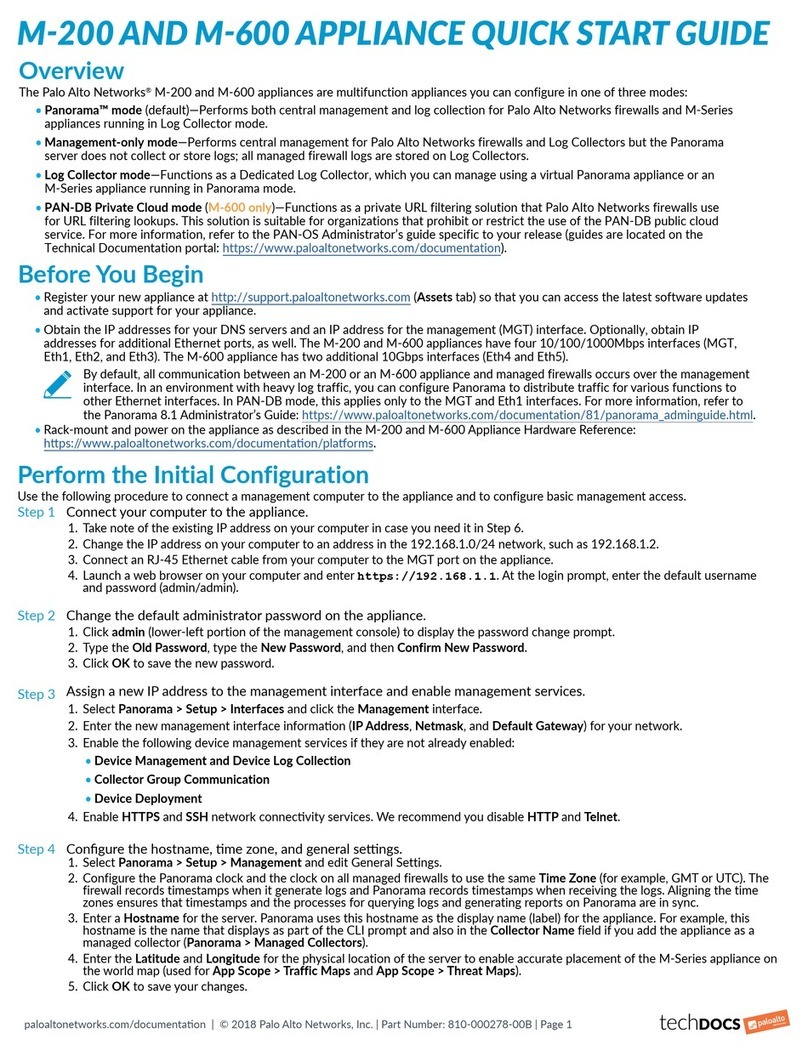
PaloAlto Networks PA-400R Series Application guide

PaloAlto Networks

PaloAlto Networks PA-400R Series Application guide

PaloAlto Networks PA-400 Series User manual

PaloAlto Networks

PaloAlto Networks PA-400 Series User manual

PaloAlto Networks PA-450R User manual

PaloAlto Networks

PaloAlto Networks PA-450R User manual

PaloAlto Networks PA-400 Series User manual

PaloAlto Networks

PaloAlto Networks PA-400 Series User manual

PaloAlto Networks ION 1000 Application guide

PaloAlto Networks

PaloAlto Networks ION 1000 Application guide

PaloAlto Networks WF-500-B Application guide

PaloAlto Networks

PaloAlto Networks WF-500-B Application guide

PaloAlto Networks ION 9200 Application guide

PaloAlto Networks

PaloAlto Networks ION 9200 Application guide

PaloAlto Networks ION 5200 Application guide

PaloAlto Networks

PaloAlto Networks ION 5200 Application guide

PaloAlto Networks PA-5400 Series User manual

PaloAlto Networks

PaloAlto Networks PA-5400 Series User manual

PaloAlto Networks PA-7500 User manual

PaloAlto Networks

PaloAlto Networks PA-7500 User manual

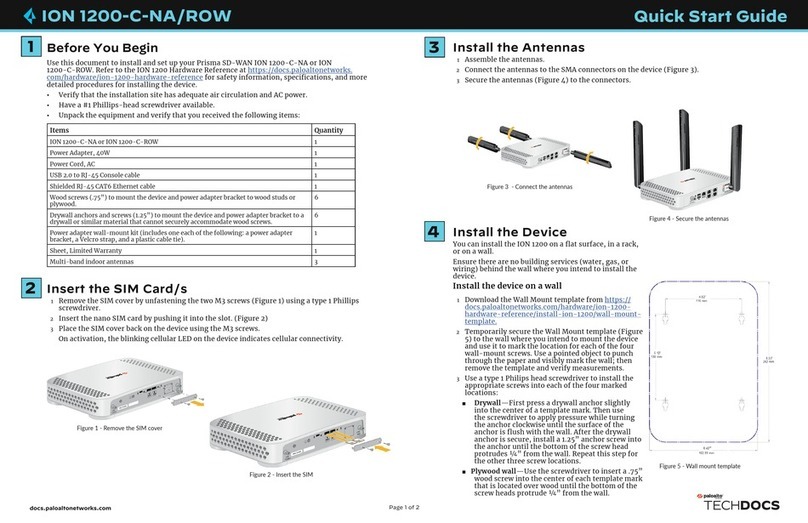
PaloAlto Networks ION 1200-C-NA/ROW User manual

PaloAlto Networks

PaloAlto Networks ION 1200-C-NA/ROW User manual

PaloAlto Networks TECHDOCS ION 1200 User manual

PaloAlto Networks

PaloAlto Networks TECHDOCS ION 1200 User manual

PaloAlto Networks PA-5420 User manual

PaloAlto Networks

PaloAlto Networks PA-5420 User manual

PaloAlto Networks ION 9200 User manual

PaloAlto Networks

PaloAlto Networks ION 9200 User manual

PaloAlto Networks M-200 User manual

PaloAlto Networks

PaloAlto Networks M-200 User manual

PaloAlto Networks M-200 Application guide

PaloAlto Networks

PaloAlto Networks M-200 Application guide

PaloAlto Networks ION 3200 User manual

PaloAlto Networks

PaloAlto Networks ION 3200 User manual

PaloAlto Networks PA-455 User manual

PaloAlto Networks

PaloAlto Networks PA-455 User manual

PaloAlto Networks PA-5400 Series User manual

PaloAlto Networks

PaloAlto Networks PA-5400 Series User manual

PaloAlto Networks PA-400 Series Application guide

PaloAlto Networks

PaloAlto Networks PA-400 Series Application guide

PaloAlto Networks ION 1200-S Application guide
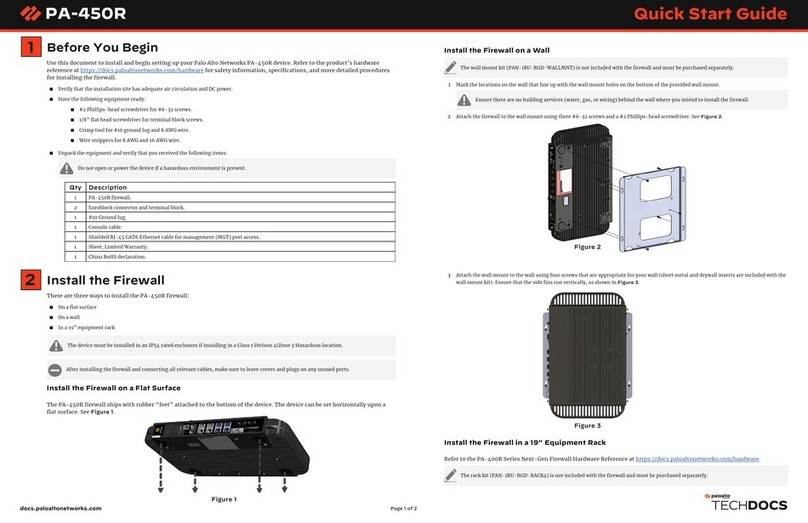
PaloAlto Networks

PaloAlto Networks ION 1200-S Application guide

PaloAlto Networks PA-7500 Application guide

PaloAlto Networks

PaloAlto Networks PA-7500 Application guide

PaloAlto Networks ION 3200 Application guide

PaloAlto Networks

PaloAlto Networks ION 3200 Application guide

PaloAlto Networks M-500 User manual

PaloAlto Networks

PaloAlto Networks M-500 User manual
Popular Network Hardware manuals by other brands

Extreme Networks AP305C Accessories guide

Extreme Networks

Extreme Networks AP305C Accessories guide

Nexcom NSA7150 Quick reference guide

Nexcom

Nexcom NSA7150 Quick reference guide

Crestron 8 Channel Dimmer Module CLX-1DIM8 Specification sheet

Crestron

Crestron 8 Channel Dimmer Module CLX-1DIM8 Specification sheet

Cisco Firepower 9300 Installation & maintenance

Cisco

Cisco Firepower 9300 Installation & maintenance

Panasonic LJ-SK56A user manual

Panasonic

Panasonic LJ-SK56A user manual

tufin T-1100 quick start guide

tufin

tufin T-1100 quick start guide

Kaseya Unitrends Recovery Series quick start guide

Kaseya

Kaseya Unitrends Recovery Series quick start guide

Lumisys LUMISCAN ACR-2000 Service manual

Lumisys

Lumisys LUMISCAN ACR-2000 Service manual

Bosch VideoJet X10/X20/X40 Quick installation guide

Bosch

Bosch VideoJet X10/X20/X40 Quick installation guide

HIRED-HAND 6607-8036 Installation & operation manual

HIRED-HAND

HIRED-HAND 6607-8036 Installation & operation manual

Amped Wireless AV3000 Setup guide

Amped Wireless

Amped Wireless AV3000 Setup guide

Xyclop XC-4CH-NVR-1TB user manual

Xyclop

Xyclop XC-4CH-NVR-1TB user manual

Canon VK-16 v2.0 Administrator's manual

Canon

Canon VK-16 v2.0 Administrator's manual

H3C H3C S7500E Series installation manual

H3C

H3C H3C S7500E Series installation manual

Tenda TES70 Series Quick installation guide

Tenda

Tenda TES70 Series Quick installation guide

AVPro Edge ConferX AC-CX42-AUHD quick start guide

AVPro Edge

AVPro Edge ConferX AC-CX42-AUHD quick start guide

I-Tech YPM2010P user manual

I-Tech

I-Tech YPM2010P user manual

Tripp Lite N48LSM-16X16 owner's manual

Tripp Lite

Tripp Lite N48LSM-16X16 owner's manual

manuals.online logo
manuals.online logoBrands
  • About & Mission
  • Contact us
  • Privacy Policy
  • Terms and Conditions

Copyright 2025 Manuals.Online. All Rights Reserved.