manuals.online logo
Brands
  1. Home
  2. •
  3. Brands
  4. •
  5. Panasonic
  6. •
  7. Printer Accessories
  8. •
  9. Panasonic KX-FP200 User manual

Panasonic KX-FP200 User manual

Pp
_
a
Compact
Plain
Paper
FAX
—
Model
No.
:
KX-FP200
Sas
KX-FP1
95
(
dares
si
FIRST
OPERATING
INSTRUCTIONS
————=——
EIS
H9INO
SUO|RadG
poadugApy
sbuijes
jeiseds
=
o
i
=
*]
2
5
Fo
SJe7)
dU/INOY
pue
Please
read
these
Operating
Instructions
*This
product
is
designed
for
use
in
the
=
before
using
the
unit
and
save
for
future
United
States
of
America,
and
may
not
5
reference.
operate
in
other
countries.
(See
page
74
for
2
more
details.)
=
*Este
producto
ha
sido
disefado
para
su
uso
a
FOR
OPERATION
ASSISTANCE
en
los
Estados
Unidos
de
América,
y
puede
no
funcionar
correctamente
en
otros
paises.
(Consulte
la
pagina
74
para
tener
més
detalles.)
CALL
1-800-HELP-FAX
(1-800-435-7329)
Thank
you
for
purchasing
the
Panasonic
Compact
Plain
Paper
Facsimile.
Welcome
to
the
world
of
Panasonic
facsimiles.
This
Panasonic
compact
plain
paper
facsimile
combines
the
telephone,
fax,
copier,
and
TAM
interface
functions
to
provide
you
with
more
efficient
office
or
home
use.
By
utilizing
these
convenient
features,
you
can
maximize
the
effectiveness
of
this
unit.
Things
you
should
keep
records
of
For
your
future
reference
Date
of
purchase
Serial
No.
(found
on
the
bottom
of
the
unit)
Dealer's
name
and
address
Dealer’s
telephone
number
Caution:
The
telephone
Protection
Act
of
1991
requires
the
following
information
to
be
clearly
stated
either
at
the
top
or
bottom
margin
of
the
first
message
page
when
transmitting
messages
via
telephone
facsimile;
—Date
and
time
of
transmission,
—Identification
of
the
business,
entity
or
person(s)
sending
the
facsimile
and,
—Telephone
number
of
the
business,
entity
or
person(s).
To
program
this
information
into
your
facsimile
machine,
complete
all
the
instructions
on
pages
12
through
14.
@Note
that
the
images
of
copied
or
received
documents
will
remain
on
the
used
film.
When
disposing
of
the
used
film,
use
discretion.
@Do
not
rub
or
use
an
eraser
on
the
printed
side,
as
the
print
may
smear.
Copyright:
This
manual
is
copyrighted
by
Kyushu
Matsushita
Electric
Co.,
Ltd.
(KME)
and
its
licensee.
Under
the
copyright
laws,
this
manual
may
not
be
reproduced
in
any
form,
in
whole
or
part,
without
the
prior
written
consent
of
KME
and
its
licensee.
©
Kyushu
Matsushita
Electric
Co.,
Ltd.
1997
Important
safety
instructions
When
using
this
unit,
basic
safety
precautions
should
always
be
followed
to
reduce
the
risk
of
fire,
electric
shock,
or
personal
injury.
1.
Read
and
understand
all
instructions.
2.
Follow
all
warnings
and
instructions
marked
on
this
unit.
3.
Unplug
this unit
from
AC
outlets
before
cleaning.
Do
not
use
liquid
or
aerosol
cleaners.
Use
a
damp
cloth
for
cleaning.
4.
Do
not
use
this
unit
near
water,
for
example,
near
a
bath
tub,
wash
bowl,
kitchen
sink,
or
the
like.
5.
Place
this unit
securely
on
a
stable
surface.
Serious
damage
and/or
injury
may
result
if
the
unit
falls.
6.
Do
not
cover
stots
and
openings
on
the
unit.
They
are
provided
for
ventilation
and
protection
against
overheating.
Never
place
the
unit
near
radiators,
or
in
a
place
where
proper
ventilation
is
not
provided.
7.
Use
only
the
power
source
marked
on
the
unit.
If
you
are
not
sure
of
the
type
of
power
supplied
to
your
home,
consult
your
dealer
or
local
power
company.
8.
For
Safety
purposes
this
product
is
equipped
with
a
three
prong
grounded
plug.
If
you
do
not
have
this
type
of
outlet,
please
have
one
installed.
Do
not
use
any
type
of
adaptor
plug
to
defeat
this
safety
feature.
9.
Do
not
place
objects
on
the
power
cord.
Install
the
unit
where
no
one
can
step
or
trip
on
the
cord.
10.
Do
not
overload
wall
outlets
and
extension
cords.
This
can
result
in
the
risk
of
fire
or
electric
shock.
11.
Never
push
any
objects
through
slots
in
this
unit.
This
may
result
in
the
risk
of
fire
or
electric
shock.
Never
spill
any
liquid
on
the
unit.
12.
To
reduce
the
risk
of
electric
shock,
do
not
disassemble
this
unit.
Take
the
unit
to
an
authorized
servicenter
when
service
is
required.
Opening
or
removing
covers
may
expose
you
to
dangerous
voltages
or
other
risks.
Incorrect
reassembly
can
cause
electric
shock
when
the
unit
is
subsequently
used.
13.
Unplug
this
unit
from
the
wall
outlet
and
refer
servicing
to
an
authorized
servicenter
when
the
following
conditions
occur:
A.
When
the
power
supply
cord
or
plug
is
damaged
or
frayed.
B.
If
liquid
has
been
spilled
into
the
unit.
C.
If
the
unit
has
been
exposed
to
rain
or
water.
D.
If
the
unit
does
not
work
normally
by
following
the
operating
instructions.
Adjust
only
controls
covered
by
the
operating
instructions.
Improper
adjustment
may
require
extensive
work
by
an
authorized
servicenter.
E.
If
the
unit
has
been
dropped
or
physically
damaged.
F.
If
the
unit
exhibits
a
distinct
change
in
performance.
14.
During
thunderstorms,
avoid
using
telephones
except
cordless
types.
There
may
be
a
remote
risk
of
an
electric
shock
from
lightning.
15.
Do
not
use
this
unit
to
report
a
gas
leak,
when
in
the
vicinity
of
the
leak.
SAVE
THESE
INSTRUCTIONS
INSTALLATION:
1.
Never
install
telephone
wiring
during
a
lightning
storm.
2.
Never
install
telephone
jacks
in
wet
locations
untess
the
jack
is
specifically
designed
for
wet
locations.
3.
Never
touch
uninsulated
telephone
wires
or
terminals
unless
the
telephone
line
has
been
disconnected
at
the
network
interface.
4.
Use
caution
when
installing
or
modifying
telephone
lines.
WARNING:
To
prevent
the
risk
of
fire
or
electrical
shock,
do
not
expose
this
product
to
rain
or
any
type
of
moisture.
OTHER
INFORMATION
oKeep
the
unit
away
from
electrical
noise-
generating
devices,
such
as
fluorescent
lamps
and
motors.
oThe
unit
should
be
kept
free
from
dust,
high
temperature,
and
vibration.
oThe
unit
should
not
be
exposed
to
direct
sunlight.
©Do
not
place
heavy
objects
on
top
of
this
unit.
©Do
not
touch
the
plug
with
wet
hands.
Quick
Start
HNO
WAINKGSC.
Table
of
Contents
Before
you
start
olncluded
accessories
............
a
ioe
trduigientea
sa
sca
toise
wer
naceraons
oAccessory
order
information
.....
0...
ccc
cee
eee
ee
eee
GOVCIVIEW
“26
caries
aiaGa
gas eud
ss
ee
ee
een
ene
Installation
olnstalling:
the:dIVENO!
2
i564
3s
dat
waow
Seder
evaliainn
cea
ane
OINsialling
ING‘
PAPE!
oie
sea
bc
tScSt
eet
e
bee
eea
as
rea
ee
anew
s
oConnecting
the
telephone
line
and
the
power
outlet
............
OLOCATION
OF
CONIONS:.
ssiitt
cites
au
able
eid
crawewene
med
await
Shei
TUNCHON:
«het
terethaen
cate
eases
Canaries
tae
enews
Initial
preparation
oSetting
the
date
and
time...
61...
ee
eee
cee
ees
OSSUNG
YOUN
IOGO’
ni
janceGrei
od
atone
tecw
sc
aoa
nee
eee
eae
oSetting
your
facsimile
telephone
number
................00008-
Basic
operations
OMAKING
VOICC
CallS
s)..civitensiesebietessec
tasters
vseeraud
eae
oAnswering
voice
CallS
.....
kc
ce
ee
ee
ee
ee
ene
aes
OMAKING:
ACODY)
garisial
teed
cen
tins
ccs
eraan
teu
essts
tao
SOTransmitling
GOCUMENS
sos
..%
once
ceca
ee
Sees
eee
haa
edad
oReceiving
documents
(receive
mode,
etc.)
2...
eee
ee
eee
Special
receiving
modes
EXT.TAM
mode
(recording
voice
messages
and/or
receiving
documents)
.
.
TEL/FAX
mode
(automatic
voice
and
fax
recognition)...............65)
Automatic
dialing
Storing
phone
numbers
for
automatic
dialing
...........
0...
cee
Making
voice
calls
using
automatic
dialing
.....
0...
0...
eee
eee
eee
Transmitting
documents
using
automatic
dialing
..................
Electronic
telephone
directory
(selecting
a
station
name
in
the
directory)
.
.
Telephone
Voice
contact
(talking
to
the
caller
during
or
after
fax
reception
or
transMiSSiION)
6...
ee
teens
TONE,
FLASH
and
REDIAL/PAUSE
buttons
...............
000000
Special
sending
features
Polling
(retrieving
fax
documents)
......
0...
0c
cee
eee
eee
ee
eee
Delayed
transmission
(sending
a
fax
at
alater
time)
...............00.
Transmitting
documents
from
Memory
.........
0.
cee
ee
ee
ee
Transmitting
documents
to
multistations
.........
0.0...
cece
eee
eee
Reserving
transmission
during
fax
reception
.................
0008
PAMING
A
COVES
PAGE
b6wcs05
SceawdwkaS
Seeders
Bee dee
ess
4
Special
receiving
features
Remote
fax
receiving
(using
an
extension
phone
to
receive
a
fax
message)
.
.
Junk
mail
prohibditor
(preventing
the
reception
of
unwanted
fax
documents)
.
.
Receiving
with
a
distinctive
ring
Service
2.1.0...
cee
ee
eee
eee
Enhanced
copy
features
Making
an:
extension
COPY
jcisiecdied
Weenie
cea
oeee
ceed
ys
Making
a:
Teguction:
CODY
sais.
ates
iamehieneseeaweceedes
For
Assistance,
Call
1-800-435-7329
Settings
JROUDESNOCUME
and
Routine
Care
General
Summary
of
user
programmable
features
...........
0...
ce
eee
eee
43
Setting
the
FAX
mode
ring
count
.......
20.0...
.
cece
eee
eee
44
Setting
the
TEL/FAX
mode
ring
Count
...........
0...
cee
eee
ee
45
Setting
the
silent
fax
recognition
ring
count.
................0.06-
45
Setting
the
dialing
Mode
.....
1...
eee
eee
eee
eee
46
Changing
the
logo
print
position
.......
0...
cece
eee
ee
ees
46
Sending
documents
OverS€aS
«1...
ee
eee
eee
47
Film/Paper
save
reception
.........
0...
ccc
eee
eee
eee
48
Receiving
oversized
documnentS
.......
0...
c
cece
eee
eee
ee
ees
49
Changing
the
display
contrast
«1.0.0...
cece
eee
sie
50
Setting
the
silent
detection
.....
0...
0...
cece
eee
ee
ees
51
Setting
the
memory
reception
alert
.........
0...
cee
eee
eee
52
Setting
the
friendly
reception
.......
0.0...
ccc
eee
ee
eee
52
Signaling
your
pager
that
you
have
received
a
fax
document......
53
Setting
the
film
detection...
.
cece
eee
ees
54
Resetting
the
advanced
features
.....
0...
ccc
cece
cee
eee
eee
55
Printing
reports
and
listS:...
vnc.ssi
es
eek
cies
kee
ee
ead
eee
wees
56
Troubleshooting
Error
messages
on
the
display
.......
0.0.
cece
cece
eee
eens
59
Before
requesting
help
2...
cee
cece
eee
eee
nee
eee
61
If
a
power
failure
OCCUIS...
2...
eee
eee
e
ete
eneee
63
Clearing
a
recording
paper
jam
...........
ec
eee
eee
ee
eens
64
Clearing
a
GOCuUMONUIAM:
isacdcotssesa.
ead
Seneeus
bee
aroeties
66
Adjusting
the
feeder
pressure...
ke
ce
cee
en
eens
66
Routine
care
Checking
the
remaining
filM
.........
0...
cece
cece
eee
te
ees
67
Replacing
the
film
or
film
cartridge
.....
0...
.
ccc
eee
cee
ee
ees
67
Cleaning
the
inside
of
the
unit
2.0.0...
0.0...
ce
cece
cee
eee
tenes
69
ECC
INOMMaAllOn,
aqneeede
tela
ae
eeetee
taken
COA
a
eo
70
LIPMGG:
WATANY
asics
wis,
waste
Nees
seaweed
dane
ew le
eta
eke
71
SEVICE-
CONIC!
GIECIONY
|
xaicants
ose
ee
ea
oe
wd
Cage
ORNS
ee Oe
72
User
information
........
io
ttvcted
Sy
rau
Smpetete
hates
Baclin
is
eae
out
Biers
73
SPSCIICALONS:
ss¢ndiure
cewek
header
eee
foie
We
Deeds
winless
74
One-touch
dialing
list/Speed
dialing
list
.........
0... cece
eee
ee
eee
75
NOOK
Scere
te
Sag
tiret
See
ee
nan
aes
teee
eC
ew
ere
EER
Taree
soe?
79
For
Assistance,
Call
1-800-435-7329
°
YWELS
INO
(3)
sot
fA
OR
ay
(X)
=F
OB
rs
(eh
Quick
Start
Before
you
start
Before
you
siart
Included
accessories
(To
order,
call
toll
free
1-800-332-5368.)
Power
cord
......
1
pe.
Part
No.
PQJA200Z
Telephone
line
=~
~—*|{|:
Handset..........
.
|
Handsetcord
....
1
pe.
COM:
asavevownecte
1
pe.
Part
No.
PQJA212M
Part
No.
PQUASSV
C/
=>)
Ay
Diverter
..........
1
pe.
Part
No.
PFUS1074Z
Paper
tray........
1
pe.
Part
No.
PFYEFP200
Film
cartridge
....
1
pc.
(with
starter
film)
—The
film
cartridge
is
pre-installed.
@lf
any
items
are
missing
or
damaged,
check
with
the
place
of
purchase.
©The
part
numbers
listed
above
are
subject
to
change
without
notice.
Save
the
original
carton
and
packing
materials
for
future
shipping
and
transporting
of
the
unit.
Accessory
order
information
The
starter
film
is
only
20
meters
(65’)
long.
We
recommend
buying
regular
film
[100
m
(328')]
for
extra
stock.
For
accessory
order,
call
toll
free
1-800-332-5368.
;
1
cartridge
and
1
film
Film
has
been
already
SEATS
nil
canndge
[216
mmx
100
m
(8%”
x
328’)
roll]
|
installed
in
the
cartridge.
2
films
Film
only.
Use
with
your
REN
Se
Fepicement
ire
216
mmx
100
m
(81%"x
328’)
rolls
|
original
cartridge.
Caution:
The
film
is
not
reusable.
If
you
rewind
the
used
film
and
use
it
again,
the
printout
will
be
faint
and
letters
may
be
missing.
6
For
accessory
order,
call
toll
free
1-800-332-5368
Overview
Paper
tray
Document
entrance
Speaker
Recording
paper
entrance
Document
feeder
tray
Recording
paper
set
lever
Recording
paper
exit
Paper
stacker
Front
cover
open
lever
Microphone
(Used
to
talk
the
other
party
when
using
the
speakerphone.)
Diverter
Document
exit
For
Assistance,
Call
1-800-435-7329
7
ueIS
DINO
weis
noA
alojog
Quick
Start
Installation
Installation
Installing
the
diverter
Insert
the
diverter
into
the
slots
on
the
main
unit
until
it
clicks
into
place.
Instailing
the
paper
The
recording
paper
size
that
can
be
loaded
is
letter
or
egal.
The
paper
tray
can
hold
up
to
150
sheets
of
75
g/m?
(20
Ib.)
paper.
Use
60
to
90
g/m?
(16
to
24
Ib.)
paper.
|
Open
the
paper
tray.
Paper
tray
as
ae
D
Insert
the
two
fins
on
the
paper
tray
into
the
slots
on
the
back
of
the
unit.
3
Pull
the
recording
paper
set
lever
forwards.
Recording
paper
set
lever
8
For
Assistance,
Call
1-800-435-7329
ra
Fan
the
stack
of
paper
to
avoid
a
paper
jam
and
insert
the
paper
into
the
paper
tray.
Upper
limit
eThe
height
of
the
stack
of
the
paper
should
not
exceed
the
upper
limit
on
the
paper
tray,
or
it
may
cause
a
paper
jam.
@)
oThe
paper
should
not
be
over
the
tab.
=
olf
the
paper
is
not
inserted
correctly,
readjust
the
QO
paper
or
a
paper
jam
may
occur.
sc
stack
of
os
~*
paper
a
Paper
tray
=
Correct
Incorrect
Move
the
recording
paper
set
lever
back.
Recording
paper
olf
the
lever
releases,
the
unit
will
beep
and
the
set
lever
following
message
is
displayed.
=
Move
the
lever
back
again.
a
S
=
6
Pull
out
the
paper
stacker
from
the
bottom
of
the
unit
completely.
©Do
not
place
the
unit
in
areas
where
the
paper
tray
may
be
obstructed
by
walls,
etc.
Note:
©Do
not
use
different
types
or
thicknesses
of
paper
in
the
paper
tray
at
the
same
time.
This
may
cause
a
paper
jam.
oAvoid
extremely
smooth
or
shiny
paper
that
is
highly
textured.
Also
avoid
paper
that
is
coated,
damaged
or
wrinkled
paper
with
a
cotton
and/or
fiber
content
that
is
over
20 %.
Avoid
used
paper
for
double-sided
printing.
eDo
not
use
paper
printed
from
this
unit
for
double-sided
printing
with
other
copiers
or
printers,
or
a
paper
jam
may
occur.
Adding
paper
to
the
paper
tray
Recording
paper
1.
Pull
the
recording
paper
set
lever
forwards.
set
lever
oThe
unit
will
beep
and
the
following
message
is
displayed.
Remove
the
installed
paper.
Add
paper
to
the
removed
paper.
Fan
the
stack
of
paper
and
insert
it
into
the
paper
tray.
5.
Move
the
recording
paper
set
lever
back.
For
Assistance,
Call
1-800-435-7329
9
POR
Quick
Start
Installation
Connecting
the
telephone
line
and
the
power
outlet
1.
Connect
the
handset
and
handset
cord.
2.
Connect
the
telephone
fine
cord.
3.
Connect
the
power
cord.
oThe
unit
will
print
an
information
list.
Power
socket
Connect
to
LINE.
Power
cord
=>
J
=>
Single
telephone
line
(RJ11C)
Line
surge
protector
)
=>
TJ
=>
Power
outlet
(120
V,
60
Hz)
Power
surge
(
protector
)
Telephone
line
cord
Note:
For
additional
equipment
protection,
we
recommend
the
use
of
a
surge
protector.
The
following
types
are
available;
TELESPIKE
BLOK
MODEL
TSB
(TRIPPE
MFG.
CO.),
SPIKE
BLOK
MODEL
SK6-0
(TRIPPE
MFG.
CO.),
SUPER
MAX
(PANAMAX)
or
MP1
(ITW
LINX).
oWhen
you
operate
this
product,
the
power
outlet
should
be
near
the
product
and
easily
accessible.
Automatic
dialing
mode
setting
When
the
power
cord
is
connected,
the
unit
will
start
detecting
the
dialing
mode.
Display:
|
CHECKING
LINE
Wait
until
one
of
the
following
messages
is
displayed.
—lIf
your
line
has
touch
tone
service,
the
unit
will
display
the
following
message.
LINE
IS
TONE
—lf
your
line
has
rotary
pulse
dial
service,
the
unit
will
display
the
following
message.
LINE
IS
PULSE
olf
you
connect
the
power
cord
before
connecting
the
telephone
line
cord,
the
following
messages
will
be
shown
alternately.
CONNECT
TEL
LINE
|<*e>}/}
TEL
LINE
IS
OPEN
Connect
the
telephone
line
cord.
olf
the
power
cord
is
disconnected
or
a
power
failure
occurs,
the
unit
will
detect
the
dialing
mode
again
when
power
is
restored.
©You
can
change
the
diating
mode
setting
manually.
See
“Setting
the
dialing
mode”
on
page
46.
10
For
Assistance,
Call
1-800-435-7329
Location
of
controls
Used
to
select
a
resolution
(p.
17).
Used
for
one-touch
dialing.
Also
used
as
character
and
command
keys
(p.
13,
27,
28).
Checks
the
amount
of
remaining
film
(p.
67).
Dial
keypad
Used
to
print
a
quick
reference
(see
below).
Used
to
initiate/exit
programming.
Used
for
speed
dialing
(p.
28,
29).
Used
for
multistation
transmission
Display
panel
(p.
35,
36).
AUTO;RECEIVE!
Go
cet
i)
Mic
SS
1]
E
a
a,
ee
a
Used
to
select
a
lower
station
(p.
27,
28).
Used
to
turn
on/off
the
auto
receive
mode
(p.
19,
21).
Used
to
stop
an
operation
or
programming.
Used
for
voice
muting
(p.
15).
Used
for
the
speakerphone
operation
(p.
15).
Redials
the
last
number
dialed.
Also
inserts
a
pause
during
dialing
(p.
31).
Adjusts
ringer/nandset/speaker
volumes.
Also
used
as
a
cursor
key
or
a
selection
key
(p.
12,
15,
16).
Changes
from
pulse
to
tone
during
dialing
(p.
31).
Used
to
initiate
fax
transmission/reception
and
copying.
Also
used
to
store
a
parameter
during
programming.
Used
as
a
hookswitch
(p.
31).
Flelp
function
For
assistance,
press
[HELP
).
The
unit
will
print
a
quick
reference.
For
Assistance,
Call
1-800-435-7329
17
WELS
WINO
UONE]]EISU]
Quick
Start
Initial
preparation
Initial
preparation
Before
using
your
unit,
program
the
correct
date
and
time,
your
!ogo
and
your
facsimile
telephone
number.
This
information
will
be
printed
on
the
top
of
each
page
transmitted
from
your
unit.
Your
logo
Your
facsimile
telephone
number
Date
and
time
FROM
:
Panasonic
Fax
system
PHONE
NO
:
1234567
Feb.
26
1997
04:02PM
Pl
Fax
Correspondence
Setting
the
date
and
time
1
Press
(MENU).
7
Press
(START/COPY/SET).
D
Press
(#],
then
(0)
(1).
Press
(MENU).
3)
Press
|START/COPY/SET
}.
A
Enter
the
correct
month/day/year
by
selecting
Dial
keypad
=
@WENU)
each
2
digits.
|
Example:
Aug.
10
1997
Press
(0](8)
{1
(0)
(9
[7].
olf
you
make
a
mistake,
press
(VOLUME
))
to
move
the
cursor
to
the
incorrect
number,
then
make
corrections.
B
Press
|START/COPY/SET).
START/COPY/SET
(6)
Enter
the
correct
hour/minute
by
selecting
each
2
digits.
Press
(3¢]
to
select
AM
or
PM.
Example:
3:00PM
Press
[0](3](0][0],
then
press
until
PM
is
displayed.
;
.
Note:
olf
you
press
while
programming,
the
olf
you
make
a
mistake,
press
display
will
return
to
the
previous
one.
((VOLUME))
to
move
the
cursor
to
the
oThe
accuracy
of
the
clock
will
be
incorrect
number,
then
make
corrections.
approximately
+60
seconds
a
month.
12
For
Assistance,
Call
1-800-435-7329
Setting
your
logo
The
logo
can
be
a
company,
division
or
personal
name
in
an
abbreviated
form.
|
Press
(MENU).
.
Direct
call
Dial
keypad
(MENU]|
station
keys
Display:
|
SYSTEM
SET
UP
?
Press
(#],
then
(0]
(2).
YOUR LOGO
3
Press
[START/COPY/SET
|.
LOGO=
A
Enter
your
logo
up
to
30
characters
using
the
dial
keypad
and
direct
call
station
keys.
For
example,
when
entering
“Bill”
as
your
logo:
adel
ee
boost
Character
table
2.
Press
(4]
six
times.
eee
i
atiti+
Fs
4.
Press
(>)
((VOLUME))
to
move
the
cursor
DEFdefs
and
press
[5] six
times.
GHIghi4
pial
|CD[
J
KLIKIS
Note:
olf
you
use
the
same
number
key
continuously
(2)
PQRSpars?
to
enter
the
next
character,
press
TUVtuvs
(>)
(VOLUME))
to
move
the
cursor.
fa)
WIV
2
wx
ye
5
Press
(START/COPY/SET).
we.
O()<>!"#$%R&¥
?
321k
@At
>
|
*
@
321k
@At
>
|
6
Press
(MENU).
Ca
key
(Used
to
insert
one
character
or
one
space.)
SECRET
key
(Used
for
automatic
dialing
on
page
27.)
To
correct
a
mistake
while
i
SPACE
key
(Used
to
replace
one
P
character
with
a
space.)
programming
DELETE
key
(Used
to
delete
one
character.)
3.
Press
[5]
six
times.
Use
((VOLUME))
to
move
the
cursor
to
the
incorrect
character,
then
make
the
correction.
=
HYPHEN
key
(Used
to
insert
a
hyphen.)
<J
key
(Used
to
move
the
cursor
to
the
left.)
2
>
key
(Used
to
move
the
cursor
to
(er)
the
right.)
or
Press
[STOP
|
to
delete
the
character
to
the
left
of
the
cursor.
For
Assistance,
Call
1-800-435-7329
13
WES
WINO
uonesedaid
jeniuy
Quick
Start
Initial
preparation
Setting
your
facsimile
telephone
number
T
2
3
14
Press
(MENU).
(MENU)
Dial
keypad
Display:
|
SYSTEM
SET
UP
Press
[#],
then
[0]
(3].
‘O@O@
\OQ@a
ee
Press
|[START/COPY/SET
.
NOQ.=
Enter
your
facsimile
telephone
number
up
to
20
digits.
©The
(#]
button
inserts
a
space
and
the
[3]
button
a
i
olf
you
make
a
mistake,
press
[STOP]
to
delete
the
wrong
number
to
the
left
of
the
cursor.
OR
Press
((VOLUME))
to
move
the
cursor
to
the
incorrect
number,
then
make
corrections.
Press
|START/COPY/SET).
Press
(MENU).
For
Assistance,
Call
1-800-435-7329
(MENU)
sor)
((VOLUME))
START/COPY/SET
Basic
operations
Making
voice
calls
|
Press
[SP-PHONE
]
or
lift
the
handset.
D
Dial
the
phone
number,
olf
you
misdial,
hang
up
and
dial
again.
3
When
the
other
party
answers,
speak
into
the
microphone
or
handset.
Al
When
finished,
press
or
hang
up
the
handset.
Microphone
Voice
muting
Handset
volume
Using
this
feature,
the
other
party
cannot
hear
you
Press
(VOLUME)
(V/A)
while
using
the
handset.
but
you
can
hear
them.
©3
levels
(high/middle/low)
are
available.
1.
Press
[MUTE
)
during
a
telephone
conversation.
Display:
Speaker
volume
2.
To
resume
the
conversation,
press
(MUTE).
Press
(VOLUME)
(V/A)
while
using
the
speakerphone.
.
;
08
levels
(high
to
low)
are
available.
Hints
for
speakerphone
operation
oUse
the
speakerphone
in
a
quiet
room.
olf
you
have
difficulty
hearing
the
other
party,
adjust
the
volume
using
(VOLUME).
olf
you
and
the
other
party
speak
at
the
same
time,
parts
of
your
conversation
will
be
cut
off.
©TOo
switch
to
the
handset,
lift
the
handset.
To
switch
back
to
the
speakerphone,
press
(SP-PHONE).
For
Assistance,
Call
1-800-435-7329
19
HE'S
YIINO
suonesado
oiseg
Quick
Start
Basic
operations
Answering
voice
calls
1
When
the
unit
rings,
press
or
lift
the
handset.
?
When
finished,
press
or
hang
up
the
handset.
Ringer
volume
Press
|
VOLUME}
(V/A)
while
the
unit
is
idle.
04
levels
(high/middle/low/off)
are
available.
To
turn
the
ringer
off:
1.
Press
[VOLUME
)
(V)
repeatedly.
©The
following
messages
will
be
shown
alternately.
Display:
|
RINGER
OFF=
OK?
YES:
PRESS
SET
2.
Press
(START/COPY/SET
).
While
the
ringer
volume
is
set
to
off:
The
display
will
show
the
following
message
and
the
unit
will
not
ring
when
receiving
a
call.
RINGER
OFF
When
receiving
a
call,
the
unit
will
not
ring
but
show
the
following
message.
INCOMING
CALL
|
a
IE
ey
a
VOLUME
START/COPY/SET
16
For
Assistance,
Call
1-800-435-7329
Making
a
copy
Any
transmittable
document
can
be
copied.
Open
the
document
feeder
tray.
Insert
the
document
(up
to
15
sheets)
FACE
DOWN
until
a
beep
tone
is
heard.
Adjust
the
document
guides
to
the
width
of
the
document.
Press
[RESOLUTION
repeatedly
to
the
desired
setting,
if
needed
(see
below).
Press
|[START/COPY/SET).
©The
unit
will
start
printing.
Cl
&
EG
PP
Note:
oWhen
copying,
the
unit
will
automatically
select
FINE
resolution.
oYou
can
make
or
receive
a
voice
call
while
making
a
copy.
Selecting
the
resolution
You
can
select
the
desired
resolution
by
pressing
RESOLUTION).
For
printed
or
STANDARD
oa
typewritten
originals
|
with
normal-sized
characters.
;
small
printing.
y
minute
printing.
containing
photographs,
shaded
drawings,
etc.
Note:
oUsing
the
fine,
super
fine
or
half
tone
setting
will
increase
the
transmission
time.
olf
the
resolution
setting
is
changed
during
feeding,
it
will
be
effective
from
the
next
sheet.
oThe
super
fine
resolution
only
works
with
other
compatible
machines.
Document
———
feeder
tray
[
Document
guides
FACE
DOWN
i
i
Is
WE
STOP)
|
[RESOLUTION
START/COPY/SET
To
stop
copying
Press
(STOP).
To
feed
16
or
more
sheets
at
a
time
Insert
the
first
15
sheets
of
the
document.
Add
the
extra
sheets
(up
to
15)
before
the
last
sheet
is
fed
into
the
unit.
For
Assistance,
Call
1-800-435-7329
17
MELS
WIINO
suoleiado
siseg
Quick
Start
Basic
operations
Transmitting
documents
1
Open
the
document
feeder
tray.
Document
Document
guides
feeder
tray
2
Insert
the
document
FACE
DOWN
(up
to
15
sheets)
until
a
beep
tone
is
heard.
Adjust
the
document
guides
to
the
width
of
the
document.
Press
[RESOLUTION]
repeatedly
to
the
desired
setting,
if
needed
(see
page
17).
Press
[SP-PHONE
)
or
lift
the
handset.
Dial
the
phone
number.
olf
you
misdial,
hang
up
and
dial
again.
When
a
fax
tone
is
heard,
press
START/COPY/SET).
Hang
up
the
handset,
if
using
it.
START/COPY/SET
=J
G29
ol
&
C9
To
stop
transmission
Note:
Press
(STOP).
olf
the
other
party
answers
your
call,
ask
them
to
start
oTo
eject
the
document,
press
STOP
again.
receiving
a
fax,
then
press
your
(START/COPY/SET
).
Documents
the
unit
can
feed
Minimum
size
Maximum
size
Effective
scanning
area
Document
weight
ca
7
=
ee
|
Single
sheet:
o
a
Scanned
45
to
90
g/m?
(12
to
24
lb.)
2
\ES
area
Multiple
sheets:
a
Sa
60
to
75
g/m?
(16
to
20
Ib.)
oO
—
128
mm
4mm
5"
soa
e
ve
ft
208
mm
(8%e6")
le
216
mm
>|
Paper
width
Note:
oRemove
clips,
staples
or
other
similar
fastening
objects.
oCheck
that
ink,
paste
or
correction
fluid
has
dried.
°Do
not
send
the
following
types
of
documents.
Use
copies
for
fax
transmission.
—Chemically
treated
paper
such
as
carbon
or
carbonless
duplicating
paper
—Electrostatically
charged
paper
—
Heavily
curled,
creased
or
torn
paper
—
Paper
with
a
coated
surface
~—
Paper
with
a
faint
image
—
Paper
with
printing
on
the
opposite
side
that
can
be
seen
through
the
front
(e.g.
newspaper)
18
For
Assistance,
Call
1-800-435-7329
Receiving
documents
(receive
mode,
etc.)
Setting
the
receive
mode
The
unit
has
two
receive
modes:
The
AUTO
RECEIVE
mode
allows
your
unit
to
receive
all
calls
automatically
without
your
assistance.
Use
this
mode
when
you
wish
to
use
the
unit
solely
as
a
facsimile
machine
or
when
you
are
going
out.
The
MANUAL
RECEIVE
mode
lets
you
answer
calls
by
lifting
the
handset.
Use
this
mode
when
you
are
in
and
wish
to
answer
voice
and
fax
calls.
These
modes
can
be
selected
by
pressing
the
(AUTO
RECEIVE
|
button.
AUTO
RECEIVE
and
MANUAL
RECEIVE
have
two
different
receive
settings.
MANUAL
RECEIVE
MODE
Allows
you
to
answer
all
calls
manually.
WO
aca
CC)
When
the
unit
rings,
you
must
answer
all
calls
by
es
picking
up
the
handset.
oWhen
a
fax
call
is
received,
you
can
start
fax
The
FAX
indicator
is
off.
TEL
mode
reception
by
pressing
the
(pre-selected)
|
button.
For
further
details,
see
page
20.
off
you
answer
a
fax
call
using
an
extension
telephone
connected
to
the
same
line,
you
can
start
fax
reception
remotely
by
pressing
[¢][9].
For
further
details,
see
page
38.
Automatic
voice
and
fax
recognition
When
a
fax
call
is
detected,
the
unit
will
automatically
answer
the
line
and
start
reception.
TEL/FAX
When
a
voice
call
is
detected,
the
unit
will
start
to
ring.
You
can
lift
the
handset
to
answer
the
call.
For
further
information
about
this
mode,
see
pages
25
and
26.
To
change
the
number
of
rings
before
a
call
is
answered,
see
page
45.
mode
AUTO
RECEIVE
MODE
UTOIRECEIVE
FAX—
7.
Os
The
FAX
indicator
is
on.
Receives
fax
documents
only.
FAX
mode
(pre-selected)
The
unit
will
answer
all
calls
automatically
and
activate
the
fax
function
(see
page
21).
To
change
the
number
of
rings
before
a
call
is
answered,
see
page
44.
Records
voice
messages
and/or
receives
fax
documents
(used
with
an
external
telephone
answering
machine).
EXT.TAM
mode
When
a
voice
call
is
detected,
the
telephone
answering
machine
will
record
the
voice
message.
When
a
fax
call
is
detected,
the
facsimile
unit
will
receive
fax
documents.
For
further
information
about
this
mode,
see
pages
22
through
24.
For
Assistance,
Call
1-800-435-7329
19
MES
JONO
suonejssdo
siseg
Quick
Start
Basic
operations
Receiving
documents
(receive
mode,
etc.)
(cont.)
$=
Allowing
you
to
answer
all
calls
manually
(TEL
mode)
|
When
the
unit
rings,
press
or
lift
the
handset
to
answer
the
call.
yA
When:
—document
reception
is
required,
—a
slow
beep
is
heard,
or
—no
sound
is
heard,
press
(START/COPY/SET
).
3
Hang
up
the
handset
if
using
it.
Note:
olf
you
do
not
answer
a
call
by
15
rings,
the
unit
will
temporarily
activate
the
fax
function
to
receive
documents.
ge
The
FAX
indicator
START/COPY/SET)
's
off.
Friendly
reception
To
stop
reception
When
you
answer
the
call
and
hear
a
slow
beep,
Press
(STOP).
the
unit
will
automatically
start
reception
even
if
you
do
not
press
[START/COPY/SET
.
olf
this
feature
is
not
required,
set
to
OFF
(see
page
52).
Memory
reception
When
a
printing
problem
is
detected,
the
unit
will
temporarily
store
the
received
document
into
memory.
Whiie
documents
are
in
memory,
the
unit
will
—display
an
error
message
and
the
following
message
alternately;
Display:
|
FAX
IN
MEMORY
—alert
you
with
a
slow
beep
(Receive
alert).
©Follow
the
instructions
on
pages
59
and
60
to
clear
the
problem
and
print
the
stored
document.
oFor
memory
capacity,
see
page
74.
20
For
Assistance,
Call
1-800-435-7329
Other manuals for KX-FP200

1

This manual suits for next models

1

Other Panasonic Printer Accessories manuals

Panasonic KX-PPRC7 User manual

Panasonic

Panasonic KX-PPRC7 User manual

Panasonic KX-FLM551 Administrator Guide

Panasonic

Panasonic KX-FLM551 Administrator Guide

Panasonic Jetwriter KX-CLEM1 User manual

Panasonic

Panasonic Jetwriter KX-CLEM1 User manual

Panasonic KX-CLTC1 Parts list manual

Panasonic

Panasonic KX-CLTC1 Parts list manual

Panasonic Jetwriter KX-CLAD1 User manual

Panasonic

Panasonic Jetwriter KX-CLAD1 User manual

Panasonic Check Pnnting Accountant KX-RC105 User manual

Panasonic

Panasonic Check Pnnting Accountant KX-RC105 User manual

Panasonic KX-RC95 User manual

Panasonic

Panasonic KX-RC95 User manual

Panasonic Jetwriter KX-CLWT1 User manual

Panasonic

Panasonic Jetwriter KX-CLWT1 User manual

Panasonic Jetwriter KX-CLUG1 User manual

Panasonic

Panasonic Jetwriter KX-CLUG1 User manual

Panasonic KV-SS010 User manual

Panasonic

Panasonic KV-SS010 User manual

Panasonic Jetwriter KX-CLHD1 User manual

Panasonic

Panasonic Jetwriter KX-CLHD1 User manual

Panasonic KX-PFSU7 User manual

Panasonic

Panasonic KX-PFSU7 User manual

Panasonic KX-FA85 series User manual

Panasonic

Panasonic KX-FA85 series User manual

Panasonic KV-SS05 User manual

Panasonic

Panasonic KV-SS05 User manual

Panasonic Jetwriter KX-CLAU1 User manual

Panasonic

Panasonic Jetwriter KX-CLAU1 User manual

Panasonic KX-FA102 User manual

Panasonic

Panasonic KX-FA102 User manual

Panasonic Jetwriter KX-CLPK1 User manual

Panasonic

Panasonic Jetwriter KX-CLPK1 User manual

Panasonic Jetwriter KX-CLFU1 User manual

Panasonic

Panasonic Jetwriter KX-CLFU1 User manual

Panasonic Jetwriter KX-CLPF1 User manual

Panasonic

Panasonic Jetwriter KX-CLPF1 User manual

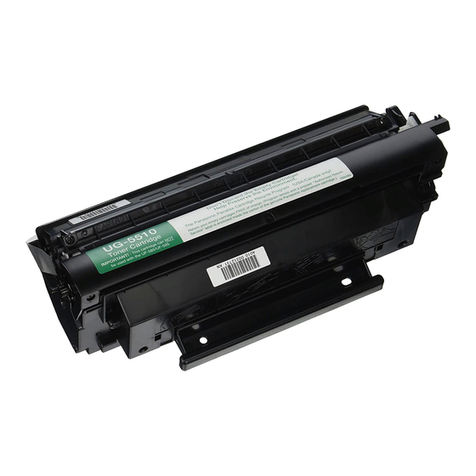
Panasonic UG-5510 Operating and maintenance instructions

Panasonic

Panasonic UG-5510 Operating and maintenance instructions

Panasonic KV-SS010 User manual

Panasonic

Panasonic KV-SS010 User manual

Popular Printer Accessories manuals by other brands

Avery Dennison Cutter 2000 Technical manual

Avery Dennison

Avery Dennison Cutter 2000 Technical manual

Epson C83202 user guide

Epson

Epson C83202 user guide

Lanier LD020c Type M20 Magenta Toner 480-0087 datasheet

Lanier

Lanier LD020c Type M20 Magenta Toner 480-0087 datasheet

Fujitsu FI-590PRF Operators Operator's guide

Fujitsu

Fujitsu FI-590PRF Operators Operator's guide

Ricoh Aficio 3228C installation instructions

Ricoh

Ricoh Aficio 3228C installation instructions

Epson Vi-POSIF-S Installing manual

Epson

Epson Vi-POSIF-S Installing manual

HP Color LaserJet CP3520 install guide

HP

HP Color LaserJet CP3520 install guide

Labelmate MC-11 user manual

Labelmate

Labelmate MC-11 user manual

KMP B-DR1 instructions

KMP

KMP B-DR1 instructions

Würth 0772 800 Translation of the original operating instructions

Würth

Würth 0772 800 Translation of the original operating instructions

EFI KM-C1530 Job management guide

EFI

EFI KM-C1530 Job management guide

Pitney Bowes OptiFlow DIVS Operator's guide

Pitney Bowes

Pitney Bowes OptiFlow DIVS Operator's guide

MPI InfoPrint 6700 Series user manual

MPI

MPI InfoPrint 6700 Series user manual

UniFlow microMIND V2 Installation & configuration manual

UniFlow

UniFlow microMIND V2 Installation & configuration manual

HP 4050 - LaserJet B/W Laser Printer user guide

HP

HP 4050 - LaserJet B/W Laser Printer user guide

Epson T099520 Product information sheet

Epson

Epson T099520 Product information sheet

Sharp AR-PB8 Operation manual

Sharp

Sharp AR-PB8 Operation manual

aoyue Ritocco instruction manual

aoyue

aoyue Ritocco instruction manual

manuals.online logo
manuals.online logoBrands
  • About & Mission
  • Contact us
  • Privacy Policy
  • Terms and Conditions

Copyright 2025 Manuals.Online. All Rights Reserved.