5
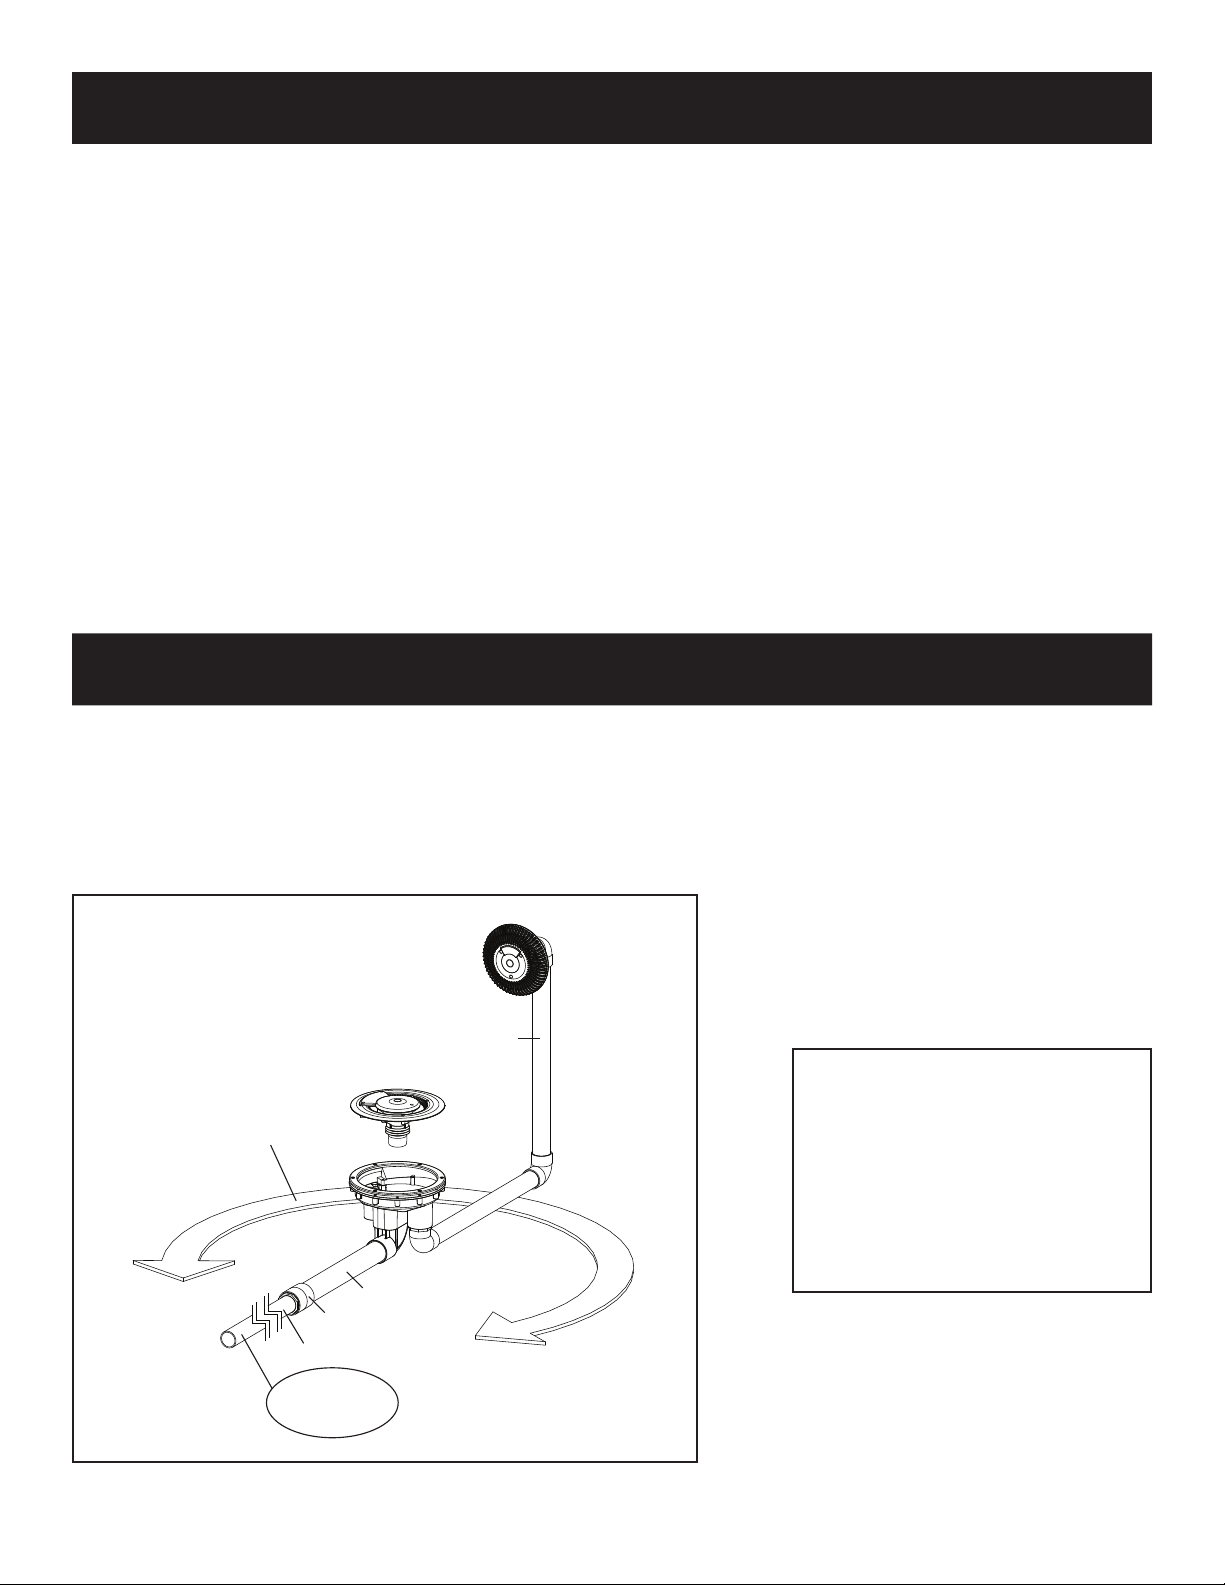
MDX WINTERIZATION
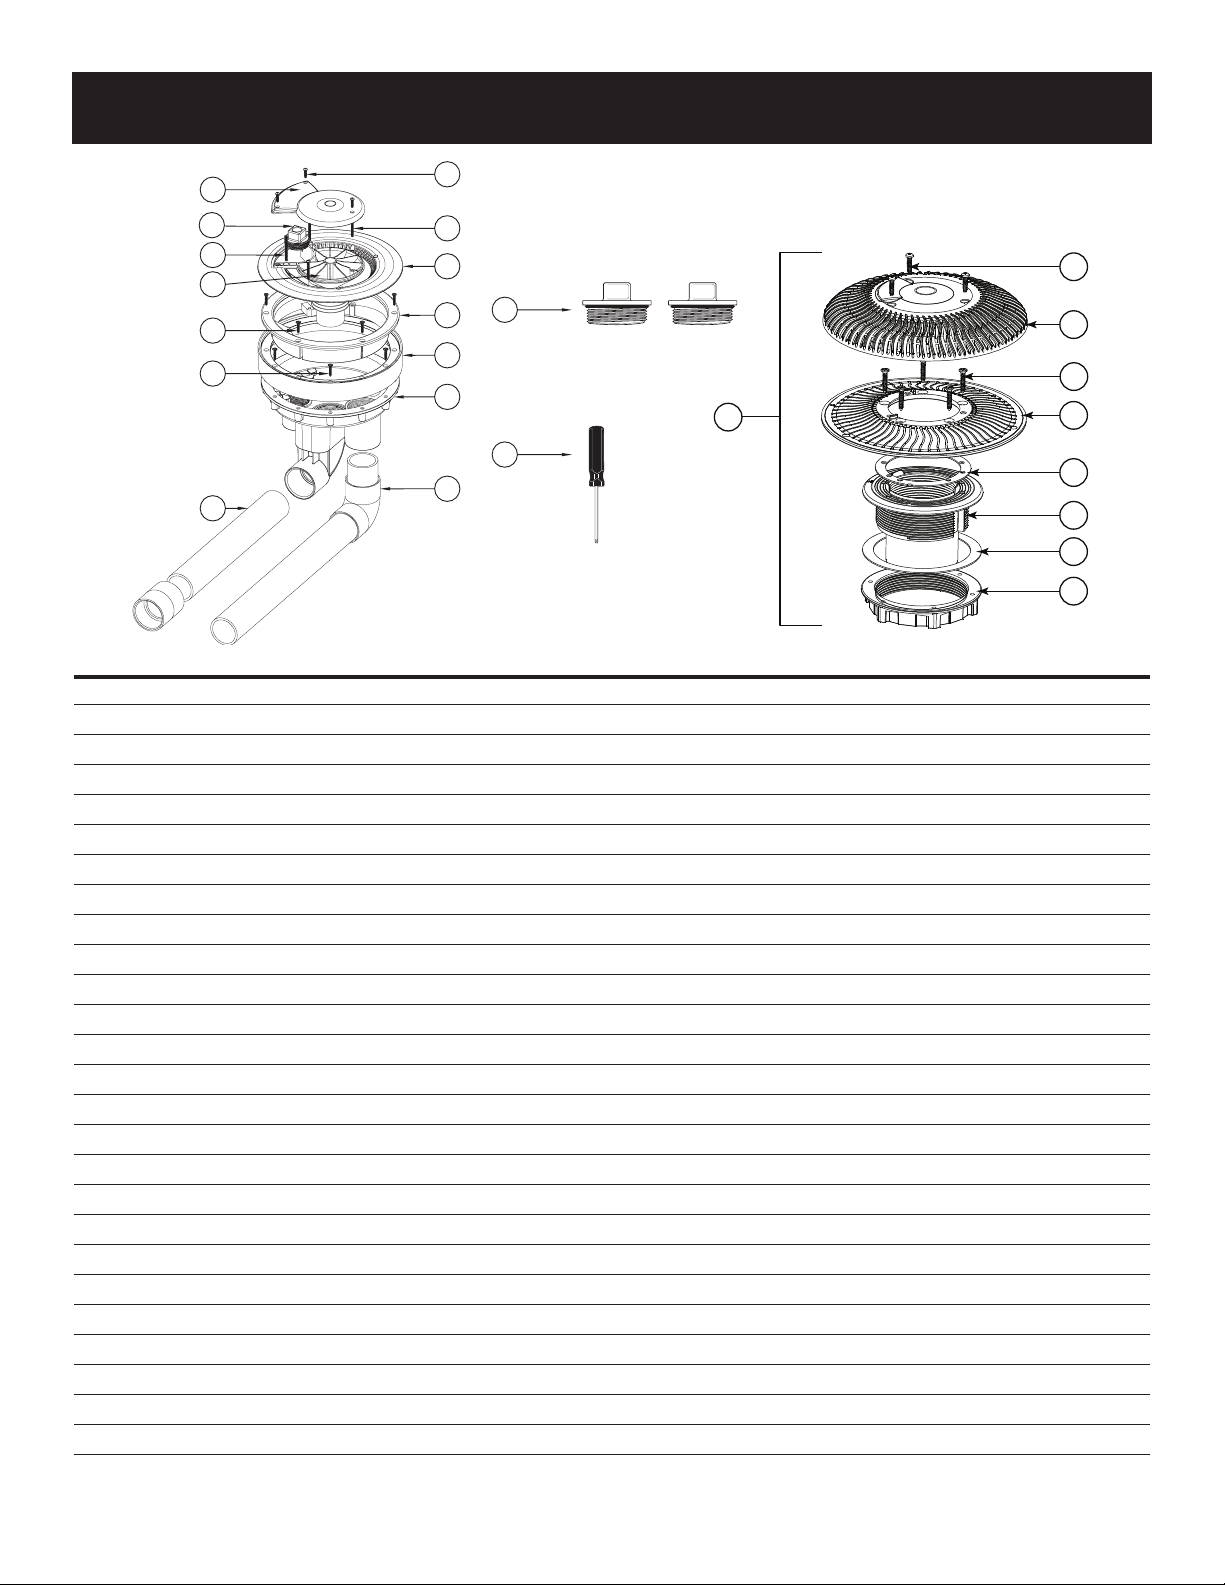
WITH CANISTER WITHOUT CANISTER
If vacuum relief suction outlets are located below freeze
line skip steps 1 and 2.
1. Remove grate from second suction and install blow
through plug and blow line to achieve airlock.
2. If 3rd suction line is installed remove grate, install 3"
blow-through plug and blow line to achieve airlock.
3. o to canister instructions step 1 - 4 below.
4. If vent tube is installed, install blow through plug and
blow line to achieve airlock. Repeat vacuum out
canister. Then complete canister step 5.
If vacuum relief suction outlets are located below freeze
line skip steps 1 and 2.
1. Remove grate from second suction and install blow
through plug and blow line to achieve airlock.
2. If 3rd suction line is installed remove grate, install 3"
blow-through plug and blow line to achieve airlock.
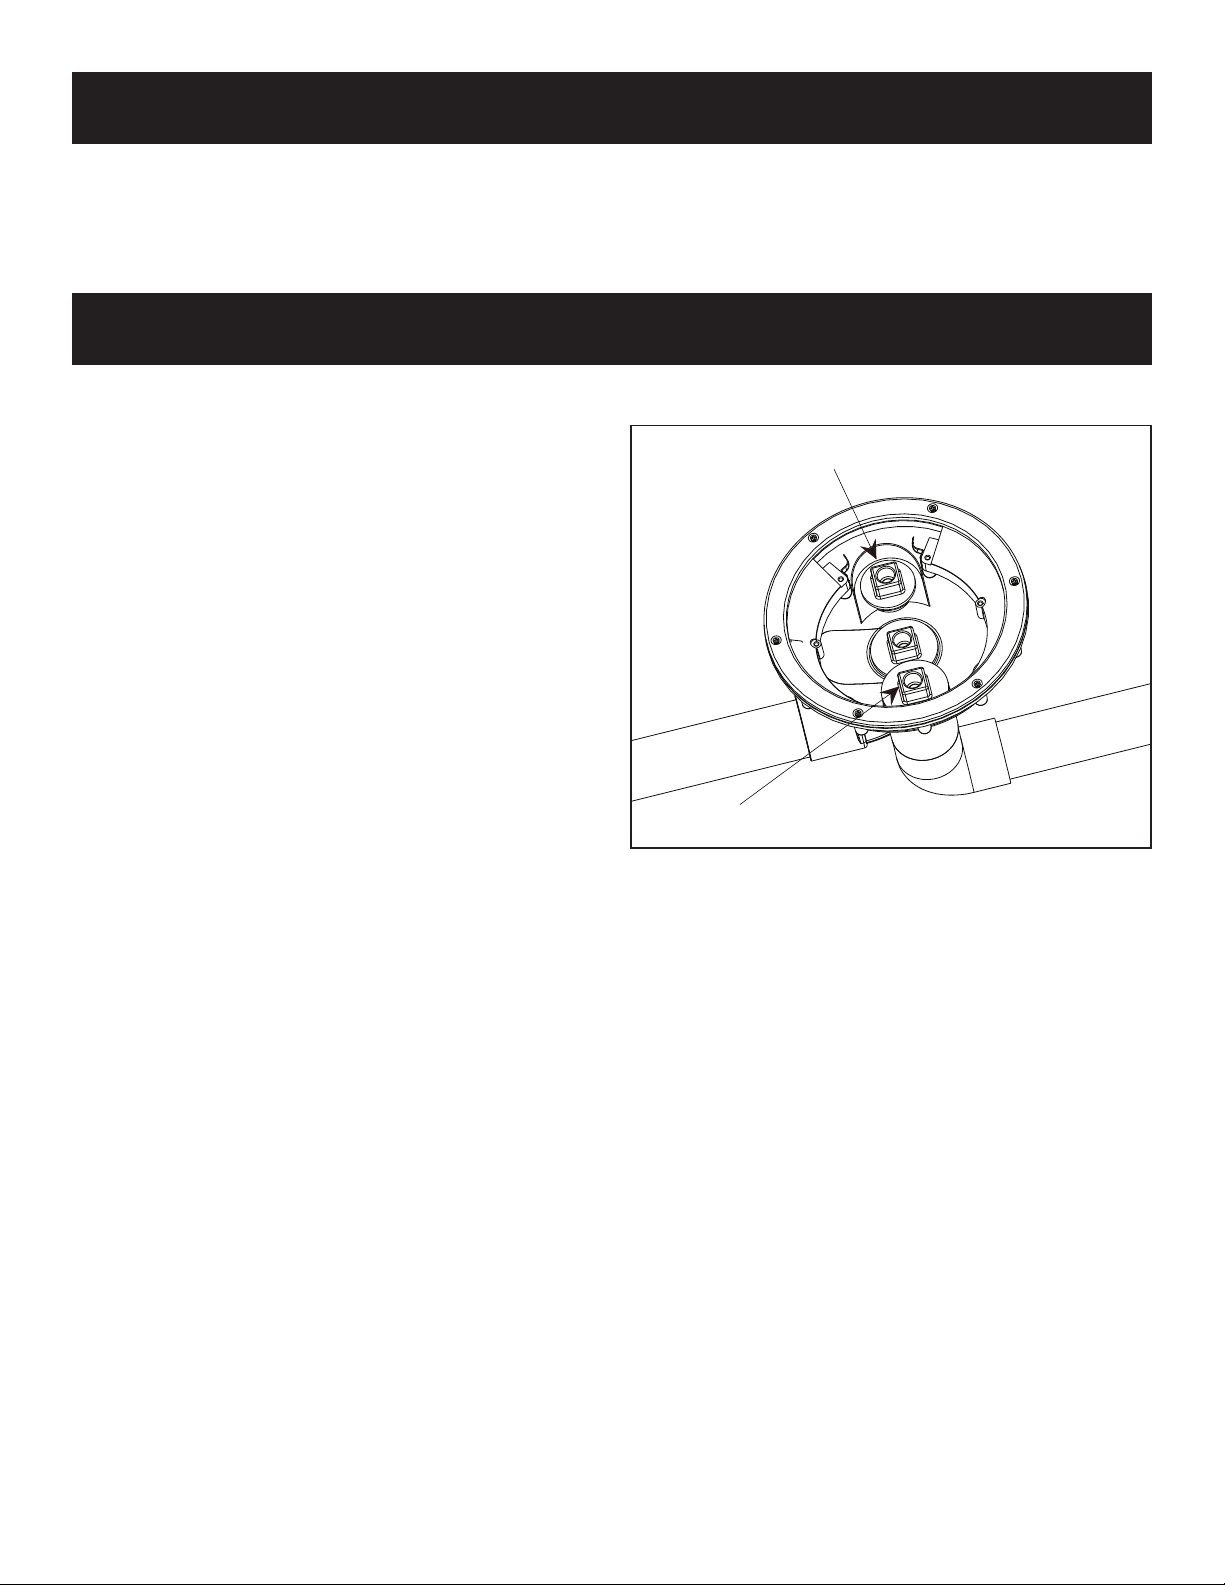
3. If vent line is installed in main suction line, plug vent
line and install blow through plug in pump inlet and
blow line to achieve airlock.
4. Lastly, blow vent line to achieve airlock.
1. Remove outer lid, inner lid and basket, clean and dry
off, and store in same area as modules
2. Install and secure regular winterization plug in
equalizer line of canister to pool at poolside.
3. Install and secure Schrader plug or blow out plug
from canister to main drain. Blow out and obtain air
lock as previously described, if skimmer is tied into
canister, repeat procedure to skimmer.
4. Bottom port of canister to pump may require an
extended pipe for ease of blowing out. Install and
blow out line from canister to pump. Install and
secure plug in pump. Using shop vac, remove all
water from within canister components.
5. Extension pipe can be removed and replaced with
plug or izmo type container if izmo not used. Be
sure to install device to absorb ice expansion in
canister area. Failure to do this may result in potential
ice freeze damage to canister.
WWiinntteerriizzaattiioonn aannttii--ffrreeeezzee iiss ttoo bbee uusseedd aass nneecceessssaarryy oorr
wwhheenn rreeqquuiirreedd..
Additional questions should be forwarded to Paramount’s
corporate office at 1.800.621.5886.
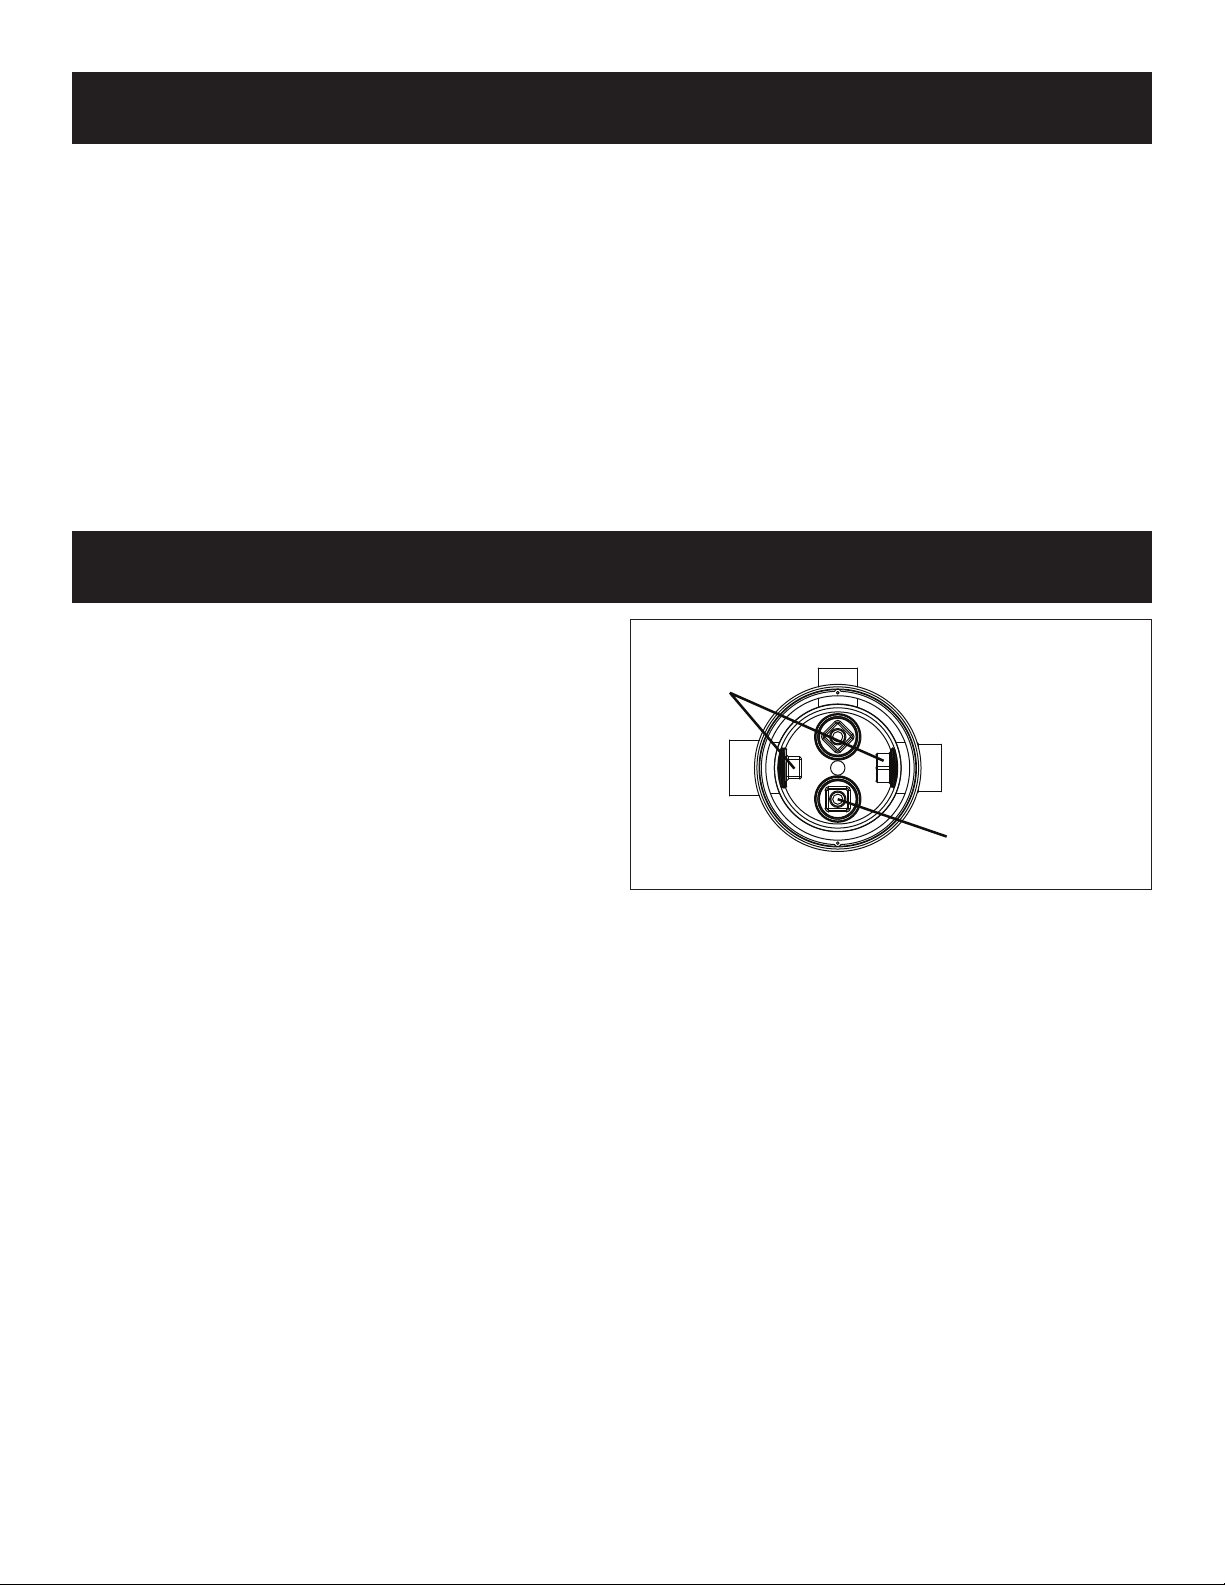
ARAMOUNT CANISTER WINTERIZATION
TEST PLUGS
2" GALV.
SQ. HEAD
BALANCE LINE
TO MAIN
DRAIN
TO OPTIONAL SKIMMER
OR VENT LINE
USE STANDARD
SKIMMER PLUG
WRENCH