110,000
1100
1 sec 60 sec
1 3
0 °C (32 °F) 55 °C (131 °F)
50 mm 30 mm 10 mm
60 mm 194 mm 30 mm
150 mm 194 mm 72 mm
Specications
Min Max
Min Max
Environment
Dimensions
Features
Waterproof
Width Height Depth
Door open time
Number of Packs
Silent operation
Number of Users
Access levels (Colour Zones)
Operating temperature - Battery limits
Yes
No
Battery Type
Typical Battery Life 30,000 operations up to 5 years
Paxton Battery Pack
Full System Reset
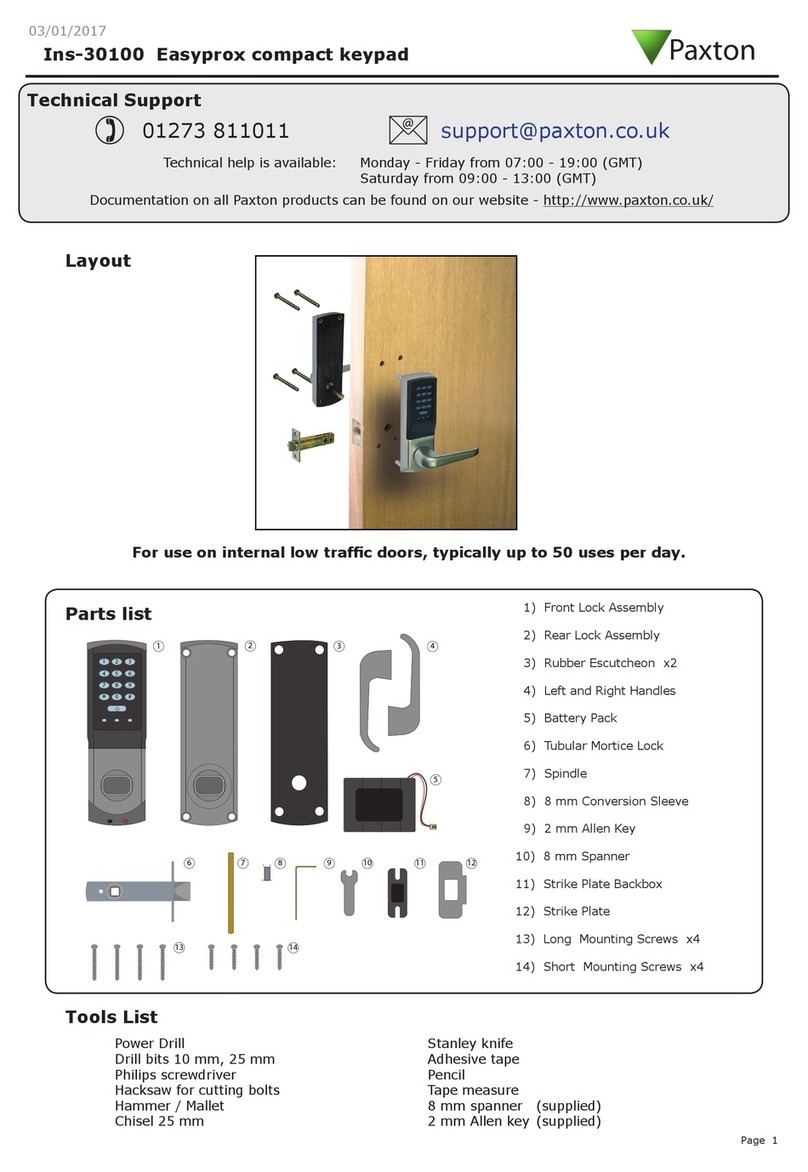
1. Remove the unit from the door by removing the 4 securing screws on the rear lock assembly.
(see layout on rst page)
2. Remove the access plate at the rear of the front lock assembly. (top two standoff screws).
3. Locate the reset button at the lower right corner of the circuit board.
4. While holding down the reset button, press the Power button once on the main keypad.
- The unit will beep 2 times.
5. Immediately, press and release the reset button 4 more times - The unit will beep to conrm each press
- the unit will then produce a series of 5 rapid beeps and display a ashing GREEN LED.
6. Remove and replace the battery plug. - Press the Power button and the unit will start to beep and
display ashing GREEN AND RED LEDs - RE-ENROLL and test the unit.
7. Replace the access plate.
8. Ret the lock to the door with the 4 xing screws.
< OR >
1. Present Enrolment card.
2. Present Door open time card twice.
3. Present Enrolment card.
4. Present Door open time card twice.
5. WAIT FOR 5 SECONDS!
This function should only be used to clear all the stored user
information from the unit. The unit is returned to its Factory
settings and will require initialising again (See: Enrolment Card)
Battery replacement
1. Remove the unit from the door by removing the 4 securing screws on the rear lock assembly.
(see Layout on front page)
2. Remove the top two standoff screws - Fig 1
3. Remove the access plate to reveal the battery pack. - Fig 2
4. Unplug the lead and replace the pack with a new Paxton Access battery pack. - Fig 3.
(NOTE: The unit will retain its settings and should not be manually reset)
5. Ret the access plate and secure.
6. Ret the unit to the door
Fig 1 Fig 2 Fig 3
Read Range Keyfob
Token Watchprox
Vandal resistance Low
Reader/Keypad module (Required space on Door)
Total outside dimensions (includes handle clearence)
