manuals.online logo
Brands
  1. Home
  2. •
  3. Brands
  4. •
  5. Pfeiffer Vacuum
  6. •
  7. Water Pump
  8. •
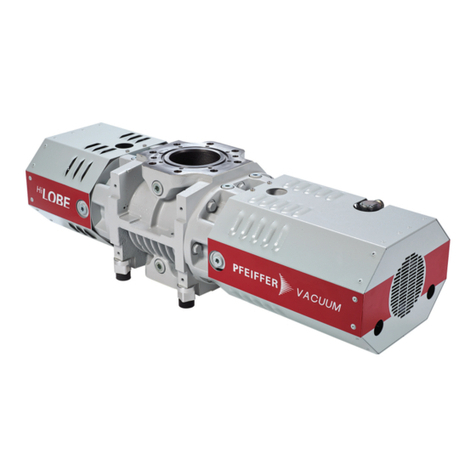
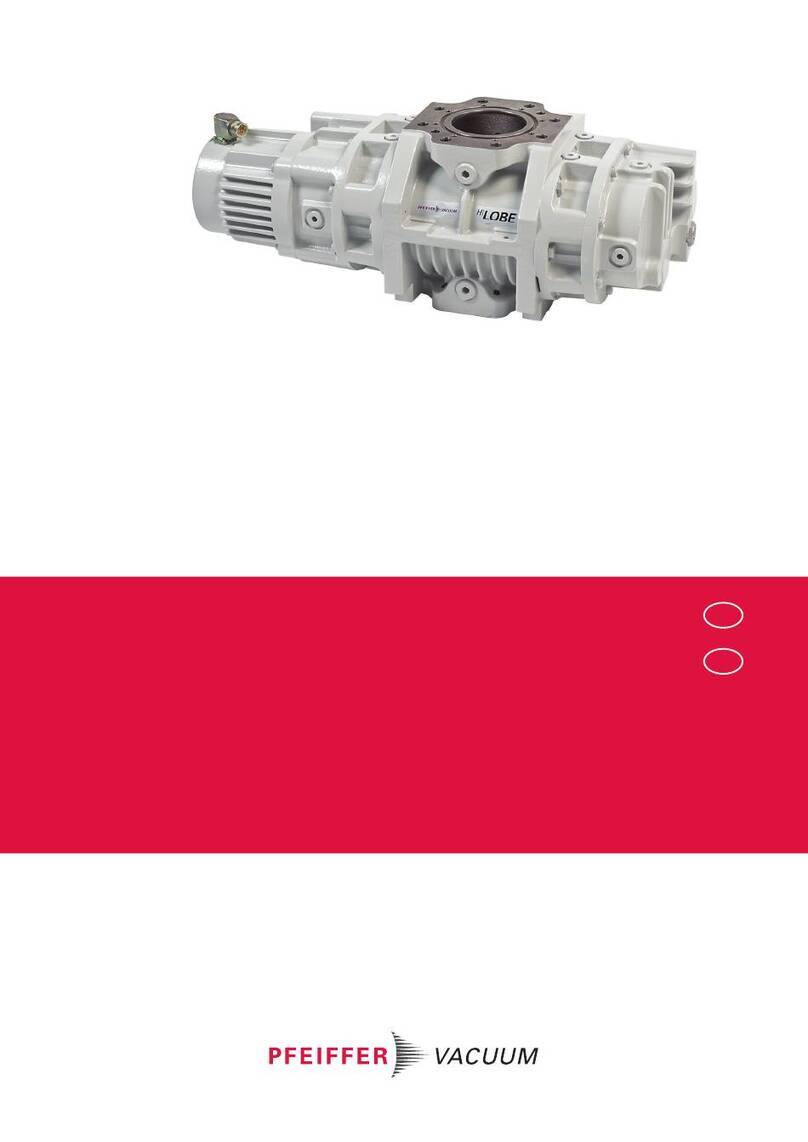
  9. Pfeiffer Vacuum HILOBE 1004 User manual

Pfeiffer Vacuum HILOBE 1004 User manual

OPERATING INSTRUCTIONS
EN
Original
HILOBE 1004 | 1304 | 2104
Roots pump
Dear Customer,
Thank you for choosing a Pfeiffer Vacuum product. Your new roots pump should support you
in your individual application with full performance and without malfunctions. The name
Pfeiffer Vacuum stands for high-quality vacuum technology, a comprehensive and complete
range of top-quality products and first-class service. From this extensive, practical experience
we have gained a large volume of information that can contribute to efficient deployment and
to your personal safety.
In the knowledge that our product must avoid consuming work output, we trust that our
product can offer you a solution that supports you in the effective and trouble-free
implementation of your individual application.
Please read these operating instructions before putting your product into operation for the
first time. If you have any questions or suggestions, please feel free to contact info@pfeiffer-
vacuum.de.
Further operating instructions from Pfeiffer Vacuum can be found in the Download Center on
our website.
Disclaimer of liability
These operating instructions describe all models and variants of your product. Note that your
product may not be equipped with all features described in this document. Pfeiffer Vacuum
constantly adapts its products to the latest state of the art without prior notice. Please take
into account that online operating instructions can deviate from the printed operating
instructions supplied with your product.
Furthermore, Pfeiffer Vacuum assumes no responsibility or liability for damage resulting from
the use of the product that contradicts its proper use or is explicitly defined as foreseeable
misuse.
Copyright
This document is the intellectual property of Pfeiffer Vacuum and all contents of this
document are protected by copyright. They may not be copied, altered, reproduced or
published without the prior written permission of Pfeiffer Vacuum.
We reserve the right to make changes to the technical data and information in this document.
2/62
Table of contents
1 About this manual 7
1.1 Validity 7
1.1.1 Applicable documents 7
1.1.2 Variants 7
1.2 Target group 7
1.3 Conventions 7
1.3.1 Instructions in the text 7
1.3.2 Pictographs 8
1.3.3 Stickers on the product 8
1.3.4 Abbreviations 10
2 Safety 11
2.1 General safety instructions 11
2.2 Safety instructions 11
2.3 Safety precautions 14
2.4 Limits of use 15
2.5 Proper use 15
2.6 Foreseeable misuse 16
2.7 Personnel qualification 16
2.7.1 Ensuring personnel qualification 16
2.7.2 Personnel qualification for maintenance and repair 17
2.7.3 Advanced training with Pfeiffer Vacuum 17
3 Product description 18
3.1 Function 18
3.1.1 Drive 19
3.1.2 Cooling 20
3.1.3 Mounting orientations 20
3.2 Identifying the product 20
3.3 Product features 20
3.4 Scope of delivery 20
4 Transportation and Storage 21
4.1 Transporting the vacuum pump 21
4.2 Storing the vacuum pump 22
5 Installation 23
5.1 Installing the vacuum pump 23
5.2 Mounting orientations 23
5.3 Filling with lubricant 24
5.4 Connecting the vacuum side 25
5.5 Connecting the fore-vacuum side 26
5.6 Connect the switch box 27
5.7 Connect the temperature sensors and fan 28
5.8 Establishing mains connection 28
6 Interfaces 30
6.1 "Remote" interface 30
6.1.1 Voltage output 30
6.1.2 Inputs 31
6.1.3 Outputs 31
6.1.4 RS-485 31
6.2 Interface RS-485 31
6.3 Pfeiffer Vacuum protocol for RS-485 interface 32
6.3.1 Telegram frame 32
6.3.2 Telegram description 33
6.3.3 Telegram example 1 33
Table of contents
3/62
6.3.4 Telegram example 2 33
6.3.5 Data types 34
7 Parameter set 35
7.1 General 35
7.2 Control commands 35
7.3 Status requests 36
7.4 Set value settings 37
7.5 Additional parameter for the DCU 37
8 Operation 38
8.1 Putting the vacuum pump into operation 38
8.2 Switching on the vacuum pump 38
8.3 Configuring the connections with the Pfeiffer Vacuum parameter set 38
8.4 Operating modes 39
8.4.1 Normal operation 39
8.4.2 Stand-by operation 40
8.4.3 Operation speed setting mode 40
8.5 Operation monitoring 40
8.5.1 Operating mode display via LED 40
8.5.2 Temperature monitoring 40
8.5.3 Checking the lubricant level 41
8.6 Switching off and venting 41
9 Maintenance 42
9.1 Maintenance information 42
9.2 Checklist for inspection and maintenance 42
9.3 Cleaning the air filter 43
9.4 Changing the lubricant 44
9.4.1 Draining the lubricant 44
9.4.2 Filling the lubricant 45
10 Decommissioning 47
10.1 Shutting down for longer periods 47
10.2 Recommissioning 47
10.3 Disposing of the vacuum pump 47
11 Malfunctions 48
11.1 General 48
11.2 Troubleshooting 48
11.3 Error codes 49
11.4 Warning and error messages when operating with DCU 49
12 Service solutions from Pfeiffer Vacuum 51
13 Ordering spare parts packs 53
14 Accessories 54
14.1 Accessory information 54
14.2 Ordering accessories 54
15 Technical data and dimensions 56
15.1 General 56
15.2 Substances in contact with the media 56
15.3 Technical data 56
15.4 Dimensions 58
Declaration of conformity 61
Table of contents
4/62
List of tables
Tbl. 1: Stickers on the product 9
Tbl. 2: Abbreviations used 10
Tbl. 3: Permissible ambient conditions 15
Tbl. 4: Features of the roots pumps 20
Tbl. 5: Plug arrangement of the D-Sub socket, 15-pin 30
Tbl. 6: Features of the RS-485 interface 32
Tbl. 7: Explanation and meaning of the parameters 35
Tbl. 8: Parameter set | Control commands 36
Tbl. 9: Parameter set | Status requests 36
Tbl. 10: Parameter set | Reference value inputs 37
Tbl. 11: Parameter for DCU functions 37
Tbl. 12: Configuration with parameters [P:019] and [P:024] 39
Tbl. 13: Configuration with parameters [P:060] and [P:061] 39
Tbl. 14: Meaning of the LEDs 40
Tbl. 15: Maintenance intervals 43
Tbl. 16: Troubleshooting 48
Tbl. 17: Error messages of the electronic drive unit 49
Tbl. 18: Warning messages of the electronic drive unit 49
Tbl. 19: Warning and error messages when using a DCU 50
Tbl. 20: HiLobe spare parts packs 53
Tbl. 21: Accessories 54
Tbl. 22: Consumables 55
Tbl. 23: Conversion table: Pressure units 56
Tbl. 24: Conversion table: Units for gas throughput 56
Tbl. 25: Materials that make contact with the process media 56
Tbl. 26: Technical data HiLobe | vertical direction of flow 57
Tbl. 27: Technical data HiLobe | horizontal direction of flow 58
List of tables
5/62
List of figures
Fig. 1: Position of stickers on product with vertical direction of flow 9
Fig. 2: Position of stickers on product with horizontal direction of flow 10
Fig. 3: Max. permissible pressure differential between input and output sides, in ac-
cordance with pump rotation speed
15
Fig. 4: Design, vertical direction of flow 18
Fig. 5: Design, horizontal direction of flow 19
Fig. 6: Design, switch box 19
Fig. 7: Transporting the vacuum pump 22
Fig. 8: Mounting orientation: Vertical direction of flow 23
Fig. 9: Mounting orientation: Horizontal direction of flow 24
Fig. 10: Filling with lubricant 25
Fig. 11: Connect the switch box 27
Fig. 12: Connect the extension cable 28
Fig. 13: Mains connection pin assignment 29
Fig. 14: Pin assignment of the D-Sub socket, 15-pin 30
Fig. 15: Cross-link via connection RS-485 using connection cables and accessories 32
Fig. 16: Replace the baffle strainer of the fan 43
Fig. 17: Drain the lubricant 45
Fig. 18: Filling with lubricant 46
Fig. 19: HiLobe 1004, HiLobe 1304, HiLobe 2104 | DN 100 59
Fig. 20: RC 4000 electronic drive unit 60
List of figures
6/62
1 About this manual
IMPORTANT
Read carefully before use.
Keep the manual for future consultation.
1.1 Validity
These operating instructions are for customers of Pfeiffer Vacuum. They describe the function of the
designated product and provide the most important information for safe usage of the product. The de-
scriptions comply with applicable directives. All information provided in these operating instructions refer
to the current development status of the product. The documentation remains valid as long as the cus-
tomer does not modify the product in any way.
1.1.1 Applicable documents
Document Number
Declaration of conformity A component of these instructions
You can find this document in the Pfeiffer Vacuum Download Center.
1.1.2 Variants
●HiLobe 1004
●HiLobe 1304
●HiLobe 2104
●HiLobe 1004 H
●HiLobe 1304 H
●HiLobe 2104 H
1.2 Target group
These operating instructions are aimed at all persons performing the following activities on the product:
●Transportation
●Setup (Installation)
●Usage and operation
●Decommissioning
●Maintenance and cleaning
●Storage or disposal
The work described in this document is only permitted to be performed by persons with the appropriate
technical qualifications (expert personnel) or who have received the relevant training from Pfeiffer Vac-
uum.
1.3 Conventions
1.3.1 Instructions in the text
Usage instructions in the document follow a general structure that is complete in itself. The required ac-
tion is indicated by an individual step or multi-part action steps.
Individual action step
A horizontal, solid triangle indicates the only step in an action.
►This is an individual action step.
About this manual
7/62
Sequence of multi-part action steps
The numerical list indicates an action with multiple necessary steps.
1. Step 1
2. Step 2
3. ...
1.3.2 Pictographs
Pictographs used in the document indicate useful information.
Note
Tip
1.3.3 Stickers on the product
This section describes all the stickers on the product along with their meaning.
D-35641 Asslar
Mod .: HiLobe 2104
P/N .: PP V22 400
S/N .: 12036349
Made in Germany 2019/11
320-500 V 50/60 Hz
Oil: P3 0.65 l
S(N2): max. 2100 m3/h
n: max. 12000 1/min
Mass: 115 kg
Rating plate (example)
The rating plate for the vacuum pump is located on the front of
the vacuum pump drive.
D-35641 Asslar
Mod.: RC 4000
P/N PP 100 075
S/N 12345637
Input 320-500 V 50/60 Hz 16 A
Output 400 V 12A
Mass 12 kg Made in Germany 2018/07
C US
TÜV Rheinland
Rating plate of the electronic drive unit
The rating plate is located on the switch box of the electronic
drive unit.
Supply connection
use only the original supply plug
3~/PE
Mains power supply
This sticker indicates that you must use the original power sup-
ply connector.
Operating instructions note
This sticker indicates that this operating instructions must be
read before performing any tasks.
Warning hot surface
This sticker warns of injuries caused by high temperatures in
case of touching without protection during operation.
About this manual
8/62
warranty seal
Closure seal
The product is sealed ex-factory. Damaging or removing a clo-
sure seal results in loss of the warranty.
Oil can
The "Oil can" sticker indicates the filler screws for lubricant.
Tbl. 1: Stickers on the product
7
123
6
5
4
Fig. 1: Position of stickers on product with vertical direction of flow
1 Closure seal 5 Warning notice: hot surface
2 Rating plate of the electronic drive unit 6 Note: Read the operating instructions
3 Note: Original power supply connector 7 Rating plate of the vacuum pump
4 Note: Filling ports for lubricant
About this manual
9/62
12354
876
Fig. 2: Position of stickers on product with horizontal direction of flow
1 Closure seal 5 Rating plate of the vacuum pump
2 Rating plate of the electronic drive unit 6 Warning notice: hot surface
3 Note: Original power supply connector 7 Note: Read the operating instructions
4 Note: Filling ports for lubricant 8 Note: Filling ports for lubricant
1.3.4 Abbreviations
Abbreviation Explanation
DCU Display Control Unit
HPU Handheld Programming Unit
[P:xxx] Electronic drive unit control parameters. Printed in bold as a three-digit number in
square brackets. Frequently displayed in conjunction with a short description:
Example: [P:xxx] Software version
PE Earthed conductor (protective earth)
n.c. not connected
RS-485 Standard for a physical interface for asynchronous serial data transmission (Recom-
mended Standard)
remote 15-pin D-Sub connecting socket on the control panel of the switch box
Ssc Short-circuit capacity
FKM Fluoropolymer rubber
FC Frequency converter
BA Operating instructions
SI Service instructions
PV Pfeiffer Vacuum
Tbl. 2: Abbreviations used
About this manual
10/62
2 Safety
2.1 General safety instructions
This document includes the following 4 risk levels and 1 information level.
DANGER
Imminent danger
Indicates a hazardous situation which, if not avoided, will result in death or serious injury.
►Instructions on avoiding the hazardous situation
WARNING
Possibly imminent danger
Indicates a hazardous situation which, if not avoided, could result in death or serious injury.
►Instructions on avoiding the hazardous situation
CAUTION
Possibly imminent danger
Indicates a hazardous situation which, if not avoided, could result in minor or moderate injury.
►Instructions on avoiding the hazardous situation
NOTICE
Danger of property damage
Notice is used to address practices not related to physical injury.
►Instructions on avoiding property damage
Notes, tips or examples indicate important information on the product or on this document.
2.2 Safety instructions
All safety instructions in this document are based on the results of the risk assessment carried out in
accordance with Machinery Directive 2006/42/EC Annex I and EN ISO 12100 Section 5. Where applica-
ble, all life cycle phases of the product were taken into account.
Risks during transport
WARNING
Risk of serious injury from swinging, toppling or falling objects
During transport, there is a risk of crushing and impact on swinging, toppling or falling objects. There
is a risk of injuries to limbs, up to and including bone fractures and head injuries.
►Secure the danger zone if necessary.
►Pay attention to the center of gravity of the load during transport.
►Ensure even movements and moderate speeds.
►Observe safe handling of the transport devices.
►Avoid sloping attachment aids.
►Never stack products.
►Wear protective equipment, e.g. safety shoes.
Safety
11/62
Risks during installation
DANGER
Danger to life from electric shock
Contact with exposed and live elements generate an electric shock. Incorrect connection of the mains
supply leads to the risk of live housing parts that can be touched. There is a risk to life.
►Before the installation, check that the connection leads are voltage-free.
►Make sure that electrical installations are only carried out by qualified electricians.
►Provide adequate grounding for the device.
►After connection work, do a PE conductor check.
DANGER
Danger to life from electric shock
When establishing the voltages that exceed the specified safety extra-low voltage (according to IEC
60449 and VDE 0100), the insulating measures will be destroyed. There is a danger to life from elec-
tric shock at the communication interfaces.
►Connect only suitable devices to the bus system.
WARNING
Risk of danger to life through missing mains disconnection device
The vacuum pump and electronic drive unit are not equipped with a mains disconnection device
(mains switch).
►Install a suitable motor protection switch.
►Obtain the power details for the setting value from the motor rating plate.
WARNING
Risk of fatal injury due to electric shock on account of incorrect installation
The device's power supply uses life-threatening voltages. Unsafe or improper installation can lead to
life-threatening situations from electric shocks obtained from working with or on the unit.
►Ensure safe integration into an emergency off safety circuit.
►Do not carry out your own conversions or modifications on the unit.
WARNING
Risk of crushing from rotating parts
Fingers and hands may be caught by rotating pistons within the connection flange. This results in se-
vere injuries.
►Keep limbs out of the reach of the roots pump.
CAUTION
Danger of injury from bursting as a result of high pressure in the exhaust line
Faulty or inadequate exhaust pipes lead to dangerous situations, e.g. increased exhaust pressure.
There is a danger of bursting. Injuries caused by flying fragments, the escaping of high pressure, and
damage to the unit cannot be excluded.
►Route the exhaust line without shut-off units.
►Observe the permissible pressures and pressure differentials for the product.
►Check the function of the exhaust line on a regular basis.
Safety
12/62
CAUTION
Electric shock and damage to the vacuum pump and electronic drive unit due to improper
connection and disconnection of components
With existing power supply connection to the switch box, there is a risk of electric shock when making
contact with the motor connecting plug. Even after the power supply has been switched off, the vac-
uum pump continues to deliver electrical energy during its run-down period. If the units are discon-
nected prematurely, there is the risk of electric shock, and destruction of electric components.
►Always interrupt the power supply connection at the switch box before connecting the power sup-
ply plug to the motor.
►With existing power supply connection to the switch box or when the pistons are running, never
disconnect the motor connecting plug.
►After switching off, wait at least another 5 minutes until the capacitors have discharged before
separating the cable connection.
Risks during operation
WARNING
Danger of poisoning due to toxic process media escaping from the exhaust pipe
During operation with no exhaust line, the vacuum pump allows exhaust gases and vapors to escape
freely into the air. There is a risk of injury and fatality due to poisoning in processes with toxic process
media.
►Observe the pertinent regulations for handling toxic process media.
►Safely purge toxic process media via an exhaust line.
►Use appropriate filter equipment to separate toxic process media.
CAUTION
Danger of injury from bursting as a result of high pressure in the exhaust line
Faulty or inadequate exhaust pipes lead to dangerous situations, e.g. increased exhaust pressure.
There is a danger of bursting. Injuries caused by flying fragments, the escaping of high pressure, and
damage to the unit cannot be excluded.
►Route the exhaust line without shut-off units.
►Observe the permissible pressures and pressure differentials for the product.
►Check the function of the exhaust line on a regular basis.
Risks during maintenance, decommissioning and in event of malfunctions
WARNING
Danger to life from electric shock during maintenance and service work
There is a danger to life from electric shock when making contact with live components that still exist
after the vacuum pump has been switched off.
►Disconnect the vacuum pump safely from the mains.
►Wait until the vacuum pump comes to a standstill (rotation speed =0).
►After switching off the vacuum pump, wait another 5 minutes until the capacitors have dis-
charged.
WARNING
Danger to life from electric shock in the event of a fault
In the event of a fault, devices connected to the mains may be live. There is a danger to life from
electric shock when making contact with live components.
►Always keep the mains connection freely accessible so you can disconnect it at any time.
Safety
13/62
WARNING
Risk of crushing from rotating parts
Fingers and hands may be caught by rotating pistons within the connection flange. This results in se-
vere injuries.
►Keep limbs out of the reach of the roots pump.
WARNING
Health hazard through poisoning from toxic contaminated components or devices
Toxic process media result in contamination of devices or parts of them. During maintenance work,
there is a risk to health from contact with these poisonous substances. Illegal disposal of toxic sub-
stances causes environmental damage.
►Take suitable safety precautions and prevent health hazards or environmental pollution by toxic
process media.
►Decontaminate affected parts before carrying out maintenance work.
►Wear protective equipment.
CAUTION
Scalding from hot lubricant
Danger of scalding when draining lubricant if it comes into contact with the skin.
►Wear protective equipment.
►Use a suitable collection receptacle.
2.3 Safety precautions
Duty to provide information on potential dangers
The product holder or user is obliged to make all operating personnel aware of dangers
posed by this product.
Every person who is involved in the installation, operation or maintenance of the product
must read, understand and adhere to the safety-related parts of this document.
Infringement of conformity due to modifications to the product
The Declaration of Conformity from the manufacturer is no longer valid if the operator
changes the original product or installs additional equipment.
●Following the installation into a system, the operator is required to check and re-evalu-
ate the conformity of the overall system in the context of the relevant European Direc-
tives, before commissioning that system.
General safety precautions
►Do not expose body parts to the vacuum.
►Observe the safety and accident prevention regulations, if necessary wear personal protective
equipment.
►Check all safety measures at regular intervals.
►Always ensure a secure connection to the earthed conductor (PE), protection class I.
►During operation, make sure that plug-and-socket connections are securely fitted.
►Never operate the vacuum pump with open vacuum flange.
►Never make your own conversions or modifications to the vacuum pump.
►Before returning the vacuum pump, observe the notes in the chapter Service.
Safety
14/62
2.4 Limits of use
Parameter HiLobe
Installation location ● Indoors: protected from dust deposits
● Outdoors: dry, protected from direct weather influ-
ences such as
─ strong air drafts
─ rain and splashed water
Installation altitude max. 2000 m above sea level1)
Installation surface flatness horizontal, max. permissible angle of inclination: ±3°
Ambient temperature +5 °C to +40 °C
Relative air humidity max. 85 %
Permanent intake pressure in circulation
mode
< 1100 hPa (abs.)
Max. pressure differential in circulation
mode
80 hPa
Max. speed in circulation mode 4200 rpm
Permanent intake pressure in vacuum
mode
depending on max. pressure differential
Max. gas temperature, pressure side 250 °C
Tbl. 3: Permissible ambient conditions
20
30
40
50
60
70
80
n [1/min]
3000 5000 9000 110007000
[hPa]
Δpmax
Fig. 3: Max. permissible pressure differential between input and output sides, in accordance
with pump rotation speed
2.5 Proper use
►Use the vacuum pump for vacuum generation only.
►To protect the lubricant and the bearing, use sealing gas if high boiling or corrosive media (e.g.
solvents) are pumped.
►Operate the vacuum pump within the application limits of the product and in compliance with the
technical data.
►Adhere to the installation, commissioning, operating, and maintenance instructions.
►Use only accessory parts recommended by Pfeiffer Vacuum.
1) at installation altitudes > 1,000m above m.s.l. and an ambient temperature of 40 °C the rated power of the
motor reduces by around 10 %
Safety
15/62
2.6 Foreseeable misuse
Misuse of the product invalidates all warranty and liability claims. Any use that is counter to the purpose
of the product, whether intentional or unintentional, is regarded as misuse.
●Pumping explosive media
●Pumping media that can corrode or not be withstood by the vacuum pump materials
●Pumping media that introduce an ignition source to the suction chamber
●Pumping media that form adhesive deposits inside the suction chamber and cause the pistons to
touch or jam
●Pumping pressurized media (> atmospheric pressure)
●Pumping fluids that do not serve cleaning
●Pumping radioactive media
●Pumping media prone to spontaneous, specific exothermic reactions
●Use in potentially explosive areas
●Use in systems in which the equipment is subjected to dynamic loads and vibrations or periodic
forces
●Use in strong electrical, magnetic, or electromagnetic fields
●Use with vacuum and/or fore-vacuum flange open to the atmosphere
●Modification of frequency converter parameters in the electronic drive unit
●Using lubricants not specified by Pfeiffer Vacuum
●Using pipes to lift the vacuum pump
●Use of accessories or spare parts that are not listed in these instructions
●Using the vacuum pump as a climbing aid
●Use of mineral-based lubricants, such as P3, with an oxygen concentration > 21 %
Mineral-based lubricants are combustible and ignite at high temperatures, and when they come
into contact with pure oxygen. These lubricants oxidize heavily and thus lose their lubricating ca-
pacity.
2.7 Personnel qualification
The work described in this document may only be carried out by persons who have appropriate profes-
sional qualifications and the necessary experience or who have completed the necessary training as
provided by Pfeiffer Vacuum.
Training people
1. Train the technical personnel on the product.
2. Only let personnel to be trained work with and on the product when under the supervision of
trained personnel.
3. Only allow trained technical personnel to work with the product.
4. Before starting work, make sure that the commissioned personnel have read and understood
these operating instructions and all applicable documents, in particular the safety, maintenance
and repair information.
2.7.1 Ensuring personnel qualification
Specialist for mechanical work
Only a trained specialist may carry out mechanical work. Within the meaning of this document, special-
ists are people responsible for construction, mechanical installation, troubleshooting and maintenance
of the product, and who have the following qualifications:
●Qualification in the mechanical field in accordance with nationally applicable regulations
●Knowledge of this documentation
Specialist for electrotechnical work
Only a trained electrician may carry out electrical engineering work. Within the meaning of this docu-
ment, electricians are people responsible for electrical installation, commissioning, troubleshooting, and
maintenance of the product, and who have the following qualifications:
●Qualification in the electrical engineering field in accordance with nationally applicable regulations
●Knowledge of this documentation
In addition, these individuals must be familiar with applicable safety regulations and laws, as well as the
other standards, guidelines, and laws referred to in this documentation. The above individuals must
Safety
16/62
have an explicitly granted operational authorization to commission, program, configure, mark, and earth
devices, systems, and circuits in accordance with safety technology standards.
Trained individuals
Only adequately trained individuals may carry out all works in other transport, storage, operation and
disposal fields. Such training must ensure that individuals are capable of carrying out the required activi-
ties and work steps safely and properly.
2.7.2 Personnel qualification for maintenance and repair
Advanced training courses
Pfeiffer Vacuum offers advanced training courses to maintenance levels 2 and 3.
Adequately trained individuals are:
●Maintenance level 1
─Customer (trained specialist)
●Maintenance level 2
─Customer with technical education
─Pfeiffer Vacuum service technician
●Maintenance level 3
─Customer with Pfeiffer Vacuum service training
─Pfeiffer Vacuum service technician
2.7.3 Advanced training with Pfeiffer Vacuum
For optimal and trouble-free use of this product, Pfeiffer Vacuum offers a comprehensive range of
courses and technical trainings.
For more information, please contact Pfeiffer Vacuum technical training.
Safety
17/62
3 Product description
3.1 Function
The operating principle of the HiLobe roots pump is based on 2 synchronous pistons that rotate in a
housing without touching. The pumping effects arise as a result of the opposing rotation of the 2 figure-
of-eight shaped rolling pistons. While suction chambers are formed between the rolling pistons and the
housing, the rolling pistons continuously form a mutual seal without touching each other or the housing.
A pair of gears positioned on the extended shaft ends, causes the opposing, synchronous running of
the roots pistons. Lubrication is limited to the two bearing and gear chambers which are arranged sepa-
rately from the suction chambers.
36 7
8
9
10
2
11
12
13
154
Fig. 4: Design, vertical direction of flow
1 Filler screw 8 Fore-vacuum flange
2 Vacuum flange with flange cover (foil) 9 Drain screw
3 Filler screw 10 Measurement connection vacuum side
4 Motor power supply plug 11 Measurement connection fore-vacuum side
5 Fan cover 12 Sight glass, opposite side
6 Sight glass motor side 13 Connecting cable, fan/temperature sensor
7 Connecting cable, fan/temperature sensor
Product description
18/62
12
5
6
7
8
9
10
11
12
4
3
Fig. 5: Design, horizontal direction of flow
1 Filler screw 7 Connecting cable, fan/temperature sensor
2 Measurement connection vacuum side 8 Sight glass motor side
3 Motor power supply plug 9 Fan cover
4 Filler screw 10 Vacuum flange with flange cover (foil)
5 Measurement connection fore-vacuum side 11 Sight glass, opposite side
6 Fore-vacuum flange with flange cover (foil) 12 Connecting cable, fan/temperature sensor
Temp. 1
Fan 1
Fan 2
Temp. 2
7
8
2
65
4
3
1
Fig. 6: Design, switch box
1 Switch box 5 Fan and
temperature sensor connections
2 Operator panel 6 Motor connecting cable
3 Venting grille, inlet 7 Mains power supply
4 Switch box rear side 8 Venting grille, outlet
3.1.1 Drive
The drive of the vacuum pump is carried out coupling-free in "Cantilever design". Due to the motor de-
sign, the vacuum pump is compact, hermetically sealed and also has a high efficiency. The frequency
converter takes over the control of the vacuum pump and permits the adjustment of the speed to the
actual process requirements (in the valid speed range).
Product description
19/62
3.1.2 Cooling
The vacuum pump is equipped with active sensor-monitored air cooling.
3.1.3 Mounting orientations
The vacuum pump is available in 2 versions; for either vertical or horizontal direction of flow. The
mounting orientation is defined at the factory prior to delivery. Subsequent alteration of the mounting
orientation by the user is not permissible. The oil supply is different for each version, whereby an imper-
missible mounting orientation will lead to deficient lubrication of the bearing.
3.2 Identifying the product
To ensure for a clear identification of the product when communicating with Pfeiffer Vacuum, always
keep all of the information on the rating plate to hand.
The following information is shown on the rating plate:
●Pump model
●Model number
●Type and quantity of the lubricant
●Max. allowable pump rotation speed
●Date of manufacture
●Input voltage range
3.3 Product features
Pump type Nominal pumping speed Inlet/direction of flow
HiLobe 1004 520 –1050 m3/h top/vertical
HiLobe 1304 520 -1300 m3/h top/vertical
HiLobe 2104 520 -2100 m3/h top/vertical
HiLobe 1004 H 520 –1050 m3/h lateral/horizontal
HiLobe 1304 H 520 -1300 m3/h lateral/horizontal
HiLobe 2104 H 520 -2100 m3/h lateral/horizontal
Tbl. 4: Features of the roots pumps
3.4 Scope of delivery
●Vacuum pump with switch box and frequency converter
●Flange cover (foil) for the connection flange
●Seal for the connection flange
●Screw kit for the connection flange
●2 ring bolts for lifting the vacuum pump
●Mating plug for the mains connection
●2 temperature sensors
●Motor and temperature sensor extension cable, 3 m, 5 m or 10 m
●Lubricant P3 (for standard pump)
●Operating instructions
Product description
20/62

Other manuals for HILOBE 1004

2

This manual suits for next models

5

Other Pfeiffer Vacuum Water Pump manuals
Pfeiffer Vacuum DUO 255 User manual

Pfeiffer Vacuum

Pfeiffer Vacuum DUO 255 User manual

Pfeiffer Vacuum HENA 201 User manual

Pfeiffer Vacuum

Pfeiffer Vacuum HENA 201 User manual

Pfeiffer Vacuum HIPACE 350 User manual

Pfeiffer Vacuum

Pfeiffer Vacuum HIPACE 350 User manual

Pfeiffer Vacuum HEPTA 400 P User manual

Pfeiffer Vacuum

Pfeiffer Vacuum HEPTA 400 P User manual

Pfeiffer Vacuum HILOBE 1002 User manual

Pfeiffer Vacuum

Pfeiffer Vacuum HILOBE 1002 User manual

Pfeiffer Vacuum ACP 40 Series User manual

Pfeiffer Vacuum

Pfeiffer Vacuum ACP 40 Series User manual

Pfeiffer Vacuum TPH 1201 U P User manual

Pfeiffer Vacuum

Pfeiffer Vacuum TPH 1201 U P User manual

Pfeiffer Vacuum HILOBE 1002 User manual

Pfeiffer Vacuum

Pfeiffer Vacuum HILOBE 1002 User manual

Pfeiffer Vacuum TMH 260 C User manual

Pfeiffer Vacuum

Pfeiffer Vacuum TMH 260 C User manual

Pfeiffer Vacuum A 124H User manual

Pfeiffer Vacuum

Pfeiffer Vacuum A 124H User manual

Pfeiffer Vacuum UNO 005 A User manual

Pfeiffer Vacuum

Pfeiffer Vacuum UNO 005 A User manual

Pfeiffer Vacuum HiCube 80 Eco User manual

Pfeiffer Vacuum

Pfeiffer Vacuum HiCube 80 Eco User manual

Pfeiffer Vacuum HiPace 2300 User manual

Pfeiffer Vacuum

Pfeiffer Vacuum HiPace 2300 User manual

Pfeiffer Vacuum TMH 071 User manual

Pfeiffer Vacuum

Pfeiffer Vacuum TMH 071 User manual

Pfeiffer Vacuum OKTA 250 User manual

Pfeiffer Vacuum

Pfeiffer Vacuum OKTA 250 User manual

Pfeiffer Vacuum DUO 6 M User manual

Pfeiffer Vacuum

Pfeiffer Vacuum DUO 6 M User manual

Pfeiffer Vacuum DUO 3 User manual

Pfeiffer Vacuum

Pfeiffer Vacuum DUO 3 User manual

Pfeiffer Vacuum HISCROLL 6 User manual

Pfeiffer Vacuum

Pfeiffer Vacuum HISCROLL 6 User manual

Pfeiffer Vacuum OKTA 1000 M User manual

Pfeiffer Vacuum

Pfeiffer Vacuum OKTA 1000 M User manual

Pfeiffer Vacuum HiPace 2300 User manual

Pfeiffer Vacuum

Pfeiffer Vacuum HiPace 2300 User manual

Pfeiffer Vacuum HIPACE 450 User manual

Pfeiffer Vacuum

Pfeiffer Vacuum HIPACE 450 User manual

Pfeiffer Vacuum HIPACE 800 H User manual

Pfeiffer Vacuum

Pfeiffer Vacuum HIPACE 800 H User manual

Pfeiffer Vacuum DUO 20 MC User manual

Pfeiffer Vacuum

Pfeiffer Vacuum DUO 20 MC User manual

Pfeiffer Vacuum HEPTA 200 P User manual

Pfeiffer Vacuum

Pfeiffer Vacuum HEPTA 200 P User manual

Popular Water Pump manuals by other brands

fish mate 1500 instructions

fish mate

fish mate 1500 instructions

vacuubrand ME 2 NT Instructions for use

vacuubrand

vacuubrand ME 2 NT Instructions for use

KNF LABOPORT N820.18 manual

KNF

KNF LABOPORT N820.18 manual

Mazzoni 3.071.02.020 Use and maintenance manual

Mazzoni

Mazzoni 3.071.02.020 Use and maintenance manual

PFT RITMO XL FC-230V operating manual

PFT

PFT RITMO XL FC-230V operating manual

SAMES KREMLIN PRIMA 01D100 user manual

SAMES KREMLIN

SAMES KREMLIN PRIMA 01D100 user manual

Bosch rexroth 1 Series instruction manual

Bosch

Bosch rexroth 1 Series instruction manual

Demco LIL'THUMPER Operator's manual

Demco

Demco LIL'THUMPER Operator's manual

Coleman 120V QuickPump How to use and enjoy

Coleman

Coleman 120V QuickPump How to use and enjoy

Sealey TP98 instructions

Sealey

Sealey TP98 instructions

Titan TTP-300 owner's manual

Titan

Titan TTP-300 owner's manual

Universal Pumps UP-GPP600 instruction manual

Universal Pumps

Universal Pumps UP-GPP600 instruction manual

MYERS MRGD200MC2 owner's manual

MYERS

MYERS MRGD200MC2 owner's manual

JABSCO ITT 36600 Series manual

JABSCO

JABSCO ITT 36600 Series manual

Crivit 26301 instruction manual

Crivit

Crivit 26301 instruction manual

Fountain TECH FT-2500 user guide

Fountain TECH

Fountain TECH FT-2500 user guide

Lumax LX-1318 manual

Lumax

Lumax LX-1318 manual

MRC PP-D-720 Operation manual

MRC

MRC PP-D-720 Operation manual

manuals.online logo
manuals.online logoBrands
  • About & Mission
  • Contact us
  • Privacy Policy
  • Terms and Conditions

Copyright 2025 Manuals.Online. All Rights Reserved.