manuals.online logo
Brands
  1. Home
  2. •
  3. Brands
  4. •
  5. Phoenix
  6. •
  7. Safe
  8. •
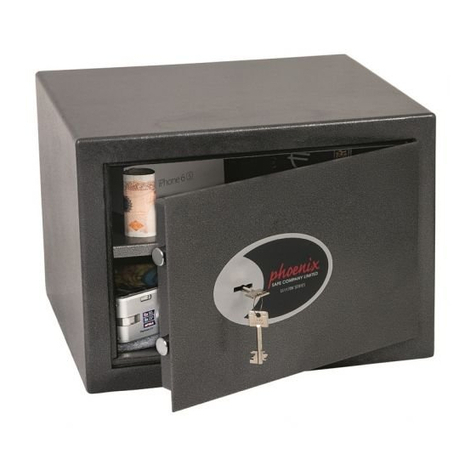
  9. Phoenix KS0030E Series User manual

Phoenix KS0030E Series User manual

2. Compartiment des piles
3. Lock Casing
Reset Button
2. Compartimento de pilas
3. Lock Casing
Reset Button
COMO ABRIR SU CAJA DE SEGURIDAD POR LA PRIMERA VEZ
Retire el tapón de plástico de color gris que está en la parte inferior del teclado e inserte una de las llaves de emergen-
cia , gírela en el sentido contrario a las agujas del reloj, luego gire el mando de apertura en el sentido de las agujas del
reloj. Una vez la puerta este abierta coloque 4 X AA pilas alcalinas en el compartimento de las pilas y siga las
instrucciones que se mencionan más abajo para introducir sus códigos.
1. NOTA
1.1 El código de usuario original es “159”. Ambos códigos se pueden cambiar fácilmente, el código maestro no está
configurado (y puede configurarse siguiendo las instrucciones del paso 3).
1.2 Cuando cambie el código, MANTENGA SIEMPRE LA PUERTA ABIERTA y pruebe el nuevo código antes de cerrar y
bloquear la caja de seguridad.
2. APERTURA Y CIERRE DE LA CAJA DE SEGURIDAD
2.1 Para desbloquear: introduzca el código de usuario o maestro y pulse "#"para confirmar. Cuando se encienda la luz
verde, gire la maneta (3) en el sentido de las agujas del reloj y abra la puerta.
2.2 Para bloquear: cierre la puerta y gire la maneta (3) en el sentido contrario al de las agujas del reloj.
NOTA: Si introduce un código incorrecto 3 veces consecutivas, el panel se bloqueará durante 20 segundos. Si introduce
un código incorrecto 3 veces más, el panel se bloqueará durante 5 minutos mientras suena la alarma.
NOTA: El encendido de la luz roja al mismo tiempo que la verde al abrir la caja de seguridad, significa que las pilas se
están agotando y que se deben sustituir cuanto antes.
3. INTRODUCCIÓN DE CÓDIGOS DE USUARIO Y MAESTRO
3.1 CONFIGURACIÓN DEL CÓDIGO DE USUARIO:
Con la puerta abierta, pulse el botón de reinicio (dentro del compartimento de la batería). Con la luz amarilla de
advertencia encendida, introduzca el nuevo código de usuario (3-8 dígitos) y pulse "#" o "*". Un doble pitido sonará
y la luz amarilla de advertencia se apagará. Si escucha 3 pitidos, su código no ha sido aceptado y deberá comenzar
de nuevo.
3.2 Con la puerta abierta, introduzca "0" dos veces y pulse el botón de reinicio. Mientras la luz de advertencia amarilla
está encendida, introduzca el nuevo código maestro (3-8 dígitos) y pulse "#" o "*". Un doble pitido sonará y la luz
amarilla de advertencia se apagará, y su nuevo código estará configurado. Si escucha 3 pitidos, su código no ha
sido aceptado y deberá comenzar de nuevo.
4. APERTURA DE LA CAJA CON LLAVE DE EMERGENCIA
Si ha olvidado el código o las pilas se han agotado, podrá abrir la caja de seguridad con la llave de emergencia. Retire la
tapa gris de la cerradura (4), introduzca la llave y gírela en el sentido de las agujas del reloj. Mientras la llave se mantiene
girada, podrá girar la maneta para abrir la caja de seguridad. En ese momento, podrá retirar la llave y sustituir las pilas y
el código.
5. CAMBIO DE PILAS
Cuando las pilas estén agotadas, se encenderá el testigo rojo al pulsar los botones del teclado.
Se requieren 4 x AA pilas (2). Sustituya las pilas agotadas lo antes posible. Cuando cambie las pilas,
debe reintroducir su código personal siguiendo las instrucciones del punto 2. No tire las pilas usadas
a la basura doméstica. Deposítelas en los puntos indicados para la recogida de las mismas. También
puede devolver las pilas usadas a su proveedor quien se encargará de la gestión de su
reciclado (cuando sea posible).
6. CÓMO CAMBIAR LAS PILAS
Retire la tapa gris de plástico situada entre la maneta redonda y el teclado. A continuación, inserte la llave de emergencia
y gírela en el sentido de las agujas del reloj. Gire la maneta y abra la puerta. En la parte de atrás de la puerta encontrará
el compartimento de las pilas, retire la tapa del mismo y sustituya las pilas agotadas por otras nuevas. Vuelva a colocar la
tapa del compartimento de pilas; cierre la puerta y gire la llave en sentido contrario a las agujas del reloj. Retire la llave y
vuelva a colocar la tapa gris de plástico.
7. INSTALACIÓN
Use los dos pernos de 6mm para fijar la caja a la pared.
OUVRIR VOTRE COFFRE POUR LA PREMIERE FOIS
Retirez le capuchon en plastique gris en bas du clavier, insérez l'une des clefs d'urgence et tournez la dans le sens
contraire des aiguilles d'une montre. Puis tournez la poignée dans le sens des aiguilles d'une montre. Une fois la porte
ouverte, insérez 4 piles alcalines AA (non fournies) dans le compartiment à piles et suivez les instructions ci-dessous pour
définir vos codes.
1. NOTEZ
1.1 Le code par défaut est "159", le code maître est non défini (et peut être défini en suivant les instructions de l'étape 3).
Le code par défaut et le code maître peuvent être facilement changés en suivant les instructions ci-dessous.
1.2 Lors du paramétrage de votre code, TOUJOURS LAISSER LA PORTE OUVERTE, et vérifier votre nouveau code avant de
fermer et vérouiller le coffre.
2. OUVERTURE ET FERMETURE DE VOTRE COFFRE
2.1 Pour déverrouiller - Entrez votre code ou code maître puis appuyez “#” ou “*” pour confirmer. Lorsque la lumière
verte s'allume, tournez la poignée dans le sens horaire (3) et ouvrez la porte.
2.2 Pour vérouiiller - Fermez la porte et tournez la poignée dans le sens inverse d'une aiguille d'une montre (3).
NOTEZ- Si vous entrez un code erroné 3 fois de suite, le panneau se verrouillera pendant 20 secondes. Si le code est
erroné et entré 3 fois de suite une nouvelle fois, le panneau se verrouillera pendant 5 minutes et l'alarme retentira pendant
5 minutes.
NOTEZ- Si vous voyez une lumière rouge en même temps qu'une lumière verte lors de l'ouverture du coffre, ceci indique
que les piles sont faibles et doivent être changées au plus vite.
3. INSTALLATION DU CODE UTILISATEUR ET CODE MAITRE.
3.1 CONFIGURATION DU CODE D'UTILISATEUR:
Avec la porte ouverte, appuyez sur le bouton de réinitialisation (à l’intérieur du compartiment à piles). Lorsque le
voyant jaune est allumé, entrez le nouveau code d'utilisateur (3 à 8 chiffres) et appuyez sur «#» ou «*». Un double bip
retentit et le voyant jaune s'éteint. Le nouveau code est défini. Si vous obtenez 3 bips, votre code n'est pas défini et
vous devez recommencer.
3.2 La porte ouverte, saisissez “0” deux fois puis appuyez sur le bouton de réinitialisation. Lorsque le voyant jaune est
allumé, entrez le nouveau code maître (3 à 8 chiffres) et appuyez sur «#» ou «*». Un double bip retentit et le voyant
jaune s'éteint, votre nouveau code est défini. Si vous obtenez 3 bips, votre code n'est pas défini et vous devez
recommencer.
4. OUVRIR LE COFFRE AVEC LA CLEF DE SECOURS
Si vous oubliez votre code ou si les piles sont épuisées, vous pouvez ouvrir votre coffre avec la clef de secours. Enlevez
simplement le couvercle gris (4), insérez la clef et tournez dans le sens horaire, en tournant la clef vous pouvez en même
temps tournée la poignée pour ouvrir le coffre. Vous pouvez ensuite retirer la clef et paramétrer votre coffre avec de
nouvelles piles et un nouveau code.
5. REMPLACEMENT DES PILES
Lorsque les piles sont faibles, le voyant rouge s'allumera à chaque pression des touches sur le clavier. La serrure utilise 4
piles X AA situées dans le compartiment à piles (2). Veuillez les remplacer au plus vite. Lorsque vous remplacez les piles,
vous devez reconfigurer votre code personnel en suivant les instrctions de l'étape 2. Les piles usagées ne doivent pas être
jetées avec les ordures ménagères. Ces dernières doivent être apportées dans des bacs de collecte disponible à cet effet.
6. COMMENT REMPLACER LES PILES
Enlevez le petit couvercle en plastique gris qui se trouve entre la poignée ronde et le pavé numérique. I
nsérez la clef de secours et tournez la dans le sens horaire. Tournez la poignée ronde et ouvrez le coffre.
A l'intérieur de la porte, vous verez le couvercle du compartiment à piles, enlevez le; retirez les piles
usagées et remplacez les par des piles neuves. Remettez le couvercle du compartiment à piles; fermez
la porte et tournez la clef de secours dans le sens inverse d'une aiguille d'une montre. Retirez la clef et
remettez le petit couvercle en plastique gris.
7. INSTALLATION
Utilisez les deux boulons de 6mm pour fixer le coffre dans un mur adéquat.
INSTRUCTIONS D'UTILISATION INSTRUCCIONES DEL USUARIO
Porte du coffre en position ouverte Puerta de la caja en posición abierta
Trous pour la fixation au mur/sol Agujeros para fijación a la pared/suelo
Ouvert
Piles faibles
Alerte
3. Poignée ouverture / Fermeture 4. Clef de secours
Abierta
Pilas bajas
Atención
3. Maneta de apertura/cierre4. Cerradura de la llave de emergencia
Phoenix Safe Company: Where peace  mind is guaranteed
MANUAL DE INSTRUCCIONES PARA
KS0030E, SS0800E/ED PHOENIX SERIE & GARANTÍA
Para mayor seguridad, le recomendamos que cuando acceda a nuestra página
web www.phoenixsafe.com, haga clic en Registro de garantía e introduzca
su registro de garantía.
AVDA, DE LA INDUSTRIA, 52 POLÍGONO INDUSTRIAL, 28820 COSLADA, MADRID,
ESPAÑA | 0034 (91) 6736411
ISTRUZIONI PER L'USO DI KS0030E, SS0800E/ED
SERIE PHOENIX & REGISTRAZIONE DELLA GARANZIA
Per una maggiore sicurezza vi raccomandiamo di inoltrare la vostra
registrazione della garanzia visitando il nostro sito web: www.phoenixsafe.com e
cliccando su registrazione della garanzia.
VIA MONTE ROSA 28, 20049, CONCOREZZO, MILAN, ITALY | 39 039 5965844
BETRIEBSANLEITUNG FÜR PHOENIX KS0030E,
SS0800E/ED SERIE & GARANTIEKARTE
Aus Sicherheitsgründen empfehlen wir Ihnen, Ihre Garantiekarte online auf unserer
Website www.phoenixsafe.com per Mausklick auf der Schaltfläche
„Garantieanmeldung“ auszufüllen.
DEUTSCHLAND GMBH, BAHNSTR. 23, D-42327 WUPPERTAL 0049-202-69519-0
MODE D'EMPLOI POUR PHOENIX SÉRIE
KS0030E, SS0800E/ED & GARANTIE
Pour une meilleure sécurité, nous vous recommandons d’enregistrer
votre garantie en ligne par notre site: www.phoenixsafe.com et en cliquant
sur enregistrement de garantie.
19 RUE DES HALLES, 16510 VERTEUIL SUR CHARENTE,
FRANCE | 00 33 (0) 5 45 89 68 80
OPERATING INSTRUCTIONS FOR PHOENIX KS0030E,
SS0800E/ED SERIES & GUARANTEE REGISTRATION
Please submit your guarantee registration by visiting our website
www.phoenixsafe.com and clicking on guarantee registration.
For further assistance or information please contact us on 0151 944 6444.
APEX HOUSE, 1 ORRELL MOUNT, LIVERPOOL, L20 6NS,
UNITED KINGDOM | +44 (0)151 944 6444
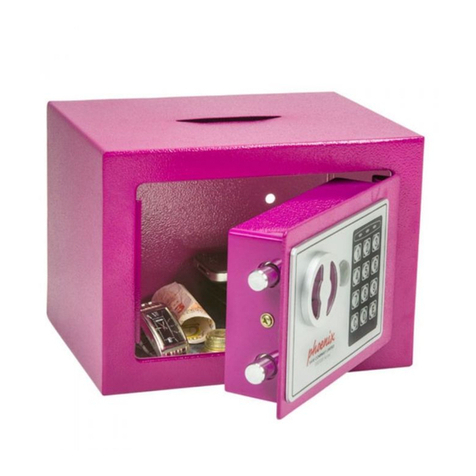
OPENING YOUR SAFE FOR THE FIRST TIME.
Remove the grey plastic plug from the bottom of the keypad, insert one of the Emergency keys and turn anti-clockwise.
Then rotate the handle clock-wise. Once the door is open insert 4 x AA alkaline batteries (not supplied) into the battery
compartment and follow the instructions below for setting your codes.
1. NOTE
1.1 The original user code is “159”, the master code is not set (and can be set by following the instructions in step 3)
The master code and user code can be changed easily by following the below instructions.
1.2 When resetting your code ALWAYS KEEP DOOR OPEN and test your new code before closing and locking the safe.
2. OPENING AND CLOSING YOUR SAFE
2.1 To Unlock - Input your user or master code and press “#” or “*” to confirm. When the green light is on,
turn the handle (3) clockwise and open the door.
2.2 To lock – Close door and turn handle (3) anti-clockwise
NOTE: If you input the code incorrectly 3 times successively, the panel will be locked for 20 seconds. If inputted
incorrectly a further 3 times, the panel will be locked for 5 minutes and the alarm will sound for 5 minutes.
NOTE: If you get a red light at same time as green when opening the safe, this indicates that your batteries
are low and should be changed at the earliest possible time.
3. SETTING USER AND MASTER CODES
3.1 SETTING USER CODE:
With the door open, press the reset button (inside the battery compartment). While the yellow warning light is on,
input the new user code (3-8 digits), and press “#” or “*”. A double bleep will sound and the yellow warning light
will go off your new code is set. If you get 3 bleeps your code is not set and you must start again.
3.2 With the door open, input “0” twice then press the reset button. While the yellow warning light is on, input the new
master code (3-8 digits), and press “#” or “*”. A double bleep will sound and the yellow warning light will go off,
your new code is set. If you get 3 bleeps your code is not set and you must start again.
4. OPENING THE SAFE WITH OVERRIDE KEY
If you forget your code or the batteries are flat, you can open your safe using the override key. Simply remove the grey
lock cover (4), insert key and turn anticlockwise, whilst key is turned you can turn you handle to open the safe. You can
now remove key and set your safe up with new batteries and code.
5. REPLACEMENT BATTERIES
When the batteries are low the red indicator light will be illuminated when the keypad buttons
are pressed. The lock uses 4 x AA alkaline batteries (not supplied) located in the battery holder (2).
6. HOW TO REPLACE BATTERIES
Open the safe using the override key. On the inside of the door, you will see the cover to the battery pack,
remove this; take out the dead batteries and replace with new ones. Replace the cover to the battery pack;
close the door and turn the override key clockwise. Remove the key and replace the grey plastic cover.
7. INSTALLATION
Use the two 6mm bolts to bolt the safe to a suitable wall.
Safe Door in the open position
Sportello cassaforte in posizione aperta
Parete/Base Fori/fissaggio
Open
Low Battery
Warning
3. Open/Close Handle 4. Key Override
Offen
Batterieunterspannung
Hinweis
3. Griff 4. Notschloss
Aperto
Pile in Esaurimento
Avviso
3. Apertura/Chiusura Maniglia 4. Chiave Maestra
APRIRE LA CASSAFORTE PER LA PRIMA VOLTA.
Togliere il coperchietto grigio dalla tastiera, inserire una delle chiavi di Emergenza e girare in senso anti-orario. Quindi
ruotare la maniglia in senso orario. A sportello aperto inserire 4 pile AA alcaline (non fornite) nello scomparto pile e
seguire le istruzioni sotto riportate per impostare i codici.
1. NOTA
1.1 Il codice utente originale è “159”, il codice master non è impostato (e può essere impostato seguendo le istruzioni
al punto 3) Il codice master e il codice utente possono essere facilmente modificati seguendo le istruzioni sotto
indicate.
1.2 Durante il cambio del codice TENERE SEMPRE LO SPORTELLO APERTO e verificare il nuovo codice prima di chiudere
la cassaforte.
2. APRIRE E CHIUDERE LA CASSAFORTE
2.1 Per Aprire – Inserire codice utente o master e premere “#” oppure “*” per confermare. Quando l’indicatore verde si
illumina girare la maniglia (3) in senso orario e aprire lo sportello.
2.2 Per Chiudere – Chiudere sportello e girare la maniglia (3) in senso anti-orario
NOTA: Se si digita un codice sbagliato 3 volte consecutive, il pannello si bloccherà per 20 secondi. Se si digita il codice
sbagliato altre 3 volte, il pannello si bloccherà per 5 minuti e l’allarme si attiverà per 5 minuti NOTA: Se gli indicatori rosso
e verde si accendono contemporaneamente durante l’apertura, questo indica pile in esaurimento, da sostituire il più
presto possibile.
3. IMPOSTARE CODICI UTENTE E MASTER
3.1 IMPOSTARE CODICE UTENTE:
Con sportello aperto, premere il tasto reset (all’interno dello scomparto pile). Mentre l’indicatore giallo di avviso è
acceso, inserire il nuovo codice utente (3-8 cifre), e premere “#” oppure “*”. Si sentirà un doppio segnale acustico e
l’indicatore giallo si spegnerà, il nuovo codice è stato impostato. Se si sente un segnale acustico per 3 volte il
codice non è stato impostato e sarà necessario ricominciare da capo.
3.2 Con sportello aperto, inserire “0” due volte quindi premere il tasto reset. Mentre l’indicatore giallo di avviso è
acceso, inserire nuovo codice master (3-8 cifre), e premere “#” oppure “*”. Si sentirà un doppio segnale acustico e
l’indicatore giallo si spegnerà, il nuovo codice è stato impostato. Se si sente un segnale acustico per 3 volte il
codice non è stato impostato e sarà necessario ricominciare da capo.
4. APRIRE LA CASSAFORTE CON CHIAVE MAESTRA
In caso di codici smarriti oppure pile esaurite, aprire la cassaforte con la chiave maestra. Togliere il coperchio grigio (4),
inserire la chiave e girare in senso anti-orario, finché la chiave è girata, è possibile girare la maniglia ed aprire la
cassaforte. Togliere la chiave ed impostare il nuovo codice oppure sostituire le pile.
5. SOSTITUZIONE PILE
Quando le pile si stanno scaricando, l’indicatore rosso si accenderà ogni qualvolta si usa la tastierina.
La serratura richiede 4 pile AA (non fornite) situate nell’apposito alloggiamento (2).
6. COME SOSTITUIRE LE PILE
Aprire la cassaforte usando la chiave maestra. All’interno dello sportello vi è il vano pile, togliere il coperchio; togliere le
pile esaurite e sostituire con pile nuove. Riposizionare il coperchio del vano pile; chiudere lo sportello e girare la chiave
maestra in senso orario. Togliere la chiave e riposizionare il coperchio grigio in plastica.
7. INSTALLAZIONE
Utilizzare le due viti da 6mm per fissare la cassaforte a parete adatta.
ERSTÖFFNUNG
Entfernen Sie die graue Abdeckung im unteren Teil der Tastatur. Führen Sie einen der beiden mitgelieferten Notschlüssel
in das Notschloss ein und drehen Sie diesen entgegen dem Uhrzeigersinn. Im Anschluss drehen Sie bitte den Griff im
Uhrzeigersinn. Jetzt setzen Sie bitte 4 x AA Alkaline Batterien (nicht im Lieferumfang enthalten) in das Batteriefach ein
und folgen der Anweisung.
1. HINWEIS
1.1 Der werkseitig eingestellte Benutzercode lautet 159. Der Mastercode ist nicht programmiert, kann aber wie unten
beschrieben programmiert werden. Beide Codes können sehr einfach anhand der folgenden Beschreibung geändert
werden.
1.2 Bitte führen Sie alle Programmiervorgänge BEI OFFENER SAFETÜR aus. Erst nach mehrmaligem Testen verschließen
Sie bitte den Safe.
2. ÖFFNEN / SCHLIEßEN
2.1 ÖFFNEN - Geben Sie Ihren Benutzercode / Mastercode ein und drücken Sie die #- oder * Taste. Anschließend drehen
Sie den Griff (3) im Uhrzeigersinn, um den Safe zu öffnen.
2.2 SCHLIEßEN - Schließen Sie die Safetür und drehen Sie anschließend den Griff (3) entgegen dem Uhrzeigersinn
Hinweis Nach 3 aufeinanderfolgenden Falscheingaben geht das Schloss in eine 20-sekündige Sperrzeit. Nach 3 weiteren
aufeinanderfolgenden Falscheingaben geht Schloss in eine 5- minütige Sperrzeit. Die Sperrzeit erkennen Sie an dem
Piepton.
Hinweis Leuchten die rote und die grüne LED gleichzeitig nach der Codeeingabe bzw. beim Öffnen der Safetür ist der
Batteriestatus zu gering. Die Batterien sollten in diesem Fall so schnell wie möglich ausgetauscht werden.
3. BENTUZERCODE PROGRAMMIEREN
Drücken Sie bei offener Safetür den Resetknopf. Sie finden diesen im Batteriefach.
Während die gelbe LED leuchtet geben Sie bitte den neuen 3 bis 8-stelligen Benutzercode ein und bestätigen Sie die
Eingabe mit der # oder * Taste. Sie hören einen Doppelpiepton und die gelbe LED erlischt. Hören Sie 3 Pieptöne wurde
kein Benutzercode programmiert, bitte fangen Sie noch einmal von vorne an.
4. MASTERCODE PROGRAMMIEREN
Drücken Sie bei offener Safetür zweimal die Taste 0. Danach drücken Sie bitte den Resetknopf. Sie finden diesen im
Batteriefach. Während die gelbe LED leuchtet geben Sie bitte den neuen 3 bis 8-stelligen Mastercode ein und bestätigen
Sie die Eingabe mit der # oder * Taste. Sie hören einen Doppelpiepton und die gelbe LED erlischt. Hören Sie 3 Pieptöne
wurde kein Mastercode programmiert und Sie müssen von vorne anfangen.
5. BATTERIEN AUSTAUSCHEN
Sind die Batterien zu schwach wird die rote LED während Sie die Tasten drücken aufleuchten. Das Schloss arbeitet
mit 4 x AA Alkaline Batterien. Sie finden diese im Batteriefach (2). Bitte tauschen Sie die Batterien so
schnell wie möglich aus. Nachdem Sie die Batterien ausgetauscht haben, muss Ihr Code wieder neu
programmiert werden (siehe Punkt 3). Altbatterien gehören nicht in den Hausmüll. Die Batterien sollen
zur Entsorgung zu einer geeigneten Stelle gebracht werden. Sie können die gebrauchten Batterien ggf.
auf Ihre Kosten an die Verkaufsstelle (Versandlager) zurückschicken.
6. ANLEITUNG ZUM BATTERIEWECHSEL
Entfernen Sie die graue, runde Plastikabdeckung zwischen dem Drehgriff und der Tastatur. Stecken Sie einen der beiden
Notschlüssel in das Notschloss und drehen ihn entgegen dem Uhrzeigersinn. Drehen Sie den Griff und öffnen die Tür. Auf
der Innenseite der Tür, im Türdeckel, finden Sie das Batteriefach. Entfernen Sie den Deckel, entnehmen Sie die leeren
Batterien und setzen Sie die neuen ein. Setzen Sie anschließend den Batteriefachdeckel wieder ein, schließen Sie die Tür
und drehen den Notschlüssel entgegen den Uhrzeigersinn. Ziehen Sie den Schlüssel jetzt wieder aus dem Schloss.
Drücken Sie die graue, runde Plastikabdeckung wieder auf die dafür vorgesehene Stelle.
7. INSTALLATION
Benutzen Sie die zwei 6mm Schrauben/Bolzen um den Safe an einer geeigneten Wand zu befestigen.
Wall/Base Fixing Holes
2. Battery Compartment
3. Lock Casing
Reset Button
2. Batteriefach
3. Schlossabdeckung
Resetknopf
2. Vano Pile
3. Scomparto Chiusura
Tasto reset
USER INSTRUCTIONS
ISTRUZIONI PER L’USO
BEDIENUNGSANLEITUNG
Safetür in OFFEN-Position
Version 3/PB/OCT 19
Wand/Boden Verankerungsbohrungen

This manual suits for next models

8

Other Phoenix Safe manuals

Phoenix PS610-E36 Product information sheet

Phoenix

Phoenix PS610-E36 Product information sheet

Phoenix FS2230K Series User manual

Phoenix

Phoenix FS2230K Series User manual

Phoenix SS1160 Product information sheet

Phoenix

Phoenix SS1160 Product information sheet

Phoenix SS0720E Series User manual

Phoenix

Phoenix SS0720E Series User manual

Phoenix SS0800E Series User manual

Phoenix

Phoenix SS0800E Series User manual

Phoenix Elara HS3550 Product information sheet

Phoenix

Phoenix Elara HS3550 Product information sheet

Phoenix SS0992E User manual

Phoenix

Phoenix SS0992E User manual

Phoenix SPECTRUM LS6000 User manual

Phoenix

Phoenix SPECTRUM LS6000 User manual

Phoenix FS1510E Series User manual

Phoenix

Phoenix FS1510E Series User manual

Phoenix DIONE SS0313E User manual

Phoenix

Phoenix DIONE SS0313E User manual

Phoenix VENUS HS0650 Product information sheet

Phoenix

Phoenix VENUS HS0650 Product information sheet

Phoenix FS1610K Product information sheet

Phoenix

Phoenix FS1610K Product information sheet

Phoenix FS1270E Series User manual

Phoenix

Phoenix FS1270E Series User manual

Phoenix FS0352C Series User manual

Phoenix

Phoenix FS0352C Series User manual

Phoenix PS600 User manual

Phoenix

Phoenix PS600 User manual

Phoenix REDL2 User manual

Phoenix

Phoenix REDL2 User manual

Phoenix VENUS HS0656 Product information sheet

Phoenix

Phoenix VENUS HS0656 Product information sheet

Phoenix FS1280F User manual

Phoenix

Phoenix FS1280F User manual

Phoenix DS2500K User manual

Phoenix

Phoenix DS2500K User manual

Phoenix SS0100E Product information sheet

Phoenix

Phoenix SS0100E Product information sheet

Phoenix NEXT PLUS LS7010 User manual

Phoenix

Phoenix NEXT PLUS LS7010 User manual

Phoenix KS0030E User manual

Phoenix

Phoenix KS0030E User manual

Phoenix FIRECHIEF FS1650 Product information sheet

Phoenix

Phoenix FIRECHIEF FS1650 Product information sheet

Phoenix FORTRESS II SS1182E Product information sheet

Phoenix

Phoenix FORTRESS II SS1182E Product information sheet

Popular Safe manuals by other brands

Mottura HOKEY HE 8000 Instructions and guarantee

Mottura

Mottura HOKEY HE 8000 Instructions and guarantee

Clarke CS400FP Operation and maintenance instructions

Clarke

Clarke CS400FP Operation and maintenance instructions

Hornady Security TriPoint 98152 owner's manual

Hornady Security

Hornady Security TriPoint 98152 owner's manual

Barska Biometric Safe manual

Barska

Barska Biometric Safe manual

Grizzly H5673 instructions

Grizzly

Grizzly H5673 instructions

Standers 3276007312577 Assembly, Use, Maintenance Manual

Standers

Standers 3276007312577 Assembly, Use, Maintenance Manual

First Alert MMSKYE0709 Operations & installation guide

First Alert

First Alert MMSKYE0709 Operations & installation guide

Honeywell 2054D - 1 Hour Steel Fire Safe Operations & installation guide

Honeywell

Honeywell 2054D - 1 Hour Steel Fire Safe Operations & installation guide

Steren SEG-520 instruction manual

Steren

Steren SEG-520 instruction manual

Comsafe Premium Line FireSafe.EL Electronic User instructions

Comsafe

Comsafe Premium Line FireSafe.EL Electronic User instructions

Bunker Hill Security 61724 Owner's manual & safety instructions

Bunker Hill Security

Bunker Hill Security 61724 Owner's manual & safety instructions

Arregui Premier 16501-S0 Instruction manual and guarantee

Arregui

Arregui Premier 16501-S0 Instruction manual and guarantee

Guzzanti GZ-503 user manual

Guzzanti

Guzzanti GZ-503 user manual

HMF 250451 instruction manual

HMF

HMF 250451 instruction manual

ExecutiveSafe ES035 Operation manual

ExecutiveSafe

ExecutiveSafe ES035 Operation manual

Manutan A158786 user guide

Manutan

Manutan A158786 user guide

First Alert 2087F-BD Operations & installation guide

First Alert

First Alert 2087F-BD Operations & installation guide

SnapSafe Titan owner's manual

SnapSafe

SnapSafe Titan owner's manual

manuals.online logo
manuals.online logoBrands
  • About & Mission
  • Contact us
  • Privacy Policy
  • Terms and Conditions

Copyright 2025 Manuals.Online. All Rights Reserved.