manuals.online logo
Brands
  1. Home
  2. •
  3. Brands
  4. •
  5. Phonocar
  6. •
  7. Car Receiver
  8. •
  9. Phonocar 04069 User manual

Phonocar 04069 User manual

FIAT 500X
ESCLUSO / EXCLUDED PARK ASSIST
JEEP Renegade ‘15>
ESCLUSO / EXCLUDED PARK ASSIST
Istruzioni di montaggio
Instructions manual • Instructions de montage
Montageanleitung • Instrucciones para el montaje
04069
Leggere attentamente le istruzioni di montaggio al fine di familiarizzare con tutti i controlli.
Carefully read the Mounting Instructions in order to get familiar with the various control keys.
Lire les Instuctions de Montage avec attention, afin de familiariser avec les touches de commande.
Montage-Anweisungen aufmerksam durchlesen und sich gut mit den Kontroll-Knöpfen auseinander setzen.
Leer atentamente las instrucciones de montaje con el fin de familiarizarse con todos los controles.
COMPATIBILITÁAUTORADIO - CAR-RADIO COMPATIBILITY:
ALPINE - CLARION - JVC - KENWOOD - PHONOCAR - PIONEER - SONY
INTERFACCIA COMANDI
AL VOLANTE
STEERING WHEEL COMMANDS
INTERFACE
IT L’interfaccia è un dispositivo elettronico che permette di recuperare le funzioni dei comandi al volante
originali delle vetture quando si sostituisce l’autoradio originale.
IMPORTANTE: La nuova autoradio deve essere provvista dell’uscita comandi al volante tramite cavo.
Per poter visualizzare la retrocamera originale/sensori di parcheggio/menu vettura E’ NECESSARIO:
1) Inserire i terminali nel connettore del CAVO SEGNALE AUTORADIO rispettando gli schemi di collega-
mento.
2) Collegare il cavo segnale autoradio e successivamente il connettore alimentazione.
3) Accendere il quadro strumenti , attendere 10-15 sec e verificare il funzionamento.
GB The Interface is an electronic device providing for the Original steering-wheel functions of cars, fitted
with CAN-BUS or RESISTIVE-protocols, when the Original car-radio is replaced.
IMPORTANT: The new car-radio must have an Exit for the steering-wheel commands through cable-control.
To visualize the Original Rear-camera/Parking Sensors/Vehicle-Menu, you have to:
1) Put the terminals into the connector of the CABLE FOR CAR-RADIO-SIGNAL, as per connection-scheme.
2) Connect the cable for car-radio-signal . Then plug the current-supply-connector.
3) Switch-on the instruments-board; wait for 10 – 15 seconds and check if everything works.
FR L’Interface est un dispositif électronique permettant de récupérer les commandes au Volant d’origine,
dans les voitures équipées avec protocole CAN-BUS ou RESISTIF, quand on remplace l’autoradio d’origine.
IMPORTANT: Le modèle d’autoradio qu’on va choisir, doit être équipé avec une Sortie pour les commandes
au volant par câble.
Pour pouvoir visualiser la caméra de recul original/capteurs de stationnement/menu véhicule il est nécessaire:
1) Introduire les terminaux dans le connecteur du CABLE SIGNAL AUTORADIO, en respectant les schémas
de branchement.
2) Brancher le câble de signal autoradio et, en suite, le connecteur d’alimentation.
3) Allumer le tableau de bord, attendre 10 – 15 secondes et vérifier le fonctionnement.
D Die Interface ist eine elektronische Vorrichtung, mit der sich die Original-Lenkradsteuerungen wiederher-
stellen lassen, wenn das Original-Autoradio ersetzt wird, soweit der Wagen mit CAN-BUS oder RESISTIF-
Protokoll ausgestattet ist.
WICHTIG: das Nachrüst-Autoradio muss mit einem Ausgang für den Anschluss eines Lenkradsteuerungs-
Kabels versehen sein.
Um Original-Rückfahrkamera/Parksensoren/Wagen-Menü auszuweisen, muss man:
1)Endstücke,gemäss Anschluss-Plan, in den Stecker des AUTORADIO-SIGNAL-KABELS geben
2)Zuerst das Autoradio-Signal-Kabel verbinden, dann Stromstecker eingeben.
3)Instrumenten-Tafel einschalten. 10 – 15 Sekunden warten und kann kontrollieren, ob alles funktioniert.
E El interfaz es un dispositivo electrónico que permite recuperar las funciones de los mandos de volante de
origen en los coches con protocolo CAN-BUS o RESISTIVO cuando se sustituye la autoradio de origen.
IMPORTANTE la nueva autoradio debe tener las funciones para controlar los mandos de volante mediante
cable.
Para poder visualizar la retro-cámara original/sensores de aparcamiento/menú coche ES NECESARIO:
1) Introducir los terminales en el conector del CABLE SEÑAL AUTORADIO respetando los esquemas de
conexión.
2) Conectar el cable de señal autoradio y a continuación el conector de alimentación.
3) Encender el cuadro de los instrumentos, esperar 10-15 s y verificar el funcionamiento.
COLLEGAMENTI • CONNECTIONS • CONNEXIONS • ANSCHLÜSSE • CONEXIONES
COMMUTATORI • SWITCHES • INTERRUPTEURS • SCHALTER • CONMUTADORES
1 ON Solo con autoradio Pioneer - Only with Pioneer car-radio - Seulement avec autoradio Pioneer
Nur mit Pioneer-Autoradio - Solo con autoradio Pioneer
2 ON Con telecamera segnale PAL - With Rear-camera having PAL-signal - Avec caméra signal PAL
Mit Rückfahrkamera mit PAL-Signal
2 OFF Con retrocamera segnale NTSC - With Rear-camera having NTSC-signal - Avec caméra de recul
signal NTSC - Mit Rückfahrkamera mit NTSC-Signal - Con retro-cámara señal NTSC
3 ON Per ripristino impostazioni di fabbrica - To re-establish Factory-settings - Pour restaurer les réglages
d’origine - Um Fabrik-Einstellungen wiederherzustellen - Para volver a los ajustes de fábrica
4 Non abilitato - Not activated - Pas activé - Nicht aktiviert - No habilitado
ATTENZIONE quando avviene il ripristino delle funzioni di fabbrica il monitor si illumina di rosso.
IMPORTANT: when Factory-settings are getting re-established, the Monitor will turn red.
ATTENTION: lorsque la restauration des fonctions originaux se fait, l’écran devient rouge
WICHTIG: während der Wiederherstellung der Farikeinstellungen wird der Bildschirm rot.
ATENCIÓN cuando se realiza la operación para volver a los ajustes de fábrica el monitor se ilumina de color rojo.
USCITA COMANDI AL VOLANTE
STEERING WHEEL COMMAND OUTPUT
CONNETTORE
ORIGINALE AUTO
ORIGINAL CAR
CONNECTOR
INGRESSO
RETROCAMERA
REAR CAMERA
INPUT
MUTE
VERDE/GREEN
RETROCAMERA
ORIGINALE
ORIGINAL
REAR-CAMERA
BUZZER
ON
ISO
CAR
RADIO
ISO
ISO
1 2 3 4
INTERFACE
CAN-BUS
04069
COMMUTATORI / SWITCH
ODOMETRO
ROSA/PINK
REVERSE
VIOLA/PURPLE
FUNZIONI • FUNCTIONS • FONCTIONS • FUNKTIONEN • FUNCIONES
KEY FOR VOICE-CALL
Press for 2 seconds to enter the Functions-Menu.
Press briey to get the Functions of the selected Menu.
TOUCHE RAPPEL VOCAL
Appuyer pour 2 secondes pour accéder au menu des fonctions
Appuyer brièvement pour accéder aux fonctions du menu choisi
TASTE FÜR SPRACHANRUF
2 Sekunden drücken, um das Funktions-Menü zu betreten.
Nur kurz drücken, um die Funktionen des gewählten Menüs zu tätigen.
TECLA MARCACIÓN POR VOZ
Pulsar durante 2 segundos para acceder al menú funciones.
Pulsar brevemente para acceder a las funciones del menú seleccionado.
TASTO RICHIAMO VOCALE
Premere per 2 secondi per accedere al menu funzioni.
Premere brevemente per accedere alle funzione del menu selezionato.
TASTI DIETRO VOLANTE
Premere ALTO/BASSO per selezionare le varie impostazioni.
KEYS ON STEERING-WHEEL ON LEFT BACK
Press UP/DOWN to select the various Settings.
TOUCHE DERRIÈRE LE VOLANT CÔTÉ GAUCHE
Appuyer HAUT/BAS pour sélectionner les différents réglages
TASTEN LINKS HINTER DEM LENKRAD
OBEN/UNTEN drücken, um aus den verschiedenen Einstellung zu
wählen.
TECLAS DETRÁS DEL VOLANTE
Pulsar ARRIBA/ABAJO para seleccionar los ajustes.
SCHERMATE • SCREENSHOTS • PAGE-ÉCRAN
BILDSCHIRM-AUFZEICHNUNG • VENTANAS MENÚ
Vehicle Settings
Display
Clock
Doors and Locks
Lights
Safety and Driving Assistance
Vehicle Off Options
< Back
Configuration Menu
Vehicle Settings
Infodapter Settings
Language
Version
< Back
Screen Size/Position
Horizontal Size
Horizontal Position
Vertical Size
Vertical Position
< Back
Preferences
Park Assist Version 0
Camera Connected Yes
Reverse Priority Park Assist
Park Brake Source Speed
Restore factory settings
< Back
Infodapter Settings
Screen Size/Position
Picture Settings
Preferences
<Back
MARRONE/BROWN
CONNESSIONE ADATTATORE COMANDI AL VOLANTE
ADAPTER-CONNECTION FOR STEERING-WHEEL COMMANDS
CONNEXION ADAPTATEUR COMMANDES AU VOLANT
ADAPTER-ANSCHLUSS FÜR LENKRAD-FERNBEDIENUNGEN
CONEXIÓN ADAPTADOR MANDOS DE VOLANTE
ALPINE
VIOLA/PURPLE
VIOLA/PURPLE
MARRONE/BROWN
MARRONE/BROWN
MARRONE/BROWN
NERO/BLACK NERO/BLACK
NERO/BLACK
NERO/BLACK
NERO/BLACK
NERO/BLACK
NERO/BLACK
MARRONE/BROWN
MARRONE/BROWN
MARRONE/BROWN
MARRONE/BROWN
MARRONE/BROWN
CLARION
JVC >11
KENWOOD
JVC ´11>
PHONOCAR
VM024 >´12
PHONOCAR
VM033-037
PHONOCAR
VM038-VM039
VM009-VM044
PHONOCAR
VM024 ´12>
PHONOCAR
VM030-031-032-036
PHONOCAR
VM066
PHONOCAR VM051
PIONEER
SONY
VIOLA/PURPLE
MARRONE/BROWN
VIOLA/PURPLE
VIOLA/PURPLEKEY A/1
KEY B/2
KEY GND
VIOLA/PURPLE
MARRONE/BROWN
Phonocar S.p.A. - Via F.lli Cervi, 167/C - 42124 Reggio Emilia (Italy) - Tel.
++
39 0522 941621 - Fax
++
39 0522 1602093
www.phonocar.com - e-mail:info@phonocar.it

Other Phonocar Car Receiver manuals

Phonocar VM 149 User manual

Phonocar

Phonocar VM 149 User manual

Phonocar VM 051 User manual

Phonocar

Phonocar VM 051 User manual

Phonocar VM 098 User manual

Phonocar

Phonocar VM 098 User manual

Phonocar VM082 Instruction manual

Phonocar

Phonocar VM082 Instruction manual

Phonocar VM 024 User manual

Phonocar

Phonocar VM 024 User manual

Phonocar VM 022 User manual

Phonocar

Phonocar VM 022 User manual

Phonocar VM013 User manual

Phonocar

Phonocar VM013 User manual

Phonocar 89956 User manual

Phonocar

Phonocar 89956 User manual

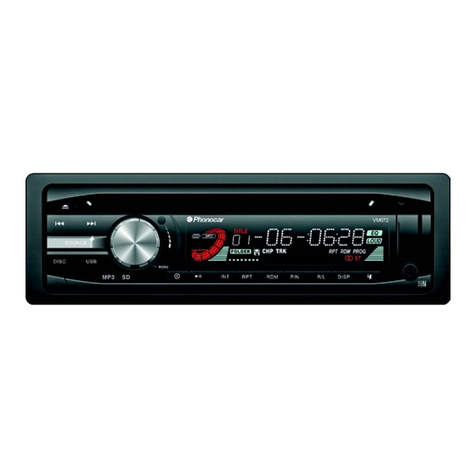
Phonocar VM072 User manual

Phonocar

Phonocar VM072 User manual

Phonocar VM069 User manual

Phonocar

Phonocar VM069 User manual

Phonocar VM 029 User manual

Phonocar

Phonocar VM 029 User manual

Phonocar VM208 Use and care manual

Phonocar

Phonocar VM208 Use and care manual

Phonocar VM 207 Simple manual

Phonocar

Phonocar VM 207 Simple manual

Phonocar VM052 User manual

Phonocar

Phonocar VM052 User manual

Phonocar VM 071 User manual

Phonocar

Phonocar VM 071 User manual

Phonocar VM 070 User manual

Phonocar

Phonocar VM 070 User manual

Phonocar VM028 User manual

Phonocar

Phonocar VM028 User manual

Phonocar VM002D User manual

Phonocar

Phonocar VM002D User manual

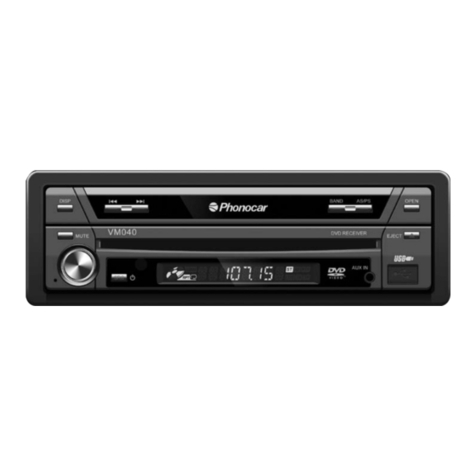
Phonocar VM 040 Simple manual

Phonocar

Phonocar VM 040 Simple manual

Phonocar VM 193 User manual

Phonocar

Phonocar VM 193 User manual

Phonocar VM083 Instruction manual

Phonocar

Phonocar VM083 Instruction manual

Phonocar VM 026 User manual

Phonocar

Phonocar VM 026 User manual

Phonocar VM012 User manual

Phonocar

Phonocar VM012 User manual

Phonocar VM063 User manual

Phonocar

Phonocar VM063 User manual

Popular Car Receiver manuals by other brands

Blaupunkt ACR 3230 operating instructions

Blaupunkt

Blaupunkt ACR 3230 operating instructions

Pioneer KEH-P1010 Operation manual

Pioneer

Pioneer KEH-P1010 Operation manual

JVC KD-SX750 instructions

JVC

JVC KD-SX750 instructions

Clarion VRX935VD owner's manual

Clarion

Clarion VRX935VD owner's manual

Sony CDX-H905IP operating instructions

Sony

Sony CDX-H905IP operating instructions

Soundstream TRC.60C Owner's manual & installation guide

Soundstream

Soundstream TRC.60C Owner's manual & installation guide

JVC EXAD KD-AR5000 instructions

JVC

JVC EXAD KD-AR5000 instructions

Rolls HR78 owner's manual

Rolls

Rolls HR78 owner's manual

JVC KD-R201 instructions

JVC

JVC KD-R201 instructions

Blaupunkt Concept Pro II Operating and installation instructions

Blaupunkt

Blaupunkt Concept Pro II Operating and installation instructions

Yamaha CRX-E500 owner's manual

Yamaha

Yamaha CRX-E500 owner's manual

Seat SOUND SYSTEM 1.0 manual

Seat

Seat SOUND SYSTEM 1.0 manual

Kenwood KDC-X599 instruction manual

Kenwood

Kenwood KDC-X599 instruction manual

Sony CDX-H905IP Installation/connections

Sony

Sony CDX-H905IP Installation/connections

Pioneer DEH-P8950BT Operation manual

Pioneer

Pioneer DEH-P8950BT Operation manual

Kenwood KDC-C421FM instruction manual

Kenwood

Kenwood KDC-C421FM instruction manual

JVC KS-FX722R instructions

JVC

JVC KS-FX722R instructions

Sony CDX-GT420iP - Radio / CD operating instructions

Sony

Sony CDX-GT420iP - Radio / CD operating instructions

manuals.online logo
manuals.online logoBrands
  • About & Mission
  • Contact us
  • Privacy Policy
  • Terms and Conditions

Copyright 2025 Manuals.Online. All Rights Reserved.