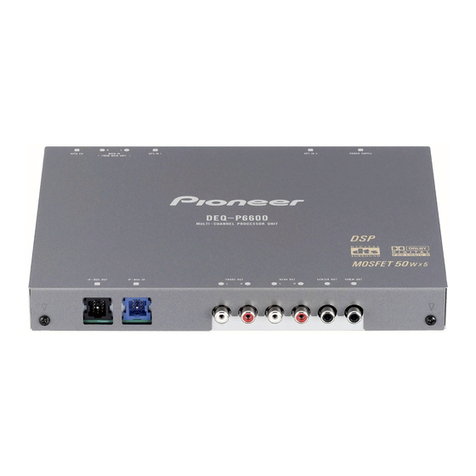
Pioneer DEQ-P8000 - DSP - External User manual

Operation Manual
Mode demploi
Multi-channel AV processor
Processeur AV multi-canaux
DEQ-P8000
English Français

Thank you for buying this Pioneer product.
Please read through these operating instructions so you will know how to operate
your model properly. After you have finished reading the instructions, keep this man-
ual in a safe place for future reference.
Before You Start
Information to User 4
About this unit 4
About this units optical input 4
Features 4
About this manual 5
After-sales service for Pioneer products 5
Product registration 5
Precautions 6
Resetting the microprocessor 6
Whats What
Head unit 7
Digital Signal Processor
Introduction of SP adjustments 8
Using the sound field control 8
Using the position selector 9
Using balance adjustment 9
Adjusting source levels 10
Using the dynamic range control 10
Using the down-mix function 10
Using the direct control 11
Using the olby Pro Logic B11
Adjusting the Music mode 11
Setting the speaker setting 12
Correcting the subwoofers phase 12
Selecting a cross-over frequency 13
Adjusting the speaker output levels 13
Adjusting the speaker output levels using a
test tone 14
Using the time alignment 14
Selecting the time alignment
adjustment mode 15
Adjusting the time alignment 15
Using the equalizer 15
Recalling equalizer curves 15
Adjusting 3-band parametric
equalizer 16
Using the auto-equalizer 17
Auto TA and EQ (auto-time alignment and
auto-equalizing) 17
Before operating the auto TA and EQ
function 18
Carrying out auto TA and EQ 18
Initial Settings
Correcting distorted sound 20
Resetting the audio functions 20
dditional Information
Troubleshooting 21
Understanding auto TA and EQ error
messages 22
Terms 23
Specifications 24
Contents
En
2

Selecting fine audio equipment such as the unit you’ve just purchased is only the start of your
musical enjoyment. Now it’s time to consider how you can maximize the fun and excitement your
equipment offers. This manufacturer and the Electronic Industries Association’s Consumer
Electronics Group want you to get the most out of your equipment by playing it at a safe level. One
that lets the sound come through loud and clear without annoying blaring or distortion—and, most
importantly, without affecting your sensitive hearing.
Sound can be deceiving. Over time your hearing “comfort level” adapts to higher volumes of
sound. So what sounds “normal” can actually be loud and harmful to your hearing. Guard against
this by setting your equipment at a safe level BEFORE your hearing adapts.
To establish a safe level:
•Start your volume control at a low setting.
•Slowly increase the sound until you can hear it comfortably and clearly, and without distortion.
Once you have established a comfortable sound level:
•Set the dial and leave it there.
Taking a minute to do this now will help to prevent hearing damage or loss in the future. After
all, we want you listening for a lifetime.
We Want You Listening For A Lifetime
Used wisely, your new sound equipment will provide a lifetime of fun and enjoyment. Since
hearing damage from loud noise is often undetectable until it is too late, this manufacturer and the
Electronic Industries Association’s Consumer Electronics Group recommend you avoid prolonged
ex
p
osure to excessive noise. This
l
ist of sound
l
eve
l
s is inc
l
uded for
y
our
p
rotection
.
D
ec
i
bel
Leve
l Exampl
e
30
Quiet
l
i
b
rar
y
, soft whis
p
er
s
4
0
L
ivin
g
room, refri
g
erator,
b
edroom awa
y
from traffi
c
50
L
i
g
ht traffic, norma
l
conversation,
q
uiet office
60 Air conditioner at 20 feet, sewing machine
70 Vacuum cleaner, hair dryer, noisy restaurant
80 Average city traffic, garbage disposals, alarm clock at two feet
THE FOLLOWING NOISES CAN BE DANGEROUS UNDER CONSTANT EXPOSURE
90 Subway, motorcycle, truck traffic, lawn mower
100 Garbage truck, chain saw, pneumatic drill
120 Rock band concert in front of speakers, thunderclap
140 Gunshot blast, jet plane
180 Rocket launching pad
Information courtesy of the Deafness Research Foundation.
En 3
English

Information to User
Alteration or modifications carried out without
appropriate authorization may invalidate the
users right to operate the equipment.
About this unit
Important
!Following functions cannot be operated when
VH-P7000, VH-P5000MP or AVH-P6500 V
is connected to this unit.
Using the down-mix function
Using the Dolby Pro Logic B
electing the time alignment adjustment
mode
Using the auto-equalizer
Auto TA and EQ (auto-time alignment and
auto-equalizing)
Resetting the audio functions
!If VH-P7000, VH-P5000MP or AVH-
P6500 V is connected to this unit, operation
of following function is limited.
electing a cross-over frequency
About this units optical input
This unit provides two optical inputs, however,
units that can be connected to each input are
limited. Refer to following chart, and use the
optical inputs correctly. Otherwise, this unit
may not operate properly.
Connection with the Pioneer head unit
Optical 1 input
(head unit)
Optical 2 input
(DVD player)
AVH-P6600 V
AVX-P8 V
AVX-P7300 V
S V-P7
X V-P90
AVH-P6500 V
VH-P5000MP
VH-P7000
Optical 2 input is not available.
!Only the system with AVH-P6600 V can
use both optical 1 input and optical 2 input.
Otherwise, optical 2 input is not available.
Connection with the Pioneer audio
master unit
Optical 1 input
(DVD player)
Optical 2 input
(DVD player)
AVX-P8 V S V-P7
*1 *2
X V-P90
*1 *2
AVX-P7300 V S V-P7
*1 *2
X V-P90
*1 *2
!For more details concerning connection
with the Pioneer audio master unit, refer to
audio master unit (AXM-P8000) owners
manual.
Features
Dolby Digital/DTS compatibility
When using this unit with a Pioneer V
player, you can enjoy the atmosphere and exci-
tement provided by V movie and music
software featuring 5.1 channel recordings.
*1This unit must be set as digital source.
*2This unit must be set to stand alone mode (master mode).
Before ou Start
En
4
Section
01

!Manufactured under license from olby La-
boratories. olby,Pro Logic, and the
double- symbol are trademarks of olby
Laboratories.
!TSand TS igital Surroundare regis-
tered trademarks of igital Theater Sys-
tems, Inc.
About this manual
This unit features a number of sophisticated
functions ensuring superior reception and op-
eration. All the functions have been designed
for the easiest possible use, but many are not
self-explanatory. This operation manual will
help you benefit fully from this units potential
and to maximize your listening enjoyment.
We recommend that you familiarize yourself
with the functions and their operation by read-
ing through the manual before you begin
using this unit. It is especially important that
you read and observe precautions noted on
the next page and in other sections.
After-sales service for
Pioneer products
Please contact the dealer or distributor from
where you purchased this unit for after-sales
service (including warranty conditions) or any
other information. In case the necessary infor-
mation is not available, please contact the
companies listed below:
Please do not ship your unit to the companies
at the addresses listed below for repair without
advance contact.
U.S. .
Pioneer Electronics (USA) Inc.
CUSTOMER SUPPORT IVISION
P.O. Box 1760
Long Beach, CA 90801-1760
800-421-1404
C N D
Pioneer Electronics of Canada, Inc.
CUSTOMER SATISFACTION EPARTMENT
300 Allstate Parkway
Markham, Ontario L3R OP2
1-877-283-5901
For warranty information please see the Lim-
ited Warranty sheet included with this unit.
Product registration
Visit us at the following site:
1 Register your product. We will keep the details
of your purchase on file to help you refer to
this information in the event of an insurance
claim such as loss or theft.
2 Receive updates on the latest products and
technologies.
3 ownload owners manuals, order product
catalogues, research new products, and
much more.
Before ou Start
En 5
English
Section
01

Precautions
W RNING:
Handling the cord on this product or cords asso-
ciated with accessories sold with the product will
expose you to lead, a chemical known to the
State of California and other governmental enti-
ties to cause cancer and birth defects or other re-
productive harm. Wash hands after handling.
CAU ION:
USE OF CON ROL OR ADJUS MEN OR
PERFORMANCE OF PROCEDURES
O HER HAN HOSE SPECIFIED HEREIN
MAY RESUL IN HAZARDOUS RADIA ION
EXPOSURE.
CAU ION:
HE USE OF OP ICAL INS RUMEN S
WI H HIS PRODUC WILL INCREASE
EYE HAZARD.
!Keep this manual handy as a reference for
operating procedures and precautions.
!Always keep the volume low enough so
that you can hear sounds from outside the
vehicle.
!Protect this unit from moisture.
!If the battery is disconnected or dis-
charged, the preset memory will be erased
and must be reprogrammed.
Resetting the microprocessor
The microprocessor must be reset under the
following conditions:
!Prior to using this unit for the first time
after installation
!If the unit fails to operate properly
!When strange or incorrect messages ap-
pear on the display
%Press RESET with a pen tip or other
pointed instrument.
RESET button
Before ou Start
En
6
Section
01

Head unit
Operate this unit with the connected head
unit. Instructions in this operation manual use
AVH-P6600 V as an example head unit.
1VOLUME
Rotate it to increase or decrease the vo-
lume.
2SOURCE button
This unit is turned on by selecting a source.
Press to cycle through all the available
sources.
3ATT button
Press to quickly lower the volume level, by
about 90%. Press once more to return to the
original volume level.
4EQ button
Press to select various equalizer curves.
5Joysti k
Use to adjust the selected audio function
and turn it on or off (substitute for the touch
panel key).
5
4
1
2
3
Whats What
En 7
English
Section
02

Introduction of DSP
adjustments
1
By carrying out the following settings/adjust-
ments in the order shown, you can create a fi-
nely-tuned sound field effortlessly.
1etting the speaker setting
2Using the position selector
3Auto TA and EQ (auto-time alignment and auto-
equalizing)
4Adjusting the time alignment
5Adjusting the speaker output levels using a
test tone
6electing a cross-over frequency
7Adjusting the speaker output levels
8Adjusting 3-band parametric equalizer
1DSP display
Shows the SP function names.
%Tou h A.MENU and then tou h DSP to
display the DSP fun tion names.
The SP function names are displayed and
operable ones are highlighted.
#When A.MENU is not displayed, you can dis-
play it by touching the screen.
#You can also display MENU by clicking the
joystick.
#To go to the next group of function names,
touch NEXT.
#To return to the previous group of function
names, touch PREV.
#When playing discs recorded with more than
96 kHz sampling frequency, you cannot use audio
functions. Also, equalizer curve setting,
POSITION,AUTO EQ and AUTO TA will be can-
celled.
#When playing discs recorded with more than
96 kHz sampling frequency, audio is outputted
from front speaker only.
#When selecting the FM tuner as the source,
you cannot switch to SLA.
#When playing other than the V disc, you
cannot switch to D.R.C.
#When neither FRONT-L nor FRONT-R is se-
lected in POSITION, you cannot switch to
TIME ALIGNMENT.
#To return to the previous display, touch BACK.
#To return to the display of each source, touch
ESC.
Note
If you do not operate the SP function within
about 30 seconds, the display is automatically re-
turned to the source display.
Using the sound field control
The SFC function creates the sensation of a
live performance.
!The acoustics of different performance en-
vironments are not the same and depend
on the extent and contour of space through
which sound waves move and on how
sounds bounce off the stage, walls, floors
and ceilings. At a live performance you
hear music in three stages: direct sound,
early reflections, and late reflections, or re-
verberations. Those factors are programed
into the SFC circuitry to recreate the acous-
tics of various performance settings.
1 Press EQ and hold to swit h to SFC
fun tion.
Press EQ and hold until SFC appears in the
display.
Digital Signal Processor
En
8
Section
03

#To switch to equalizer function, press EQ and
hold again.
2 Press EQ to sele t the desired SFC
mode.
Press EQ repeatedly to switch between the fol-
lowing mode:
MUSICAL (musical)DRAMA (drama)
ACTION (action)JAZZ (jazz)HALL (hall)
CLUB (club)OFF (off)
Note
If the source is a 2-channel LPCM audio or a 2-
channel olby igital audio and you select SFC
effects that are most applicable for 5.1-channel
audio (i.e., MUSICAL,DRAMA or ACTION), we
recommend turning olby Pro Logic Bon. On the
other hand, when selecting SFC effects that are
intended for use with 2-channel audio (i.e., JAZZ,
HALL or CLUB), we recommend turning olby
Pro Logic Boff.
Using the position selector
One way to assure a more natural sound is to
accurately position the stereo image, putting
you right in the center of the sound field. The
position selector function lets you automati-
cally adjust the speaker output levels and in-
serts a delay time to match the number and
position of occupied seats. When used in con-
junction with the SFC, the feature will make
the sound image more natural and offer a pa-
noramic sound that envelops you.
1 Tou h A.MENU and DSP and then tou h
POSITION.
2 Tou h c/d/a/bto sele t a listening po-
sition.
Touch one of these, c/d/a/b, to select a lis-
tening position as listed in the table.
Key Display Position
cFRONT-L Front seat left
dFRONT-R Front seat right
aFRONT Front seats
bALL All seats
#To cancel the selected listening position,
touch the same key again.
Note
When you make adjustments for listening posi-
tion, the speakers are automatically set for appro-
priate output levels. You can tailor them if you
want as discussed under the heading of Adjust-
ing the speaker output levels using a test tone or
Adjusting the speaker output levels.
Using balance adjustment
You can select a fader/balance setting that
provides an ideal listening environment in all
occupied seats.
1 Tou h A.MENU and DSP and then tou h
FADER/BALANCE.
2 Tou h aor bto adjust front/rear
speaker balan e.
Each time you touch aor bit moves the
front/rear speaker balance towards the front or
the rear.
FRONT:25 REAR:25 is displayed as the front/
rear speaker balance moves from front to rear.
#FR:00 is the proper setting when only two
speakers are used.
3 Tou h cor dto adjust left/right speak-
er balan e.
Each time you touch cor dit moves the left/
right speaker balance towards the left or the
right.
Digital Signal Processor
En 9
English
Section
03

LEFT:25 RIGHT:25 is displayed as the left/
right speaker balance moves from left to
right.
Adjusting source levels
SLA (source level adjustment) lets you adjust
the volume level of each source to prevent ra-
dical changes in volume when switching be-
tween sources.
!Settings are based on the FM tuner volume
level, which remains unchanged.
1 Compare the FM tuner volume level
with the level of the sour e you wish to ad-
just.
2 Tou h A.MENU and DSP and then tou h
SLA.
3 Tou h aor bto adjust the sour e vo-
lume.
Each time you touch aor bit increases or de-
creases the source volume.
SLA +4 SLA 4is displayed as the source vo-
lume is increased or decreased.
Notes
!The AM tuner volume level can also be ad-
justed with source level adjustments.
!Video C , C and MP3/WMA are set to the
same source level adjustment volume auto-
matically.
!V and the optional V player are set to
the same source level adjustment volume
automatically.
!External unit 1 and external unit 2 are set to
the same source level adjustment volume
automatically.
!AUX (auxiliary input) and AV (video input) are
set to the same source level adjustment vo-
lume automatically.
Using the dynamic range
control
The dynamic range refers to the difference be-
tween the largest and softest sounds. The dy-
namic range control compresses this
difference so that you can clearly hear sounds
even at low volume levels.
!The dynamic range control is effective only
on olby igital sounds.
!When playing other than the V disc, you
cannot switch to D.R.C.
1 Tou h A.MENU and DSP and then tou h
D.R.C.
2 Tou h ato turn the dynami range on-
trol on.
#To turn dynamic range control off, touch b.
Using the down-mix function
This function cannot be operated when DVH-
P7000, DVH-P5000MP or AVH-P6500DVD is con-
nected to this unit.
The down-mix function allows you to play back
multi-channel audio in 2 channels.
1 Tou h A.MENU and DSP and then tou h
DOWN MIX.
2 Tou h or to swit h the setting.
!Lt/Rt own mix so that the surround
components can be restored (decoded).
!Lo/Ro Stereo mix the original audio that
do not contain channel modes such as sur-
round components.
Digital Signal Processor
En
10
Section
03

Using the direct control
You can override audio settings to check for ef-
fectiveness of your audio settings.
!All audio functions are locked out when the
direct control is on except VOLUME.
!If the source is a 2-channel LPCM audio or
a 2-channel olby igital audio and you
select DIRECT ON, audio is heared only
over front left/right speakers.
1 Tou h A.MENU and DSP and then tou h
DIGITAL DIRECT.
2 Tou h ato turn the dire t ontrol on.
#To turn direct control off, touch b.
Using the Dolby Pro Logic B
This function cannot be operated when DVH-
P7000, DVH-P5000MP or AVH-P6500DVD is con-
nected to this unit.
olby Pro Logic Bcreates five full-bandwidth
output channels from two-channel sources to
achieve high-purity matrix surround.
!If both the center and the rear speakers are
set to OFF, you cannot use this function.
!olby Pro Logic Bsupports up to 48kHz
sampling rate stereo source and has no ef-
fect on other types of source.
1 Tou h A.MENU and DSP and then tou h
NEXT.
2 Tou h DOLBY PRO LOGIC B.
3 Tou h any of the following tou h panel
keys to sele t the desired mode.
!MOVIE The Movie mode suitable for
movie playback
!MUSIC The Music mode suitable for
music playback
!MATRIX The Matrix mode for when FM
radio reception is weak
!OFF Turn olby Pro Logic Boff
!MUSIC ADJUST Adjust the Music mode
#You can operate MUSIC ADJUST only when
MUSIC has been selected.
Adjusting the Music mode
You can adjust the Music mode with the fol-
lowing three controls.
!Panorama (PANORAMA) extends the front
stereo image to include the surround
speakers for an exciting wraparoundef-
fect.
!imension (DIMENSION) allows you to
gradually adjust the sound field either to-
wards the front or the rear.
!Center Width Control (CENTER WIDTH)al-
lows center-channel sounds to be posi-
tioned between the center speaker and the
left/right speakers. It improves the left-cen-
ter-right stage presentation for both the dri-
ver and the front passenger.
1 Tou h A.MENU and DSP and then tou h
NEXT.
2 Tou h DOLBY PRO LOGIC B.
3 Tou h MUSIC and then tou h
MUSIC ADJUST.
#You can operate MUSIC ADJUST only when
MUSIC has been selected.
4 Tou h or to sele t PANORAMA
(panorama).
Each time you touch or selects the item
in the following order:
PANORAMA (panorama)DIMENSION (di-
mension)CENTER WIDTH (center width)
Digital Signal Processor
En 11
English
Section
03

5 Tou h to turn the panorama ontrol
on.
#To turn the panorama control off, touch .
6 Tou h and then tou h or to ad-
just front/surround speaker balan e.
Each time you touch or it moves the
sound towards the front or the surrounds.
+3 3is displayed as the front/surround
speaker balance moves from front to sur-
rounds.
7 Tou h and then tou h or to ad-
just the enter image.
Each time you touch or it gradually
spreads the center channel sound into the
front left and right speakers over a range 07.
3is the default and its recommended for
most recordings. 0places all center sound in
the center speaker. 7places all center sound
equally in the left/right speakers.
Setting the speaker setting
You need to make with/without (or yes/no) and
size (bass reproducing capacity) selection/ad-
justments depending on the installed speak-
ers. The size needs to be set to LARGE (large)
if the speaker is capable of reproducing
sounds of about 100 Hz or below. Otherwise
select SMALL (small).
!Low frequency range is not output if the
subwoofer is set to OFF and the front and
rear speakers set to SMALL or OFF.
!It is imperative that non-installed speakers
be set to OFF.
!Set the front or rear speaker to LARGE if
the speaker is capable of reproducing bass
content, or if no subwoofer is installed.
1 Tou h A.MENU and DSP and then tou h
NEXT.
2 Tou h SPEAKER SETTING.
3 Tou h or to sele t the speaker to
be adjusted.
Each time you touch or selects the
speaker in the following order:
FRONT (front speakers)CENTER (center
speaker)REAR (rear speakers)
SUB WOOFER (subwoofer)PHASE (sub-
woofer setting)
#You can switch to PHASE only when the sub-
woofer has been set to ON.
4 Tou h or to sele t the orre t size
for the sele ted speaker.
Each time you touch or selects the size
in the following order:
OFF (off)SMALL (small)LARGE (large)
#You cannot select OFF, when FRONT (front
speakers) have been selected.
#You can select ON or OFF, when
SUB WOOFER (subwoofer) has been selected.
#You can switch REVERSE (reverse phase) or
NORMAL (normal phase), when PHASE (subwoo-
fer setting) has been selected.
Correcting the subwoofers phase
If trying to boost the bass output of the sub-
woofer doesnt do much or rather makes you
feel that the bass gets more murky, this may
indicate that the subwoofers output and bass
content you hear over other speakers cancel
each other out. To remove this problem, try
changing the phase setting for the subwoofer.
1 Tou h A.MENU and DSP and then tou h
NEXT.
2 Tou h SPEAKER SETTING.
Digital Signal Processor
En
12
Section
03

3 Tou h or to sele t SUB WOOFER
(subwoofer).
Each time you touch or selects the
speaker in the following order:
FRONT (front speakers)CENTER (center
speaker)REAR (rear speakers)
SUB WOOFER (subwoofer)PHASE (sub-
woofer setting)
4 Tou h to turn subwoofer output on.
#To turn subwoofer output off, touch .
5 Tou h and then tou h or to se-
le t the phase of subwoofer output.
Touch to select normal phase and
NORMAL appears in the display. Touch to
select reverse phase and REVERSE appears in
the display.
Note
When playing a 2-channel mono source with Pro
Logic Bturned on, there may be occasions when
the following will occur:
!No audio is outputted if the center speaker
setting is SMALL or LARGE and no center
speaker is installed.
!Audio is heard only over the center speaker if
installed and the center speaker setting is
SMALL or LARGE.
Selecting a cross-over
frequency
If DVH-P7000, DVH-P5000MP or AVH-P6500DVD
is connected to this unit, operation is slightly
different.
You can select a frequency, under which
sounds are reproduced through the subwoo-
fer. If the installed speakers include one whose
size has been set to SMALL, you can select a
frequency, under which sounds are repro-
duced through a LARGE speaker or subwoo-
fer.
1 Tou h A.MENU and DSP and then tou h
NEXT.
2 Tou h CROSS OVER.
3 Tou h or to sele t the speaker to
be adjusted.
Each time you touch or selects the
speaker in the following order:
FRONT (front speakers)CENTER (center
speaker)REAR (rear speakers)
SUB WOOFER (subwoofer)
#If VH-P7000, VH-P5000MP or AVH-
P6500 V is connected to this unit, you cannot
operate this procedure.
4 Tou h or to sele t ut-off fre-
quen y.
Each time you touch or selects cut-off
frequencies in the following order:
6380100125160200 (Hz)
Note
Selecting a cut-off frequency is to set a cut-off fre-
quency of the subwoofers L.P.F. (low-pass filter)
and that of the SMALL speaker H.P.F. (high-pass
filter). The cut-off frequency setting has no effect
if the subwoofer is set to OFF and other speakers
are set to LARGE or OFF.
Adjusting the speaker
output levels
You can readjust the speaker output levels
using a test tone while listening to music.
1 Tou h A.MENU and DSP and then tou h
NEXT.
Digital Signal Processor
En 13
English
Section
03

2 Tou h SP Lev.
3 Tou h or to sele t the speaker to
be adjusted.
Each time you touch or selects the
speaker in the following order:
FRONT-L (front speaker left)CENTER (center
speaker)FRONT-R (front speaker right)
REAR-R (rear speaker right)REAR-L (rear
speaker left)SUB WOOFER (subwoofer)
#You cannot select speakers whose size is set
at OFF.
4 Tou h or to adjust the speaker
output level.
Each time you touch or increases or de-
creases the speaker output level. +10 10 is
displayed as the level is increased or de-
creased.
Note
To adjust the speaker output levels in this mode is
the same as making the speaker output levels at
TEST TONE. Both provide the same results.
Adjusting the speaker output
levels using a test tone
A convenient test tone allows you to easily get
the overall balance right among the speakers.
1 Tou h A.MENU and DSP and then tou h
NEXT.
2 Tou h TEST TONE.
3 Tou h START to start the test tone out-
put.
The test tone is outputted. It rotates from
speaker to speaker in the following sequence
at intervals of about two seconds. The current
settings for the speaker over which you hear
the test tone are shown in the display.
FRONT-L (front speaker left)CENTER (center
speaker)FRONT-R (front speaker right)
REAR-R (rear speaker right)REAR-L (rear
speaker left)SUB WOOFER (subwoofer)
Check each speaker output level. If no adjust-
ments are needed, perform step 5 to stop the
test tone.
#You can also start the test tone output by mov-
ing the joystick up.
#The settings do not appear for speakers
whose size is set OFF.
4 Tou h or to adjust the speaker
output level.
Each time you touch or increases or de-
creases the speaker output level. +10 10 is
displayed as the level is increased or de-
creased.
#The test tone rotates to the next speaker after
about two seconds from the last operation.
5 Tou h STOP to stop the test tone out-
put.
#You can also stop the test tone output by mov-
ing the joystick down.
Notes
!If needed, select speakers and adjust their ab-
soluteoutput levels. (Refer to Adjusting the
speaker output levels on the previous page.)
!To adjust the speaker output levels in this
mode is the same as making the speaker out-
put levels at SP Lev. Both provide the same re-
sults.
Using the time alignment
The time alignment lets you adjust the dis-
tance between each speaker and the listening
position.
Digital Signal Processor
En
14
Section
03

Selecting the time alignment
adjustment mode
This function cannot be operated when DVH-
P7000, DVH-P5000MP or AVH-P6500DVD is con-
nected to this unit.
You can select the time alignment adjustment
mode.
1 Tou h A.MENU and DSP and then tou h
NEXT.
2 Tou h TIME ALIGNMENT.
3 Tou h any of the following tou h panel
keys to sele t the time alignment.
!INITIAL Initial time alignment (factory set-
ting)
!AUTO TA Time alignment created by auto
TA and EQ. (Refer to Auto TA and EQ (auto-
time alignment and auto-equalizing) on
page 17.)
!CUSTOM Adjusted time alignment that
you can create for yourself
!OFF Turn the time alignment off
!ADJUSTMENT Adjust the time alignment
as desired
#You cannot select AUTO TA if auto TA and EQ
has not been carried out.
#You cannot select ADJUSTMENT when
neither FRONT-L nor FRONT-R is selected in
POSITION.
Adjusting the time alignment
You can adjust the distance between each
speaker and the selected position.
!An adjusted time alignment is memorized
in CUSTOM.
1 Tou h A.MENU and DSP and then tou h
NEXT.
2 Tou h TIME ALIGNMENT and then
tou h ADJUSTMENT.
#You cannot select ADJUSTMENT when
neither FRONT-L nor FRONT-R is selected in
POSITION.
3 Tou h the speaker to be adjusted.
#You cannot select speakers whose size is set
at OFF.
4 Tou h aor bto adjust the distan e be-
tween the sele ted speaker and the listen-
ing position.
Each time you touch aor bincreases or de-
creases the distance. 0.0in. 200.0in. is dis-
played as the distance is increased or
decreased.
5 Tou h ESC to return to the playba k dis-
play.
Using the equalizer
The equalizer lets you adjust the equalization
to match car interior acoustic characteristics
as desired.
Recalling equalizer curves
There are seven stored equalizer curves which
you can easily recall at any time. Here is a list
of the equalizer curves:
Display Equalizer curve
SUPER BASS Super bass
POWERFUL Powerful
NATURAL Natural
VOCAL Vocal
FLAT Flat
CUSTOM1 Custom 1
CUSTOM2 Custom 2
Digital Signal Processor
En 15
English
Section
03

!CUSTOM1 and CUSTOM2 are adjusted
equalizer curves.
!When FLAT is selected no supplement or
correction is made to the sound. This is
useful to check the effect of the equalizer
curves by switching alternatively between
FLAT and a set equalizer curve.
1 Press EQ and hold to swit h to equali-
zer fun tion.
Press EQ and hold until an equalizer curve
name appears in the display.
#To switch to SFC function, press EQ and hold
again.
2 Press EQ to sele t the equalizer.
Press EQ repeatedly to switch between the fol-
lowing equalizers:
SUPER BASSPOWERFULNATURAL
VOCALFLATCUSTOM1CUSTOM2
Adjusting 3-band parametric
equalizer
For CUSTOM1 and CUSTOM2 equalizer
curves, you can adjust the front, rear and cen-
ter equalizer curves separately by selecting a
center frequency, an equalizer level and a Q
factor for each band.
!A separate CUSTOM1 curve can be cre-
ated for each source.
!ACUSTOM2 curve can be created com-
mon to all sources.
!The center speaker largely determines the
sound image and getting the balance right
isnt easy. We recommend reproducing a 2-
ch. audio (a C for example) and getting
the balance right among the speakers ex-
cept for the center, and then reproducing a
5.1-ch. audio ( olby igital or TS) and ad-
justing the center speaker output to the
balance you have already got among the
other speakers.
1 Tou h A.MENU and DSP and then tou h
NEXT twi e.
2 Tou h PRESET EQ.
3 Tou h or to sele t the desired
item.
Each time you touch or selects the item
in the following order:
FRONT (speakers)LOW (bands)Low (cen-
ter frequency)L(equalizer level)WIDE (Q
factor)
4 Tou h or to sele t the speaker to
be adjusted.
Touch or until the desired speaker ap-
pears in the display.
REAR (rear speakers)CENTER (center speak-
er)FRONT (front speakers)
#You cannot select speakers whose size is set
at OFF.
5 Tou h and then tou h or to se-
le t the equalizer band to be adjusted.
Each time you touch or selects equalizer
bands in the following order:
LOW (low)MID (mid)HIGH (high)
6 Tou h and then tou h or to se-
le t the enter frequen y of sele ted band.
Touch or until the desired frequency ap-
pears in the display.
40Hz50Hz63Hz80Hz100Hz125Hz
160Hz200Hz250Hz315Hz400Hz
500Hz630Hz800Hz1kHz1.25kHz
1.6kHz2kHz2.5kHz3.15kHz4kHz
5kHz6.3kHz8kHz10kHz12.5kHz
7 Tou h and then tou h or to ad-
just the equalizer level.
Each time you touch or increases or de-
creases the equalizer level. +06 06 is dis-
played as the level is increased or decreased.
Digital Signal Processor
En
16
Section
03

8 Tou h and then tou h or to se-
le t the desired Q fa tor.
Each time you touch or switches be-
tween the following Q factor:
WIDE (wide)NARROW (narrow)
#You can adjust parameters for each band of
the other speakers in the same way.
Note
You can select a center frequency for each band.
You can change the center frequency in 1/3-oc-
tave steps, but you cannot select frequencies that
have intervals shorter than 1 octave among the
center frequencies of the three bands.
Using the auto-equalizer
This function cannot be operated when DVH-
P7000, DVH-P5000MP or AVH-P6500DVD is con-
nected to this unit.
The auto-equalizer is the equalizer curve cre-
ated by auto TA and EQ (refer to Auto TA and
EQ (auto-time alignment and auto-equalizing)
on this page).
You can turn the auto-equalizer on or off.
1 Tou h A.MENU and DSP and then tou h
NEXT twi e.
2 Tou h AUTO EQ.
#You cannot use this function if auto TA and
EQ has not been carried out.
3 Tou h ato turn the auto-equalizer on.
#To turn auto-equalizer off, touch b.
Auto TA and EQ (auto-time
alignment and auto-
equalizing)
This function cannot be operated when DVH-
P7000, DVH-P5000MP or AVH-P6500DVD is con-
nected to this unit.
The auto-time alignment is automatically ad-
justed for the distance between each speaker
and the listening position.
The auto-equalizer automatically measures
the car interior acoustic characteristics, and
then creates the auto-equalizer curve based
on that information.
W RNING
To prevent accidents, never carry out auto TA and
EQ while driving. When this function measures
the car interior acoustic characteristics to create
an auto-equalizer curve, a loud measurement
tone (noise) may be outputted from the speakers.
C UTION
!Carrying out auto TA and EQ under the follow-
ing conditions may damage the speakers. Be
sure to check the conditions thoroughly be-
fore carrying out auto TA and EQ.
When speakers are incorrectly connected.
(e.g., When a rear speaker is connected to
a subwoofer output.)
When a speaker is connected to a power
amp delivering output higher than the
speakers maximum input power capabil-
ity.
!If the microphone is placed in an unsuitable
position the measurement tone may become
loud and measurement may take a long time,
resulting in a drain on battery power. Be sure
to place the microphone in the specified loca-
tion.
Digital Signal Processor
En 17
English
Section
03

Before operating the auto TA
and EQ function
!Carry out auto TA and EQ in as quiet a
place as possible, with the car engine and
air conditioning switched off. Also cut
power to car phones or portable telephones
in the car, or remove them from the car be-
fore carrying out auto TA and EQ. Sounds
other than the measurement tone (sur-
rounding sounds, engine sound, tele-
phones ringing etc.) may prevent correct
measurement of the car interior acoustic
characteristics.
!Be sure to carry out auto TA and EQ using
the supplied microphone. Using another
microphone may prevent measurement, or
result in incorrect measurement of the car
interior acoustic characteristics.
!When front speaker is not connected, auto
TA and EQ cannot be carried out.
!When this unit is connected to a power
amp with input level control, auto TA and
EQ may not be possible if you lower power
amp input level. Set the power amps input
level to the standard position.
!When this unit is connected to a power
amp with an LPF, turn off the LPF on the
power amp before carrying out auto TA and
EQ. In addition, the cut-off frequency for
built-in LPF of an active subwoofer should
be set to the highest frequency.
!The time alignment value calculated by
auto TA and EQ may differ from the actual
distance in the following circumstances.
However, the distance has been calculated
by computer to be the optimum delay to
give accurate results for the circum-
stances, so please continue to use this
value.
When the reflected sound within a vehi-
cle is strong and delays occur.
When delays occur for low sounds due
to the influence of the LPF on active
subwoofers or external amps.
!Auto TA and EQ changes the audio settings
as below:
The fader/balance settings return to the
center position. (Refer to page 9.)
The equalizer curve switches to FLAT.
(Refer to page 15.)
It will be adjusted automatically to high
pass filter setting for front, center and
rear speaker.
!If you carry out auto TA and EQ when a pre-
vious setting of this already exists, the set-
ting will be replaced.
Carrying out auto TA and EQ
1 Stop the ar in a pla e that is as quiet
as possible, lose all doors, windows and
the sun roof, and then turn the engine off.
If the engine is left running, engine noise may
prevent correct auto TA and EQ.
2 Fix the supplied mi rophone in the en-
ter of the headrest of the drivers seat, fa-
ing forward, using the belt (sold
separately).
The auto TA and EQ may differ depending on
where you place the microphone. If desired,
place the microphone on the front passenger
seat to carry out auto TA and EQ.
3 Turn the ignition swit h to ON or ACC.
If the cars air conditioner or heater is turned
on, turn it off. Noise from the fan in the air
Digital Signal Processor
En
18
Section
03

conditioner or heater may prevent correct auto
TA and EQ.
#Press SOURCE to turn the source on if this
unit is turned off.
4 Sele t the position for the seat on
whi h the mi rophone is pla ed.
Refer to Using the position selector on page 9.
#If no position is selected before you start auto
TA and EQ, FRONT-L is selected automatically.
5 Press SOURCE and hold until the unit
turns off.
6 Press and hold EQ to enter the auto TA
and EQ measurement mode.
7 Plug the mi rophone into the mi ro-
phone input ja k on this unit.
8 Tou h START to start the auto TA and
EQ.
9 Get out of the ar and lose the door
within 10 se onds when the 10-se ond
ount-down starts.
The measurement tone (noise) is outputted
from the speakers, and auto TA and EQ be-
gins.
#When all speakers are connected, auto TA
and EQ is completed in about nine minutes.
#To stop auto TA and EQ, touch STOP.
#To cancel auto TA and EQ part way through,
touch BACK or ESC.
10 When auto TA and EQ is ompleted,
Complete is displayed.
When correct measurement of car interior
acoustic characteristics is not possible, an
error message is displayed. (Refer to Under-
standing auto TA and EQ error messages on
page 22.)
11 Tou h ESC to an el the auto TA and EQ
mode.
12 Store the mi rophone arefully in the
glove ompartment.
Store the microphone carefully in the glove
compartment or any other safe place. If the
microphone is subjected to direct sunlight for
an extended period, high temperatures may
cause distortion, color change or mal-
function.
Digital Signal Processor
En 19
English
Section
03

Correcting distorted sound
You can minimize distortion that may be
caused by the equalizer curve settings.
Setting an equalizer level high can cause dis-
tortion. If high sound is crippled or distorted,
try switching to LOW. Normally, leave the set-
ting at HIGH to ensure quality sound.
1 Tou h A.MENU and INITIAL and then
tou h NEXT.
2 Tou h DIGITAL ATT.
3 Tou h or to swit h the digital at-
tenuator setting.
Touch to select low setting and LOW ap-
pears in the display. Touch to select high
setting and HIGH appears in the display.
Resetting the audio
functions
This function cannot be operated when DVH-
P7000, DVH-P5000MP or AVH-P6500DVD is con-
nected to this unit.
You can reset all audio functions except vo-
lume.
1 Tou h A.MENU and INITIAL and then
tou h NEXT.
2 Tou h AUDIO RESET.
3 Tou h RESET.
Ready to reset. Are you sure? appears in the
display.
4 Tou h RESET again to reset audio fun -
tions.
The reset end was arried out. appears in
the display.
#To cancel resetting the audio functions, touch
CANCEL.
Initial Settings
En
20
Section
04
Other manuals for DEQ-P8000 - DSP - External
1
This manual suits for next models
1
Table of contents
Languages:
Other Pioneer Computer Hardware manuals

Pioneer
Pioneer AXY1153 User manual

Pioneer
Pioneer BDR-XD08EMB-S User manual

Pioneer
Pioneer RG-2 User manual

Pioneer
Pioneer SP-700D User manual

Pioneer
Pioneer OSK102 User manual

Pioneer
Pioneer DEQ-P800/UC User manual

Pioneer
Pioneer DEQ-P7650 User manual

Pioneer
Pioneer AVG-VDP1 User manual

Pioneer
Pioneer RMD-V3000X User manual

Pioneer
Pioneer DEQ-P7050 User manual