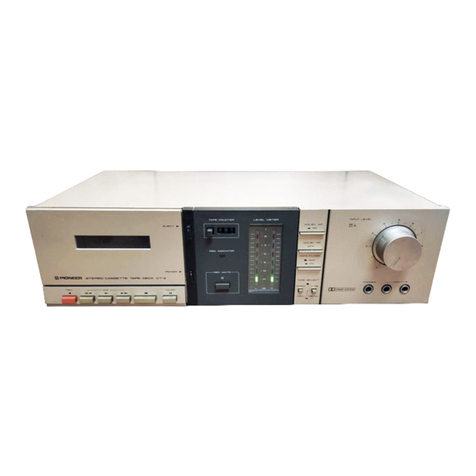
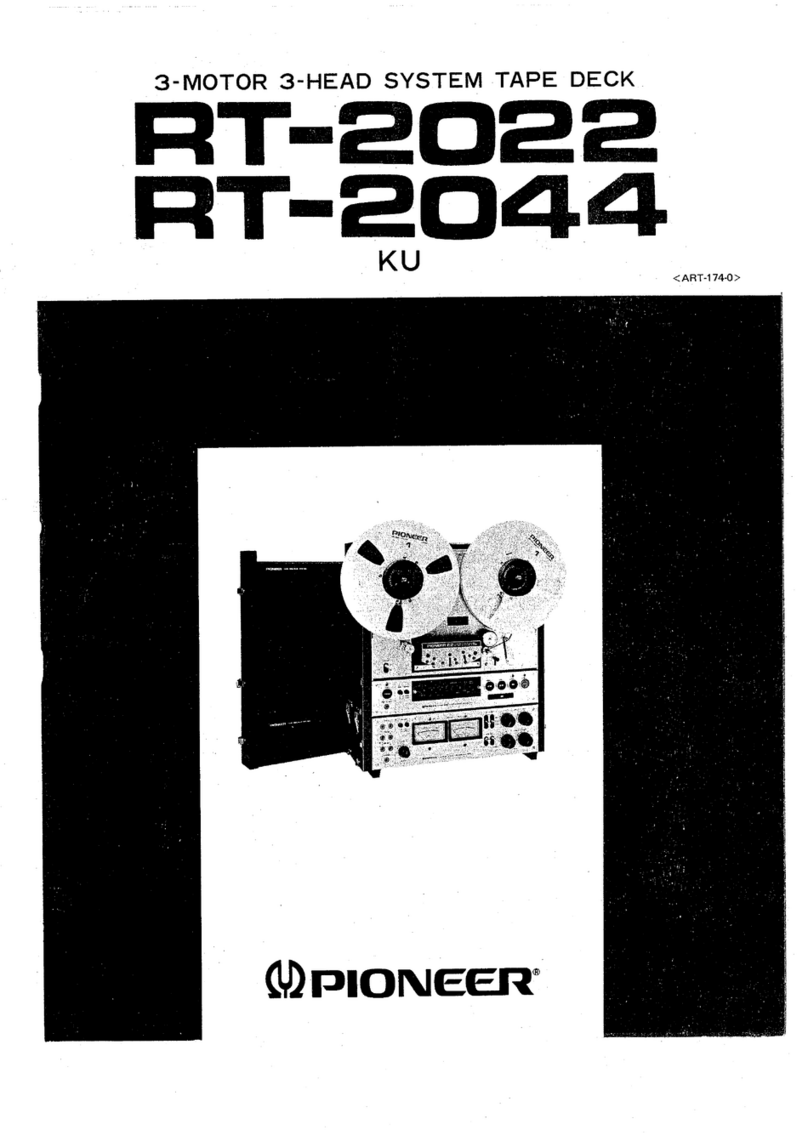
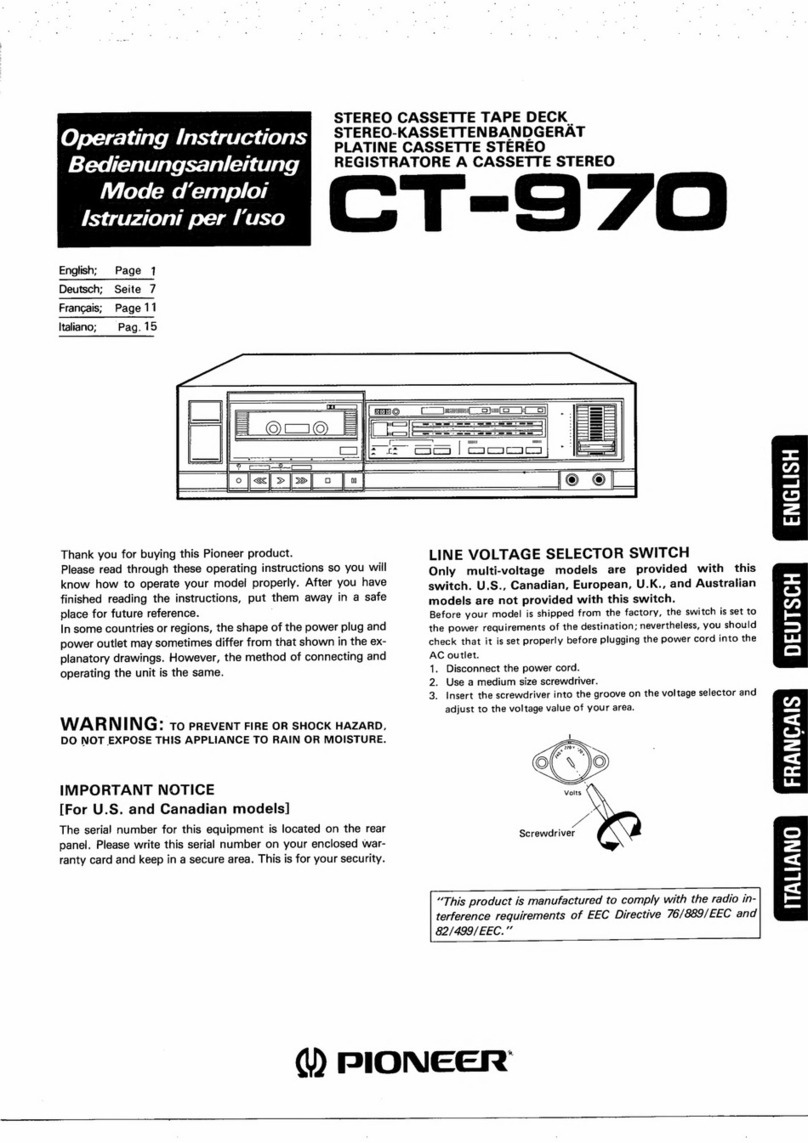
Pioneer RT-707 User manual

3-MOTOR
4-HEAD
TAPE
DECK
RT-707
OPERATING
INSTRUCTIONS
KCU
est
i
I
1
ee
eal
VJ
IMPORTANT
NOTICE
|_|)
veisautpinne
torueninat
is
|
Bee
eames
Se
arctan
me
So
etal
el
eae
ee:
|
Pa
yaaa
WARNING:
TO
PREVENT
FIRE
OR
SHOCK
HAZARD,
cael
-
DO
NOT
EXPOSE
THIS
APPLIANCE
TO
RAIN
OR
QMPIONEER'
MOISTURE.

CONTENTS
Points
to
Bear
in
Mind
......
0...
2
Auto
Repeat...
..ceseeseeeeseeeesee
ee
dD
Features
cee
ee
eee
as
3
Recording...
‘
13
|
Choosing
a
Location...
2
Microphone
Recording
-
16
Front Panel
Facil
4
Other
Methods
of
Recording
17
|
Connection
Diagram
......
6
—
Rack-mounting
Connections
6
Handling
Tapes
Threading
the
Tape
....
5...
7
Careand
Maintenance
.
Basie
Operations
8
Live
Recording
‘Techniques
Playback...
10
Specifieations
Auto
Reverse
oo...
ee
eeee
11
Troubleshooting
-
24
POINTS
TO
BEAR
IN
MIND
KEEP
THE
TAPE
HEAD
SECTION
CLEAN
eure
ema
‘The
sound
quality
will
deteriorate
and
other
payback
bead
unforeseen
difficulties
may
arise
if
you
allow
the
areas
of
the
heads,
capstan,
pinch
rolle:,
ete.,
which
come
into
direct
contact
with
the
tape,
to
become
dusty
or
dirty.
Before
actually
using
the
tape
deck,
be
sure
to
clean
the
surfaces
of
the
heads
with
the
cleaning
swabs
supplied
with
the
o
deck,
For
further
details,
refer
to
page
21,
“Care
y
and
Maintenance”
TAPE
REELS
Sensing
pole
#
Use
7-inch
or
S-inch
reels.
Both
eecls
should
be
hut
ol
lever
of
the
same
size.
If
they
are
not,
they
will
slow
down
st
different
rates
which
loads
to
unstable
tape
run
©
Do
not
use
reels
which
have been
deformed
or
warped
in
any
way,
or
reels
with
a
broad
tape
width.
Uf
the
tape
comes
in
contact
with
the
side
of
the
reel,
it
will
be
damaged.
BE
SURE
TO
CLAMP
THE
REEI
After
you
mount
the
reels,
make
absolutely
sure
that
you
damp
both
reels
so
that
they
will
not
separate
themselves
from
the
bases
during
tape
play
(Refer
to
Pig.
2).
For
further
details,
refer
to
the
section
on
“Mount:
ing
the
Reele”
on
page
7.

FEATURES
Tough
and
Reliable
Construction
The
tape
deck's
construction
combines
a
Smmthick
front
panel
and
a
diecast
frame
for
the
outer
casing
to
protect
the
heavy
Inside
paits.
The
construction
is
designed
to
display
the
maximum
precision
and
durability,
and
the
front
panet
«an
be
mounted
in
a
ack
conferming
to
EIA
standards,
‘Tape
Transport
has
D.D.
Motor
to
Drive
Capstan
The
tape
deck’s
AC
seryomotor
with
frequency
generator
features
direct
capstan
drive.
Even
the
slightest
luctuations
in
the
speed
caused
by
external
factors
are
controlled
by
the
servoamplifier
and
so
the
motor
displays
excellent
load
bearing
charactoristies,
and.
it
can
also
withstand
fluctuations
in
voltage.
Finally,
the
DD,
system
reduces
‘wowfluttar
and
yields
a
speed
which
is
subjact
to
minimal
ageing.
For
the
ree!
drive,
the
tape
deck
uses
a
pair
of
6-pole
inner
rotor
induction
motors
with
optimum
torque
characteristics.
Their
low
moment
of
inertia
and
the
use
of
solenokdacti
-
vated
differential
band
brakes
prevent
undue
tape
strain
and
protect
the
tape,
Auto
Reverse,
Auto
Repeat
Mechanisms
The
RI-7O7
with
its
four
heads
has
a
sensing
tape
auto
reverse
mechanism
for
return
playback
(material
is
recorded
in
one
direction
only).
This
allows
recorded
programs
to
be
played
back
automaticaly
over
long
periods
of
time
with
fout
the
tape
being
changed
over
oF
rewound
smarually
‘Also,
there
is
an
auto
repeat
mechanism
(repeat
button)
which
employs
the
tape
deck's
tape
counter.
The
sensing
tape
and
the
repeat
button
are
used
together
for
repeated
auromatic
playback,
Finally,
the
added
attraction
of
«tape
CHOOSING
A
LOCATION
|
SE
ST
HT
CL
IE
direction
selector
bution
allows
you
to
reverse
the
direction
of
tape
play
at
the
desired
position
Independent
Recording
Amplifier
Circuit
for
LINE
and
MIC
Inputs
The
recording
amplifie
Features
a
high
S/N,
and
the
micro=
phone
amplifier
displays
an
input
sensitivity
high
enough
for
use
with
600-chm
professional
microphones.
The
dynamic
range
fy
an
amazing
SBUB.
Powered
by
regulated
power
supply
aid
unaffected!
by
fluctuations
inthe
voltage
‘or
by
changes
in
the
temperature,
this
circuit
ensures
stable
recordings
a
all
times,
In
addition,
there
are
independent
LINE
and
NIC
recording
lovel
controls
to
enable
you
to
have
Fun
with
mixing
recording,
Convenient
Accessory
Function
PITCH
CONTROL
knob:
This
control
is
used
Lo
change
the
rated
tape
speed
during
playback
(19cm/s,
9.5cm/s}
across
a
£6%
range
—
in
other
words,
the
tape
can
be
made
Lo
go
695
faster
or
slower.
Musical
steps
ean
be
raised
or
lowered
as fat
as
the
semi=
tones.
This
means
that
you
can
bring
the
steps
of
the
recorded
music
into
line
with
tho
stops
of
the
instrument
Which
you
are
playing.
This
control
is
therefore
useful
when
you
are
using
2
tape
for
song
accompaniments
REC
MODE
button:
Program
sources
can
he
recarded
not
‘only
in
stereo,
but
also
in
mono
using
the
left
oF
right
‘channel
only.
This
button
allows
you
to
use
your
recerding
talents
and
techniques
10
the
full
whether
you
want
to
record
mono
signals
over
a
prolonged
period
of
time,
dabble
with
mixing
recording
oF
try
out
sound-on-sound
recoriling.
It
gives
you
a
range
of
possibilities
that
you
‘would
expect
from
the
tip-top
RT-707.
‘To
ensure
the
best
sound
quality
and
trouble-free
operation,
avoid
cetting
up
the
tape
deck
in
any
of
the
locations
described
below.
[
Lloottions
table
to
downgrade
pertormence
td
resin
breakconns
1.
Locations
exposed
to
direct
suntiant,
oF
near
heaters
or
other
2.
Locations
with
poor
vintilation,
or
with
high
humidity
or
mosturecontents,
Dusty
locations.
3.
Locations
unceptbie
to
vibration,
4.
Locations
where
thare
are
thinners
bentine
nd
other
types
of
volatile
liquids:
insect
sprays
or
any
kind
of
flammable
2
Ceuse
of
faulty
contact
in
input/output
terminal,
and
of
rust
‘3.
Tho
locations
arect
the
precision
parts
adversely
44
These
hep
covroce
ine
ont
panel,
tn
particu,
he
hewesare
Extormal
hat
causes
the
performares
of
aul
pats
to
ctor
‘orate,
and
operation
becores
unscape
High
humidity
aed
aon
moishse
content
aausecnrioration
In
inalaion.
There
i
aso
the
danger
of
cutrent
leakage
and
ars
caues
the
paris
to
deteriorate.
pocison
fina
to
micron
demands,
Chemicals
may
recucs
{hai
pertormance,w
exercise
al
due
ear,
|
a

FRONT
PANEL
FACILITIES
POWER
SWITCH
Push
cis
switch
and
power
ic
sued
tothe
ane
deck,
Pash
fora
second
time
to
tan
the
power
ol
SPEED
SWITCH
“This
witch
selects
the
tape
speed,
Push
Fora
9.5ems
seed
push
again
fora
19ers
speed
(lease
position
Teme
Used
For
recording
music
programs,
etc
W
Suniss
Used
fee
recording
lengthy
conversivons
et
PAUSE
LAMP.
This
groen
lamp
lights
up
when
the
PAUSE
button
is
pressed
to
indicate
the
tape
has
stopped
temporary
PHONES
JACK
This
isthe
output
jack
for
stren
headphones,
Signals
selecteé
by
the
MONITOR
switch
are
avalaole
ners,
Use
I
When
you
want
Lo
Inonitor
the
tecording
or
Halon
to
4
performance
dectly
taped
from
the
RT-303.
The
output
eel
is
0%
variable
Pease
use
low
impedanersypr
headphones.
Jf
you
we
high
MIC
JACKS
These
are
the
Input
[cks
For
mictoprone
‘cording,
The
Lett)
and
R
(eight)
channels
can
be
used
independently.
Only
the
micro
hones
input
signals
ae
recordag
ifthe
RECIPLAY
connector
JOIN
spevtcations}
on
he
fear
panel
and
{he
ANC
jacks
a
onavcted
at
she
same
time,
Ae
long
a6
the
microphones
have
a
Standard
6mm
clameter
plug,
you
can
use
ethera
low
mpecance
|600-ohms}
or
high
impedance
(10
~
SOkehms)
trae
MIC
RECORDING
LEVEL
CONTROLS:
Use
there
controls
ta
adjust
the
recording
level
whan
yu
are
recoreing
with
=
mictopnone
(oF
mirootones|
or
when
you
are
tring
tre
rear
panel
REC/FLAY
comnsetar
(DIN.
standard
Use
the
outer
contral
for
the
right
and
the
inner
contro
forthe
Jef
channel,
Input
signals
from
both
the
NIC
jacks
ard
the
REC/PLAV
connector
eannct
he
recorded
siultaneculy
LINE
RECORDING
LEVEL
CONTROLS.
‘Adjusethe
recording
input
level
frm
the
LINE
INPUT
terminals
‘on
he
fear
panel,
The
level
incraser
ache
camera
are
turned
to
the
rn,
The
outer
vantrol
i
fr
te
Hh
canned
and
the
Inne
eS
a
RECORDING
LAMP
(REC)
Ths
red
lamp
IMs
up
during
revorsing.
Check
that
thas
Ht
Up
before
revrding
MONITOR
SWITCH
TAPE:
Alwesyon
olen
othe
corded
eat
SOURCE:
You
canlstn
tothe
signa
bear
econangf
hs
it
avesvien
once
senate
SOURCE
an
TAPE
cut
sng
ec
wpe
te
and
subd
a
ae
TAPE
COUNTER
Ths
indicates
how
euch
tape
has
been
eecorded
oF
played
back
and
now
much
there
I
efe
over
REPEAT
BUTTON
This
button
allows
you
ta
riven
the
taps
forwart
For
reverse
playback
automata.
Ht
you
remember
to
work
the
tape
Counter
and
REPEAT
button,
then
the
tape
will
utorally
be
Feversed
and
The
tape
deck
wil
he
set
to
forward
playa
the
"9000"
splay
oM
the
tape
counter
gives
way
to
during
tevers
playback,
For
detail,
vefer
ta
the
ection
"Auto
Repeat
”
on
page
12.
Be
sure
10
reese
ths
Ducvan
when
you
rot
require
repeated
playback,
COUNTER
RESET
BUTTON.
Push
this
button
to
reset
the
tae
center
to
“000

-———
BIAS
SWITCH
“Ths
selects
the
reconling
bls
erent
according
10
the
type
tape szed
for
rosording.
Pus
for
LH
tapas;
puch
again
for
STD
tapes
(Fleas
positon)
STD:
For
standard
tape.
LHe
Farlow
note
hich
outpa
r9es
EQ
SWITCH
This
selecis
the
racorcing
eauateation
characterises
according
to
the
typeof
tape
used
ust
for
LM;
push
aque
for
STD
(ross)
STD:
Forstandard
tapos
LH: For
low
nse
and
high
output
tapes,
|
{for
funter
deta
on
How
©
use
the
BIAS
ard
EQ
switches,
|
|
refer
to
the
"BIAS
and
EQ
Suitehee”
on
page
15)
|
LEVEL
METERS
These
allow
you
to
read
out
the
levels
during
‘ecording
and
play
back.
When
the
MONITOR
siieh
Is
set
19
SOURCE,
they
indicate
the
input
signal
level,
and
when
set
10
TAPE,
they
indicate
the
playback
output
level
CAPSTAN
Tie
rotates
whan
the
power
ik
avitched
on,
Together
with
the
pinch
rte,
Ir
R3ens
the
cane
2
HS
rated
sped,
PITCH
CONTROL
KNOB
You
can
use
ths
co
make
the
tape
travel
6X
faster
a
slawer
than
the
nocmal
tae
speed
during
playback.
When
seo
the
cenial
position,
the
tape
speed
ie
TBem
for
8:Semfs
etandard
value
Tutn
che
contol
to
the
let ané
the
speed
tops
and
the
muscal
rises
and the
rusialstens
are
raed,
This
contra
cannot
be
used
a
ONE
REC
MODE
SWITCHES
(L.
R}
Deptes
these
switches
when
recordin
Le
Use
thisswiteh
fort.
(left)
channel
recorcing
Re
Use
thisswitch
for
R
(ight)
channalroarding
Fox
stereo
cevoiing,
eke
Sure
that
yOu
fepr
es
bo:
suits,
TAPE
DIRECTION
SELECTOR
BUTTONS
These
buttons
allow
you
to
set
the
dirsctlon
of
tape
phy
during
Playback.
When
depresso,
the
ution’
lamp
wil
hah
up
to
Indleate
che
dirsction
of
tape
play
Forstar
playback:
The
tape
rirs
from
lei
torah
Revers
payback:
The
tape
sur
from
right
eo
let
When
you
are
recording,
you
cannot
change
the
diecton
of
tape
play
even
by
dopressng
this
button,
The
tape
wil
abways.un
in
2
PAUSE
BUTTON
This
temporary
ops
the
tape
during
tape
play.
When
pressee
during
recording
or
playback,
the
tape
merely stops:
When
pressed
Iain,
the
tape
starts
to
ron,
This
button
dees
act
work
daring
FUNCTION
BUTTONS
“44.
REWIND:
This
causes
the
tape
to
be
wound
at
high
sped
from
the
right
vo
the
let
re
D>
FAST
FORWARD:
This
canes
the
tape
to
be
wound
ata
high
sped
from
he
eft
to
the
rah
re!
PLAY:
For
tape
playback
or
cording,
push
this
button,
REC:
To
record,
prow
this
button
together
with
the
PLAY
bution
WESTOP:
This
stops
the
tape
and
releases
the
ether
functlon
tape
set
to
®ve
revene
plavback
tection.
hen
the
fe
somata
hie
bacon
ae
bor
art
+
Thee
ne
ek
0
rs
Be
im
oy
Baton
So
tnt

CONNECTION
DIAGRAM
Rr70
LINE
4c
ouTLET——~
{This
ls
the
power
socket
(maxi
You
ean
eonnect
the
power
lu
Sn
another
tape
dace
oe
ampitit
ujum
the
LINE.
output
levels
‘Turn.
thom
clockwise
19
incense
Sunpst
evel
asony
wath
Oss
Siaplaved
an
the
Tel
meter)
ca
Stancard
tape
can
be
obtain
Chat
Power
piu
'RT
707's
ploybacki/
ro
the
power
nci9
bution
AC
bx
T
LIne
tereninets
i
ps
=e
Ground
nie
Tape
consis
of
Connections
fer
or
Tighi
dered
Connections
for
playback
ight
channel
(DIN
stander
rc
tereo
amaiiar
Recording
andara
CONNECTIONS
Use
the
accessory
connecting
cords
to
connect
the
RT-707
LINE
terminals
with
the
tape
terminals
oa
the
stereo
amplifier
or
receiver,
The
verminals
in
front
are
for
the
right
channel
and
those
behind
are
for
the
left
charmel.
If
you
do
not
connect
the
tape
deck
with
the
other
audio
equipment
properly,
you
will
hear
a
monot-
nous
single-pitched
hum
and
this
will
impair
your
recording.
Take
care,
therefore,
to
connect
pro-
porly.
Conneetions
for
playback:
Connect
the
TAPE
PLAY
input
terminals
on
the
stereo
amplifier
with
the
LINE
OUTPUT
terminals
on
the
RT-707,
Stereo
amplifier
Wa
(a)
Ooo
OK?
aa
90100
Connections
for
recording:
Connect
the
TAPE
REC
output
terminals
on
the
stereo
amplifier
with
the
LINE
INPUT
terminels
on
the
RT-707.
Using
the
REC/PLAY
connectors:
If
the
stereo
amplifier
is
equipped
with
DIN
recording/playback
connectors,
use
DIN
recording/playback
cords,
which
are
sold
separately,
to
connect
the
REC/
PLAY
connectors
on
the
RT-707
and
the
stereo
amplifier.
There
is
no
need
for
the
accessory
connecting
cords
since
the
same
connections
serve
for
both
recording
and
playback.
Adjust
the
recording
level
with
the
MIC
recording
level
con-
trols.
Refer
to
the
section
“Mixing
Recording”
on
page
16
when
you
want
to
record
signals
mixed
‘with
those
from
a
second
stereo
amplifier.

THREADING
THE
TAPE
Use
either
two
Tsinch
or
two
Brinch
reels
with
this
tape
deck.
Use
reels
of
the
same
size
and
of
the
same
material
(use
metal
with
metal,
or
plastic
with
plastic,
for
example).
You
may
damage
the
tape
if
you
use
rools
with
differont
sizes
and
materials
MOUNTING-"THE
REELS
Mount
the
reek
with
the
tape
on
the
left-hand
reel
base,
and
the
take-up
reel
on
the
right.
Make
sure
‘that
the
recl
bases
are
stationary
when
you
mount
the
reels,
As
shown
in
Fig.
3,
pull
the
reel
clamps
toward
you,
align
the
top
and
bottom
pawls
and
ingort
the
reels.
Next,
pull
the
reel
clamps
toward
you,
tum
to
the
right
or
left,
and
they
will
clamp
‘the
reel
into
place.
Threading
the
tape
Unwind
two
tums
of
tape
from
the
left-hand
reel
and
thread
the
tape
as
shown
in
Fig.
4,
inserting
the
end
of
the
tape
into
the
winding
stot
in
the
take-up
reel.
To
facilitate
tape
threading,
lock
the
left
and
right
tape
guides
as
shown
in
Fig.
6.
Pressing
the
PLAY
button
automatically
releases
this
lock,
bul
return
the
Jock
manually
for
fast
forward
and
rewind.
Winding
the
tope
Wind
5-6
tums
of
tape
onto
the
right-hand
reel
to
take
up
the
slack
so
that
the
tape
does
not
slip
loose
when
tape
transport
begins.
NOTE:
‘Twn
the
reels
end
cheek
thot
the
tape
is
not
touching
the
edges
of
the
reets
and
tact
the
reels
do
not
move
white
the
tape
ie
running
SHUT-OFF
MECHANISM
If
the
tape
runs
out
from
cithor
reel,
or
if
it
be
comes
slack,
this
mechanism
automatically
stops
the
tape
and
the
funetion
buttons
are
released
As
shown
in
Fig.
6,
the
shut-off
lever
causes
the
shul-off
switch
to
go
to
OFF
since
the
reel
drive
motor
stops.
Supply
side
—
Tena
voter
PIONEER
Feel
camo
See
Fig.
3

BASIC
OPERATIONS
TAPE
PLAY
(PLAYBACK
OR
RECORDING)
The
tape
can
be
played
hack
in
a
forward
direction
from
left
to
right,
or
in
a
reverse
direction
from
right
to
left.
The
tape
will
not
run
in
the
reverse
direction
when
you
are
recording,
1.
First,
check
that
the
tape
is
on
the
left-hand
reel
for
normal
recording
and
playback,
2.
When
you
depress
the
tape
PLAY
button
when
you
want
to
play
a
tape
back,
the
tape
will
run
forward
in
accordance
with
the
Lape
direction
selector
button,
If
you
depress
both
the
PLAY.
and
the
REC
buttons
when
you
want
to
record
a
tape,
then
the
tape
will
run
in
a
forward
direc
tion.
8.
You
can
select
the
direction
of
the
tape
play
during
playback
(forward
»
:
from
left
to
right;
4
reverse:
from
right
to
left)
with
the
DIREC:
TION
buttons.
STOP
ress
the
m™
stop
button
to
stop
the
tape.
PAUSE
1,
Press
the
PAUSE
button
while
the
tape
is
playing (during
playback
or
recording).
2.
The
tape
stops.
The
play
function
button
re-
mains
in
the
“on”
state.
3.
Press
the
PAUSE
button
again
and
the
tape
resumes
its
running,
The
PAUSE
buston
does
not
work
during
fast
for-
ward
or
rewind,
FAST
FORWARD
1.
Cheek
that
the
tape
is
on
the
left-hand
real
2.
Press
the
PD
fast
forward
button,
3.
The
tape
is
wound
at
a
high
speed
from
the
left:
to
the
right
reel
4.
Press
tie
am
slop
bution
to
stop
the
tape,
©
To
rewum
the
tape
deck
from
fast
forward
to
tape
play,
press
the
PLAY
button.
The
tape
stops
for
several
seconds
and
then
starts
playing,
from
the
left
to
the
right
reel.
*
Press
the
44
rewind
bution
if
you
have
wound
the
tape
on
too
far
ehead.
The
tape
is
thon
put
into
reverse
and
it
travels
at
a
high
speed
from
the
right
to
the
left
reel
Oe
Fast
forward
button
Play
bution
Pig.
7
Fig.
8
CE)
Od
1,
There
is
no
need
to
press
the
ma
ston
button
when
changing
over
from
one
function
(fast
forward,
for
example)
to
enother
(like
tape
play).
Just
prese
the
‘appropriate
function
bution.
With
torg-playing
tapes.
and
especially
with
thin
tapes,
prose
the
bb
fast
forward
ond
then
the
44
rewind
buttons,
oF
the
rewind
and
then
the
fast.
forwond
Butions,
when
‘you
tant
to
change
over
from
feet
Forward
or
rewind
to
stop
oF
tape
play.
Then
press
the
WM
top
button
oF
the
PLAY
button
ichen
the
rotat
ing
reels
slow
down.
This
helps
prevent
tape
elongation
and
discortion,
9.
The
auto
reverse
mechoniam
and
the
DIRECTION
butions
will
not
work
during
fast
forward
or
rewind

REWIND
1.
Cheek
that
the
tape
is
on
the
right-hand
reel
2,
Press
the
4
rewind
button,
3.
The
tape
is
rewound
at
a
high
speed
from
the
right
to
the
left
reels.
4,
Press
the
am
stop
button
Lo
stop
the
tape.
*
To
retum
the
iape
deck
from
rewind
to
tape
play,
press
the
PLAY
button,
The
tape
stops
for
several
seconds
and
then
starts
playing
from
the
left
to
the
right
reel.
Press
the
PP
fast
forward
button
if
you
have
rewound
too
much
tape.
The
tape
is
then
put
into
reverse
and
it
travels
at
a
high
speed
from
the
left
to
the
right
ree!
SETTING
THE
TAPE
SPEED
(Fig.
9)
1,
Set the
recording
tape
speed
or
check
the
pley
back
tape
speed
(19em/s,
or
9.5em/s).
2.Tum
the
SPEED
switch
to
the
appropriate
position
19em/s:
Press
switch
twice
(released
position
Ml)
9.5em/s:
Press
switch
onco(depressed
position
m)
Setting
the
tape
speed
to
9,5em/s
enables
you
to
couble
the
recording
time,
compared
with
a
19em/s
tape
speed
‘TAPE
TRACKS
The
RT-707
is
a
d.track,
2-channol
tape
deck.
A
track
is
that
strip
of
the
tape
which
is
recorded
(magnetized),
Channel
refers
to
the
recording!
playback
system.
Kirst,
L
channel
signals
are
recorded
on
track
1
and
R
channel
signals
are
recorded
oa
track
8.
When
the
tape
has
been
taken
up
and
the
reels
changed
over,
the
L
channel
and
R
channel
signals
are
recorded
on
tracks
4
and
2,
respectively.
With
playback,
the
track
1
(L
channel)
and
track
3
(R
channel)
are
played
back
in
the
forward
direction,
and
the
track
4
(L
channel]
and
track
2
(R.
channol)
ere
played
back
when
the
tape
is
reversed
automatically
with
the
auto
reverse
mechanism,
or
manually
PIONEER
Fig.
9
Revere
Farmar
ployosex
frets
Etare
hese
Signal
vs.
Track
1
shanna
rat
Trask
1
chanel
gna
Traek
2
[Lehane
ar
Track
&

PLAYBACK
Before
turing
the
POWER
sniteh
an,
act
the
controls
as
follows:
1”
PAUSE
switch
is
et
to
OFF
(released position)
6
Set
PITCH
CONTXOL
knob
to
ential
position,
2.
ress
eouunser
reset
bution
anil
set
counter
16
"0000"
7
Cheek
ecnneetions
between
RT-707
and
stereo
amplifioe
8,
REPEAT
button
ie
sot
10
OFF
or
receiver
4
Set
MONITOR
switeh
to
TAPE,
18,
Chock
whether
head
is
dirty.
Clean
if
wecessary
5.
Tun
LINE
and
MIC
recording
level
controls
fully
to
ete
‘The
number
nthe
illustration
correspond
tothe
step
involued
inthe
plevoac
procedure
1.
Attach
the
tapes.
6.
Depress
the
PLAY
button.
‘Atiseh
the
tape
you
wan:
to
play
back
(prerecorded
‘The
lape
runs
in
aecordance
with
the
DIRBCTION
tape)
to
the
left-hand
reel
bse.
button
satting
in
the
playack
mode.
‘Tho
tape
can
be
x
aditelvend
Gam
Gowsson?
reversed.
manually
anywhere
you
tike
in
the
playback
2.
Push
POWER
evitch
and
turn
po
node
if
you
depress
the
DIRECTION
button.
"The
shut-off
switch
goes
off
and
the
tape
saps
if
thore
is
any
slack
in
the
tape,
Be
sure
Lo
keep
the
tape
taut,
TP
you
wont
to
slop
the
tape
temporarily
during
playbsck
‘The
level
meters
light
up
ond
the
capstan
starts
rotating
fas
soon
as
the
power
is
switched
on,
3,
Check
the
tape
speed.
Decide
whether
the
tape
10
be
played
was
recorded
at
Sree
rey
eres
TGomfe
or
BSomla
and
ott
SPERD
ewiich
accordingly.
@
Yaurcnn
aajuat
tne
tops
epecd
within
46%,
of
ia
vating
4.
Get
HONTTOR
syiich
io
TAPE,
wrth
the
tah
contol
fe
Ga.
ope
moe
avlsk
on
toe
esse
awuicne
2.
"Whew
playlaole
hab
finiahed
whieh
is
eonnected
to
the
F707
to
ON
(plasback
Wher
Auyback
has
Tiished,
pris
the
m
stop
button
nod).
Tbe
tape
has
tun
out
ving
plsboch,
the
shat
ott
WERE
GRE
tape
ahnecUbN
“aRIGE
tbat
Sch
ria
he
pe
kaart
ee
@IRECTION).
©
To
adjust
lhe
sound
ainity,
and
volunie;
peste
the
When
the
POWER
awitch
is
deprossod
and
power
is
supplied
ta
the
tepe
deck,
the
Forward
lamp
lights
up
Lo
SO
ae
ae
Ee
indioote
thet
the
tape
will
play
in
the
»
forward
diree
tion.
If
the
tape
is
set
on
the
eight-tand
reel,
dapress
the
4
reverse
DIRECTION
button,

AUTO
REVERSE
‘You
can
automatically
reverse
the
tape
feom
a
for-
ward
to
a
reverse
direction
during
playback
if
you
stick
the
accessory
sensing
tape
onto
the
magnetic
surface
of
the
playback
tape.
Moreover,
you
can
also
reverse
the
direction
of
the
playback
tape
from
reverse
to
forward
by
using
the
auto
repeat
mechanism.
Pinelly,
you
can
change
over
the
direction
of
the
tape
manually
to
forward
or
reverse
even
during
auto
roverse
by
depressing
the
appropriate
tape
direction
selector
button
(DIREC.
TION).
©
The
tape
always
goes
from
forward
to
reverse
with
automatic
reverse
which
makes
use
of
the
sensing
tape.
It
will
never
go
from
reverse
to
forward.
¢
On
the
other
hand,
the
tape
always
goes
from
reverse
to
forward
with
automatic
reverse
which
makes
use
of
the
aulo
repeat
mechanism.
[t
wall
never
go
from
forward
to
reverse.
STICKING
THE
SENSING
TAPE
(Fig.
12)
1.
Use
the
accessory
sensing tape
(7
~
LOmm).
2.
Stick
the
sensing
tape
onto
the
magnetic
surface
cf
the
playback
tape
exactly
where
you
went
it,
to
be
automatically
reversed,
Make
sure that
the
sensing
tape
does
not
protrude
over
the
edges
of
the
playback
tape.
It
doos
not
matter
if
that
part
of
the
tape
earmarked
for the
sensing
tape
is
the
leader
section.
3.
Smooth
the
sensing
tape
to
remove
any
air
bubbles.
ADJUSTING
THE
PLAYBACK
SPEED
Using
the
PITCH
CONTROL
knob,
you
can
change
the
tape
speed
to
within
+6%
of
that
speed
which
has
been
selected
by
the
SPEED
switch
(19cm/s,
9.5em/s).
Turning
this
control
to
the
left
from
the
central
position
slows
down
the
tape
speed
and
lowers
the
musical
steps.
‘Turning
it
right
round
to
the
left
lowers
the
musical
steps
by
a
semitone.
Conversely,
tuming
the
control
to
the
right,
in-
creases
the
tape
epeed
and
raises
the
musical
ateps.
‘Tuming
it
fully
to
the
right
raises
the
musical
steps
by
a
semitone.
If
you
listen
to
the
playback
sound
and
adjust
this
control,
you
ean
easily
harmonize
the
musical
steps
of
the
music
you
want
to
perform,
Normally,
this
control
is
kept
to
the
central
posi-
tion
during
playback,
PIONEER
toot
ee
ee
Aiestion
ofthe
tape
ply.
Fig.
11
Pus)
the
tape
guides
up
arc
toc,
‘Senne
pole
Pen!
off
the
sea)
on
the
sensing
tape
{7
—
Town)
ane
stick
to
the
imagewtie
surface
of
the
tape
Fig.
12
°0'6
Fig.
18

AUTO
REPEAT
You
can
play
back
a
tape
you
want
to
hear
again
and
again
if
you
use
the
sensing
tape
and
the
auto
repeat
mechanism
together.
For
example,
say
you
want
to
hear
just
one
tune
or
song
from
a
group
of
recorded
melodies.
All
you
have
to
do
is
stick
the
sensing
tape
onto
the
playback
tape
immediately
after
the
melody
you
want
to
hear,
and
then
set
the
auto
repeat
mechanism
at
the
beginning
of
the
melody.
Sit
back
and
you
will
hear that
melody
as
many
times
as
you
want
to
without
lifting
a
finger.
PROCEDURE
FOR
AUTO
REPEAT
4.
Wind
the
tape
onto
the
righthand
reel
by
depressing
the
PP
fast
forward
button.
2.
Stick
the
sensing
tape
onto
the
end
of
the
tape
‘on
the
right-hand
reel.
2.
Wind
the
tape
onto
the
left-hand
reel
by
depres
sing
the
44
rewind
button.
4,
Depress
the
@
forward
DIRECTION
button
and
the
tape
PLAY
button,
and
the
tape
will
start
to
run
forward
5.
Depress
the
counter
reset
button
to
“0000"
at
the
heginning
of
the
part
of
the
playback
you
want
repeated.
Then,
depress
the
REPEAT
button.
‘The
tepe
will
continue
to
run
until
the
sensing
tape
is
reached
which
will
automatically
reverse the
tape
and
set
the
tape
in
the
reverse
playback
mode.
The
counter
will
count
down
and
when
it
goes
down
past
“0000”
to
“9999”,
the
tape
is
reversed
auto.
matically
and
is
now
played
back
in
the
forward
direction,
NOTE
Tf
you
continue
the
euto-repest
play
for
a
long
period
of
time,
the
position
at
which
the
retuned
tape
begins
to
play
again
may
sip.
This
trouble
might
be
caused
ty
the
tepe
materiale,
the
winding
conditions
or
other
tunfavorable
factors.
Therefore,
when
you
intend
10
perform
utorrepeat
play
for
along
lime,
you
should
bet
the
"0090"
point
which
detects
the
starting
point
{for
the
forward
re-piay
when
some
tope
remaining
on
the
righthand
reek
We
recommend
that
you
press
the
counter
reset
button
to
"0000"
when
the
tupe
counter
has
advanced
over
15
‘counts
after
loading
the
tops
conn
CTS
Teen)
Ey
¥e0
Sensing
eB
?
\
—
a
=
-
“||
nen
the
sensing
te
8
Frochad,
the
divacion
of
Iie
played
Back
ithe
\©1
Pash
thi
nuttom
athe
desire
position
on
the
tape
when
the
{pe
rurning
in
the
formar
traction.
22
‘The
divection
of
the
tape
is
automatically
reversed
when
the
Counter
reaches
"9990"
when
the
‘ape
ie
runcing
in
the
Fig.
14

RECORDING
1,
PAUSE
switch
is
st
to
OFF
(released
position)
2.
Press
counter
ree
bulLon
and
set
counter
to.
"0000!
2.
REPRAT
bution
is
set
to
OFF
1,
Set
MONITOR
smitch
to
TAPE,
5.
Tun
LINE
and
MIC
recording
level
controls
fully
co
left
PIONEER
6,
Sot
PITCH
CONTROL
lod
to
central
position
7.
Cheek
connections
between
RT-07
and
steeea
amplifier
8.
Check
whether
bend
is
dirty,
Clean
if
necsseary
“The
numbers
in
He
usteation
correspond
to
the
steps
involved
in
te
recording
procadure.
1,
Attacl
Attach
the
tape
you
want
to
record
bs
2.
Push
POWER
switch
to
turn
power
on.
‘The
ievel
meters
light
up
and
the
capstan
starts
rotating
sa
sp0n
as
the
power
i
switched
on
3.
Setting
the
tape
speed.
Set
the
SPEED
ewiteh
to
19em/s
or
9,5em/s
in
accord
ance
with
the
program
source
You
intend
to
record
4.
Set
the
MONITOR
switch
to
SOURCE.
5.
Setting
the
BIAS
and
EQ
switehes.
Refer
to
the
section
on
“Bias
and
HQ
Switches”
on
page
15
and
set
the
rwitehes
in
aceordance
with
the
pe
of
tape
you
intend
to
eeeord
on,
6.
Pross
the
PAUSE
button.
7.
Selecting
the
REC
MODE
switches
(L,
R)
Nomally;
both
ewitehes
are
depreted,
However,
depress
only
the
Lor
R
switch
for
mano
recordings
8.
Setting
the
recording
level.
‘The
level
meter
pointors
will
desleet
in
accordance
with
the
strength
of
che
input
signal,
Adjust
the
LINE
or
MIC
recording
level
controls
aa
that
the
pointers
donot
deflect
into
the
red
areas,
‘The
reeeriing
level
control
(LINE
oF
MIC)
of
the
terminal
to
which
mo
signal
i
applied
should
be
tet
to
Hs
lowest
position,
For
further
dolzila,
refer
to
the
section
on
“Recording
Level
Adjust
mente"
on
pose
14
the
left-hand
test
12.9
610
9.
Press
PLAY
and
REC
buttons
together.
The
REC
lanap
will
ight
up.
10.
Start
recording.
Release
the
PAUSE
button,
‘The
tape
travels
from
lett
to
right
and
the
deck
isso
to
the
recording
mode.
I
thove
isany
Sack
in
the
tape,
the
shuvort
switeh
goes
off
and
the
tape
stop
Be
sur
to
keap
the
tape
ta
LL,
Monitoring
the
recording.
Seb
the
MONITOR
swrich
to
TAPE
snd
compare
the
sound
quality
with
shat
when
the
same
switeh
wes
set
to
SOURCE.
If
there
i
anything
vial
about
the
avund
Auality
when
the
MONITOR
switeh
is
set
to
TAPE,
this
may
indicate
a
deformed
tape,
a
dirty
head
section
or
an
irregularity
in
the
recording
level
or
BIAS
and
EQ
suviches,
Track
down
the
eause
of
the
probiem
aad
start
recording
12,
When
recording
is
completed.
Woon
the
recording
is
over, pross
the
m
stop
button.
If
the
tape
runs
out
daring
recording,
the
shutott
lever
causes
the
shut-off
switch
to
go
off
and
the
tape
deck
is
Automatically
set
to
the
stap
mode
lage,
the
HEC
bation
wil
be
rteaed
and
the
tape
Cock

RECORDING
LEVEL
ADJUSTMENTS
Setting
the
recording
level
has
a
great
effect
on
the
playback
sound.
‘The
playback
sound
will
be
distorted
if
the
level
meter
pointers
deflect
to
the
upper
end
of
the
scale
during
recording,
Conversely,
if
the
angle
of
deflec-
tion
is
too
low,
the
S/N
will
deteriorate
and
there
will
be
@
high
level
of
audible
noise
during
play.
back.
The
best
recording
is
assured
if
you
adjust
the
recording
level
controls
s0
that
the
level
meter
pointers
deflect
across
a
—8—OdB
range
at
signal
peaks
in
the
program
source.
‘The
signal
level
varies
greatly
from
program
to
program
and
so
take
care
in
sorting
the
controls.
‘As
shown
in
Fig.
16,
the
recording
level
controls
ean
be
used
to
adjust
the
recording
levels
of
the
left
and
right
channels.
HOW
TO
USE
THE
MONITOR
SWITCH
‘As
shown
in
Fig.
17,
the
RT-707
adopts
an
indepandently
aligned
reverse
—playback/erase/
recordingMforward
playback
4-head
system
While
you
are
recording,
the
erese
head
goes
into
action
and
erases
any
pye-recordings
on
the
tape
before
they
reach
the
recording
head.
This
means
‘that
you
can
record
a
new
peogram
source
even
if
you
are
using
a
pre-recorded
tape.
In
addition,
you
can
also
play
back
the
newly
recorded
program
immediately
with
the
playback
heads.
If
you
set
the
MONITOR
switch
to
TAPE
during
recording,
you
can
listen
in
to
the
program
which
hhas
just
been
recorded.
Setting
the
same
switch
to
SOURCE
allows
you
to
listen
in
to
the
program
whieh
you
are
ahout
to
record
and
to
check
whether
you
want:
to
go
ahead
and
record
it
or
not.
Be
sure
to
set
the
stereo
amplifier’s
TAPE
MON
TOR
switch
to
ON
when
monitoring
the
recording
from
the
siereo
amplifier.
ERASING
RECORDED
SOUND
@
Turn
the
recording
level
controls
(LINE,
MIC)
to
the
left-as
far
as
they
will
go
and
depress
both,
the
REC
and
PLAY
buttons
together
if
you
‘want
0
erase
completely
a
previously
recorded
program
source.
© If
you
want
to
record
a
new
program
source
on
a
tape
which
has
proviously
been
used
for
recording,
the
recording
is
automatically
erased
and
the
new
program
source
is
recorded
instead.
(Ot
siaral
peaks.
i
Zaro-adjusiing
the
meters
Both
meters
re
provid
ity
special
sexews
for
zm
adjust.
Use»
inal
srmadeuer
1
achist
then
eer
fing
ifthe
pointers
Jo
hotpoint
wo
Zora
wher
te
power
i
of,
Fig.
16
ight
channel
knob
‘Turning
she
controls
adusts
Bot”
Land
Charme
the
seme
Time,
To.
acive!
indepancnty,
hoW
the
contral
you
donot
jst
and
unm
the
canwot
of
shat
chanel
you
wish
10
Fig,
15
Set
monic
slic
on
ereo
MITT
Gasokar
sytem
won
pata
rogram
sours
raya
neat!
|
|
——$poyoace
neat
‘Revere
ornare
Fra
Lprcorsing!
‘1
Alternately
set
the
MOWITOR
swch
10
tre
SOURCE
wed
TAFE
positions
162
The
heads
crange
alora
with
the
change
in
she
diresion
of
bce
Fig.
17
1a
L

BIAS
AND
FQ
SWITCHES
BIAS
ewitch
In
order
for the
tapes
to
give
full
rein
to
their
ehar-
acteristics
and
for
you
to
keep
distortion
to
the
minimam;
you
must
select
a
bias
value
in
keeping
with
tho
characteristics
of
the
tape
you
are
©
Ifyou
record
an
LH
tape
with
the
BLAS
switch
set
to
STD,
the
bias
becomes
shallow,
distortion
inereases
and
the
high
range
level
rises
resulting
in
an
unnatural
sound.
©
Ifa
standard
tape
is
used
with
the
switeh
set
to
LH,
the
bins
deepens
and
so
the
high
range
level
drops.
EQ
switeh
Standard
and
LH
tapes
have
different
equalization
values
in
the
high
range
during
recording
and
so
you
must
not
only
choose
a
bias
value
in
keeping
with
the
characteristics
of
the
tape,
but
also
make
allowances
for
high
range
equalization.
Set the
EQ
switch
in
accordance
with
the
characteristics
of
the
tape
you
are
using.
©
If
you
record
an
LH
tape
with
the
switch
set
to
STD,
the
high
range
level
rises,
resulting
in
an,
unnatural
sound.
@
If
you
record
on
a
standard
tape
with
the
EQ
switch
set
to
LH,
the
high
range
lovel
drops.
a
BIAS
and
EQ
switeh
combinations
with
different
makes
of
tape
Table
1
lists
the
standacd
combinations
of
the
switches
and
tapes
although
the
two
switches
allow
totel
of
four
combinations.
‘The
table
does
not
aim
to
give
you
absolute
values.
Feel
free
to
press
and
release
the
MONITOR
switch
and
compare
the
sound
at
TAPE
with
that
at
SOURCE.
Set
the
switches
so
that
the
sound
is
to
your
liking.
(Before
choosing
the
LH
and
STD
positions,
read
the
tape’s
“instructions
for
use’)
i
RRR
SS
Fa
I
FIN.
COCEE
‘B660000"
t
BIAS
ewiteh]
EO
snitch
|]
Moke
of
tare
i
sro]
tH
[STO]
1H
Soren
[728
Pi
COASSIC
:
a
s:208,21,
212,213,226]
a
ae
=|
|
2)
Pare
‘|
I
Bb
160,
AUDUA
TOK
mawete
Gig
DEG,
UORE,
LNE
Bo
3
7
Pi
fen
626
spe
FES
FE
t
ts
Tapaoressiowal
|
ease
|
cbsecRoniRS
Lose
‘
3
tSube
L
RiREK
a9, a4,
|
wirach
oo
I
é
3
11
the
soural
is
not
to
your
thing
with
the
EO
ond
BIAS.
position
stdin
the
table
rycen
postion

MICROPHONE
RECORDING
STEREO
RECORDING
Connect
either
a
stereo
microphone
or
two
iden-
tical
models
to
the
MIC
jacks
(L
and
R),
as
shown
in
Fig.
19,
Ber
the
recording
procedure,
refer
to
section
on
“Recording”
on
page
13,
Points
to
bear
in
mind
©
You
can
use
either
low
impedance
(600-obms)
or
high
impedance
(10
—
50-kohms)
micro-
phones.
© Tf
you
are
using
a
high
impedance
microphone,
meke
sure
that
its
cable
is
not
more
than
5
meters
long.
©
When
not
recording
with
microphones,
either
pull
the
microphone
plugs
from
the
MIC
jacks
or
set
the
MIC
switches
to
OFF.
©
When
using
a
microphone
to
record,
it’s
a
good
idea
to
monitor
the
recording
through
your
headphones,
Monitoring
the
recording
with
the
speakers
very
often
gives
rise
to
howl
so
use
the
microphone
as
far
away
from
the
speakers
as
possible.
MIXING
RECORDING
You
can
mix
the
signals
from
the
MIC
input
jacks,
or
those
from
the
rear
panel
IN/OUT
(Recording!
Playback)
connectors
(DIN
standard),
with
those
of
the
line
input
(LINE
INFUT)
terminals.
1.
Connect
the
microphone
plug
(or
plugs)
to
the
MIC
jack
(or
jacks),
and
then
connect
the
signals
from
the
stereo
amplifier
to
the
LINE
INPUT
terminals.
Remove
the
microphone
plugs
if
you
‘use
a
DIN
connector.
The
microphone’s
signals
will
be
mixed
with
the
line
signals
with
the
microphone
connectad
to
its
jack
2.
You
can
adjust
the
microphone
signals
or
those
available
at
the
DIN
connector
with
the
MIC
recording
level
controls.
The
signals
from
the
stereo
amplifier
can
be
adjusted
using
the
LINE
recording
level
controls,
3.
Refer
to
the
section
“Recording”
on
page
18
or
the
recording
procedure.
ores:
1.
Set
the
recording
lovel
controls
not
used
for
mixing
at
their
lowest
level
(turn
right
round
(o
the
lef)
2,
Vou
wil
obiain
much
better
reaults
with
mixing
if
you
urn
the
LINE
recording
level
controls
down
slightly
rather
than
if
you
use
the
microphones
or
line
input
independent.
Left
chanrel
Rich?
chan
Focording'nloyouec
(6h
cord
oe
rieroohones
are
yan
30
‘part
Fig.
19
Stop
comet
dock
ae
Bil
Stereo
amplifier

OTHER
METHODS
OF
RECORDING
SOUND-ON-SOUND
RECORDING
Sound-on-sound
is
one
method
of
recording
you
‘ean
pursue.
It
briefly
involves
mixing
a
fresh
pro-
gram
source
with
the
sound
being
played
back
on
2
monaural
recorded
tape.
‘The
new sound
souree
is
mixed
and
recorded
on
a
different
track.
Let's
take
an
example:
you
can
all
by
yourself
sing
a
cnet.
or
rio
accompanied
by
background
music
which
is
played
back
as
you
sing.
L
channel
playback,
R
channel
recording
1,
Connect
the
R
LINE
INPUT
terminal
with
the
L.
LINE
OUTPUT
terminal
on
the
rear
panel
of
the
RT-707.
(Refer
to
Fig.
21),
2.
Connect
the
microphone
to
the
R
MIC
jack
oa
the
front
panel
8.
Depress
the
R
REC
MODE
switch
(ON
position)
and
release
the
L
switch
(OFF
position).
ess
the
TAPE
MONITOR
switch
(TAPE
position).
5.
Check
that
the
forward
DIRECTION
lamp
has
lit
up
and
depress
both
the
PLAY
and
REC
buttons.
6.
Using
the
LINE
and
MIC
recording
level
con-
ols,
adjust
the
levels
of
the
playback
sound
and
srophone
sound.
Should
the
playback
level
be
high,
adjust
with
the
L
output
level
control
on
the
rear
panel.
Rewind
the
tape
to
start
position
thon
staxt
the
microphone
recording,
all
the
while
listening
to
the
[channel
playhack
sound
through
the
headphones.
Table
2
shows
the
differences
in
the
meter
pointer
deflections
during
recording
and
in
the
LINE
OUTPUT
terminal
signals
based
on
the
positions
of
tae
MONITOR
switch,
Nore:
If
you
are
planning
R
channel
playbach
and
L
channel
recording,
corry
out
the
above
steps
substituting
1.
for
R
end
B
for
For
example,
if
you
record
a
duet
on
the
R
channel
by
Uw
sownd-onsound
method,
and
then
go
further
10
record
the
R
channel
playback
sound
and
the
fresh
program
source
on
the
L
channel,
you
will
end
up
with
tong
ix
vio.
You
con
keep
on
repeating
the
program
{outee
Jn
this
way
for
as
many
superimposed
recordings
at
you
tke
sea
pin
plug
cows
se
3
e+
PIGNEER
Wereatone
U
through
headphones
Fig.
21
{Me
your
own
voice
{ix
your
ann
vooe
with
the
(Paecompan
rene
and
record)
~
ithe
order
of
recording
eikionnitnd
ninput
le
Tabye,
2
MONTOR
|
crane
|Levt
me]
_
OUTPUT
tema
TERT
|
Defects
|
Airniy
ceed
sara
TAPEPLAY
Figur
|
bef
Signal
mo)
ee
ce
ounce
might
|
etecs

RECORDING
WITH
TIMER
SWITCH
The
‘Timer
switch
which
is
sold
separately,
allows
you
to
recor
while
you
ae
out
or
sleeping,
or
it
can
wake
you
up
by
playing
beck
a
recorded
program
source.
It
also
has
a
‘sleeping’
function.
Unattended
Recording
1.
As
shown
in
Fig.
23,
connect
the
RT-707's
power
cable
to
the
Time
switch.
Also,
plug
the
power
cables
of
the
stereo
amplifier
and
tuner
into
the
timer
so
that
thoir
ON-OFB
functions
are
controlled
by
the
timer.
,
Set
the
power
switches
of
the
RT-707,
amplifier
‘and
tuner
to
ON.
8
Adjust
the
amplifier
controls
and
tune
the
tuner
into
the
station
whose
program
you
want
to
record
4.
Follow
the
steps
in
section
“Recording”
on
page
13
and
proceed
with
recording,
Set
the
recording
levels.
Set
the
Timer
switch
so
that
the
power
will
go
oon
at
the
pre-determined
time.
The
power
to
the
‘other
components
goes
OFF.
6.Press
both
the
PLAY
and
REC
buttons
and
check
that
the
tape’
deck
will
be
set
to
the
recording
mode
when
the
power
goes
on.
‘At
the
pre-determined
time
the
power
will
auto-
‘matically
go
on
and
the
tape
deck
will
start
to
record,
‘The
Timer
switeh
will
also
turn
the
power
off
again
at
a
pre-arranged
time,
You
can
therefore
record
programs
while
you
are
out
—
just
follow
the
above
steps
and
put
your mind
at
‘ease.
Sleeping
Function
and
Wake-up
Playback
1.
Connect
the
power
cables
of
the
RT-707
and
the
stereo
amplifier
to
the
Timer
switch.
2,
Set
the
timer
so
that
the
power
goes
off
in
30
—
60
minutes.
You
can
now
relax
and
listen
to
music
while
you
fall
off
to
sleep
(sleeping
func
tion).
3,
If
you
set
the
timer
so
that
the
power
goes
on
at
‘a
pre-detormined
time,
eamy
out
the
instructions
listed
in
steps 1
—
6
under
the
section
“Play.
back’
on
page
10
and
set.
the
R'T-707's
POWER
switeh
to
ON,
then
playback
will
start
at
that
prodetermined
time
(wake-up
playback).
p
Vad
Sas

FOLLOW-UP
RECORDING
‘You
can
record
a
new
program
source
as
you
play
back
a
previously
recorded
program
source.
A
1.Connect
the
signals
from
the
new
program
source
to
the
LINK
INPUT
terminals
or
MIC
Jacks.
2.
Adjust
the
recording
level
5.
8.
Press
the
PLAY
button
and
the
tape
starts
to
play
back
When
the
section
of
tape
you
want
to
rerecord
is
heard,
press
the
PLAY
and
REC
buttons
together.
I
4.
The
tape
deck
now
starts
to
record
the
new
program
source,
Nore:
‘The
tape
dech
will
not
be
set
to
the
recording
mode
if
you
prest
Just
the
REC
button,
You
must
press
the
PLAY
button
toa,
LENGTHY
MONO
RECORDINGS
‘When
the
program
souree
does
not
require
record:
ing
in
stereo,
you
ean
still
make
efficient
use
of
all
‘the
tape
tracks
by
recording
in
mono.
Operation
First,
connect:
the
program
source
to
the
L
(or
R)
MIC
jack,
or
to
the
L
(or
R)
TAPE
REC
terminal
Then:
1.
Depress
the
L
(or
R)
REC
MODE
switch
(ON
position)
and
release
the
R
(or
L)
switeh
(OFF
position).
2.
The
sound
is
recorded
on.
track
1,
8.
Stop
the
tape
before
it
is
wound
onto
the
right:
RACK-MOUNTING
The
R'T-707
is
designed
to
be
mounted
in
racks
that
comply
with
EIA
standard.
Choose
a
rack
which
meets
these
standards.
MOUNTING
PROCEDURE,
1.
Remove
the
RT-707's
four
logs.
|
2.
Decide
where
you
want
to
mount
the
tape
decle
and
align
the
holes
in
the
rack
with
those
in
the
front
panel
B.Use
the
accessory
screws
to
screw
the
front:
panel
into
tne
rack
(see
Fig.
25).
MOUNTING
PRECAUTIONS
©
Make
sure that
the
rac
is
standing
on
stable
ground,
©
Keep
the
rack
steady
when
mounting
a
component.
Make
sure
that
the
heavy
components
are
mounted
in
the
bottom
park
of
the
rack.
6.
|
sm
RS
REE
RNY
PTCA
CE?
hand
reel.
Change
over
the
resls
—
the
recorded
rool
should
now
be
on
the
left
and
the
empty
reel
on,
tho
right.
Do
not
rewind
with
the
tape
in
the
state
outlined
under
(3).
When
recording
starts
up
again,
the
sound
is
recorded
onto
track
4,
Next,
re-connect
the
recording
signals
to
the
R
(or
L)
channel
and
switch
the
REC
MODE
switeh
over,
Record
exactly
as
before.
For
playback,
refer
to
Section
“Auto
Repeat”
on
page
12,
Remember
that
different
signals
enter
into
the
L
and
R
channels
and
so
tum
cown
the
unnecessary
sound
with
the
volume
control
on
the
amplifier
which
you
are
using
for
playback,
and
fade
it
out.
*0
een
‘ver
to
second
foceh
Rcording
signals:
L
channel
over
0
Tus
face)
Recording
signals
A
channel
‘ovr
t9
ecard
fos}
Recording
signals
Rehan
=f
indiestes
the
drm
which
the
teks
ne
recorded
Fig.
24
‘The
inside
temporature
of
a
hermetically
sealed
rack
tends
to
riso
and
so
use
a
fan
for
ventilation,
Fig,
25
12

HANDLING
TAPES
If
your
tape
has
broken,
you
can
mend
it
with
the
accessory
splicing
tape
by
carrying
out
the
follow
ing
steps.
1.
As
shown
in
Fig.
26,
overlap
the
two
ends
of
the
broken
tape
and
cut
across
them
at
an
angle
of
about
60
dogrocs.
Prepare
a
25mm
long
piece
of
splicing
tape.
Put tho reverse
sides
(the
sides
that
do
not
come
into
contaet
with
the
heads)
on
a
flat
surface
and
align
the
two
ends
of
the
tape.
4.
Hold
the
splicing
tape
ends
tightly
and
attach
the
spheing
tape.
Smooth
the
tape
to
remove
any
air
bubbles.
Cut
off
any
splicing
tape
which
protrudes
beyond
the
width
of
the
tape.
Norss.
+
Use
a
cutting
instrument
which
i
not
magnetic.
+
Splice
the
broken
ends
together
along
the
break
if
you
tre
splicing
a
prevecorded
tepe
and
you
do
no!
want
fo
lose
any
of
the
recording
by
overtopping
the
ends
HINTS
ON
HANDLING
'TAPES:
®
Do
not
use
tapes
which
are
creased,
curled
or
have
stretched
edges.
Also
avoid
using
old
tapes.
Not
only
is
taeir
noise
level
high,
but
they
may
also
damage
the
heads.
©
Rewind
new
tapes
and
tapes
that
have
not
been
used
for
some
time
before
you
record
on
them.
Long-term
storage
accentuates
the
shape
of
the
tepe
windings,
and
downgrades
tapo-to-head
contact,
thereby
making
it
impossible
to
record
high-fidelity
sound.
©
Never
toueh
the
upper
(magnetized)
side
of
the
tapes
since
this
is
the
cause
of
drop-outs
in
recorded
sound
TAPE
STORAGE
‘©
Tapes
should
not
be
stored
after
rewinding
or
fast
forward
operations
which
may
deform
the
tape.
Store
only
after
winding
at
the
regular
playing
speed
©
Do
not
store
the
tapes
in
very
hot
or
humid
locations,
Also
avoid
areas
with
magnetic
fields
like
the
tops
of
television
sets
and
amplifiers.
©
When
you
have
not
used
a
tape
for
some
time.
rewind
it
from
time
to
time
to
safeguard
ageinst
‘print-through’
(the
signal
recorded
on
one
layer
of
tape
is
partially
copied
onto
the
two
adjacent
layers).
(Cun
tha
ape
at
an
tangle
of
GO
segrons
1
corsimatar
oD
Cut
int
the
sping
/
ape
anny
rose
section
of
tape
[Tepe
—
Fig.
26
Other manuals for RT-707
2
Table of contents
Other Pioneer Tape Deck manuals

Pioneer
Pioneer CT-4 User manual

Pioneer
Pioneer CT-A9X User manual
Pioneer
Pioneer CT-W802R User manual

Pioneer
Pioneer CT-F900 User manual

Pioneer
Pioneer RT-707 User manual

Pioneer
Pioneer CT-50R User manual

Pioneer
Pioneer CT1270WR User manual

Pioneer
Pioneer CT-730 User manual

Pioneer
Pioneer RT-707 User manual
Pioneer
Pioneer RT-1020L User manual

Pioneer
Pioneer CT-A9 User manual

Pioneer
Pioneer XC-IS21T User manual

Pioneer
Pioneer CT-70R User manual

Pioneer
Pioneer CT-W505R User manual

Pioneer
Pioneer CT-1060W User manual

Pioneer
Pioneer CT-9R User manual

Pioneer
Pioneer CT-F9191 User manual

Pioneer
Pioneer CT-F950 User manual

Pioneer
Pioneer GT-X5 User manual

Pioneer
Pioneer CT-5 User manual