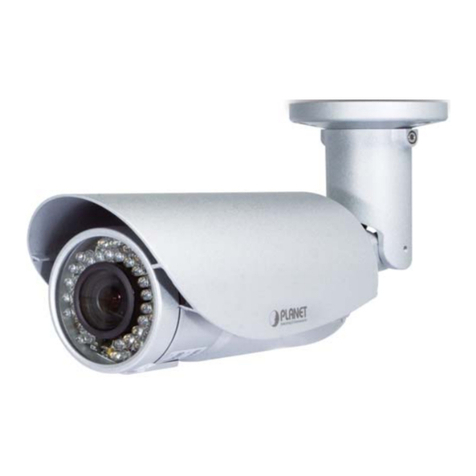
Planet ICA-3350P User manual

VERIFY THE CONTENTS INSIDE THE BOX
The package should contain the items plus 3 Mega-pixel Remote Focus Bullet IR IP Camera. If any item
is missing or damaged, please contact the seller immediately.
x 3
x 3
x 2
x 1
x 1
Quick Installation Guide CD-ROM Power Adapter Desiccant Screw Packet
Step 1 : Hardware Overview
(1) (2) (3) (4) (5) (6) (7)
Interface Description
(1) RS-485 & digital I/O
RS485D+: red
RS485D-: yellow
Alarm out: green
Sensor in: blue
GND: black
(2) Power DC power input (12V, 2A), connected to AC power adapter.
(3) Reset Reset IP-cam to default setting.
(4) Audio output
Connects to external audio amplier or speakers with built-in amplier.
May require appropriate audio jack converter (depending on the type
of amplier / speaker you’re using).
(5) Audio input Connects to audio peripheral for audio input, like microphone or other
audio devices.
(6) Ethernet (POE supported)
Connects to your local area network over Ethernet cable.
Orange LED: Power on.
Green LED: Ethernet cable is connected.
(7) TV output Connects to TV
Note
Only use the power adapter packed in the package. Otherwise, the product may be
damaged.
Step 2: Installation
1. Connect Ethernet cable to IP camera and PC.
2. (Optional) Connect audio peripherals to audio in / audio out port.
3. (Optional) Connect RS-485 peripherals to RS-485 port.
4. (Optional) Connect external video devices or video monitor to video monitor out port.
5. (Optional) Connect external I/O devices to DIDO port.
6. (Optional) Remove the front cover and insert SD card. Then tighten the front cover gently.
Micro-SD slot
Note
If the housing is opened during installation, place desiccant from the package inside the
camera for avoiding humidity.
Step 3
Step 1 Step 2

Step 4: Changing the IP addresses of PC:
1. The default IP of IP camera is 192.168.0.20.
Please make sure your PC is in the same subnet with IP camera. If not, please change PC
IP subnet. Please follow the procedure: Control Panel Network and Internet View Network
Status and Tasks Local Area Connection Properties Internet Protocol Version4 (TCP/IPv4)
Properties
2. Please set your PC’s IP address as 192.168.0.xx, subnet mask as 255.255.255.0, and default
gateway as 192.168.0.xx:
Step 5: Conguring the Web Page Further
1. Select the IP camera you want to congure and input its IP address into the browser search bar.
2. The IP camera will be connected via Web browser automatically; the IP camera will prompt for
logon user name and password. Please enter admin as the default user name and password.
3. When the device is logged on for the rst time, the browser will prompt to install controls; please
click “Allow” to install controls.
Note
If IE9 or higher version browser is used, it is suggested that the PLANET camera Web
link should be added as a trusted site.
Appendix A: Default Setting
Default DHCP Client On
Default IP Address 192.168.0.20 – if DHCP does not exist in the network
Default Login User Name admin
Default Login Password admin
Search Tools Smart Discovery Lite
Further Conguration
For detailed conguration, please check user’s manual on the bundled CD.
If you have any other question, please contact the dealer where you purchased this product or you can
contact PLANET directly at the following email address: support@planet.com.tw.
7. Use the screws in the package to fasten the sun shield above the IP camera.
8. Secure the bracket of the bullet camera on the wall.
9. Connect AC power adapter to DC power input. You will see the left-sided LED light on LAN port light
up.
Step 3: Running Installer Utility to Locate the IP Camera
1. Insert the CD-ROM supplied in the product package and it will automatically run the installation. If
not, please click the Smart Discovery Lite utility hyperlink to install.
2. After the camera utility is launched, all cameras found in your local area network will be displayed.
2011-AB8040-000

Step 4: Changing the IP addresses of PC:
1. The default IP of IP camera is 192.168.0.20.
Please make sure your PC is in the same subnet with IP camera. If not, please change PC
IP subnet. Please follow the procedure: Control Panel Network and Internet View Network
Status and Tasks Local Area Connection Properties Internet Protocol Version4 (TCP/IPv4)
Properties
2. Please set your PC’s IP address as 192.168.0.xx, subnet mask as 255.255.255.0, and default
gateway as 192.168.0.xx:
Step 5: Conguring the Web Page Further
1. Select the IP camera you want to congure and input its IP address into the browser search bar.
2. The IP camera will be connected via Web browser automatically; the IP camera will prompt for
logon user name and password. Please enter admin as the default user name and password.
3. When the device is logged on for the rst time, the browser will prompt to install controls; please
click “Allow” to install controls.
Note
If IE9 or higher version browser is used, it is suggested that the PLANET camera Web
link should be added as a trusted site.
Appendix A: Default Setting
Default DHCP Client On
Default IP Address 192.168.0.20 – if DHCP does not exist in the network
Default Login User Name admin
Default Login Password admin
Search Tools Smart Discovery Lite
Further Conguration
For detailed conguration, please check user’s manual on the bundled CD.
If you have any other question, please contact the dealer where you purchased this product or you can
7. Use the screws in the package to fasten the sun shield above the IP camera.
8. Secure the bracket of the bullet camera on the wall.
9. Connect AC power adapter to DC power input. You will see the left-sided LED light on LAN port light
up.
Step 3: Running Installer Utility to Locate the IP Camera
1. Insert the CD-ROM supplied in the product package and it will automatically run the installation. If
not, please click the Smart Discovery Lite utility hyperlink to install.
2. After the camera utility is launched, all cameras found in your local area network will be displayed.
2011-AB8040-000
Table of contents
Other Planet IP Camera manuals

Planet
Planet ICA-107 User manual

Planet
Planet ICA-HM312 User manual

Planet
Planet ICA-HM830 User manual

Planet
Planet ICA-500 User manual

Planet
Planet ICA-3200 User manual

Planet
Planet ICA-600 User manual

Planet
Planet ICA-HM127 User manual

Planet
Planet ICA-501 User manual

Planet
Planet ICA-3550V User manual

Planet
Planet ICA-8000 Series User manual

Planet
Planet ICA-350 User manual

Planet
Planet ICA-HM227W User manual

Planet
Planet ICA-108W User manual

Planet
Planet ICA-HM125 User manual

Planet
Planet ICA-601 User manual

Planet
Planet ICA-HM351 User manual

Planet
Planet ICA-W7100 User manual

Planet
Planet ICA-5250V User manual

Planet
Planet ICA-HM125 User manual

Planet
Planet ICA-HM830W User manual