User manual 4
English
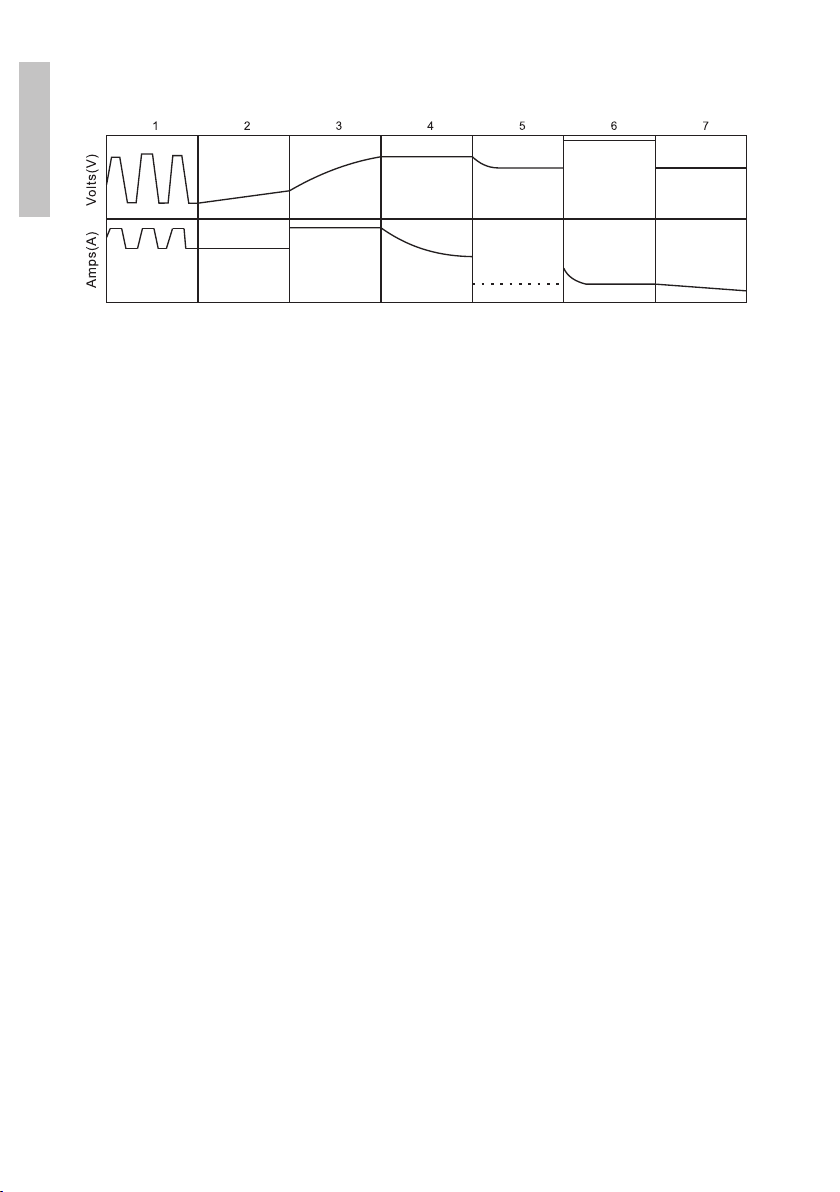
Charging stages
1. Desulfation - the automatic desulfation stage charges the battery to
breakdown the build up of lead sulphate crystals. These crystals occur
when the battery has been discharged or left unused for a certain period
of time.
2. Soft Start - a slow steady increase of the charging process that limits the
applied charging current until the battery voltage is over 12V.
3. Bulk Charge- is the main stage in the loading process when 80% of the
required loading is achieved.
4. Absorption - the battery is charged to full capacity with a steady decrease
in charging current to allow the battery to absorb more power.
5. Battery test - the Smart Charge function performs an automatic
discharge test. If further charging is required, the battery reconditioning
function is automatically selected. If the battery is fully charged, it will
enter the “float” stage.
6. Reconditioning - an additional automatic charging stage to recover deeply
discharged batteries.
7. Float - the “float” stage keeps the battery 100% charged, avoiding
its overcharging or damage, allowing the charger to be left connected
to the battery for an idenfinite period. Ideal for batterie used only
intermittently, such as seasonally used batteries for motocicles, caravans,
boats and classic cars.
Connection
1. Make sure the AC adapter is not connected to the AC mains supply.
2. a. For batteries inside the vehicle:
• Attach the red (+) clip to the red (+) terminal of the battery.
• Attach the black (-) clip to a bolt or bracket on the engine block, away