PNI IP52 2MP User manual

PNI IP52 2MP
Video surveillance IP camera/Videoüberwachung IP-Kamera
Cámara IP de videovigilancia/Caméra IP de vidéosurveillance/
Videomegfigyelő IP kamera/Telecamera IP di videosorveglianza/
Kamera IP do nadzoru wideo/Camera supraveghere video
EN User manual ............................................. 3
DE Benutzerhandbuch ...................................
ES Manual de usuario .................................... 23
FR Manuel utilisateur ..................................... 33
HU Használati utasítás ................................... 43
IT Manuale utente ........................................ 53
PL Instrukcja obsługi ..................................... 63
RO Manual de utilizare ................................... 73


3User manual
English
Main features
• WiFi and AP connection modes
• Recording on micro SD card, max. 128GB (card not included)
• Two-way audio (built-in microphone and speaker)
• Outdoor mounting, water protection class IP66, metal housing
• 18 IR LEDs for night vision to a distance of up to 30 m
• P2P connection for remote monitoring
• Remote control via CamHi application (Android/iOS) and via HiP2P
application (Windows PC)
Package contents
• Surveillance camera
• WiFi antenna
• Power adapter 230V - 12V/2A
• Ethernet cable (1 m)
• CD with software
Connections
• 12V power connector - insert the power adapter included in the package
(230V - 12V/2A)
• RJ45 connector - insert the Ethernet cable included in the package in
order to connect the camera to the router
• Reset - long press to reset the camera

User manual 4
English
Camera installation and connection
1. Install the WiFi antenna on the camera.
2. Install the micro SD card (max. 128Gb) in the camera.
3. Connect the power adapter to the camera and to a 230V outlet.
Note: We recommend that you use the power adapter included in the package
(12V/2A).
4. Connect the network cable to the RJ45 connector of the camera and to
the router.
Warnings:
• Make sure the router is connected to the internet.
• Check if the LAN port in the router where the camera will be connected to
has internet access. Use a laptop or PC connected to this port. Green network
indicator - means that the transmission of network data is normal.
The camera will start in AP mode when connected to the power supply only.
You can connect directly to the camera via AP mode. For additional details,
see the documentation “How to use the camera’s AP mode” on the CD
included in the package.

5User manual
English
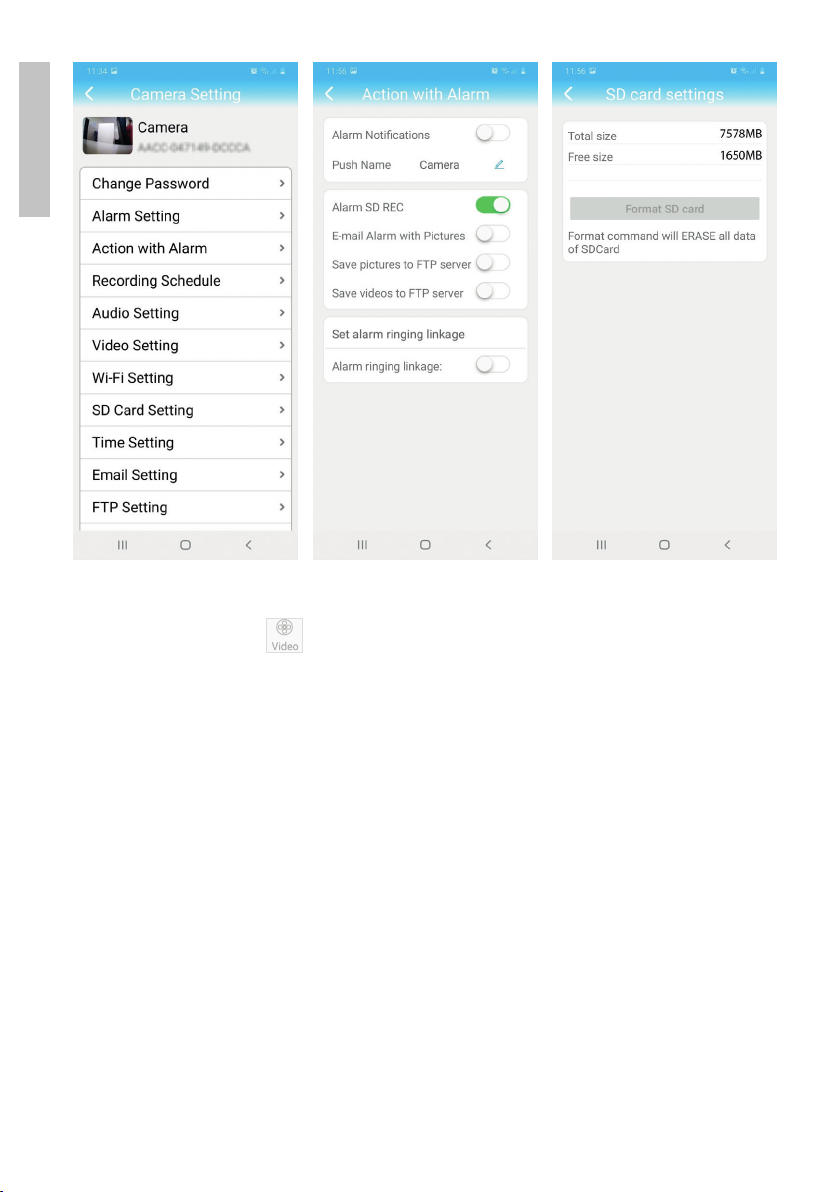
Configure and view the camera on the mobile phone
Notes:
To add and configure the camera through the application, the camera and
the mobile phone must be connected to the same router (the phone via
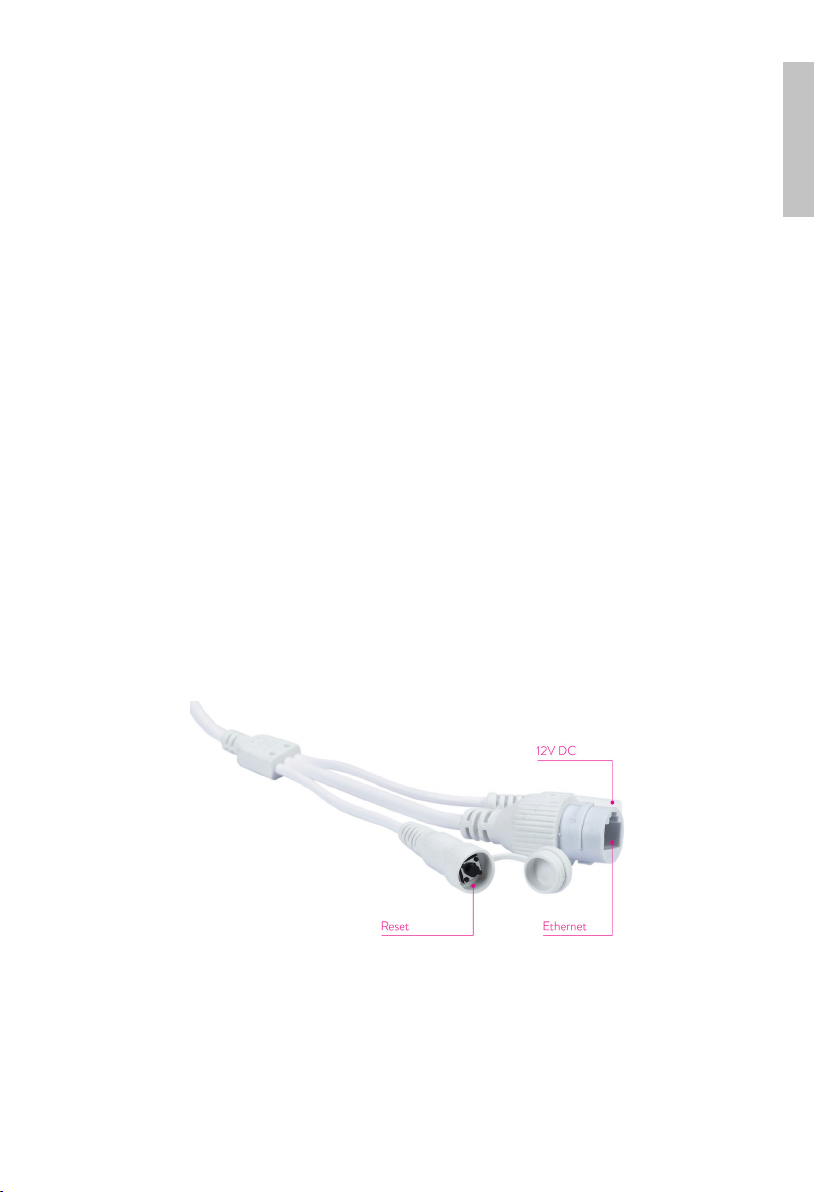
WiFi and the camera via LAN cable, as described above).
The default username of the camera is admin, and the default password is
admin.
Add the camera to the application
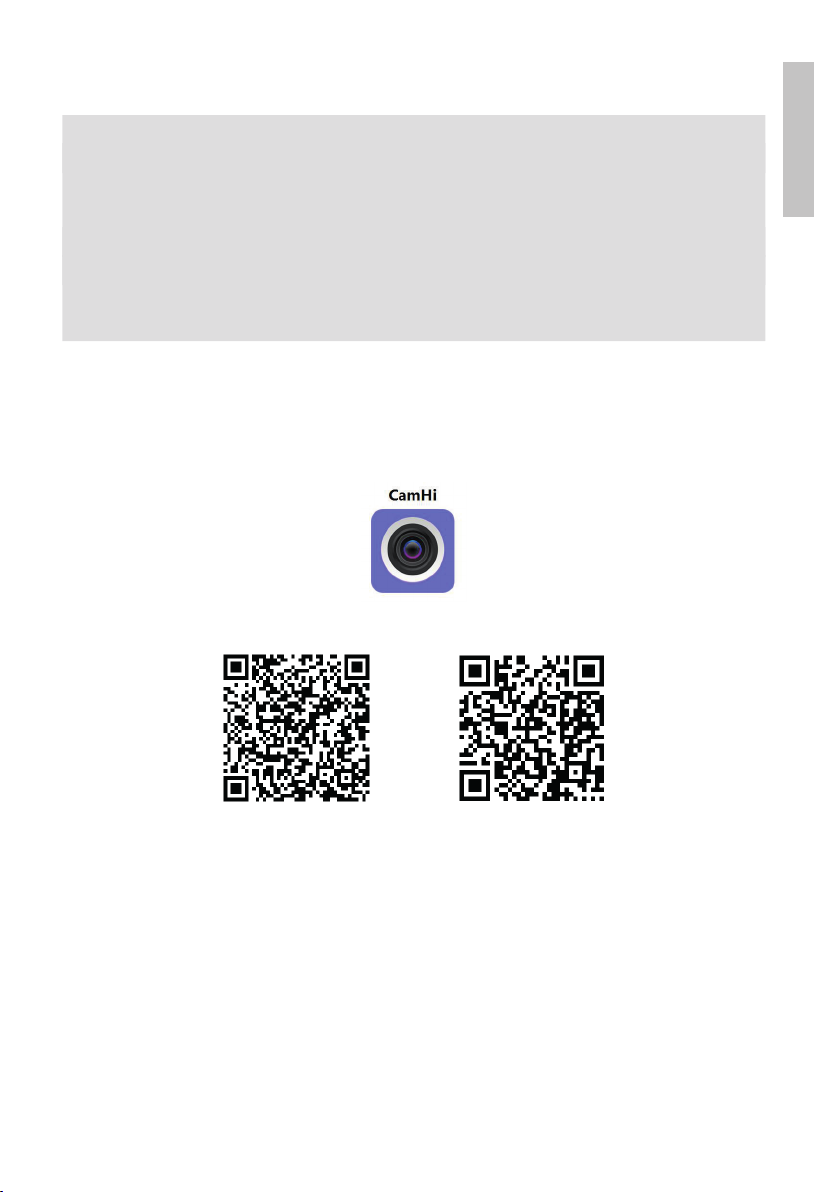
1. Download and install the application CamHi.
Android iOS
2. Open the application, create an account and log in.
3. Press Add Camera
4. In the next interface, you have several options to add the camera:
• Manually enter the camera UID, user and password (you can find this
data on the label pasted on the camera). Default username and password
are admin, admin.
• Scan the QR code on the label pasted on the camera (Scan QR code,
add UID)

User manual 6
English
• Search for the camera in the network (Search Camera from LAN)
Note: If the procedure Search camera from LAN fails, make sure you have
internet on the LAN port where the camera is connected.
• After successfully adding the camera, tap the camera in the list to view
the images taken by it in real time. Note: The status of the camera must be
Online.
Connect the camera to the WiFi network
1. Click the icon next to the camera you want to configure. Note: The
status of the camera must be Online.
2. From the settings menu displayed, select Wi-Fi Setting.
3. Select the WiFi network you want to connect to and input the password.

7User manual
English
Configure recording on micro SD card
1. Purchaseseparatelyandinstallinthecamera amicroSDcardofmaximum
128Gb. The card installation location is shown on page 4.
2. Launch the mobile application, click on the icon next to the camera
you want to configure. Note: The status of the camera must be Online.
3. From the settings menu displayed, select Action with alarm.
4. Enable the option Alarm SD REC.
5. Return to the main menu and select the option SD Card setting to check
the space available on the card.
6. Make sure that in the menu Recording Schedule the option Enable
Record is enabled.
Note: When the micro SD card installed in the camera has a reduced capacity, we
recommend activating the recording function only at motion detection. To do this,
access the menu Alarm Setting - Motion Detection.

User manual 8
English
7. To view the recordings on the micro SD card installed in the camera, press
the video option from the bottom of the application main interface.
Select the camera and the file you want to play or download.
Note: Detailed instructions about the CamHi application can be found on the CD
included in the package and on the camera’s website.

9User manual
English
Configure and view camera on the computer
Your camera can be accessed from your computer in two ways: through the
browser Internet Explorer or through the application HiP2P.
Access the camera via Internet Explorer
1. Install the application Search Tool (the installation file can be found on
the CD included in the package)
2. Connect your computer and your camera to the same router.
3. Launch the application Search Tool and click on Refresh to find the
cameras in the same network.
4. From the list displayed, identify your camera by UID.
5. Click Next to configure network parameters. You can enter the network
parameters manually or you can check the DHCP option. Click Next.

User manual 10
English
6. Open Internet Explorer and input in the address bar your camera’s IP or
return to the list of cameras in the application Serach Tool and double-
click on the camera you want to view. It will open automatically Internet
Explorer.
7. From Internet Explorer you can view live images taken by the camera,
you can play the recordings saved on the micro SD card installed in the
camera and you can make various settings related to network, video,
audio and alarm.

11 User manual
English
Note: You can only access the camera in Internet Explorer if you are connected
to the same network as the camera. If you want to access the camera from your
computer, but from another network, install the HiP2P application.
Access the camera through the HiP2P application
(Windows)
1. Install in your computer the app HiP2P (the installation file can be found
on the CD included in the package)
2. Launch the application, go to the menu Config, select or add a new area
(Add Area) and add your camera using the UID (Input UID).

User manual 12
English
Note: Detailed instructions on the HiP2P application can be found on the CD
included in the package and on the camera’s website.
Technical specifications
Sensor 1/2.8” CMOS
Sensor resolution 2MP
Registration resolution 1920 x 1080
Video compression H.264
Audio compression G.711
Lens 3.6mm
Viewing angle 80°
Ethernet 10/100 Mbps RJ45
Wireless Yes
ONVIF Yes
IR LEDs 18 pcs.
IR distance Up to 30m
Motion detection Yes
Card slot Micro SD, max. 128Gb
P2P connection Yes
Mobile application CamHi (Adroid/iOS)
Power voltage 12V/2A
Dimensions 192 x 70 x 70 mm
Waterproof IP66
Housing Metal
Working temperature -26°C ~ +60°C

Benutzerhandbuch
Deutsche
13
Hauptmerkmale
• WiFi Anschluss und Modus AP
• Es unterstützt Aufnahme auf Mikro Karte SD, höchstens 128 GB (die
Karte ist nicht eingeschlossen)
• Audio bidirektionalle Kommunikation (Mikrophon und Lautsprecher
eingebaut)
• Äußere Montage, Wasserschutzklasse IP66, metallisches Gehäuse
• 18 Leds IR für Nachtsüberwachung für eine Strecke bis zu 30 m
• Es unterstützt einen P2P Anschluss für Fernüberwachung
• Die Kamera kann fernüberwacht werden durch App CamHi (Android/
iOS) und durch die App HiP2P (PC Windows)
Inhalt
• Überwachungskamera
• Antenne WiFi
• Adapter Versorgung 230V - 12V/2A
• Kabel Ethernet (1 m)
• CD Software
Anschlüsse
• Mue Versorgung 12V - stecken Sie den Adapter ein (230V - 12V/2A)
• Konnektor RJ45 - stecken Sie das Kabel Ethernet ein, um die Kamera an
den Router anzuschließen.
• Reset - drücken Sie lang, um die Kamera neu einzustellen.

Benutzerhandbuch
Deutsche
14
Einbau und Kamera Anschluss
1. Antenne WiFi auf der Kamera einbauen
2. Legen Sie die Mikro Karte SD (höchstens 128Gb) in die Kamera ein.
3. Stecken Sie den Adapter in die Kamera und in eine Steckdose 230V
Hinweis: wir empfehlen Ihnen den mitgelieferten Adapter zu verwenden (12V/2A).
4. Verbinden Sie das Kabel mit dem RJ45 Konnektor auf der Kamera und
mit dem Router.
Achtung:
• Der Router muss Internetanschluss haben.
• Prüfen Sie, ob der LAN Port aus dem Router, wo Sie die Kamera verbinden,
Internet-Zuganghat.Verwenden Sieeinen Laptopoder einenPCangeschlossen
an diesen Port. Grüne Anzeige bedeutet die Übertragung der Daten ist normal.
Die Kamera startet in Modus AP, wenn sie nur an die Versorgungsquelle
angeschlossen ist. Sie können sich direkt mit der Kamera verbinden durch
Modus AP. Für weitere Details, lesen Sie die Anweisungen “Wie verwendet
man den Modus AP der Kamera”. (auf der CD im Paket)

Benutzerhandbuch
Deutsche
15
Konfiguration und Vorschau Kamera aus dem Handy
Hinweis:
Um die Kamera durch eine App hinzufügen oder zu konfigurieren,
müsssen die Kamera und das Handy am demselben Router angeschlossen
sein. (Telefon durch WiFi, die Kamera durch LAN Kabel, so wie es oben
beschrieben wurde).
Der implizite Nutzername der Kamera ist admin, das implizite Passwort ist
admin.
Kamera in die App hinzufügen
1. Laden Sie die App herunter und installieren Sie die CamHi.
Android iOS
2. Önen Sie die App, erstellen Sie einen Account und loggen Sie sich ein.
3. Drücken Sie Add Camera
4. Im nächsten Interface haben Sie mehrere Optionen, um eine Kamera
hinzufügen.
• Geben Sie manuell die UID der Kamera ein, Nutzer und Passwort ein
(Sie finden diese Details auf der Etikette auf der Kamera)
• Scannen Sie den QR Kode auf der Etikette auf der Kamera (Scan QR
code, add UID)

Benutzerhandbuch
Deutsche
16
• Suchen Sie die Kamera im Netz (Search Camera from LAN)
Hinweis: wenn das Verfahren “Search camera from LAN” nicht erfolgreich ist,
prüfen Sie, ob Sie Internet auf der LAN Port haben, wo die Kamera angeschlossen
ist.
• Nach dem Sie die Kamera erfolgreich hinzugefügt haben, drücken Sie
Kamera, um die Bilder in Echtzeit zu sehen. Hinweis: Der Status der
Kamera muss Online sein.
Anschluss der Kamera an das Netzwerk WiFi
1. Klicken Sie auf neben der Kamera, die Sie konfigurieren möchten.
Hinweis. Der Status der Kamera muss Online sein.
2. Aus dem Menü wählen Sie Wi-Fi Setting.
3. WählenSiedas gewünschteWiFiNetzwerkfürden Anschlussder Kamera
und geben Sie das Passwort ein.

Benutzerhandbuch
Deutsche
17
Konfiguration Aufnahme auf der Mikro Karte SD
1. Kaufen Sie separat eine Mikro Karte SD und bauen Sie sie in der Kamera
ein, höchstens 128Gb. Der Platz dafür wird auf die Seite 14 beschrieben.
2. Önen Sie die App, klicken Sie auf neben der gewünschten Kamera.
Hinweis. Der Status der Kamera muss Online sein.
3. Aus der angezeigten Einstellungsmenü, wählen Sie Action with alarm.
4. Aktivieren Sie die Option Alarm SD REC.
5. Gehen Sie zurück zum Hauptmenü und wählen Sie die Option SD Card
setting, um den verfügbaren Platz auf der Karte zu prüfen.
6. Prüfen Sie, ob im Menü Recording Schedule die Option Enable Record
aktiv ist.
Hinweis:wenndieeingebauteMikroSDKarteeinegeringeKapazitäthat,empfehlen
wir Ihnen, die Funktion Aufnahme nur bei Bewegungsdetektion zu aktivieren.
Dafür rufen Sie in der App das Menü Alarm Setting - Motion Detection, ab.

Benutzerhandbuch
Deutsche
18
7. Um die Aufnahmen auf der Mikro Karte SD zu visualisieren, drücken
Sie die Option unten auf dem Hauptinterface der App. Wählen Sie
Kamera und die gewünschte Datei.
Hinweis: Die detaillierten Anweisungen über die App CamHi finden Sie auf der
CD aus dem Paket und auf der Webseite.

Benutzerhandbuch
Deutsche
19
Konfiguration und Visualisieren der Kamera auf dem
Computer
Sie können die Kamera in 2 Weisen abrufen: durch den Browser Internet
Explorer oder durch die App HiP2P.
Abruf der Kamera durch Internet Explorer
1. Installieren Sie die App Search Tool (die Datei ist auf der CD)
2. Verbinden Sie den Computer und die Kamera zu demselben Router.
3. Önen Sie die App Search Tool und klicken Sie auf Refresh, um alle
Kameras aus dem Netzwerk zu finden.
4. Aus der angezeigte Liste identifizieren Sie Ihre Kamera nach UID.
5. Klicken Sie auf Next um die Netzwerkparameter zu konfigurieren. Sie
können manuell alle Netzwerkparameter einfügen oder Sie können die
Option DHCP ankreuzen. Klicken Sie Next.

Benutzerhandbuch
Deutsche
20
6. Önen Sie Internet Explorer und fügen Sie die IP Ihrer Kamera ein
oder gehen Sie zurück zur Liste mit den Kameras in der App Search Tool
und klicken Sie zweimal auf die gewünschte Kamera. Automatisch wird
Internet Explorer geönet.
7. Im Internet Explorer, können Sie live die Kamerabilder visualisieren,
Sie können die gespeicherten Aufnahmen auf der Mikro Karte SD
wiedergeben, Sie können verschiedene Einstellungen im Netzwerk
machen. (Video, Audio und Alarm)
Other manuals for IP52 2MP
1
Table of contents
Languages:
Other PNI Security Camera manuals