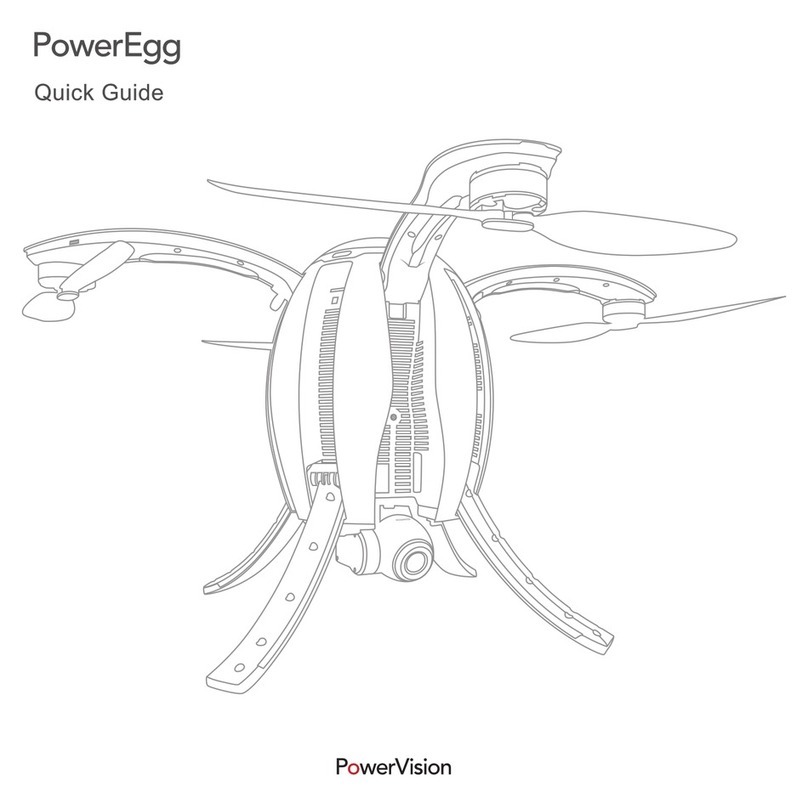
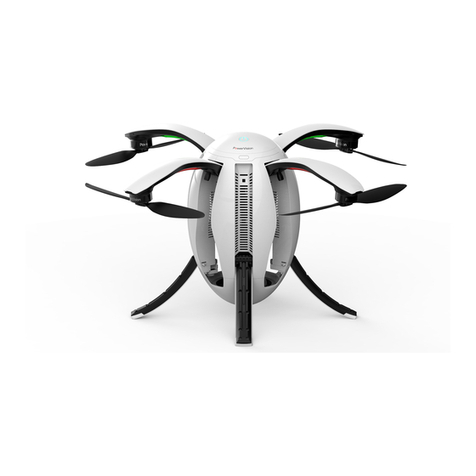
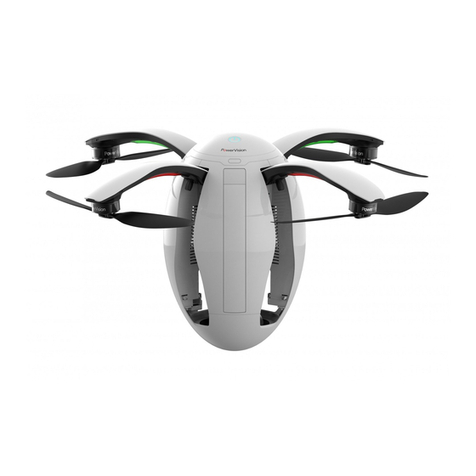
PowerVision PowerEgg X User manual

PowerEgg™X
@Quick Start Guide
(<:~
t~
~
Afl
flfii'-i
0
?-1•y?::Z.'9-
f--jj--(
~
@Guide de demarrage rapide
0E,
Kurzanleitung
{!r)
Guida rapida
(E~
Guia rapida
de
inicio
PowerVision
"'

PowerEgg X works in Drone
Mode
or
in Al-Camera Mode.
1.
In Drone Mode, PowerEgg
Xis
equipped with avisual system
both
in
the
front and at the
bottom
as
well
as
an
ultrasonic sensor
system•, which enables
the
drone
to
hover mid-air stably
both
indoors and outdoors. The drone also features auto-return,
obstacle avoidance, and intelligent flight. Its high-precision, stability augmentation gimbal can record
4K
UHD videos
at
60
fps.
Its maximum
flight
time
is
30
minutes**·
2.
In Al-Camera
Mode,
PowerEgg X can work
without
a remote controller.
You
can operate the camera and preview images
or
Ill
videos in real
time
in
the specified
App
by
connecting your phone
or
other
mobile
devices
to
the
gimbal over a Wi-Fi network.
[L
Its maximum working
time
is
3.5
hours•"'.
* The visual and ultrasonic sensor systems
both
work
under
environmental requirements,
for
more information please read <
Disclaimer and Safety
Guidelines>
and <User
Manual>.
Please watch
the
tutorial videos
at
App
or
PowerVision official website.
.,. The maximum flight
time
and
the
maximum working
time
are
the
test results
in
the
laboratory environment,
for
reference only.
0 Frontvisual system
f)
Integrated gimbal camera
C)
Mode
indicator (headlight)
C,Motor
0 Front landing gear (including antennas)
8
Rear
landing gear
0 Propeller
0 Battery cover
t)
Battery level indicator
~
Power Button

• Protective case and Gimbal
protector
48
Extended port (USS-Mini)
ff) Bottom
visual
system
G)
Ultrasonicsensor system
eAircraft status indicator (taillight)
~
Battery coverswitch button
(DWriststrap
(l, Intelligent battery
41
Tripod converter
4D
Aircraft arm installation groove
Ci)
Block
for
groove
@)
Camera micro-SD card slot
f)
Data
port
(USB-C)
*16/18/20exclusively
use
for
Al-Camera Mode.
Remove the protective
case:
Pull
the label
to
remove Remove the gimbal protector:
Press
the elastic buckles on
both
the protective
case.
sides simultaneously and then pull them downwards
to
remove
the protective cover.
A
Note:
Install the PowerEgg X's protective
case
and the gimbal protectorwhen storing
or
transporting PowerEgg X.

Remote
Controller
.
-~'
/
,.
......
~.
PowerEgg X's remote controller
can
remotely operate the aircraft and streaming HD images and videos on your mobile device via
the specified
App
in real time. Additionally, the collapsible stand
can
hold
your mobile device stably.
• 8 Mobile device stand
f)Antenna
9 Control stick
0 Flight mode switch button
9 Pmode(Professional)
0 N mode (Normal)
8 Emode
(Easy)
0 Emergency stop button
0 Intelligent return button
fD
Custom button
G)
Power button
41)
Charging
port
(micro
USB)
.,
Photo button
t,
Video button
a:,
Mobile device
port
(USB)
(D Gimbal control thumbwheel

Charge
the
Battery
and
Check
the
Battery
Level ·
:_1;·-
•j,._0i
.
• Charge
the
Battery
Fully
charge
the
battery
to
activate it for first time use.
t
Press the buckles on both sides of the battery cover simultaneously,
and
the
battery cover
will
automatically spring up.
You
can then take
the
battery out.
• Check
the
Battery Level and Switch
On/
Off
1.
Intelligent Battery
Short press once and then press and hold for 2s
to
switch battery on/off.
• For details about the battery and charging, please
see
Intelligent
Battery Safety
Guidelines.
Short press
once
to check the battery level.
level - - Q Q
Low
----
•H
igh
Remote controller
charging port
Charger
Intelligent battery
charging port
2.Remote controller
Press and hold
to
start
the
remote controller.
Remote controller (Battery level
LED
indicators)
' I /
-~-
/ I '
' I /
-@-
/ I '
,1/
-~-
/1'
<20%
20%-60%
>60%

Download
the
App
and
Watch
PowerEgg
™X Tutorials "'\, .
·--
GET
ITON
• GooglePlay
Please
scan the
QR
code
or
go
to
the
App
store
to
install the Vision+ 2
App
and
watch tutorials.
A The Vision+ 2
App
requires
an
OS version
of
iOS 10.0.2 and later
or
Android
5.0
and later.
""'
'':;/fl
Drone
mode
.
f~-1~.~
---
1. Prepare PowerEgg X
for
Drone
Mode
Remove the protective
case
and
the
gimbal protector.
Secure the battery cover into place.
..
Press
the
buckles
on
both
sides
of
the battery cover simultaneously and
remove the battery cover.
Unfold the arms and landing
gears.
A Make
sure
to
fully unfold
the
arms and propellers before starting drone.
•
Install the arms and insertthe battery
into the battery compartment.
Complete status.

•
How
to Replace a Propeller
A Attention:
1).
Use
T6 (i) screwdriver and M2.Sx3.5
screws
coated with Teflon paste.
2).
Please install the propeller according
to
the shape
of
propeller's base.
3).
Please do
not
reuse the
screws.
2. Prepare
the
Remote Controller
...
Unfold the antennas.
Lift
the
mobile
device
stand.
...
Place
your mobile device
on the stand.
...
Insert one end
of
the data
cable
into
the
remote
controller
and
the
other
into your mobile device.

Note
: Make sure
that
the antennas directly face the aircraft
to
guarantee the strongest communication link.
3. Flight Preparations
Long
press and
hold
the
power
button
to
poweron
the remote controller.
4. Flight
':""
0 Tob
Off.,.,,..,,~
eom,,_,
• Automatic take off/landing
Short press once and then press
and hold the
power
button
for
2s
to
start the drone.
Run
the Vision+ 2
App
.
When the
App
screen indicated take
off
preparation completed.
In
the
App
: •
Automat
ic
takeoff • Automatic landing.

• Manual
take
off/ landing
(@
Q
Or
Q
~
Control stick operations: Start/Stop
the
motors.
~
~6
Takeoff: Push
the
throttle stick upwards slowly. Q
landing
: Pull
the
throttle
stick
downwards
till
the
aircraft
lands
Keep
the
throttle
stick
at
the
lowest
!
po
i
nt
for 2s,
and
the
motors
will
stop
.
•
Remote
Controller Operations
By
default,
the
remote controller
is
in
mode
2.
The left control stick controls
the
flight altitude
and
direction,
and
the
right control
stick controls
the
forward, backward, leftward,
and
rightward movements. The gimbal control thumbwheel controls
the
camera's
pitch
angle
.
Left Right
t t
A
<-""'
A<_,
A
•A
•
• •
• • • •
, t , ( t '"
~
' '
•
..
.
,.
, • ~
-·
' .
I .,
....
..
..
;
Up/Oown
Tum
t.lt/Tum R
ight
Av
-/rea.,l
e !eh/ng,t
• Intelligent Flight Functions
Normal
Co'
0
Point
of
Interest [D
Ouickshot
A Press
the
@
pause
button
to
make
the
aircraft
hover
in
case
of
an
emergency.
0
[ID
Hyperlapse
Al
Track

5. Flight Safety
Properly use PowerEgg
X:
0 0
Fly
in
open
areas
Precautions during aflight:
Strong GPS signal Maintain
the
line ofsight
1.
Avoid flying over
or
near crowds, trees, power lines, tall buildings, airports, signal towers, etc.
Fly
below 120 meters
A
---
: :
II
••
II
2.
Do
not
fly
near st
rong
electromagnetic sources, such
as
radio transmitting towers, high voltage power lines, transformer
substations, and large blocks
of
magnetic metal,
as
they may affect the remote signal and compass and thus endanger flight
safety. Q Q 0
Do
not
fly:
Do
not
fly in adverse weather conditions such
as
rain, fog, snow, thunder, and high winds (wind speed: 10m/s
or
higher).
It
is
recommended
to
purchase the PowerEgg X waterproof
case
to
fly during a raining environment and maintain the line
of
sight
on rainy days.
Stay
away from the rotating propellers
to
avoid
personal injuries and property damage. @Do not
fly
at NO FLY
ZO
NE.

1.
Prepare
PowerEgg Xfor Al-Camera
Mode
Remove
the
protective
case and the gimbal
protector.
•
How
to
use
tripod
Press
the
buckles
on
both sides
of
the battery
cover
simultaneously
and remove the battery
cover.
..
l
Install
the
groove block
on
the
left
side
and
the
wrist
strap
on
the
right
side.
Insert
the
battery
into
the
battery
compartment.
Use
tripod
converter, PowerEgg X supports camera tripods.
..
..
t
Install
tripod
converter Install
tripod
..
Secure
the
battery
cover into place.

2.
Get
Ready
to
Shoot
Shortpress once and then press and
hold the
power
button
for
2s to start
the PowerEggX's gi
mbal
camera.
..
SSIO
EggX_l()()(J()(X
Pa
ss
word
:
12345678
Run
the Vi
sion+
2 App and connect the
gimbal
to
PowerEgg X following on-screen
instructions.
•
You
c
an
connectyour mobile devi
ce
to theAl-Camera over a W
i-
Finetwork
or
an
approved data cable. For details, please read
on-screen instructions
in
the
App
or watch the
re
lated tutorial
s.
3.
Shoot with
the
Al-Camera Functions
0
Hyperlapse Sl
ow
-
mot
ion·
•
More
functionswill become available in the future via updates. For
more
information, please refer
to
the instructions contained
in the
App
.
Fo
rdetails, please
v,s1t
PowerVislon soffloal
webs,t.e
www.
powerv1s1on
me and
do
wnload
th!?
user
manu
al,The content
~
subJ
e
ct
to change without
fu
rthernotice,
PowcrEgg and
PowerVls,on
.are
Tr.ldemarks
owned
by
Powervision
Tech
In
c.

Al-Camera
Aircraft
Gimbal
Camera
Weight
Dimensions
MaxWorking Time
Working Temperature
Operating Frequency
Transmission Power
522g
165x100x100mm
-----
--+
-
--
--
-------------
--1
4 Hours
0°C~40°C
FCC/IC: 2412~2462MHz
CE: 2412~2472MHz
SRRC:
2412~2472MHz
MIC: 2412~2472MHz
CE(EIRP):~18.2dBm FCC:~21dBm IC:~21dBm MIC:~10mw/MHz
SRRC(EI
RP):s:20dBm
------1
--------------
--
--
Flightweight 8629
Dia on
al
Distance 427.Smm
---------------------<
Max.
Fli
ht
S eed 18m/s
--~+-------------------------
Max
Service
Ceiling Above
Sea
Leve
_l
__
4000
_ m
GNSS GPS+GLONASS
Workin Temperature 0°C~40°C
-
-----t--------------------------l
Operating Frequency
I
T<ansm;ss;on
Powe,
Shoot
Range
Sensor
Lense
FCC/IC: 2412~2462MHz
CE:
2412~2472MHz
SRRC:
2412~2472MHz
1MIC: 2412~2472MHz
..
CE(EIRP):
~17.3dBm
FCC:
~27dBm
IC:
~27dBm MIC: ~10mw/MHz
SRRC(EIRP):
~20dBm
Drone
Mode
Vertical:-90° ~
+20°
Al-Camera
Mode
Vertical:-90° ~ +20°;
Horizontal:-55°~ +55°
1/2.8 inch CMOS: 12 Me a ixels
-----i---
View
Angle:
78.4°
Focus Len th: 27mm
_______
.....__
___________
---
Aperture: f/1.8

Camera
_____________
_,_i_
Fixed Focus Lens Shooting Range: 1m ~
00
ISO
Shutter
--
Max. Image
size
Photo shoot
Mode
Video resolution
Video:100- 3200
Photo:100 -6400
8 - 1/8000 s
4000x3000
Sin
le shoot
BURST:3/5/7
AEB:3/5 @0.7EV
.Timed Shoot:interval(3/5/7/10/15/30/60s)
4K:
3840x2160 24/25/30/48/S0/60p
FHD: 1920x1080 24/25/30/48/S0/60/120p
HD:1280x720 24/25/30/48/50/60/120/24Qp
------
Video Max. bitrate
_,,.-
7_5_M_b~p_s
__________________
_
File Format
FAT32
(~32
GB); exFAT (>32 GB)
Image Form_a_t
__________
J_P_
EG
_ /_R_
AW
Video Format MP4 / MOV(H.265/H.264/MPEG-4
AVC)
lInternal Storage
-----+--
6G
______________________
--1
Micro
SD
card
Memory
Ca
rd support Max. 128GB, Class10
or
above,
or
UHS-3
level Micro
SD
card
~-------4--------------+------=-----
-----1
Remote Control
Working Frequency
Max. Distance
Workin Temperature
Transmission Power
Batte
Working
current/
voltage
Port
Su
ort
Stand
Size
FCC/IC:2412-2462MHz
CE:2412-2472MHz
SRRC:2412~
2472MHz
MIC:2412-2472MHz
FCC:
6km;
CE:
3km;
SRRC:
3km
0°C
~40°C
CE(EIRP):
~18.3dBm
FCC:
~27dBm
IC:
~27dBm MIC: ~10mw/MHz
SRRC(EIRP):
~20dBm
3500mAh
1700
mA@
3.7
V(USB
connected with mobile device)
Ii
htnin Micro
USB,
USB-C
Width
size
of
device: 65mm-84mm
Thickness
of
device: within 8.3mm
.__
______
...__
____________
__.__

Charger
Intelligent
Battery
Output
Cha~mit
Voltage
Batte_ry-
!)'pe
-----
Weight
~
Charge temperature
_____
_
I
Max
.charging power
100-240
V,
50/60
Hz
13.3
V=
3.7
6 A
USB-A:
5
V=
2A
sv
sow
43
.
32Wh
3800
mAh
11.4V
13.
2V
LiPo
3S
237
10°c ~45°c
sow

Po
werVision
www
powervision
me

PowerEgg™X
@waterproof
Accessory Quick Start Guide
@)
~1J<.ftc1fl:t~JiffJfH~BJ:]
0
AP03
~7J<.7?-lz-ij"
1J
-,:''(fJ:j3-_t0)5±'.@$~
@Guide
de
demarrage rapide pour accessoires etanches
@Kurzanleitung Wasserdichtes Zubehor
(v
Guida rapida agli accessori impermeabili
@Gura rapida de inicio -accesorio impermeable
PowerVision
"'

1
PowerEgg
·"'
X
Waterproof
Case
----=-~
The waterproof case and its rubber seal strip
protec
t PowerEgg X from water
damage in humid environments, rain and
other
circumstances that may cause water
damage.
The waterproof case only works with Drone mode.
Do
not
use
it
in Al-Camera
mode.
• Precautions
and
maintenance
1.
Keep the
rubber
seal
strip
of
the
waterproof
case intact and clean. Any
dirt
or
foreign
object
(including
but
not
limited
to
sand, dust, hair,
or
thin thread) may
cause water damage
to
the aircraft.
2. Before installing the waterproof case, ensure that there are no water drops
or
mist
inside the waterproof
case
or on the surface
of
the aircraft.
3.
In
case
of
contact with seawater
or
othercorrosive liquid,
wash
the waterproofcase with fresh water and wipe
it
dry;
otherwise, hinges, buckles, heat sinks, and other metals will corrode, and the rubber strip seal will suffer from salt
deposition, causing aircraft failures.
4.
Do
not
remove the rubber seal strip. If cleaning
is
required,
wash
it
with water and then shake
off
water drops.
When wiping the rubberseal strip, avoid getting
dirt
or
hair stuck
in
it.
5
tf
an
aircraft arm accidentally comes into contact with seawater,
wash
it
with fresh water, shake
off
water drops, wipe
its surface
dry,
and air
it
out.
6. The waterproof case only prevents rain and water splashes.
Do
not
soak the waterproof case and aircraft arms
in
water for a
long
time
.
If
the aircraft falls into water accidentally, take
it
out
immediately.
7. Waterproof protective shell may affect the optical imaging quality and create problems including glare, reflection.
and slight distortion, which
are
considered
as
normal phenomenon.

[&W , ]
If
PowerEgg X
and
the waterproof case are not used as described above,
the
rubber seal strip may
fail
to
work.
In
this
' arnmg
case
,
water
may
damage
the
aircraft
and
battery
, which may cause
exp
losi
on
or
fire. Water
damage
caused
by
improper
use
is
not
included
in
the
warranty,
• Install
the
waterproof
case
1 Configure PowerEgg X
to
Drone mode.
2.
Open
the waterproof
case
and fit the tail
of
the
aircraft
mto
the
waterproof
case
as
shown.
Note· When fitting the
tail
of
lhe aircraft into the
wa
terproof case, make sure that the seal ring at the
base
of the arm
is
in
full
contact
with the rubber seal strip ofthe waterproofcase, and that t
he
seal ring
,s
properly
embedded
in
the groove of the rubber seal st
np

3
3.Align the front case
with
the rear case and snap the buckles
shut
....__.....,.,
____
...__.Sequence
of
assembly:
@
➔
@
____
_ fa'i:::::':~'."/4~~
~LlITF::::::=5r-,Sequence
ofdisassembly· (.0➔
@
4. Unfold arms and landing gears.
Note
Check whether the
Ioele
latch
1s
L-
-
-"_.u.:....._
__
---1
fastened
to
the hook
Other manuals for PowerEgg X
2
Table of contents
Other PowerVision Drone manuals

PowerVision
PowerVision PowerDolphin User manual

PowerVision
PowerVision Power Eye User manual

PowerVision
PowerVision PowerEgg X User manual

PowerVision
PowerVision PowerEgg User manual
PowerVision
PowerVision PowerEgg Series User manual

PowerVision
PowerVision PowerEgg User manual
PowerVision
PowerVision PowerRay User manual

PowerVision
PowerVision PowerEgg User manual

PowerVision
PowerVision PowerEgg User manual
PowerVision
PowerVision PowerEgg User manual