Controller
•Standard Controller
The PowerEgg™ Standard Controller is equipped with an integrated “one-click”technology. With
one click the users can manage the take-off, Return-to-Home and Follow Me functions and have
the camera oriented toward the pilot. Users can easily perform other tasks by using the standard
two-handed controller, including landing gear retraction, gimbal pitch control, gimbal roll control,
photo taking and video recording.
The PowerEgg™ Standard Controller is powered by a rechargeable battery with a capacity of
2800 mAh. It can work continuously for 20 hours. Users may check battery percentage by using
the light indicator on the controller.
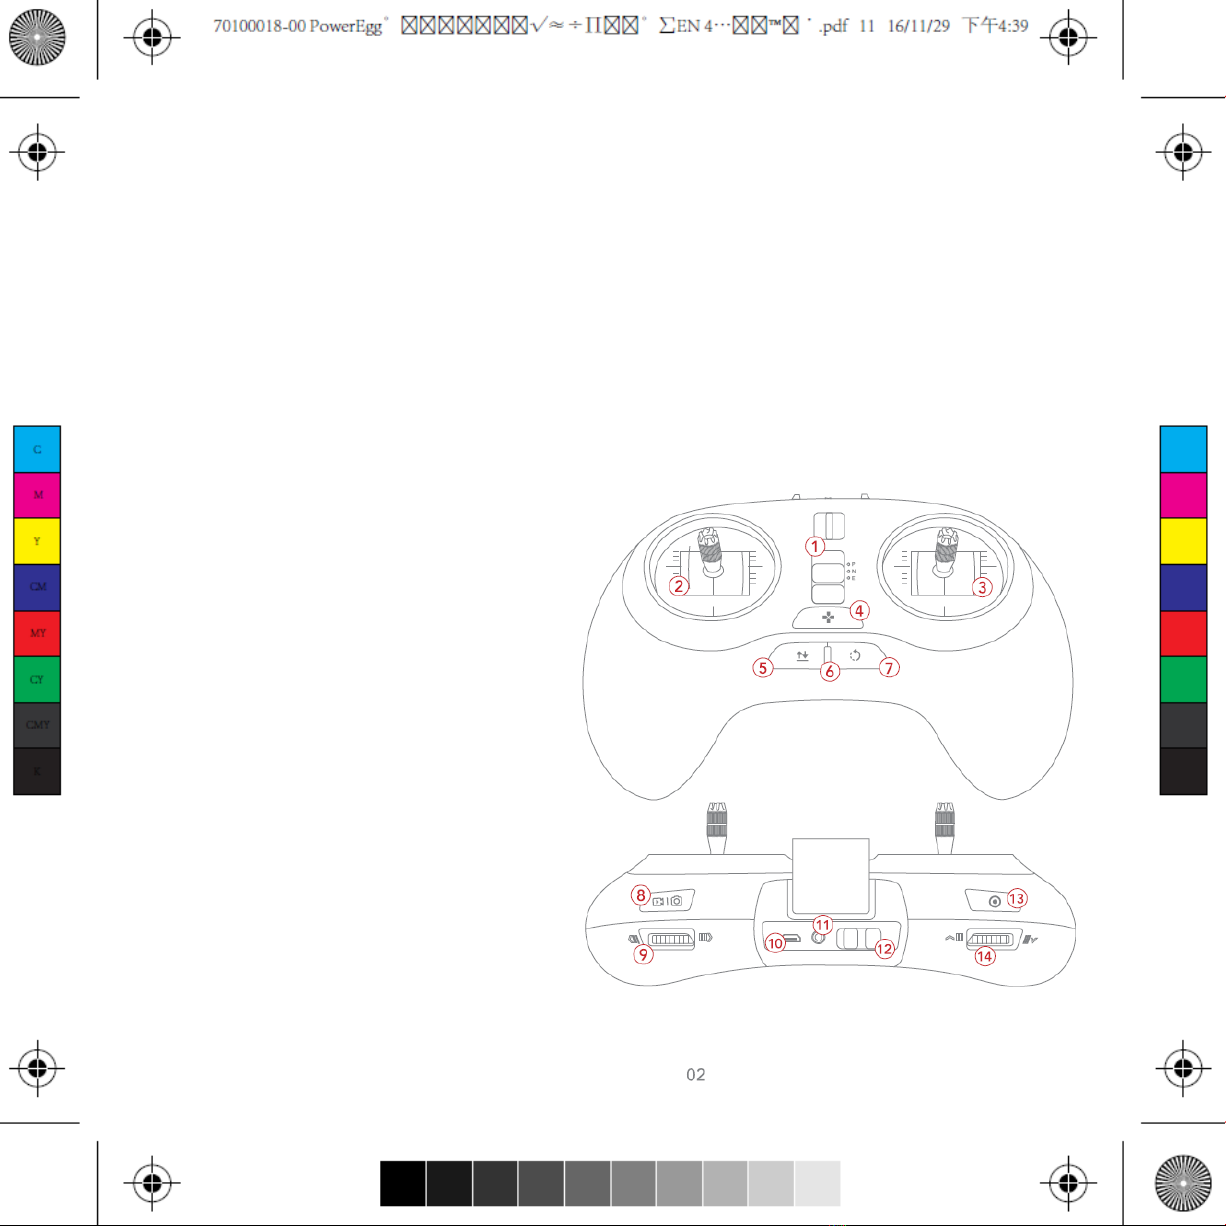
1. Mode switch
2. Left joystick
3. Right joystick
4. Custom button
5. Take-off/land/stop landing
6. Status/battery indicator
7. Return-to-Home/stop Return-to-Home
8. Top right button: take photos/videos
9. Right finger wheel: gimbal yaw
10. MicroUSB charging port
11. Port: connect to Base Station
12. Power switch
13. Top left button: gimbal back to position with
short press / selfie with double press /
gimbal face downward with long press
14. Left finger wheel: gimbal pitch
* Remote Control Mode: Users can choose between Mode 1 and Mode 2 of the controller modes in
PowerEgg’s App. Mode 2 is recommended for beginners.


 user manual")