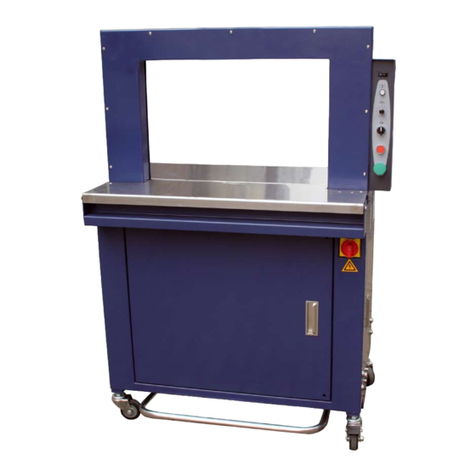
Pregis Easypack Coiler User manual

A brand of
www.pregiseu.com16-OM205-1
Operating Manual
16-OM205-1
English

2
www.pregiseu.com
A brand of
16-OM205-1
Contents
Introduction........................................................................................................................3
General safety ...................................................................................................................4
Safety instructions ............................................................................................................5
Setting up the Coiler after transit..................................................................................6
Attaching the Coiler to the Packmaster™ Pro...........................................................7
Location of the Controls .............................................................................................. 11
Control Console functions........................................................................................... 12
Safety Curtain operation............................................................................................... 13
Connecting the power supply...................................................................................... 14
Pre-Start checks.............................................................................................................. 15
Operation......................................................................................................................... 16
Safety Curtain adjustment............................................................................................. 19
Maintenance .................................................................................................................... 20
Troubleshooting ............................................................................................................. 21
Specifications ................................................................................................................... 22
EC Declaration of Conformity .................................................................................... 23

3
www.pregiseu.com
A brand of
16-OM205-1
Introduction
The Pregis Coiler produces large quantities of paper coil cushions when used in
conjunction with the Pregis Packmaster™ pro . Paper coil cushions provide light, strong
packaging options which mould to the shape of the items to be protected and are
manufactured using 100% recycled materials.
Paper coils can be made using 52/90gsm and 70gsm white or brown paper. The coils can
be produced at sizes ranging from 30cm to 70cm diameter. All of our paper is 100%
recycled, 100% recyclable and 100% biodegradable.
These coils can be produced quickly either for immediate use or to store for later use.
The Coiler is simple to use providing a hands-free repeat option which allows production
to continue. Advanced safety features ensure safe operation at all times.

4
www.pregiseu.com
A brand of
16-OM205-1
General Safety
Operator safety and the safety of others in the work area are reliant upon the operator
using good judgment and reasonable care while operating the machine. This operating
manual and any warning labels affixed to the machine provide notification of specific
hazards.
The following instructions are only a guideline and should be considered a supplement to
your plant’s comprehensive safety program. Your business’ policy supersedes these
guidelines if at any time the two contradict each other. Please read and understand the
manual including all of the dangers, warnings, and cautionary statements.
If after reading the manual you have any questions, contact your supervisor or your Pregis
service technician to get answers before operating the machine.

5
www.pregiseu.com
A brand of
16-OM205-1
Safety Instructions
1. Only authorised personnel may use the equipment.
2. Only trained authorised personnel may carry out any adjustments or repairs.
3. Never damage or remove factory installed safety stickers. If a safety sticker is lost,
damaged, or becomes illegible, report this condition to a supervisor and obtain a
replacement sticker from Pregis.
4. Check that the Coiler is disconnected from the power supply before cleaning the
machine.
5. When moving the Coiler ensure that the power lead and the flying lead connecting the
Coiler to the Packmaster™ pro are disconnected.
6. Keep the work area clean and uncluttered. Walkways and access/egress routes should
always be free of packing material and debris to prevent a slipping or tripping hazard.
7. Ensure that all covers, guards and other safety devices are in place. NEVER disable a
safety device for any reason.
8. Follow the recommended procedures in this manual.
9. Never leave the equipment unattended while operating. Turn the machine off if you
must leave the work area.
10. Keep body parts and clothing away from moving components.
11. DO NOT operate equipment if you are under the influence of alcohol, drugs or
medications that can make you less alert or affect your judgment.

A brand of
www.pregiseu.com16-OM205-1
6
Setting up the Coiler after transit
When the Coiler is unloaded after transit some items will need to be attached or re-sited
before connecting to the Packmaster™ pro.
Remove the bolts attaching the Control Console and Remote Start Switch (Hands-free
switch) in their transit positions.
The retaining bolts for the Remote Start Switch are located inside the switch box.
Install the Control Console and the Remote Start Switch on the front of the Coiler frame
using the bolts previously removed. Position both in the optimum positions for the Coiler
operative.
Control Console
in transit position
Remote Start
Switch in transit
position
Control Console
in operational
position
Remote Start in
operational position
Optional positions for Control
Console and remote Start Switch

A brand of
www.pregiseu.com16-OM205-1
7
Attaching the Coiler to the Packmaster™ Pro
Bolt the lower guide plate to the bottom right hand side of the frame (when looking at the
front of the Coiler) with the flange pointing downwards,
Place the upper guide plate in position and locate with the 3 threaded black knobs, loosely
assembled to allow the plate to be lifted over the Packmaster™ pro frame.
Lower
Guide
Plate
Upper
Guide
Plate

A brand of
www.pregiseu.com16-OM205-1
8
Attaching the Coiler to the Packmaster™ Pro
Remove two screws located below the outlet aperture of the Packmaster™ pro.
Using the two screws previously removed, attach the Shelf Plate to the Packmaster™ pro
below the outlet aperture as shown below.
Outlet
aperture
Shelf
Plate
Install screws
Remove screws

A brand of
www.pregiseu.com16-OM205-1
9
Attaching the Coiler to the Packmaster™ Pro
Push the Packmaster™ pro gently towards the Coiler. Try to keep the Upper Guide Plate
positioned in the middle of the Packmaster™ pro frame.
When the frames are close lift the Upper Guide Plate until the Guide Plate drops over the
Packmaster™ pro frame.
Use your foot to lift the Upper Guide Plate over the Packmaster™ pro frame.
Use the lugs on
either side of
the Upper
Guide Plate to
locate the plate
inside the
Packmaster™
pro frame

A brand of
www.pregiseu.com16-OM205-1
10
Attaching the Coiler to the Packmaster™ Pro
When the plate is resting over the Packmaster™ pro frame hand tighten the three black
knobs to secure the Coiler to the Packmaster™ pro.
Plug in the lead which connects the coiler to the accessory socket on the side of the
Packmaster™ pro. Make certain the lead is routed clear of the safety curtain.

11
www.pregiseu.com
A brand of
16-OM205-1
Location of the controls
The main controls for the Coiler are located on the control box which is height
adjustable to allow it to be tailored to the operator. A supplementary Remote Start
Switch (Hands free) control is located below the controller and is also height adjustable.
The Coiler mains power On/Off button is located on the back of the machine.
Mains Power Switch Switch illuminates when switched on.
Control box Refer to the next page for an explanation of the Control Console functions
Remote Start
Switch
Press the Remote Start Button (Hands-free button) to activate the Coiler.
Control Console
Power switch on reverse side of Coiler
Remote Start Button

A brand of
www.pregiseu.com16-OM205-1
12
Control Console functions
‘Stop’
Button
‘Home’
Button
Coil Size
Control
‘Start’
Button
Tail Position
Switch
Power Indicator Illuminates when the Coiler is switched on
Start Button Press the green ‘Start’ button to start the Coiler.
Stop Button Press the red ‘Stop button to prematurely stop the Coiler mid-cycle.
Home Button Resets the Coiler, if an error has occurred.
Coil Indicator Illuminates whilst making a coil and flashes when the coil is completed and requires
removal.
Coil Size Control Selects the required coil size. The coil size will vary with different grades of paper.
Tail Position Switch This selects the position of the ‘tail’ of the coil.
Switch to left (normal position) - coil is completed with the tail in the bottom
position which keeps the tail in position until the coil is removed.
Switch to the right - coil is completed with the tail in the top position allowing access
for manual taping of the coil end.
Power
Indicator
Coil
Indicator

A brand of
www.pregiseu.com16-OM205-1
13
Safety Curtain operation
The Coiler operator is protected by a Safety Curtain. If the light beam is broken all
power to the motor is cut immediately stopping the Coiler. The Packmaster™ pro will
stop producing and cut the pack. This will place the Coiler into ‘fault’ mode requiring the
‘Home’ button to be pressed before the Coiler will run another pack.
To retrieve a completed coil the operative breaks the Safety Curtain beam. Because the
coil has formed completely the Coiler will automatically reset once the coil has been
retrieved allowing the next coil to be processed.
When functioning correctly the Safety Curtain on the left hand side of the Coiler should
display three green lights and one blue light
When the beam is broken, or the curtain misaligned, (see the Safety Curtain Adjustment
section ) then a red indicator is displayed and the Coiler cannot operate.

14
www.pregiseu.com
A brand of
16-OM205-1
Connecting the power supply
Connect the power leads of the Coiler and the Packmaster™ pro to the power source
Switch on both the Coiler and the Packmaster™ pro mains supply. The mains power
supply switch is illuminated. Wait 10 seconds then load paper into the Packmaster™ pro
in accordance with the Packmaster™ pro manual. A short ‘loading’ pack will be generated
automatically; remove this from the Coiler.

A brand of
www.pregiseu.com16-OM205-1
15
Pre-Start checks
Check that the Safety Curtain on the left hand side of the Coiler displays three green lights
and one blue light
Check that the Coiler Paper Support Plate is free to move and will return to the horizontal
position when released.

16
www.pregiseu.com
A brand of
16-OM205-1
Select the required coil size using the Coil Size Selection Knob.
The coil size will vary with different grades of paper.
Select the tail position using Tail Position Switch.
• Switch to left (normal position) - coil is completed with the tail in the bottom
position which keeps the tail in position until the coil is removed.
• Switch to the right - coil is completed with the tail in the top position allowing access
for manual taping of the coil end.
Operation
Tail in bottom position
Tail in top position

17
www.pregiseu.com
A brand of
16-OM205-1
During the production of the coil the blue Coil Indicator will be illuminated.
Coil production can be stopped at any point during the winding process by pressing the
Stop button. This will immediately stop the pack being produced by the Packmaster™ pro
and will result in a smaller incomplete coil.
This may place the Coiler into a temporary ‘fault’ mode and the Coil Indicator will start to
flash denoting operator action is required to remove the coil. To exit the ‘fault’ mode remove
the coil and press the Home Button once. The Coil Indicator extinguishes and the machine is
ready to run again).
Press the Start Button . The Packmaster™ pro feeds the pack on to the Coiler load ramp
and the Coiler automatically produces a coil of the required length.
Operation
The red Power Indicator will be illuminated.

18
www.pregiseu.com
A brand of
16-OM205-1
When the coil is complete and wound to the selected tail position, the Coil Indicator will
start to flash denoting operator action is required to remove the coil.
Operation
Once the coil is removed, the Coil Indicator will extinguish, and the Coiler is ready for the
next coil to be produced.
The Remote Start switch can be used instead of the Control Console Start Button and is
intended to enable hands-free repeat operation whilst holding the previous coil.
To prevent the end of the coil from unwinding wrap the tail around the layer
beneath to provide a ‘handle’, see below. This does not detract from the protective
performance of the coil.

A brand of
www.pregiseu.com16-OM205-1
19
Safety Curtain Adjustment
If the Safety Curtain displays a red light when the beam is not broken the curtain requires
adjustment.
To adjust the Safety Curtain:
1. Loosen the M3 socket head screw on top/bottom of the upper and lower safety
curtain brackets on either or both sides of the Coiler cage.
2. Adjust the Safety Curtain angle by rotating the loosened Safety Curtain until the left
hand Safety curtain displays three green lights and one blue light indicating that the
safety curtain is working properly.
3. Re-tighten the M3 screws and check that the three green lights and one blue light
are illuminated, with the red light coming on only when the beam is broken.
Red Light indicates curtain requires adjustment Loosen the socket screws
3 green lights and 1 blue light indicates curtain is
working correctly
Tighten the socket screws

20
www.pregiseu.com
A brand of
16-OM205-1
Maintenance
The Coiler is designed to require little or no maintenance. The following
recommended maintenance items will help keep the Coiler operating correctly and
minimize any downtime on your packaging line. If there are any questions regarding the
maintenance of the Coiler, please contact your local Pregis Service Technician for
assistance.
Electrical shock or unexpected machine movement can cause injury. Unplug
the machine before performing maintenance tasks.
Disconnect the power lead before performing ANY maintenance to the machine other
than inspections.
Monthly Maintenance:
1. Clean the Coiler using a lint free cloth.
2. Ensure the two sensors (just to the left of the winding head) and the glass surfaces
of the safety curtain are free of dust (TAKE CARE - THESE ARE FRAGILE)
3. Verify all components are working properly. If there are any issues, please contact
your Pregis Service Technician.
Table of contents
Other Pregis Packaging Equipment manuals

Pregis
Pregis EASYPACK QUANTUM Series User manual
Pregis
Pregis Easypack Quantum XT User manual
Pregis
Pregis SHARP MAX PRO 18 User manual

Pregis
Pregis SHARP MAX 1143 User manual
Pregis
Pregis Easypack coiler-lite User manual
Pregis
Pregis SHARP MAX-PRO User manual
Pregis
Pregis AirSpeed SMART Installation and operating manual

Pregis
Pregis packmaster pro 383 User manual

Pregis
Pregis Quantum Pro 4068969 User manual
Pregis
Pregis SHARP SX User manual
