Accent Unity Quick Reference Guide-Empower 2
ADD A CORE WORD
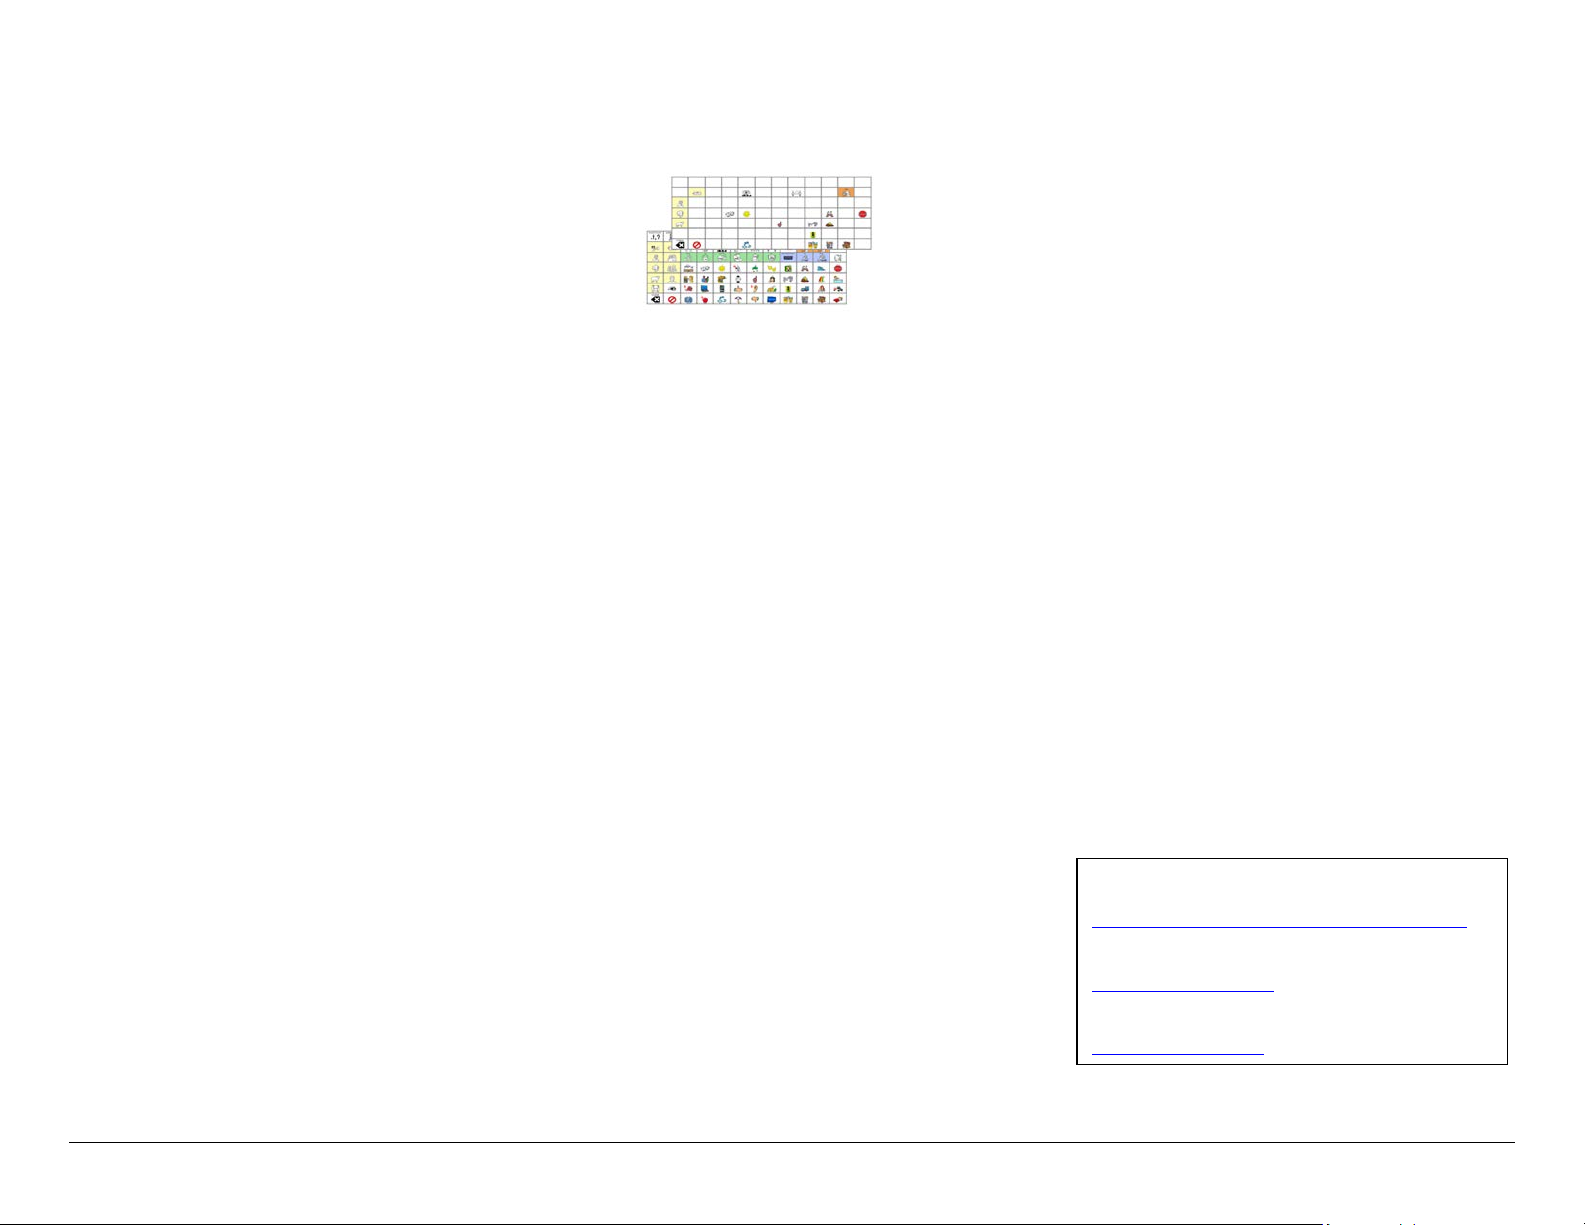
1. Select Menu, and then Editor.
2. Select the first icon for the word. For example, let’s add
the word “sip” (a present tense verb). The first icon for
the word will be Juice because we can take a sip of juice.
3. Select the second icon for the word. In this example,
the second icon will be the Mother because she can give
her child a sip of milk.
4. Select Create a new link.
5. Select the third and final icon for the word. In this
example, sip is a present tense verb. The final icon for all
present tense verbs is the green Action Man.
6. Select Edit this button.
7. Add the word (“sip”) in the Message. The label will
auto-populate.
8. Select Finished, then Save.
RESIZE A BUTTON
1. Select Menu, and then Editor.
2. Navigate to the button you want to resize, then select
Resize. Select an existing button you want to resize.
3. Tap to create the first corner for your button. You can
keep the button in the same location or move it.
4. Tap another location to finish resizing the button. Note
that buttons in that area will be deleted.
5. Select Okay to confirm resize.
CREATE A BUTTON WITH A PAGE LINK
1. Select Menu, and then Editor.
2. Navigate to the button where you want a page link, then
select Edit. Select the button you want to edit.
3. Add a Label and a Symbol.
4. If desired, change the button color from the Colors tab.
5. Select the Navigation tab.
6. If the button already has navigation, select Remove
Navigation. Select Go To Page.
7. Select an existing page or Add New.
8. Name your page and set the grid size.
9. Select Create.
10. Make sure Make Persistent is set to OFF.
11. Select Finished.
12. If you selected Add New, navigate to your new page and
add the words you want. See Edit a Button.
VOCABULARY BUILDER (VB)
Use Vocabulary Builder to temporarily limit the number of
words appearing on the screen. For example, you want to start
with 8 words when first introducing the device to a child.
1. Select Menu, and then Vocabulary Builder.
2. There are two ways to create a VB list of words.
a. Type a list of words.
i. Select Edit List.
ii. If desired, rename your list by using the text
box next to Name of Current List.
iii. Select the text field and type your word list
separated by commas.
iv. Select Finished and Exit.
b. Touch the icon sequences/symbols that lead to the
word.
i. Touch the pathway to the first word. Select
the home button (top right) when you need to
return to the home screen.
ii. Continue to touch the pathways to words.
iii. Select Exit when finished.
3. Lists are automatically saved.
Additional VB Options:
Edit List: Create, rename, manage, and clear lists.
Quick Add: Use this to quickly add words to your list.
Change List: If you have multiple lists, you can switch
between them. In addition, rename, duplicate, merge, and
delete lists.
My Lists and Default Lists: In Default lists, find the first
25/50 words and activity-specific lists (such as cars,
bubbles etc.).
Merge List: If you have multiple lists, you can combine as
many as you want into one list.
VOCABULARY BACK UP
1. Insert a USB flash drive into a USB port.
2. Select Menu, and then Toolbox.
3. Select the System Settings tab.
4. Select Export & Import.
5. Select Export Selected Files.
6. Select the Vocabularies tab.
7. Export your desired vocabulary.
8. Navigate to your USB flash drive.
9. Rename the file.
CONNECT TO Wi-Fi®
1. Select Menu, and then Toolbox.
2. Select the System Settings tab.
3. Select Devices & Connections.
4. Select Choose and then connect to a network.
UPDATE SOFTWARE VIA Wi-Fi
1. Select Menu, and then Toolbox.
2. Select the System Settings tab.
3. Select Updates.
4. Select Check for Updates next to Update Using Wi-Fi
and follow the prompts.
RESTRICTIONS
You can lock/unlock the menu two ways.
To lock/unlock via a password:
1. Select Menu, and then Toolbox.
2. From the User Settings tab, select Restrictions.
3. Select Password. Follow the prompts to create a password.
To lock/unlock via a USB flash drive:
1. Select Menu, and then Toolbox.
2. From the User Settings tab, select Restrictions.
3. Select USB. Insert a USB flash drive and follow the prompts.
This process places an unlock key on the USB flash drive.
Anytime this flash drive is plugged into the device, the
Menu button will be unlocked.
4. Remove the USB flash drive, and the Menu button will
be locked.
Learn: Register for a variety of live online AAC
implementation classes at…
www.prentrom.com/training/go/implementation_classes
Teach: Find a vast library of therapy materials at…
www.AACLanguageLab.com
Accelerate: Monitor progress and language growth…


