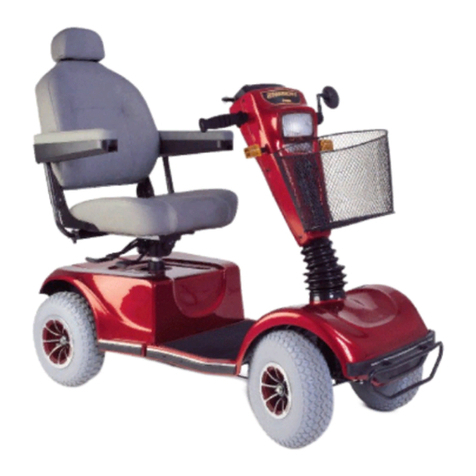
Pride Laser User manual

The Ultimate In Style & Performance
®
Owner’s Manual
Exeter, PA
St. Catharines, ON 1-800-800-8586
www.pridemobility.com
ATTENTION:
Read everything
in this manual
before operating
your Laser

2Laser
INFMANU1381/REV D/OCTOBER 2002
Read and follow all of the instructions in this manual before you attempt to operate your Scooter for the first time.
If you are unable to understand any of this information or require additional assistance for setup, contact your
authorized Pride provider or call the Pride echnical Service department at 1-800-800-8586 (or call 1-877-800-1248
and dial (7) for the Scooter department).
he following symbols will be used throughout this owners manual to identify warnings and cautions. It is very
important for you to read and understand them completely.
WARNING! Failure to heed the warnings in this owners manual may result in personal
injury.
CAU ION! Failure to heed the cautions in this owners manual may result in damage to
your Scooter.
SAFETY GUIDELINES
Copyright © 2002
Pride Mobility Products Corp.

3Laser
CONTENTS
I. INTROD CTION......................................................................................................................... 4
II. SAFETY ......................................................................................................................................... 6
III. EMI/RFI .......................................................................................................................................... 9
IV. SPECIFICATIONS ................................................................................................................... 11
V. DESCRIPTION .......................................................................................................................... 13
VI. BATTERIES AND CHARGING ............................................................................................ 19
VII. OPERATION ............................................................................................................................... 23
VIII. COMFORT ADJ STMENTS................................................................................................ 25
IX. DISASSEMBLY AND ASSEMBLY ..................................................................................... 28
X. OPTIONAL ACCESSORIES ................................................................................................. 31
XI. BASIC TRO BLESHOOTING ............................................................................................. 32
XII. CARE AND MAINTENANCE ................................................................................................ 34
XIII. WARRANTY ............................................................................................................................... 36

4Laser
Welcome to Pride Mobility Products Corporation (Pride). Congratulations on the purchase of your new Pride
Scooter. Your Scooter design combines the most advanced state-of-the-art components with modern, attractive
styling. We are certain that the design features and trouble-free operation will add convenience to your daily living
and ensure complete satisfaction.
At Pride, your safety is important to us. Please read and follow all of the instructions in this manual before
you attempt to operate your Scooter for the first time hese instructions were produced for your benefit.
Your understanding of these instructions is essential for the safe operation of your new Pride Scooter.
Pride is not liable for damage to property or personal injury arising out of unsafe use of a Pride Scooter. Pride is
also not liable for any property damage or personal injury arising out of the failure of any person and or/user to
following the instructions and recommendations set forth in this manual or any other instructions or recommenda-
tions contained in other Scooter related literature issued by Pride or contained on the Pride Scooter itself.
his owners manual is compiled from the latest specifications and product information available at the time of
publication. We reserve the right to make changes as they become necessary. Any changes to our products may
cause slight variations between the illustrations and explanations in this manual and the product you had purchased.
If you experience any problems with your Scooter that you are unable to solve, or if you do not feel capable of safely
following any of the instructions and/or recommendations as contained in this manual, please contact your authorized
Pride provider for assistance.
Once you understand how to operate and take care of your Scooter, we are certain that it will give you years of trouble-
free service and enjoyment.
Information Exchange
We want to hear your questions, comments, and suggestions about this manual. We would also like to hear about the
safety and reliability of your new Pride Scooter and the service you received from your authorized Pride provider.
Please notify us of any change of address so we can keep you apprised of important information about safety, new
products, and new options that can increase your ability to use and enjoy your Pride Scooter. Please feel free to write us
at the address below:
Pride Mobility Products Corporation
Attn: echnical Service Department
182 Susquehanna Avenue
Exeter, PA 18643-2694
1-800-800-8586
I. INTRODUCTION

5Laser
I. INTRODUCTION
Pride Owners Club
As an owner of a Pride product, you are invited to register your products warranty and enroll in the Pride Owners
Club. You may do so by filling out and returning your enclosed registration card or by visiting Prides web site at
www pridemobility com. As a registered member, each time you visit our site, you will have access to the most
interactive and honest educational venue available today for people with mobility needs, their families, and friends.
From our home page, click on the button that reads Owners Club to enter a page dedicated to current and
potential Pride product owners. You will gain access to interviews, stories, recreation ideas, daily living tips,
product and funding information, and interactive message boards. On these message boards you are invited to
speak with other Pride customers as well as Pride representatives who are available to assist you with any ques-
tions or concerns you may have. You will receive a free gift simply for registering with the Pride Owners Club.
My Authorized Pride Provider Is:
Name:_______________________________________________________________________________
Address:_____________________________________________________________________________
Phone Number:________________________________________________________________________
uick Reference Information:
Scooter Model:________________________________________________________________________
Serial Number:__________________________________________________________________________
Purchase Date:________________________________________________________________________
NOTE: If you ever lose or misplace your warranty card or your copy of this manual, call or write to us and
we will be glad to send you a new one immediately.

6Laser
II. SAFETY
WARNING! Do not expose the electronics to any type of moisture at any time (i.e., rain, snow, mist,
or washing the Sport Scooter). Such exposure can damage the electronics. Never attempt to ride
a Sport Scooter that has been exposed to moisture until it has dried thoroughly.
WARNING! Do not operate or store the Sport Scooter where it may be exposed to inclement
weather conditions such as rain, snow, mist, and below-freezing temperatures (such as storage on
an outside car/van lift). Attempting to operate the Sport Scooter in such conditions can damage
the electronics and potentially result in loss of control.
WARNING! Do not operate a Sport Scooter in icy or slippery conditions or on salted surfaces (i.e.,
walks or roads). Such use may result in an accident, personal injury, or adversely affect the
performance and/or safety of your Sport Scooter.
WARNING! Always protect batteries from freezing temperatures and never charge a frozen battery.
his damages the battery and may cause personal injury. Attempting to charge a battery in
freezing conditions does not prevent a battery from freezing.
WARNING! Battery posts, terminals, and related accessories contain lead and lead compounds.
Wash hands after handling.
SAFETY PRECA TIONS
nDo not operate your new Laser for the first time without completely reading and understanding this owners
manual.
nDo not carry passengers on your Laser.
nDo not leave the key in the key switch when your Laser is unattended.
nMake certain that the seat is locked into place and that the key is removed from the key switch before getting
on or off of your Laser. Also make certain that the seat is in a locked position when you operate your Laser.
nReduce your Lasers speed when you are operating it on uneven terrain and/or soft surfaces.
nReduce your Lasers speed when you are driving it around a corner.
nNever drive your Laser across the side of a hill or diagonally up or down a hill. Never stop, if possible, while
driving up or down an incline.
nProceed with extreme caution as you approach the downgrade of a ramp or other incline.
nProceed with caution when driving near a raised surface, unprotected ledges, or drop offs (curbs, porches,
stairs, etc.).
nNever remove your Lasers anti-tip wheels or modify the Laser in any way that is not authorized by Pride.
nUse extreme caution when operating your Laser on busy streets and in parking lots or shopping malls and
never ride your Laser where you cannot safely and legally walk. Consult local municipal or state agencies with
regard to operating your Laser on public roadways.
nDo not operate your Laser while you are under the influence of alcohol.
nCheck with your physician if you are taking any medications that may affect your ability to operate your Laser
safely.
nKeep your hands on the tiller and your feet on the floorboard when you are operating your Laser.
nMake certain that the tires are properly inflated (30 psi).
nNever use your Laser as a seat in a moving vehicle.
nMake certain that the Lasers batteries are properly secured when you transport your Sport Scooter in an-
other vehicle.
nDisconnect your Lasers batteries if you will not be using the Sport Scooter for more than 48 hours.

7Laser
As you begin using your Laser during your daily activities, you will probably encounter situations in which you will
need some practice negotiating on your Sport Scooter. Simply take your time as you operate your Laser and you will
soon be in full and confident control as you maneuver through doorways, on and off of elevators, up and down ramps,
and over moderate terrain.
DOORS
nDetermine if the door opens toward or away from you.
nUse your hand to turn the knob or push the handle or push-bar.
nDrive your Laser gently and slowly forward to push the door open; or drive your Laser gently and slowly
backwards to pull the door open.
ELEVATORS
Modern elevators have a door-edge safety mechanism that, when pushed, reopens the elevator door(s).
nIf you are in the doorway of an elevator when the door(s) begin to close, push on the rubber door edge or allow
the rubber door edge to contact the Sport Scooter and the door will reopen.
nUse care that pocketbooks, packages, or Laser accessories do not become caught in the elevator doors.
RAMPS AND OTHER INCLINES
More and more buildings have ramps with specified degrees of inclination. hese ramps are designed for easy and
safe Sport Scooter access. Some ramps may have turning switchbacks that require good cornering skills on your
Laser.
nake wide swings with your Lasers front wheel(s) around any tight corners. If you do that, the Lasers rear
wheels will follow a wide arc, not cut the corner short, and not bump into or get hung up on any railing corners.
nWhen driving down a ramp, keep the Lasers speed adjustment dial set to the tortoise (slowest speed setting) to
ensure a safely controlled descent. See V. Description.
nAvoid sudden stops and starts.
Other inclines may be natural or, if man-made, not designed specifically for Sport Scooters. Figures 1 and 2 illustrate
your Lasers stability and its ability to climb grades under various weight loads and under controlled testing conditions.
II. SAFETY
FIGURE 1. MAXIMUM RECOMMENDED INCLINE ANGLE FOR THE 3 WHEEL LASER SPORT SCOOTER
5˚
6˚
7˚ 250 lbs. 300 lbs.
200 lbs.
8˚
150 lbs.
FIGURE 2. MAXIMUM RECOMMENDED INCLINE ANGLE FOR THE 4 WHEEL LASER SPORT SCOOTER
6˚
7˚
8˚250 lbs. 300 lbs.
200 lbs.
9˚
150 lbs.
WARNING! When on any sort of an incline or decline, never place the Laser in freewheel mode
while seated on it or standing next to it.

8Laser
II. SAFETY
hese tests were conducted with the Lasers seat in the highest position and adjusted backward on the seat base
to its furthest rearward position. Use this information as a guideline. Your Lasers ability to travel up inclines is
affected by your weight, your Sport Scooters speed, your angle of approach to the incline, and your Sport
Scooter setup.
nWhen you approach an incline, it is best to lean forward. his shifts the center of gravity of you and your Laser
toward the front of the Sport Scooter for improved stability. See figures 3 and 4.
FIGURE 4. INCREASED STABILITY DRIVING POSITION
FIGURE 3. NORMAL DRIVING POSITION
WARNING! Do not exceed the incline guidelines or any other specifications presented in this
manual.
DRIVING S RFACES
Your Laser was designed to provide optimum stability under normal driving conditions typically consisting of dry,
level surfaces composed of concrete or asphalt. However, Pride recognizes that there will be times when you will
operate your Laser on surfaces other than concrete or asphalt. For that reason we have also designed your Laser
to perform admirably on packed soil, grass, and gravel. Feel free to use your Laser safely on lawns and in park
areas.
nAvoid tall grass that can entangle the running gear.
nPacked soil and gravel, such as driveways or roads, will not present a problem for your Laser.
nAvoid loosely packed gravel and sand.
nIf you feel unsure about a driving surface, avoid that surface.
DRIVING IN REVERSE
Before driving in reverse, always check that your path is free of hazards; curbs, pedestrians, etc.

9Laser
III. EMI/RFI
EMI/RFI WARNINGS
Laboratory tests performed by the Food and Drug Administration (FDA) have shown that radio waves can cause
unintended motion of electric mobility vehicles. Radio waves are a form of electromagnetic energy (EM). When
this energy unintentionally affects the operation of an electronic device, it is called Electromagnetic Interference
(EMI) or Radio Frequency Interference (RFI).
FREQ ENTLY ASKED Q ESTIONS (FAQS)
he following FAQs summarize what you should know about EMI/RFI. Use this information to minimize the risk
that EMI/RFI may affect your Scooter.
Where do radio waves come from?Where do radio waves come from?
Where do radio waves come from?
Radio waves are emitted from the antennas of cellular phones, mobile two-way radios, walkie-talkies, radio
stations, V stations, amateur radio (HAM) transmitters, wireless computer links, microwave sources, and paging
transmitters. Radio waves are a form of electromagnetic energy (EM). EM is more intense closer to transmitting
antennas, which are sources of emission. he greater the transmission strength, the greater the concern to electric
mobility vehicle users.
If my Laser is affected by EMI/RFI, what kind of motion should I e pect?If my Laser is affected by EMI/RFI, what kind of motion should I e pect?
If my Laser is affected by EMI/RFI, what kind of motion should I e pect?
his is hard to predict. he effect may depend on a number of factors including:
nStrength of the radio waves
nConstruction of the electric mobility vehicle
nPosition of the power chair (whether it is on level ground or on a slope)
nWhether or not the electric mobility vehicle is in motion
Electric mobility vehicle motion caused by EMI/RFI can be erratic. he vehicle may move by itself or come to a
sudden stop. Furthermore, it is possible for EMI/RFI to unexpectedly release the brakes on an electric mobility
vehicle. Some intense sources of EMI/RFI can even damage the control system of an electric mobility vehicle.
Is there any way to know for sure whether radio waves are responsible for the unintended motionIs there any way to know for sure whether radio waves are responsible for the unintended motion
Is there any way to know for sure whether radio waves are responsible for the unintended motion
of my Scooter?of my Scooter?
of my Scooter?
Unfortunately, interference from radio wave sources may be difficult to recognize, because the signals from these
sources are invisible and may be intermittent. However, the FDA recommends that you report all incidents of
unintended motion or brake release to the electric mobility vehicle manufacturer and, if possible, note whether
there was a radio wave source nearby at the time of the incident.
Has anHas an
Has anHas an
Has anyy
yy
yone been hurone been hur
one been hurone been hur
one been hurt frt fr
t frt fr
t from erom er
om erom er
om errr
rr
raa
aa
atictic
tictic
tic,,
,,
, unintended motion of unintended motion of
unintended motion of unintended motion of
unintended motion of electric mobility v electric mobility v
electric mobility v electric mobility v
electric mobility vehicehic
ehicehic
ehicles?les?
les?les?
les?
he FDA has reports of injuries that may have resulted from the uncontrolled motion of electric mobility vehicles.
However, it is unclear how many of these incidents were actually caused by radio wave interference.
Are all electric mobility vehicles susceptible to EMI/RFI?Are all electric mobility vehicles susceptible to EMI/RFI?
Are all electric mobility vehicles susceptible to EMI/RFI?
Each make and model differs in its ability to resist EMI/RFI. Each electric mobility vehicle has a particular level of
immunity to EMI/RFI. his immunity is measured in volts per meter (V/m). A higher immunity level offers greater
protection. In other words, a power chair with a high immunity level is less likely to be affected by a strong radio
source than one with a low immunity level.

10 Laser
III. EMI/RFI
What is the FDA doing about the problem?What is the FDA doing about the problem?
What is the FDA doing about the problem?
he FDA has written to electric mobility vehicle manufacturers and requested that they test their new products to
be sure that they provide a reasonable degree of immunity against EMI/RFI. he letter states that electric mobility
vehicles should have an immunity level of at least 20 V/m. his provides a reasonable degree of protection against
the common sources of EMI/RFI.
he FDA has also requested or recommended that:
nElectric mobility vehicle manufacturers clearly label new products with their immunity level or state that the
immunity level is not known.
nhe labeling or informational material supplied with new electric mobility vehicles must explain what the immu-
nity level means and warn users about the possibility of EMI/RFI and how to avoid it.
nElectric mobility vehicle manufacturers undertake an educational program to inform users and their caregivers
about the problems associated with EMI/RFI and about the actions they can take to minimize the risk of EMI/
RFI.
nWhile there is no exact way to tell if your electric mobility vehicle is totally safe from EMI/RFI, an immunity
level of 20 V/m (May 1994) is generally achievable and useful. his product has been tested and passed at an
immunity level of 20 V/m.
What can I do to find out if my Scooter is likely to be affected by EMI/RFIWhat can I do to find out if my Scooter is likely to be affected by EMI/RFI
What can I do to find out if my Scooter is likely to be affected by EMI/RFI?
If you have owned your Scooter for a long time and have not experienced unintended motion, it is unlikely that you
will have problems in the future. However, it is always possible that problems could arise if your power chair is
close to a source of radio waves. herefore, it is very important to be alert to this possibility. his Scooter meets or
exceeds an immunity level of at least 20 V/m.
What can I do to reduce the risk that my Scooter could be affected by EMI/RFI?What can I do to reduce the risk that my Scooter could be affected by EMI/RFI?
What can I do to reduce the risk that my Scooter could be affected by EMI/RFI?
Here are some precautions you can take:
nDo not turn on or use hand-held personal communications devices, such as citizens band (CB) radios and
cellular phones, while the power chair is on.
nBe aware of nearby transmitters such as radio or V stations and hand-held or mobile two-way radios, and try
not to come close to them. For example, if you are in a power chair with an immunity level of 20 V/m, you
should remain at least three feet from a hand-held two-way radio and ten feet from a mobile two-way radio.
nBe aware that adding accessories and/or components or modifying the power chair may make it more suscep-
tible to interference from radio wave sources.
nhere is no easy way to evaluate the effect of accessories or modifications upon the overall immunity of the
power chair.

11Laser
FIGURE 5. LASER DIMENSIONS
IV. SPECIFICATIONS
26"
58"
19"
17.5"
50.25"
4WheelTurning Radius
4Wheel Length
4"
90˚,100˚
102˚,105˚
Adjustable
8"-12"
48"-52"
16.5" - 20.5"
41"
3WheelTurning Radius
3Wheel Length
48.5"
24"- 29"
29"-26.5"

12 Laser
IV. SPECIFICATIONS
snoitacificepS
srebmuNledoM )leehw4(043CSPS,)leehw3(003CSPS
htgneL )leehw4(.ni52.05,)leehw3(.ni5.84
htdiW .ni62
seriT .ni01x.ni4:raeR,.ni01x.ni3:tnorF;citauenP:epyT
yticapaCthgieW uixaM.sbl003
epyTyrettaB HA04,V21owtro,epyt1-U,HA23,V21owT)dica-daeldelaeS(
rewopesroH )kaep(ph0.2
regrahC regrahcpa-3draobnO
)xam(deepS )obruThtiwuixahp8(hp5.5otpuelbairaV
edarmumixaM 2dna1serugifotreferesaelP
egnaR ,seirettabHA23htiwegrahcrepseli52-02otpU
seirettabHA04htiwegrahcrepseli03-52otpU
suidaRgninruT )leehw4(.ni85,)leehw3(.ni14
sroloCydoB eulBrepiV,deRelppAydnaC,kcalBxynO:detniaP
gnitaeS
sredilsdnatserdaehhtiwkcabhgihretoocStropS:elytS
)elbasu(thgieh.ni92-5.62xhtped.ni5.71x)elbasu(htdiw.ni91:snoisneiD
lynivkcalBroyarG:lairetarevoctaeS
lairetarevoctaeshctaM:stserrA
.ni5.42ot.ni5.02:dnuorgorfthgiehtaeselbatsujdaresU
.ni5.02ot.ni5.61:kcedretoocSorfthgiehtaeselbatsujdaresU
serutaeFdedulcnI
;gninoitisopdnathgiehtaeselbatsujda;egakcapthgillanoitceridlluf;srepubgnirra-non;noisnepsusraer&tnorfcianyD
obruT;sedocpeebcitsongaid;rorriweivraer;erutaefffotuhsotuagnivasygrene;taesgnidils;stserraelbatsujdathgieh
egakcaprellortnoc/rotosselhsurb;)TCS(ygolonhceTlortnoCdeepS;noitcnuf
sekarB ekarbcsidlacinahceortcelednagnikarbevitarenegercinortcelE
evirDleehWraeR rotoCDV42,elxasnartdelaeS
sleehW kcalBnisleehwyollauniulA
epyTrelliT elbatsujdayletinifnI
msinahceMleehweerF duorhsraerthgirreppunodetacolrevelesaelerleehweerF
thgieWretoocS
:thgiewlatoT )leehw4(.sbl5.432,)leehw3(.sbl5.712:seirettabHA04/w
:thgiewlatoT )leehw4(.sbl5.912,)leehw3(.sbl5.202:seirettabHA23/w
:thgiewlatoT :seirettabo/w)leehw4(.sbl5.961,)leehw3(.sbl5.251
:nwodkaerbtnenopmoC
)leehw4(.sbl75,)leehw3(.sbl04..............................................noitcestnorF
)leehw4dna3(.sbl36.............................)duorhs,seirettabo/w(noitcesraeR
.sbl5.3................................................................................duorhscitsalpraeR
.sbl5.44.....................................................................................................taeS
)HA23,V21(hcae.sbl52................................................)deriuqer2(seirettaB
)HA04,V21(hcae.sbl5.23..............................................................................
.sbl5.1....................................................................................................teksaB
pukcoLraeR-ot-tnorF etsysreveldnanipkcoL
ecnaraelCdnuor "4
seirosseccAlanoitpO yponacrekaerbrehtaew,revoctsud,galfytefas,teksabraer,redlohpuC

13Laser
FIGURE 6. LASER COMPONENTS
BATTERIES
REAR SECTION
4 WHEEL
SEAT
REAR SHROUD
BASKET
3 WHEEL
FRONT SECTION
Your Laser is a motorized electric Sport Scooter designed to enhance your personal mobility. Your Laser is an indoor/
outdoor Sport Scooter designed to travel primarily on smooth surfaces such as sidewalks, roads, parking lots, floors,
and driveways. For easy transportation or storage, you can disassemble your Laser into seven components. See figure 6.
FIGURE 7. CONTROL CONSOLE ASSEMBLY
BATTERY CONDITION METER
KEY SWITCH
HORN BUTTON
SPEED ADJUSTMENT DIAL
THROTTLE CONTROL LEVER (REVERSE
HORN BUTTON
KEY
HAZARD
LIGHT
SWITCH
LEFT TURN
SIGNAL BUTTON LIGHT
SWITCH
RIGHT TURN SIGNAL BUTTON
THROTTLE CONTROL LEVER (FORWARD
ON / OFF INDICATOR LED
V. DESCRIPTION
CONTROL CONSOLE ASSEMBLY
he control console assembly houses all of the controls you need to drive your Laser, including the key switch, on/off
indicator LED, speed adjustment dial, throttle control levers, urbo button, urbo ready indicator LED, battery
condition meter, horn buttons, light switch, turn signal buttons, and the hazard light switch. See figure 7.
TURBO BUTTON
TURBO READY INDICATOR LED

14 Laser
WARNING! Do not expose the control console assembly to moisture. In the event that the console
does become exposed to moisture, do not attempt to operate your Laser until the console has
thoroughly dried.
Key Switch
nFully insert the key into the key switch and turn it clockwise to power up (turn on) your Laser.
nTurn the key counterclockwise to power down (turn off) your Laser.
On/Off Indicator LED
When the key of the Laser is turned to the on position, the green on/off indicator LED will light to indicate that your
Laser is powered up (on).
Speed Adjustment Dial
his adjustment dial enables you to preselect and limit your Lasers top speed.
nhe image of the tortoise represents the slowest speed setting.
nhe image of the hare represents the fastest speed setting.
Throttle Control Levers
hese levers allow you to control the forward speed and the reverse speed of your Laser up to the maximum speed you
preset with the speed adjustment dial.
nPlace your right hand on the right handgrip and your left hand on the left handgrip.
nUse your right thumb to push the right side of the lever to disengage your Lasers brakes and move forward.
nRelease the lever and allow your Laser to come to a complete stop before pushing the other side of the lever to move
in reverse.
nWhen the throttle is completely released, it automatically returns to the center stop position and engages your
Lasers brakes.
Battery Condition Meter
Whenever you have the key turned to the on position, this meter gives an approximate reading of your Lasers battery
voltage.
Horn Button
he key must be inserted and turned clockwise for the horn to be operational.
nhis button activates a warning horn.
nDo not hesitate to use the warning horn when its use could prevent accident or injury.
Light Switch
his switch controls your Lasers lighting system.
noggle the switch forward to turn on the lights.
noggle the switch backward to turn off the lights.
Hazard Light Switch
his switch activates the 4-way yellow flashers on your Sport Scooter.
noggle the switch forward to turn on the lights.
noggle the switch backward to turn off the lights.
V. DESCRIPTION
WARNING! If the key is moved to the off position while your Laser is in motion, the electronic
brakes engage and your Laser comes to an abrupt stop!

15Laser
V. DESCRIPTION
Turn Signal Buttons
Use these buttons to turn on the left and right turn signal lights.
nPress the appropriate turn signal button once to activate it.
nYour Lasers turn signals are timed to shut off automatically.
T RBO F NCTION
he urbo mode provides the option to increase the Sport Scooter speed up to 8 mph by simply pressing and
holding in the urbo button while driving a straight course on flat and smooth terrain. his beneficial feature allows
the user to travel greater distances in less time as compared to the conventional Scooter speed mode.
he urbo function will engage whenever the speed adjustment dial is set to more than 3/4 of the Sport Scooters
top speed when the throttle control lever is fully depressed.
When the urbo button is released, the Sport Scooter then returns to the normal maximum Scooter speed mode
speed of approximately 5.5 mph (depending upon where the speed adjustment dial is set).
WARNING! In the event the urbo button sticks or malfunctions when you try to use it, Pride
recommends that you release the throttle control lever to stop your Scooter. urn the speed
adjustment dial to under 3/4 full speed (below the 2 oclock position) to disable the urbo feature
and notify your authorized Pride provider immediately.
Turbo Ready Indicator LED
he yellow urbo Ready indicator (adjacent to the urbo button) illuminates when the Sport Scooter is in urbo
Ready mode. he urbo function will become inactive (yellow indicator will turn off) and the vehicle speed will
decrease (to the speed preset on the speed adjustment dial) whenever:
nthe Scooter is descending an incline exceeding approximately 7°.
nthe Scooter is driven upon a lateral bank (leftward or rightward incline) exceeding approximately 11°.
nthe Scooter is steered more than an eighth (1/8) of a turn to the left or the right (i.e., approximately over the
11 oclock and 1 oclock positions when facing the drivers side of the control console assembly).
WARNING! Your Sport Scooters urbo mode has been engineered to safely function while driving
a straight course on flat and smooth terrain. o eliminate the possibility of injury, Pride recom-
mends that you adhere to the following rules for engaging and disengaging the urbo mode.
nDo not press the urbo button while turning the Scooter.
nDo not press the urbo button while driving upon inclines of any type.
nDo not press the urbo button while driving on uneven, bumpy terrain.
nRelease the urbo button before entering a turn, an incline, or uneven terrain of any type.

16 Laser
SPEED CONTROL TECHNOLOGY (SCT)
he Laser Sport Scooter features our exclusive patent-pending Speed Control echnology (SC ) as an added
safeguard. SC senses incline conditions and vehicle direction through its four sensors to automatically disable the
urbo mode during cornering, steep descents, or extreme lateral banking. his provides the user the added confi-
dence of knowing that his/her driving skills are supplemented by a state-of-the-art system that reduces speed in
situations that require greater caution.
NOTE: The additional margin of safety provided by S T should only be considered a supplement to safe
driving habits and thorough practice in operating the Scooter in strict compliance with all conditions
outlined in this owners manual.
V. DESCRIPTION

17Laser
REAR SECTION
The onboard battery charger (not shown), the charger power cord receptacle, the batteries (not shown), the electronics
module, the main circuit breaker (reset button), the ammeter, the manual freewheel lever, and the motor/transa le assembly
are located on the rear section of your Laser. See figure 8. Refer to IX. Disassembly and Assembly for instructions on
removing the rear shroud.
Batteries
he batteries store the electrical energy that powers your Laser. See VI. Batteries and Charging.
Main Circuit Breaker
When the voltage in your Lasers batteries becomes low or your Laser is heavily strained because of excessive loads or
steep inclines, the main circuit breaker may trip to protect your Lasers motor and electronics from damage. See figure 8.
nhe main circuit breaker reset button pops out when the breaker trips.
nWhen the breaker trips, the entire electrical system of your Laser shuts down.
nAllow a minute or two for your Lasers electronics to rest.
nPush in the reset button to reset the breaker.
nIf the breaker trips frequently, you may need to charge your batteries more often. You may also need to have
your authorized Pride provider perform a load test on your Lasers batteries.
nIf the main circuit breaker trips repeatedly, see your authorized Pride provider for service.
V. DESCRIPTION
MOTOR/TRANSAXLE ASSEMBLY
MANUAL FREEWHEEL LEVER
AMMETER
MAIN CIRCUIT BREAKER
(RESET BUTTON
REAR STORAGE COMPARTMENT
CHARGER POWER CORD RECEPTACLE
5-AMP CHARGER FUSE
ELECTRONICS MODULE
SPARE FUSES
LIGHT BULBS
REAR LIGHT FUSES
3-AMP CONTROL CONSOLE ASSEMBLY FUSE
FIGURE . REAR SECTION (LEFT LIGHT COVER REMOVED FOR CLARITY)
ANTI-TIP WHEEL
MANUAL FREEWHEEL LEVER

18 Laser
Manual Freewheel Lever
Whenever you need or want to push your Laser for short distances, you can put it in manual freewheel mode.
WARNING! Before placing your Laser into or taking it out of freewheel mode, make certain that the
key is removed from the key switch. Even though the motor of your Laser is disengaged from the
drive system when your Sport Scooter is put in manual freewheel mode, the motor can still run if
the throttle lever is pushed. Never sit on a Sport Scooter when it is in freewheel mode. Never put a
Sport Scooter in freewheel mode on any incline.
nhe manual freewheel lever is located on the end of the motor/transaxle assembly at the right rear of the Laser.
See figure 8.
nPull up on the manual freewheel lever to disable the drive system and the brake system.
nYou may push your Laser.
nPush down on the manual freewheel lever to reengage the drive system and the brake system and take your
Laser out of freewheel mode.
Motor/Transaxle Assembly
he motor/transaxle assembly is the electromechanical unit that converts the electrical energy of your Lasers
batteries into the controlled mechanical energy that drives the Lasers wheels. See figure 8.
Anti-Tip Wheels
he anti-tip wheels are an integral and important safety feature of your Laser. hey are located at the rear of the
Laser. Do not, under any circumstances, remove the anti-tip wheels from your Laser.
Charger Power Cord Receptacle
he charger power cord plugs into your Lasers battery charger by means of the charger power cord receptacle.
Fuses
he fuses help protect your Lasers lighting, control console assembly, and charging systems from receiving an
overload of electrical current. he fuses used in the Laser are the same type used in automobiles.
nhe control console assembly uses a 3-amp fuse.
nhe rear lights use a 3-amp fuse.
nhe charging system uses a 5-amp fuse.
If a fuse must be replaced (see figures 9 and 10), use only the specified amp fuse. For more information on
replacing a fuse, see XII. Care and Maintenance.
FIGURE 9. WORKING FUSE FIGURE 10. BLOWN FUSE (REPLACE)
WARNING! Failure to use properly rated fuses may cause damage to the Lasers electrical system
and may result in personal injury.
V. DESCRIPTION

19Laser
VI. BATTERIES AND CHARGING
Your Laser requires two long-lasting, 12-volt, deep-cycle batteries that are sealed and maintenance free. hey are
recharged by an onboard 3-amp charging system.
nCharge your Lasers batteries prior to using it for the first time.
nKeep the batteries fully charged to keep your Scooter running smoothly.
READING YO R BATTERY VOLTAGE
he battery condition meter on the control console assembly indicates the approximate strength of your batteries
using a color coded bar. See figure 11. Green indicates fully charged batteries, yellow a draining charge, and red
indicates that an immediate recharge is necessary. o check the charge, you must first unplug the charger power
cord and power up your Scooter.
You can also check the charge by the ammeter, located on the electronics module. he charger power cord must
be plugged into a standard wall outlet in order to obtain a reading. When the amperage reading is at or near zero
(0) amps, the battery charging is complete. See figure 12.
CHARGING YO R BATTERIES
Follow these easy steps to charge your batteries safely:
1. Position your Sport Scooter close to a standard wall outlet.
2. Remove the key from the key switch.
3. Make certain that the freewheel lever is in the drive (down) position.
4. Plug the charger power cord into the charger power cord receptacle on your Sport Scooter.
5. Extend the charger power cord and plug it into the wall outlet. It is recommended that you charge your
batteries for 8 to 14 hours.
6. When the batteries are fully charged, unplug the charger power cord from the wall outlet and then from the
charger power cord receptacle.
NOTE: There is a charger inhibit on your Sport Scooter. The Sport Scooter will not run and the battery
condition meter will not operate while the batteries are charging.
FIGURE 12. AMMETER INDICATES
BATTERY IS FULLY CHARGED
FIGURE 11. BATTERY CONDITION METER
WARNING! Never use an extension cord to plug in your battery charger. Plug the charger directly
into a properly wired standard wall outlet.

20 Laser
BATTERIES AND CHARGING-FREQ ENTLY ASKED Q ESTIONS (FAQS)
How does the charger work?
When your Lasers battery voltage is low, the charger works harder and sends more electrical current to the
batteries to bring up their charge. As the voltage of the batteries approaches a full charge, the charger sends less
and less electrical current to the batteries. When the batteries are fully charged, the current sent to them from the
charger is at nearly zero amperage. herefore, when the charger is plugged in, it maintains the charge on your
Lasers batteries, but does not overcharge them. We do not recommend that you charge your Lasers batteries for
more than 24 consecutive hours.
What if my Lasers batteries wont charge?
nBe sure the battery cables are connected properly.
nBe sure both ends of the charger power cord are inserted fully.
nExamine the 5-amp charger fuse. If the fuse is blown, the batteries will not charge. See figures 9 and 10.
Can I use a different charger?
For the safest, most efficient, and balanced charging of your Lasers batteries, we prefer and highly recommend the
simultaneous charging of both batteries by using the onboard battery charger.
How often must I charge the batteries?
wo major factors must be considered when deciding how often to charge your Lasers batteries:
nAll day Sport Scooter use on a daily basis.
nInfrequent or sporadic Sport Scooter use.
With these considerations in mind, you can determine how often and for how long you should charge your Lasers
batteries. We designed the onboard charger so that it will not overcharge your Sport Scooters batteries. How-
ever, you may encounter some problems if you do not charge your batteries often enough and if you do not charge
them on a regular basis. Following the five guidelines below will provide safe and reliable battery operation and
charging.
nIf you use your Laser daily, charge its batteries as soon as you finish using it for the day. Your Laser will be ready each
morning to give you a full day of service. We recommend that you charge your Lasers batteries for 8 to 14 hours
after daily use.
nIf you use your Laser once a week or less, charge its batteries at least once a week for 12 to 14 hours at a time.
nKeep your Lasers batteries fully charged.
nAvoid deeply discharging your Lasers batteries.
nDo not charge your Lasers batteries for more than 24 consecutive hours.
VI. BATTERIES AND CHARGING
Table of contents
Other Pride Scooter manuals

Pride
Pride Libre SCOOTER SERIES User manual

Pride
Pride CELEBRITY X SPORT User manual

Pride
Pride Victory Viper User manual

Pride
Pride Celebrity X LE User manual

Pride
Pride go-go ultra User manual

Pride
Pride Celebrity Deluxe User manual

Pride
Pride S34P User manual

Pride
Pride Jazzy 1113 User manual

Pride
Pride Victory 9 User manual

Pride
Pride Rally User manual

Pride
Pride Hurricane User manual

Pride
Pride BAJA MOBILITY WRANGLER User manual

Pride
Pride DESTINY User manual

Pride
Pride Go-Chair User manual

Pride
Pride Pursuit User manual

Pride
Pride Jet 2 User manual

Pride
Pride JAZZY 1113 ATS User manual

Pride
Pride Hurricane PMV User manual

Pride
Pride Hurricane PMV User manual

Pride
Pride Go-Go ES8 User manual